Conext XW+ 6848 NA User manual

Conext
™
XW Inverter/Charger
Owner’s Guide
975-0240-01-01 Revision H
November 2017
www.schneider-electric.com
Conext XW+ 6848 NA
Conext XW+ 5548 NA
http://solar.schneider-electric.com
Conext XW+ Owner's Guide NA (975-0240-01-01).book Page i Monday, November 27, 2017 10:00 AM

Conext XW+ Owner's Guide NA (975-0240-01-01).book Page ii Monday, November 27, 2017 10:00 AM

Conext
™
XW Inverter/Charger
Owner’s Guide
http://solar.schneider-electric.com
Conext XW+ Owner's Guide NA (975-0240-01-01).book Page i Monday, November 27, 2017 10:00 AM

Copyright and Contact
Copyright © 2007-2016 Schneider Electric. All Rights Reserved.
All trademarks are owned by Schneider Electric Industries SAS or its affiliated companies.
Exclusion for Documentation
UNLESS SPECIFICALLY AGREED TO IN WRITING, SELLER
(A)MAKES NO WARRANTY AS TO THE ACCURACY, SUFFICIENCY OR SUITABILITY OF ANY TECHNICAL OR OTHER INFORMATION
PROVIDED IN ITS MANUALS OR OTHER DOCUMENTATION;
(B)ASSUMES NO RESPONSIBILITY OR LIABILITY FOR LOSSES, DAMAGES, COSTS OR EXPENSES, WHETHER SPECIAL, DIRECT,
INDIRECT, CONSEQUENTIAL OR INCIDENTAL, WHICH MIGHT ARISE OUT OF THE USE OF SUCH INFORMATION. THE USE OF ANY
SUCH INFORMATION WILL BE ENTIRELY AT THE USER’SRISK; AND
(C)REMINDS YOU THAT IF THIS MANUAL IS IN ANY LANGUAGE OTHER THAN ENGLISH, ALTHOUGH STEPS HAVE BEEN TAKEN TO
MAINTAIN THE ACCURACY OF THE TRANSLATION, THE ACCURACY CANNOT BE GUARANTEED. APPROVED CONTENT IS
CONTAINED WITH THE ENGLISH LANGUAGE VERSION WHICH IS POSTED AT HTTP://SOLAR.SCHNEIDER-ELECTRIC.COM.
Date and Revision
November 2017 Revision H
Document Part Number
975-0240-01-01
Product Part Numbers
Contact Information
http://solar.schneider-electric.com
Please contact your local Schneider Electric Sales Representative or visit our website at:
http://solar.schneider-electric.com/tech-support/
Information About Your System
As soon as you open your product, record the following information and be sure to keep your proof of purchase.
Product Part Numbers Related Product Part Numbers
865-6848-01 – Conext XW+ 6848 NA 865-1015-01 – Conext XW+ Power Distribution Panel
865-5548-01 – Conext XW+ 5548 NA 865-1025 – Conext XW+ Conduit Box
865-1020-02 – Conext XW+ Connection Kit for INV2 INV3 PDP
865-1030-1 – Conext MPPT 60 150 Solar Charge Controller
865-1032 – Conext MPPT 80 600 Solar Charge Controller
865-1050-01 – Conext System Control Panel
865-1060-01 – Conext Automatic Generator Start
865-1058 – Conext ComBox
865-1080-01 – Conext Battery Monitor
Serial Number _________________________________
Product Number _________________________________
Purchased From _________________________________
Purchase Date _________________________________
Conext XW+ Owner's Guide NA (975-0240-01-01).book Page ii Monday, November 27, 2017 10:00 AM

975-0240-01-01 iii
About This Guide
Purpose
The purpose of this Owner’s Guide is to provide the information and procedures
necessary for configuring, operating, maintaining, and troubleshooting the
Schneider Electric Conext XW+ Inverter/Charger.
Scope
This Guide includes information about monitoring and configuring the Conext
XW+.
The Guide provides guidelines, detailed setup information, and information about
operating and troubleshooting the unit. It does not provide installation
procedures or details about particular brands of batteries, photoelectric cells, or
generators. Consult the equipment manufacturers for this information.
Audience
This Guide is intended for anyone who needs to operate, configure, and
troubleshoot the Conext XW+ Inverter/Charger. Certain configuration tasks
should only be performed by qualified personnel in consultation with your local
utility and/or an authorized dealer. Electrical equipment should be installed,
operated, serviced, and maintained only by qualified personnel. Keep
unqualified personnel away from batteries. Servicing of batteries must only be
performed or supervised by qualified personnel with knowledge of batteries and
their required precautions. Qualified personnel have training, knowledge, and
experience in:
• Installing electrical equipment
• Applying applicable installation codes
• Analyzing and reducing the hazards involved in performing electrical work
• Installing and configuring batteries
• Selecting and using Personal Protective Equipment (PPE)
No responsibility is assumed by Schneider Electric for any consequences arising
out of the use of this material.
Conext XW+ Owner's Guide NA (975-0240-01-01).book Page iii Monday, November 27, 2017 10:00 AM

About This Guide
iv 975-0240-01-01
Organization
This Guide is organized into four chapters and three appendices.
Chapter 1, “Introduction”, describes the operational features of the Conext XW+
Inverter/Charger.
Chapter 2, “Monitoring Operation”, contains information about monitoring Conext
XW+ Inverter/Charger operation using the inverter information panel or the
Conext System Control Panel.
Chapter 3, “Configuration” explains how to navigate through the Conext System
Control Panel menus and configure the Conext XW+ Inverter/Charger.
Chapter 4, “Troubleshooting”, contains information and procedures for identifying
and solving possible problems with the Conext XW+ Inverter/Charger.
Appendix A, “Specifications” provides the electrical and mechanical
specifications for the Conext XW+ Inverter/Charger.
Appendix B contains the default configuration settings and ranges for the Conext
XW+ Inverter/Charger. Configuration settings can be viewed and changed using
the Conext System Control Panel.
Abbreviations and Acronyms
Related Information
For information about installing the Conext XW+ Inverter/Charger, see the Conext
XW+ Inverter/Charger Installation Guide (975-0384-01-02).
You can find more information about Schneider Electric as well as its products
and services at http://solar.schneider-electric.com.
For available accessories, see “Available Conext XW+ Accessories” on page 1–
3.
CEC California Energy Commission
CSA Canadian Standards Association
GT Grid Tie
LCD Liquid Crystal Display
LED Light Emitting Diode
MPPT Maximum Power Point Tracking
NEC US National Electrical Code NFPA-70
PV Photovoltaic
PVGFP PV Ground Fault Protection
UL Underwriters Laboratories
VAC Volts AC
VDC Volts DC
Conext XW+ Owner's Guide NA (975-0240-01-01).book Page iv Monday, November 27, 2017 10:00 AM

975-0240-01-01 v
Important Safety Instructions
READ AND SAVE THESE INSTRUCTIONS - DO NOT DISCARD
This guide contains important safety instructions for the Conext XW+ Inverter/
Charger that must be followed during operation and troubleshooting. Read and
keep this Owner’s Guide for future reference.
Read these instructions carefully and look at the equipment to become familiar
with the device before trying to install, operate, service or maintain it. The
following special messages may appear throughout this bulletin or on the
equipment to warn of potential hazards or to call attention to information that
clarifies or simplifies a procedure.
The addition of either symbol to a “Danger” or “Warning” safety label
indicates that an electrical hazard exists which will result in personal
injury if the instructions are not followed.
This is the safety alert symbol. It is used to alert you to potential
personal injury hazards. Obey all safety messages that follow this
symbol to avoid possible injury or death.
DANGER
DANGER indicates a hazardous situation which, if not avoided, will result in
death or serious injury.
WARNING
WARNING indicates a hazardous situation which, if not avoided, could result
in death or serious injury.
CAUTION
CAUTION indicates a hazardous situation which, if not avoided, could result in
minor or moderate injury.
NOTICE
NOTICE is used to address practices not related to physical injury. The safety
alert symbol shall not be used with this signal word.
Conext XW+ Owner's Guide NA (975-0240-01-01).book Page v Monday, November 27, 2017 10:00 AM

Safety
vi 975-0240-01-01
Safety Information
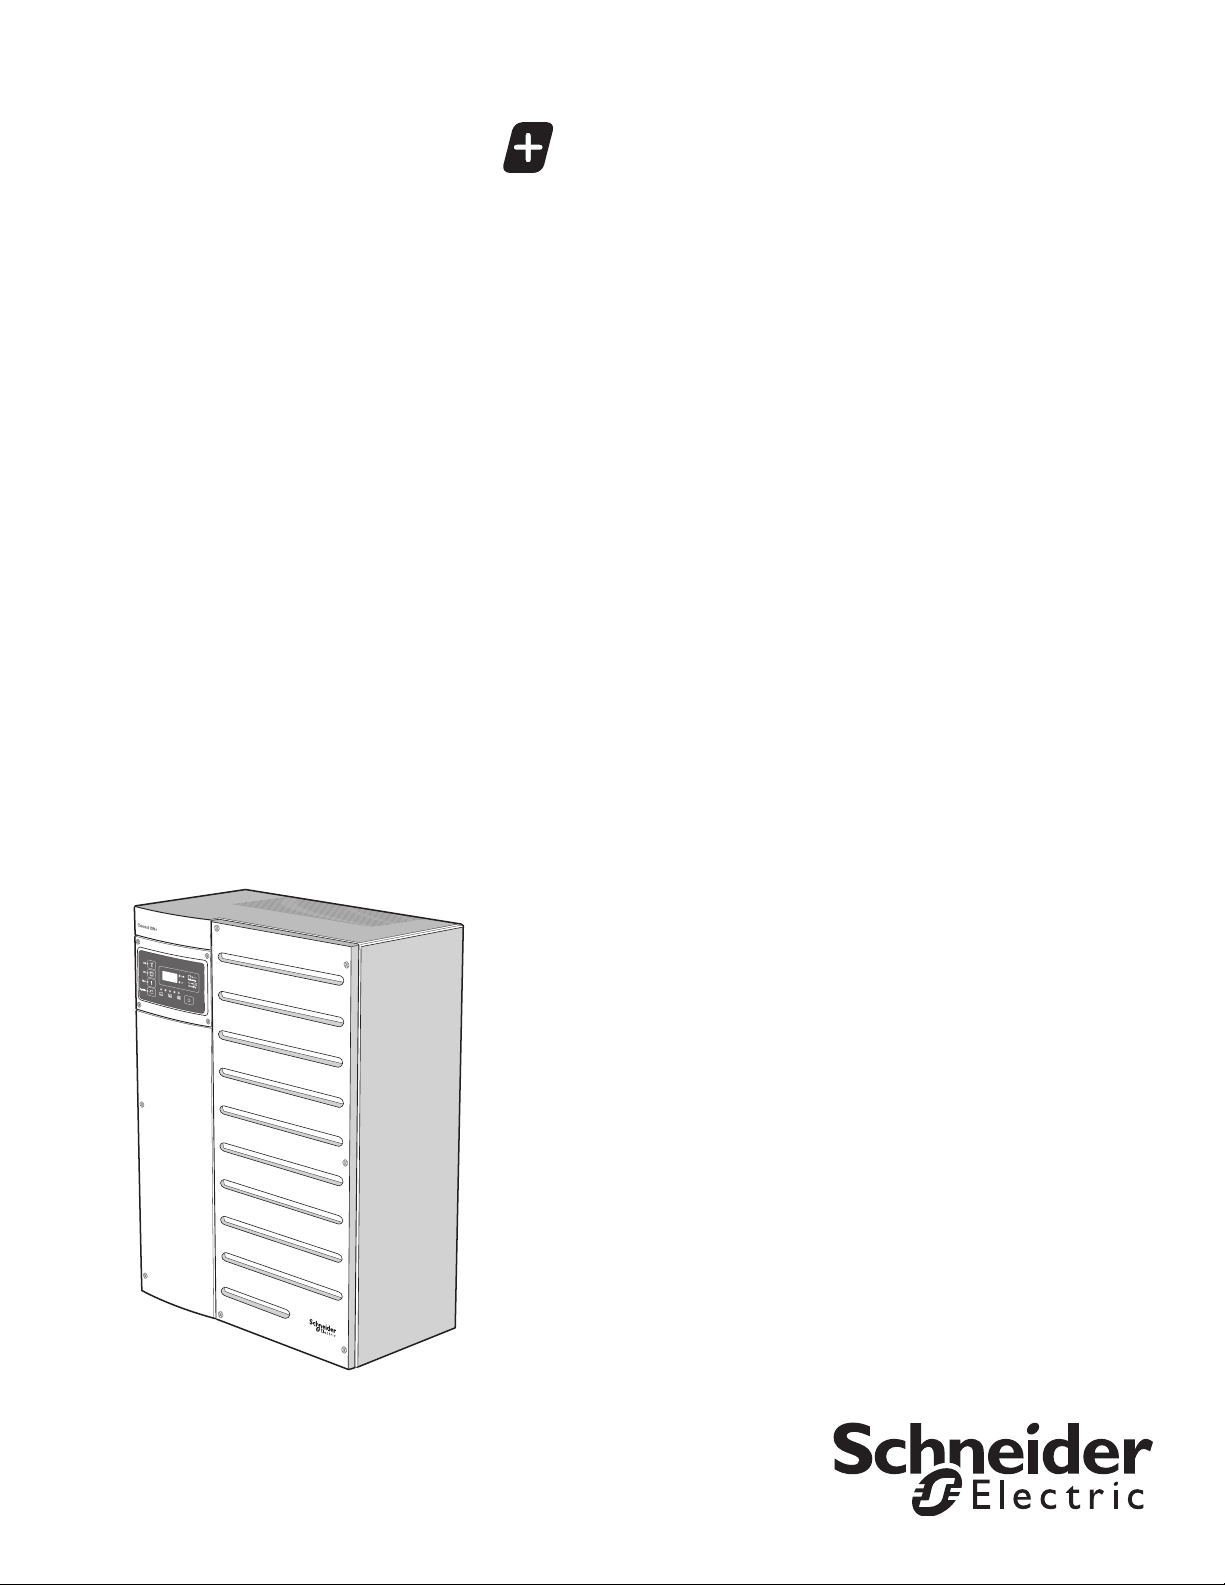
1. Before using the inverter, read all instructions and cautionary
markings on the unit, the batteries, and all appropriate sections of
this manual.
2. Use of accessories not recommended or sold by the manufacturer may result
in a risk of fire, electric shock, or injury to persons.
3. The inverter is designed to be permanently connected to your AC and DC
electrical systems. The manufacturer recommends that all wiring be done by
a certified technician or electrician to ensure adherence to the local and
national electrical codes applicable in your jurisdiction.
4. To avoid a risk of fire and electric shock, make sure that existing wiring is in
good condition and that wire is not undersized. Do not operate the inverter
with damaged or substandard wiring.
5. Do not operate the inverter if it has been damaged in any way.
6. This unit does not have any user-serviceable parts. Do not disassemble the
inverter except where noted for connecting wiring and cabling. See your
warranty for instructions on obtaining service. Attempting to service the unit
yourself may result in a risk of electrical shock or fire. Internal capacitors
remain charged after all power is disconnected.
7. To reduce the risk of electrical shock, disconnect both AC and DC power
from the inverter before attempting any maintenance or cleaning or working
on any components connected to the inverter. Putting the unit in Standby
mode will not reduce this risk.
8. The inverter must be provided with an equipment-grounding conductor
connected to the AC input ground.
9. Do not expose this unit to rain, snow, or liquids of any type. This product is
designed for indoor use only. Damp environments will significantly shorten
the life of this product and corrosion caused by dampness will not be
covered by the product warranty.
10. To reduce the chance of short-circuits, always use insulated tools when
installing or working with this equipment.
11. Remove personal metal items such as rings, bracelets, necklaces, and
watches when working with electrical equipment.
Conext XW+ Owner's Guide NA (975-0240-01-01).book Page vi Monday, November 27, 2017 10:00 AM

Safety
975-0240-01-01 vii
DANGER
HAZARD OF ELECTRIC SHOCK, EXPLOSION, OR ARC FLASH
• Apply appropriate personal protective equipment (PPE) and follow safe
electrical work practices. See NFPA 70E or CSA Z462.
• This equipment must only be installed and serviced by qualified electrical
personnel.
• Never operate energized with covers removed
• Energized from multiple sources. Before removing covers identify all
sources, de-energize, lock-out, and tag-out and wait 2 minutes for circuits
to discharge
• Always use a properly rated voltage sensing device to confirm all circuits
are de-energized.
Failure to follow these instructions will result in death or serious injury.
DANGER
HAZARD OF ELECTRIC SHOCK, EXPLOSION, OR ARC FLASH
• Disconnect negative and positive PV conductors before servicing. PV
conductors are to be treated as Hazardous Live and must be
disconnected.
• Normally GROUNDED conductors may be UNGROUNDED and
ENERGIZED when a GROUND FAULT is indicated on the front panel. Must
be serviced by qualified personnel.
Failure to follow these instructions will result in death or serious injury.
Conext XW+ Owner's Guide NA (975-0240-01-01).book Page vii Monday, November 27, 2017 10:00 AM

Safety
viii 975-0240-01-01
Precautions When Working With Batteries
Limitations on Use
Note: Battery work and maintenance must be done by qualified personnel
knowledgeable about batteries to ensure compliance with battery handling and
maintenance safety precautions.
DANGER
HAZARD OF ELECTRIC SHOCK, EXPLOSION, OR ARC FLASH
• Remove watches, rings, or other metal objects.
• This equipment must only be installed and serviced by qualified electrical
personnel.
• Keep sparks and flames away from the batteries.
• Use tools with insulated handles.
• Wear protective glasses, gloves and boots.
• Do not lay tools or other metal parts on top of batteries.
Failure to follow these instructions will result in death or serious injury.
DANGER
HAZARD OF ELECTRIC SHOCK, EXPLOSION, OR ARC FLASH
• Battery Circuit Breakers must be installed according to the specifications
and requirements defined by Schneider Electric.s.
• Servicing of batteries must only be performed by qualified personnel
knowledgeable about batteries and the required precautions. Keep
unqualified personnel away from batteries.
• Disconnect the charging source prior to connecting or disconnecting
battery terminals.
Failure to follow these instructions will result in death or serious injury.
WARNING
LIMITATIONS ON USE
The Conext XW+ Inverter/Charger is not intended for use in connection with
life support systems or other medical equipment or devices.
Failure to follow these instructions can result in death or serious injury.
Conext XW+ Owner's Guide NA (975-0240-01-01).book Page viii Monday, November 27, 2017 10:00 AM

Safety
975-0240-01-01 ix
Explosive Gas Precautions
Working in the vicinity of lead acid batteries is dangerous. Batteries generate
explosive gases during normal operation. Therefore, you must read this Guide
and follow the instructions exactly before installing or using your inverter/charger.
To reduce the risk of battery explosion, follow these instructions and those
published by the battery manufacturer and the manufacturer of the equipment in
which the battery is installed.
FCC Information to the User
This equipment has been tested and found to comply with the limits for a Class B
digital device, pursuant to part 15 of the FCC Rules. These limits are designed to
provide reasonable protection against harmful interference in a residential
installation. This equipment generates, uses and can radiate radio frequency
energy and, if not installed and used in accordance with the instructions, may
cause harmful interference to radio communications. However, there is no
guarantee that interference will not occur in a particular installation. If this
equipment does cause harmful interference to radio or television reception,
which can be determined by turning the equipment off and on, the user is
encouraged to try to correct the interference by one or more of the
following measures:
• Reorient or relocate the receiving antenna.
• Increase the separation between the equipment and the receiver.
• Connect the equipment to a circuit different from that to which the receiver is
connected.
• Consult the dealer or an experienced radio/TV technician for help.
WARNING
EXPLOSION HAZARD
This equipment is not ignition protected. To prevent fire or explosion, do not
install this product in locations that require ignition-protected equipment. This
includes any space containing gasoline-powered machinery, fuel tanks, as
well as joints, fittings, or other connections between components of the fuel
system.
Failure to follow these instructions can result in death or serious injury.
Conext XW+ Owner's Guide NA (975-0240-01-01).book Page ix Monday, November 27, 2017 10:00 AM

Safety
x975-0240-01-01
•THIS PAGE INTENTIONALLY BLANK•
Conext XW+ Owner's Guide NA (975-0240-01-01).book Page x Monday, November 27, 2017 10:00 AM

975-0240-01-01 xi
Important Safety Instructions
1Introduction
Features - - - - - - - - - - - - - - - - - - - - - - - - - - - - - - - - - - - - - - - - - - - - - - - - - - - - - - - - - - - - - - - 1–2
Performance Highlights - - - - - - - - - - - - - - - - - - - - - - - - - - - - - - - - - - - - - - - - - - - - - - - - - - 1–2
Distinguishing Features - - - - - - - - - - - - - - - - - - - - - - - - - - - - - - - - - - - - - - - - - - - - - - - - - - 1–2
Xanbus™ Network Communications Protocol - - - - - - - - - - - - - - - - - - - - - - - - - - - - - - - 1–2
Available Conext XW+ Accessories - - - - - - - - - - - - - - - - - - - - - - - - - - - - - - - - - - - - - - - - - 1–3
Operation- - - - - - - - - - - - - - - - - - - - - - - - - - - - - - - - - - - - - - - - - - - - - - - - - - - - - - - - - - - - - - - 1–3
Bidirectional Theory of Operation - - - - - - - - - - - - - - - - - - - - - - - - - - - - - - - - - - - - - - - - - - - 1–3
Surge Performance - - - - - - - - - - - - - - - - - - - - - - - - - - - - - - - - - - - - - - - - - - - - - - - - - - - - - 1–7
Islanding Protection - - - - - - - - - - - - - - - - - - - - - - - - - - - - - - - - - - - - - - - - - - - - - - - - - - - - 1–7
AC Coupling - - - - - - - - - - - - - - - - - - - - - - - - - - - - - - - - - - - - - - - - - - - - - - - - - - - - - - - - - - 1–8
Multi-unit Operation - - - - - - - - - - - - - - - - - - - - - - - - - - - - - - - - - - - - - - - - - - - - - - - - - - - - - 1–9
Auxiliary Output - - - - - - - - - - - - - - - - - - - - - - - - - - - - - - - - - - - - - - - - - - - - - - - - - - - - - - 1–10
Transfer Relay - - - - - - - - - - - - - - - - - - - - - - - - - - - - - - - - - - - - - - - - - - - - - - - - - - - - - - - 1–10
K1 and K2 relay - - - - - - - - - - - - - - - - - - - - - - - - - - - - - - - - - - - - - - - - - - - - - - - - - - - - - - 1–10
Monitoring the Conext XW+ - - - - - - - - - - - - - - - - - - - - - - - - - - - - - - - - - - - - - - - - - - - - - - - - - 1–11
Conext XW+ Information Panel - - - - - - - - - - - - - - - - - - - - - - - - - - - - - - - - - - - - - - - - - - - - 1–11
Conext System Control Panel - - - - - - - - - - - - - - - - - - - - - - - - - - - - - - - - - - - - - - - - - - - - - 1–12
2Monitoring Operation
Monitoring Operation with the Inverter Information Panel - - - - - - - - - - - - - - - - - - - - - - - - - - - - - 2–2
Monitoring AC Input Status - - - - - - - - - - - - - - - - - - - - - - - - - - - - - - - - - - - - - - - - - - - - - - - 2–2
Monitoring Conext XW+ Status - - - - - - - - - - - - - - - - - - - - - - - - - - - - - - - - - - - - - - - - - - - - - 2–3
Monitoring Charger Status - - - - - - - - - - - - - - - - - - - - - - - - - - - - - - - - - - - - - - - - - - - - - - - - 2–4
Monitoring Events - - - - - - - - - - - - - - - - - - - - - - - - - - - - - - - - - - - - - - - - - - - - - - - - - - - - - - 2–5
Equalizing Batteries - - - - - - - - - - - - - - - - - - - - - - - - - - - - - - - - - - - - - - - - - - - - - - - - - - - - 2–5
Using Startup/Shutdown/Standby Modes - - - - - - - - - - - - - - - - - - - - - - - - - - - - - - - - - - - - - 2–7
Monitoring Battery Level - - - - - - - - - - - - - - - - - - - - - - - - - - - - - - - - - - - - - - - - - - - - - - - - - 2–8
Reading the Display Screen - - - - - - - - - - - - - - - - - - - - - - - - - - - - - - - - - - - - - - - - - - - - - - - 2–9
Monitoring Operation with the Conext SCP - - - - - - - - - - - - - - - - - - - - - - - - - - - - - - - - - - - - - - 2–10
Conext System Control Panel Features - - - - - - - - - - - - - - - - - - - - - - - - - - - - - - - - - - - - - - 2–10
Using the Standby Button - - - - - - - - - - - - - - - - - - - - - - - - - - - - - - - - - - - - - - - - - - - - - - - 2–11
Conext System Control Panel Navigation - - - - - - - - - - - - - - - - - - - - - - - - - - - - - - - - - - - - 2–11
Viewing the Conext System Control Panel Home Screens - - - - - - - - - - - - - - - - - - - - - - 2–11
Viewing Other Screens - - - - - - - - - - - - - - - - - - - - - - - - - - - - - - - - - - - - - - - - - - - - - - 2–13
Reading the System Status Screen - - - - - - - - - - - - - - - - - - - - - - - - - - - - - - - - - - - - - - - - - 2–14
Reading the Conext XW+ Home Screen - - - - - - - - - - - - - - - - - - - - - - - - - - - - - - - - - - - - - 2–14
Contents
Conext XW+ Owner's Guide NA (975-0240-01-01).book Page xi Monday, November 27, 2017 10:00 AM

Contents
xii 975-0240-01-01
Reading the Meters Screen - - - - - - - - - - - - - - - - - - - - - - - - - - - - - - - - - - - - - - - - - - - - - - 2–18
3Configuration
Using the Conext System Control Panel - - - - - - - - - - - - - - - - - - - - - - - - - - - - - - - - - - - - - - - - - 3–2
Conext XW+ Setup Menu - - - - - - - - - - - - - - - - - - - - - - - - - - - - - - - - - - - - - - - - - - - - - - - - 3–2
Setting the Time and Date - - - - - - - - - - - - - - - - - - - - - - - - - - - - - - - - - - - - - - - - - - - - - - - - 3–3
Using the Setup Menus - - - - - - - - - - - - - - - - - - - - - - - - - - - - - - - - - - - - - - - - - - - - - - - - - - - - 3–4
Inverter Settings Menu - - - - - - - - - - - - - - - - - - - - - - - - - - - - - - - - - - - - - - - - - - - - - - - - - - - - - 3–8
Using the Low Battery Cut Out and LBCO Delay Settings - - - - - - - - - - - - - - - - - - - - - - - - - 3–9
Using Search Mode - - - - - - - - - - - - - - - - - - - - - - - - - - - - - - - - - - - - - - - - - - - - - - - - - - - - 3–9
Charger Settings Menu- - - - - - - - - - - - - - - - - - - - - - - - - - - - - - - - - - - - - - - - - - - - - - - - - - - - 3–11
Battery Charger Functions - - - - - - - - - - - - - - - - - - - - - - - - - - - - - - - - - - - - - - - - - - - - - - - 3–12
Multi-Unit Charger Settings - - - - - - - - - - - - - - - - - - - - - - - - - - - - - - - - - - - - - - - - - - - - - - 3–12
Multi-Stage Charging Process - - - - - - - - - - - - - - - - - - - - - - - - - - - - - - - - - - - - - - - - - - - - 3–13
Equalize Charging - - - - - - - - - - - - - - - - - - - - - - - - - - - - - - - - - - - - - - - - - - - - - - - - - - - - 3–18
Equalization Procedure - - - - - - - - - - - - - - - - - - - - - - - - - - - - - - - - - - - - - - - - - - - - - - 3–20
Custom and Lithium Ion Battery Settings Sub Menus - - - - - - - - - - - - - - - - - - - - - - - - - - - - 3–21
AC Input Settings - - - - - - - - - - - - - - - - - - - - - - - - - - - - - - - - - - - - - - - - - - - - - - - - - - - - - - - - 3–24
Grid Support Settings - - - - - - - - - - - - - - - - - - - - - - - - - - - - - - - - - - - - - - - - - - - - - - - - - - - - - 3–26
Prioritizing and Managing Energy Sources with Advanced Features- - - - - - - - - - - - - - - - - - - - 3–29
Grid Support - - - - - - - - - - - - - - - - - - - - - - - - - - - - - - - - - - - - - - - - - - - - - - - - - - - - - - - - 3–29
Grid Support and Battery Charging - - - - - - - - - - - - - - - - - - - - - - - - - - - - - - - - - - - - - 3–30
Charger Block - - - - - - - - - - - - - - - - - - - - - - - - - - - - - - - - - - - - - - - - - - - - - - - - - - - - - - - 3–32
Peak Load Shaving (PLS) - - - - - - - - - - - - - - - - - - - - - - - - - - - - - - - - - - - - - - - - - - - - - - - 3–32
Time-of-Use Metering - - - - - - - - - - - - - - - - - - - - - - - - - - - - - - - - - - - - - - - - - - - - - - - 3–33
Self-Consumption - - - - - - - - - - - - - - - - - - - - - - - - - - - - - - - - - - - - - - - - - - - - - - - - - - 3–34
Generator Support Settings- - - - - - - - - - - - - - - - - - - - - - - - - - - - - - - - - - - - - - - - - - - - - - - - - 3–34
Auxiliary Output Settings- - - - - - - - - - - - - - - - - - - - - - - - - - - - - - - - - - - - - - - - - - - - - - - - - - - 3–37
Multi-Unit Config Menu - - - - - - - - - - - - - - - - - - - - - - - - - - - - - - - - - - - - - - - - - - - - - - - - - - - - 3–39
Setting the Device Name - - - - - - - - - - - - - - - - - - - - - - - - - - - - - - - - - - - - - - - - - - - - - - - - 3–41
Setting the Device Number - - - - - - - - - - - - - - - - - - - - - - - - - - - - - - - - - - - - - - - - - - - - - - 3–42
Three-Phase Configuration - - - - - - - - - - - - - - - - - - - - - - - - - - - - - - - - - - - - - - - - - - - - - - 3–43
Connections Menu - - - - - - - - - - - - - - - - - - - - - - - - - - - - - - - - - - - - - - - - - - - - - - - - - - - - - - - 3–45
Copying Settings From Another Unit - - - - - - - - - - - - - - - - - - - - - - - - - - - - - - - - - - - - - - - - - - 3–47
Resetting the Conext XW+ to Default Settings - - - - - - - - - - - - - - - - - - - - - - - - - - - - - - - - - - - 3–48
Using the Advanced Features - - - - - - - - - - - - - - - - - - - - - - - - - - - - - - - - - - - - - - - - - - - - - - - 3–49
4Troubleshooting
General Troubleshooting Guidelines - - - - - - - - - - - - - - - - - - - - - - - - - - - - - - - - - - - - - - - - - - - 4–2
Inverter Applications - - - - - - - - - - - - - - - - - - - - - - - - - - - - - - - - - - - - - - - - - - - - - - - - - - - - - - 4–3
Resistive Loads - - - - - - - - - - - - - - - - - - - - - - - - - - - - - - - - - - - - - - - - - - - - - - - - - - - - - - - 4–3
Motor Loads - - - - - - - - - - - - - - - - - - - - - - - - - - - - - - - - - - - - - - - - - - - - - - - - - - - - - - - - - - 4–3
Problem Loads - - - - - - - - - - - - - - - - - - - - - - - - - - - - - - - - - - - - - - - - - - - - - - - - - - - - - - - - 4–3
Very Small Loads - - - - - - - - - - - - - - - - - - - - - - - - - - - - - - - - - - - - - - - - - - - - - - - - - - - 4–3
Conext XW+ Owner's Guide NA (975-0240-01-01).book Page xii Monday, November 27, 2017 10:00 AM

Contents
975-0240-01-01 xiii
Fluorescent Lights and Power Supplies - - - - - - - - - - - - - - - - - - - - - - - - - - - - - - - - - - - 4–3
Clocks - - - - - - - - - - - - - - - - - - - - - - - - - - - - - - - - - - - - - - - - - - - - - - - - - - - - - - - - - - - 4–4
Searching - - - - - - - - - - - - - - - - - - - - - - - - - - - - - - - - - - - - - - - - - - - - - - - - - - - - - - - - - 4–4
Inverter Troubleshooting - - - - - - - - - - - - - - - - - - - - - - - - - - - - - - - - - - - - - - - - - - - - - - - - - - - - 4–4
Battery Charger Troubleshooting - - - - - - - - - - - - - - - - - - - - - - - - - - - - - - - - - - - - - - - - - - - - - - 4–7
Faults and Warnings - - - - - - - - - - - - - - - - - - - - - - - - - - - - - - - - - - - - - - - - - - - - - - - - - - - - - - 4–10
Warning Messages - - - - - - - - - - - - - - - - - - - - - - - - - - - - - - - - - - - - - - - - - - - - - - - - - - - - 4–11
Warning Types - - - - - - - - - - - - - - - - - - - - - - - - - - - - - - - - - - - - - - - - - - - - - - - - - - - - 4–11
Fault Messages - - - - - - - - - - - - - - - - - - - - - - - - - - - - - - - - - - - - - - - - - - - - - - - - - - - - - - 4–16
Fault Types - - - - - - - - - - - - - - - - - - - - - - - - - - - - - - - - - - - - - - - - - - - - - - - - - - - - - - - 4–17
Inverter Operation After Faults - - - - - - - - - - - - - - - - - - - - - - - - - - - - - - - - - - - - - - - - - 4–17
ASpecifications
Electrical Specifications - - - - - - - - - - - - - - - - - - - - - - - - - - - - - - - - - - - - - - - - - - - - - - - - - - - A–2
Grid-tie Specifications - - - - - - - - - - - - - - - - - - - - - - - - - - - - - - - - - - - - - - - - - - - - - - - - - - - A–3
Response to Abnormal Grid Conditions - - - - - - - - - - - - - - - - - - - - - - - - - - - - - - - - - - - - - - A–4
Conext XW+ Overload Capability - - - - - - - - - - - - - - - - - - - - - - - - - - - - - - - - - - - - - - - - - - - A–5
Output Power Versus Ambient Temperature - - - - - - - - - - - - - - - - - - - - - - - - - - - - - - - - - - - A–8
Conext XW+ Efficiency - - - - - - - - - - - - - - - - - - - - - - - - - - - - - - - - - - - - - - - - - - - - - - - - - - A–9
Inverting Efficiency (Typical) - - - - - - - - - - - - - - - - - - - - - - - - - - - - - - - - - - - - - - - - - - - A–9
Charging Efficiency (Typical) - - - - - - - - - - - - - - - - - - - - - - - - - - - - - - - - - - - - - - - - - - A–10
Charging Efficiency Power Factor - - - - - - - - - - - - - - - - - - - - - - - - - - - - - - - - - - - - - - - A–11
Mechanical Specifications- - - - - - - - - - - - - - - - - - - - - - - - - - - - - - - - - - - - - - - - - - - - - - - - - - A–12
Accessories - - - - - - - - - - - - - - - - - - - - - - - - - - - - - - - - - - - - - - - - - - - - - - - - - - - - - - - - - - - - A–13
BDefault Settings
Default Settings and Ranges - - - - - - - - - - - - - - - - - - - - - - - - - - - - - - - - - - - - - - - - - - - - - - - - B–2
Inverter Settings Menu - - - - - - - - - - - - - - - - - - - - - - - - - - - - - - - - - - - - - - - - - - - - - - - - - - - B–3
Charger Settings Menu - - - - - - - - - - - - - - - - - - - - - - - - - - - - - - - - - - - - - - - - - - - - - - - - - - B–3
Custom Settings Submenu - - - - - - - - - - - - - - - - - - - - - - - - - - - - - - - - - - - - - - - - - - - - - B–3
LithiumIon Submenu - - - - - - - - - - - - - - - - - - - - - - - - - - - - - - - - - - - - - - - - - - - - - - - - - B–4
AC Menu - - - - - - - - - - - - - - - - - - - - - - - - - - - - - - - - - - - - - - - - - - - - - - - - - - - - - - - - - - - -B–4
Grid Support Menu - - - - - - - - - - - - - - - - - - - - - - - - - - - - - - - - - - - - - - - - - - - - - - - - - - - - - B–5
Gen Support Menu - - - - - - - - - - - - - - - - - - - - - - - - - - - - - - - - - - - - - - - - - - - - - - - - - - - - - B–5
Aux Menu - - - - - - - - - - - - - - - - - - - - - - - - - - - - - - - - - - - - - - - - - - - - - - - - - - - - - - - - - - - -B–5
Connections Menu - - - - - - - - - - - - - - - - - - - - - - - - - - - - - - - - - - - - - - - - - - - - - - - - - - - - - B–6
Advanced Features Menu - - - - - - - - - - - - - - - - - - - - - - - - - - - - - - - - - - - - - - - - - - - - - - - - B–6
Conext XW+ Owner's Guide NA (975-0240-01-01).book Page xiii Monday, November 27, 2017 10:00 AM

Contents
xiv 975-0240-01-01
•THIS PAGE INTENTIONALLY BLANK•
Conext XW+ Owner's Guide NA (975-0240-01-01).book Page xiv Monday, November 27, 2017 10:00 AM

1Introduction
Chapter 1, “Introduction”, describes the
operational features of the Conext XW+
Inverter/Charger.
Topics in this chapter include:
• “Features” on page 1–2
• “Operation” on page 1–3
• “Monitoring the Conext XW+” on page 1–11
Conext XW+ Owner's Guide NA (975-0240-01-01).book Page 1 Monday, November 27, 2017 10:00 AM

Introduction
1–2 975-0240-01-01
Features
The Conext XW+ is a modular building block sine-wave inverter/charger that can
be used for residential and commercial battery based off-grid, grid backup, and
grid interactive applications.
The Conext XW+ is a self-contained DC to AC inverter, battery charger, and
integrated AC transfer switch. It is configurable in a hybrid system to operate with
generators and renewable energy sources. These configurations are capable of
extending battery based off-grid/backup autonomy.
Performance Highlights
• Excellent load starting with high 30-minute and 5-second power.
• Off-grid AC Coupling with PV inverters using frequency power curtailment
method.
• Operation in hot environments up to 70°C.
• Conversion of DC energy to AC energy for export to the utility grid.
• Power factor corrected charging minimizes AC current required for charging.
• True sine wave output.
Distinguishing Features
• Grid-interactive feature set enables time management and prioritization of
energy sources and power conversion to support advanced modes of
operation such as load shifting, self consumption and peak load shaving.
• Dual AC input connections with 60 A automatic transfer switch integrates
both utility grid and generator.
• Generator Support functionality assists small generators with heavy loads.
• Auxiliary port assist with relay switching of external devices such as battery
room fans, diversion loads and generators.
• Configurable battery parameters for customized battery charging.
• Field serviceable boards and components.
Xanbus™ Network Communications Protocol
The Conext XW+ uses Xanbus™, a network communications protocol developed
by Schneider to communicate with other Xanbus-enabled devices. You can
configure and monitor the Conext XW+ and other Xanbus-enabled devices in the
system using the Conext System Control Panel (part number 865-1050-01) or
Conext ComBox (part number 865-1058).
Conext XW+ Owner's Guide NA (975-0240-01-01).book Page 2 Monday, November 27, 2017 10:00 AM

Operation
975-0240-01-01 1–3
Available Conext XW+ Accessories
Operation
Bidirectional Theory of Operation
The Conext XW+ is a grid forming device consisting of a bidirectional inverter/
charger. It is capable of inverting DC power into AC power and controlling the
voltage and frequency of its inverter output. It will power external loads attached
to AC OUT (See Figure 1-2, “Inverting of DC to AC Connected to AC OUT” on
page 1–4).
The Conext XW+ is also capable of charging external batteries by converting AC
power into DC power (See Figure 1-3, “Charging External Batteries and
Supplying AC Out with AC Passthrough from AC1 Grid ” on page 1–5). The
Conext XW+ accepts AC power through connection AC2 for charging batteries,
usually from a generator (See Figure 1-4, “Charging External Batteries and
Supplying AC Out with AC Passthrough from AC2 Generator” on page 1–5).
The Conext XW+ will convert externally sourced DC power into AC power for
export to the utility grid attached to its AC1 connection (See Figure 1-5,
“Converting Excess Available DC power for Export to Utility Grid (AC1) and AC
Out” on page 1–6).
The Conext XW+ has an internal automatic transfer switch (K1, K2) which allows
either AC1 or AC2 to be connected to the inverter input, but not both at the same
time (See Figure 1-1, “Connection Points and Major Power Conversion
Components of Conext XW+ ” on page 1–4). This allows shared AC energy
during charging or to directly passthrough from AC1, or AC2, to AC Out.
Accessory Part Number
Conext XW+ Power Distribution Panel 865-1015-01
Conext XW+ Power Distribution Panel
(Without AC Breakers)
865-1014-01
Conext XW+ Conduit Box 865-1025-01
Conext XW+ Connection Kit for INV2
INV3 PDP
865-1020-02
Conext System Control Panel 865-1050-01
Conext Automatic Generator Start 865-1060-01
Conext MPPT 60 150 Solar Charge
Controller
865-1030-1
Conext MPPT 80 600 Solar Charge
Controller
865-1032
Conext ComBox 865-1058
Conext Battery Monitor 865-1080-01
Conext XW+ PDP 120/240V 60A
Breaker Kit
865-1215-01
Conext XW+ Owner's Guide NA (975-0240-01-01).book Page 3 Monday, November 27, 2017 10:00 AM

Introduction
1–4 975-0240-01-01
Through firmware control over power conversion and the management of K1 and
K2, Conext XW+ can facilitate advanced interaction with the utility grid to
optimize the utilization of renewable and non-renewable energy sources.
Because the Conext XW+ is a device capable of forming an AC grid signal (AC
voltage and frequency) it is also ideal for use off-grid.
The red arrows in the diagrams below represent the direction of power flow in the
respective modes of operation. These modes and other special functions will be
explained throughout this manual.
Figure 1-1 Connection Points and Major Power Conversion Components of
Conext XW+
Figure 1-2 Inverting of DC to AC Connected to AC OUT
K2
K1
AC Transformer
Bidirectional AC/DC
power block
AC Interface Board
AC1
AC2
ACOUT
AC1
AC2
ACOUT
Conext XW+ Owner's Guide NA (975-0240-01-01).book Page 4 Monday, November 27, 2017 10:00 AM
This manual suits for next models
1
Table of contents