Proc. #715000266, Rev. A Page 1 of 3
Waters 1500 Series Manual Injector Installation
This procedure describes how to install a Waters 1500 Series Manual Injector (Rheodyne 7725i)
on a 1500 Series pump. A mounting plate comes pre-installed in the pump; it will have to be
removed and modified before you can mount the manual injector onto the mounting plate. After
adjusting the fluidic tubing to fit, you will have to put the mounting plate back onto the pump and
finish connecting the fluid lines and electrical connections.
Parts Required
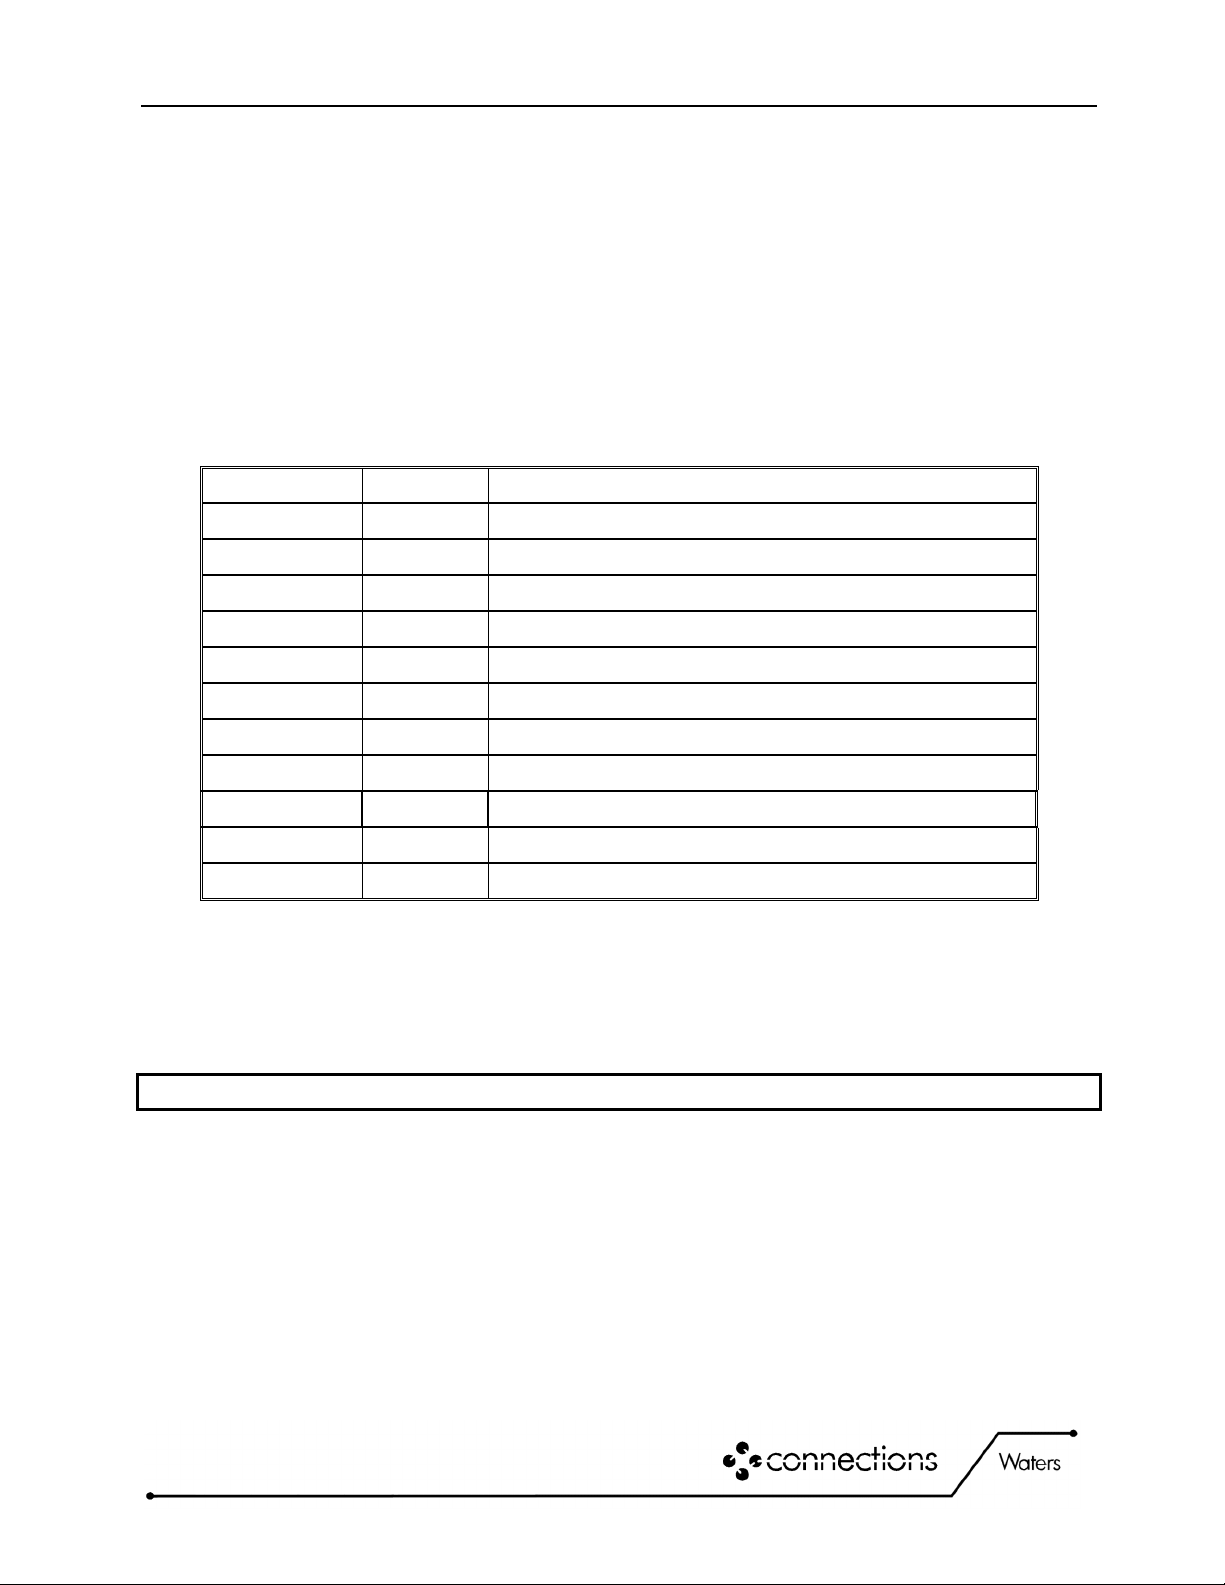
The Waters 1500 Series Manual Injector Kit (Part No. 186000872) consists of:
Part Number Quantity Item
WAT005063 1 Ferrule, Stainless Steel, 10 Pack
WAT005070 1 Compression Screw, 10-Pack
WAT020321 1 Cable, Event
WAT025462 2 Screw, 8-32X06, Binder
WAT033381 1 S
rin
e, 25
l
WAT055840 1 Injector, Manual, 7725i
WAT055857 1 Kit, Sample Loop
415000250 1 Drip Tray, Valve, Manual Inject
430000406 1 Assy, Tube, Reference Valve To Manual Inject Valve
430000407 2 Assy, Tube, Manual Inject Valve To Waste
430000408 1 Assy, Tube, Manual Inject Valve To Column
Tools Required
•Phillips head screwdriver
•1/4-5/16 inch open-end wrench (WAT022527), provided in the 1515/1525 pump startup kits
•5/32-inch Allen wrench, provided in this kit
•Adjustable wrench, provided in this kit
NOTE: Install before power-up
Waters 1500 Series Manual Injector Installation
1. Unpack the manual injector kit and identify the four (4) pieces of stainless steel tubing.
Familiarize yourself with the ports on the back of the injector; refer to the flow diagram in the
Rheodyne literature that came with the injector and with Figure 1.
2. Assemble the tubing to the back of the injector, only hand-tightening the ferrrules at this time,
per Table 1.


