Step 8: Set unit upright, resting edges
of Sides on floor. Tighten all screws
snugly. DO NOT OVER-TIGHTEN.
DO NOT DRILL. Assembly is now
complete.
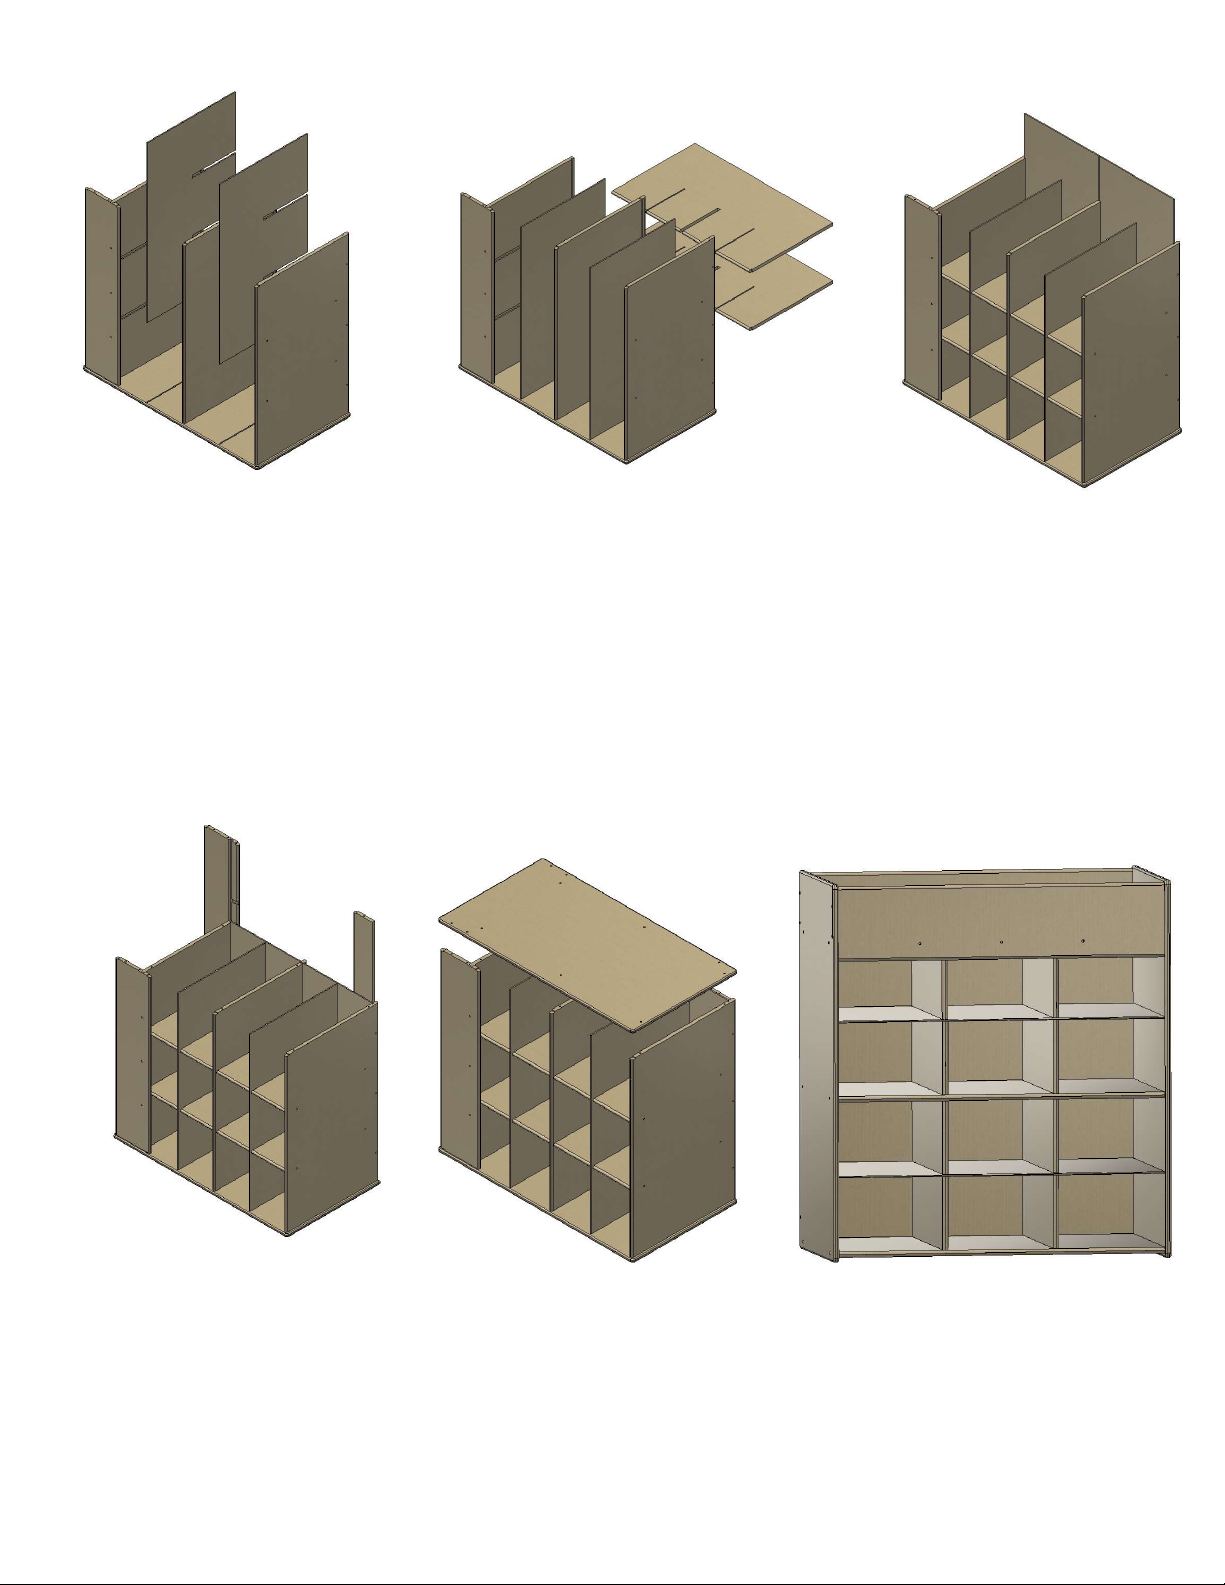
Step 6: Attach Back rail and
Back Brace to Left side. Top
fits into 3/8” deep groove in
back rail. Notches in back
brace overlap dado in left
side. Tighten down halfway.
Step 4: Slide (2) Dividers
into slots of all shelves and
dadoes of Bottom. Attach
each divider to Bottom using
(2) hex screws and allen
wrench. Tighten down
halfway. Back face of dividers
should sit flush with back
face of 4mm shelves.
Step 3: Place 4mm Shelves
into grooves in Left side.
No hardware is required in
step. Slots in 4mm shelves
align with slots in 15mm
shelf.
For assistance, call: Customer Service 1-800-247-8465
Step 5: Slide in Backs using
grooves in top, 15mm shelf,
and bottom. No hardware is
required in this step.
Step 7: Attach Right Side to pre-
viously assembled compo-
nents. Align rest of assembly into
grooves of right side. Attach using
(10) hex screws and allen wrench.


