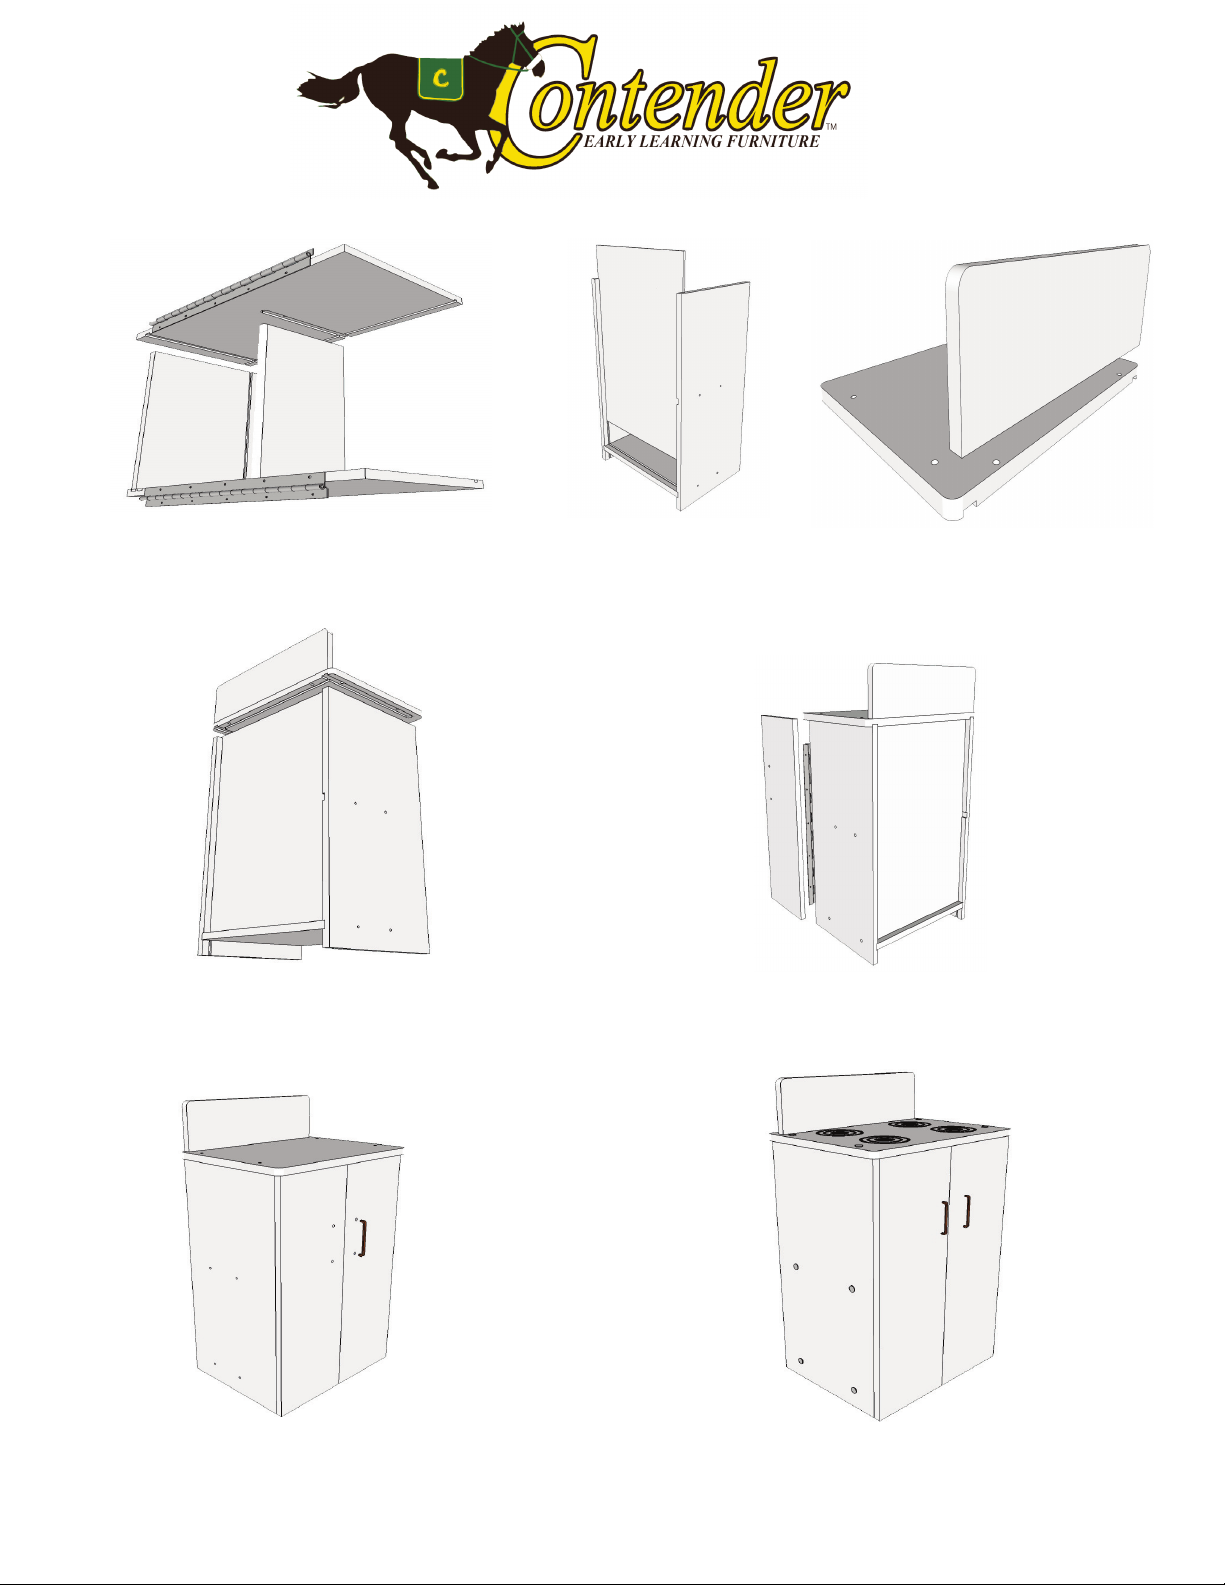
Step 6: Align hol s in Backsplash with
hol s in Top pi c . Ins rt h x scr ws into
ach of pr -drill d hol s in und rsid of Top
pi c , scr wing upwards into Backsplash.
Tight n scr ws.
Step 4: Ins rt dg s of s cond Side into dg s of
Bottom and Sh lf. Mak sur back groov of Sid
and Bottom groov ar align d, as compl t d in St p
2. Ins rt h x scr ws into pr -drill d hol s in Side.
Step 10: Tight n all scr ws snugly.
DO NOT OVERTIGHTEN. DO NOT
DRILL. Assembly is now complete.
Step 7: Ins rt r maining dg s of Sides and
Back pi c into groov s of Top pi c . Ins rt
h x scr ws into ach of th pr -drill d hol s
in Top piece.
Step 9: Ins rt Handle Screw from back of door into
th Handle and tight n. R p at for r maining Door.
C990476-101 ASSEMBLY INSTR CTIONS
Step 8: Install Door to hing pr -install d to Side. Us (8)
Small Screws to scr w Door to hing using pr -drill d
hol s in door. Mak sur handl hol s ar torwards c nt r
of cabin t. R p at for r maining door.
Step 5: Slid Back pi c into back
groov s of Side pi c s and slid
downward until Back sits in groov
of Bottom pi c .
For assistance, call: Customer Service 1-800-247-8465


