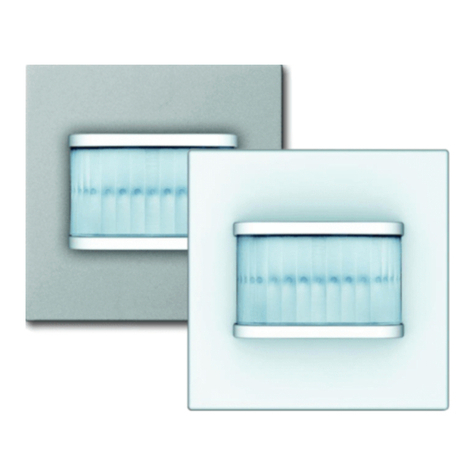
Contro l4 Movement Detector 220 SM User manual

os: 2 /#Neustruktur#/Onli ne-Doku mentation (+KNX)/Titel blätter/KNX/Wächter AP/Titelblatt - Wächter 220 @ 19\ mod_132127270109 6_15.docx @ 10968 9@ @ 1

200-00564-C 10292018 LW
Movement Detector 220 SM, SKU: C4-KNX-WD220-AP, KNXPROD filename: BM/A 1.1.41
Ende der Liste für T extmarke Cover ===
The Control4-Movement Detector 220 SM reliably
monitors the outdoor areas of buildings and switches
the light on automatically when it detects movement.
This ensures that residents and guests feel welcome
and unwelcome intruders are kept out.
The Movement Detector 220 SM can be installed
anywhere on the property - leaving no angle
unmonitored.
Especially convenient is the rearfield detection in the
front door area. Here, the Movement Detector 220 SM
provides light when someone steps out of the door and
yet is still "behind" the movement detector.
Even when you are not at home for several days, the
Movement Detector 220 SM will independently handle
switching processes to convincingly simulate your
presence in the home. The integration of the Movement
Detector 220 SM into the KNX bus system permits
functions to be implemented that go beyond the mere
switching of the exterior lighting. It also allows the light
in the house to be switched on, a blind to be moved, or
music to be played when movement is detected. Such
"signs of life" will deter potential intruders.
This manual describes the function and configuration of the Movement Detector 220 SM.
Movement Detector 220 SM. SKU: C4-KNX-WD220-AP
KNXPROD filename: BM/A 1.1.41, Download: https://ctrl4.co/knx-wd220.
Subject to change.
Exclusion of liability:
Although the contents of this document have been checked to ensure that they are
consistent with the hardware and software, deviations cannot be completely excluded.
We therefore cannot accept liability. Any necessary corrections will be incorporated in
new versions of the manual.
Please inform us of any suggested improvements.


—4 —
Pos: 4/ #Neustruktur#/Onlin e-Dokumentatio n(+KN X)/Inhalts verzeichnis (--> Für alle Doku mente< --)/Inhaltsverz eichnis @ 19\mod_132064904 4386_15.docx @ 109653 @ @ 1
1.1 Control elements.....................................................................................................................................7
1.2 Standard operation..................................................................................................................................7
1.3 Standard operation (time- and brightness dependent)............................................................................8
3.1 Features of function and equipment......................................................................................................10
3.2 Technology ...........................................................................................................................................11
4.1 Operational safety/interference factors .................................................................................................14
4.2 Detection ranges...................................................................................................................................15
4.2.1 Coverage ..............................................................................................................................................15
4.2.2 Installation sites ....................................................................................................................................16
4.3 Mounting...............................................................................................................................................17
4.3.1 Preparing the installation.......................................................................................................................17
4.3.2 Water drainage .....................................................................................................................................18
4.3.3 Mounting steps......................................................................................................................................19
4.4 Electrical connection.............................................................................................................................20
5.1 Setting / limiting the transmission range and the detection range.........................................................21
5.2 Software application..............................................................................................................................22
5.3 Programming mode...............................................................................................................................22
5.4 Activation test........................................................................................................................................23
6.1 Parameters ...........................................................................................................................................24
6.1.1 Activation / linking internal or external brightness evaluation................................................................24
6.1.2 Activation of switch-off delay object ......................................................................................................24
6.1.3 Output type ...........................................................................................................................................24
6.1.4 Operation mode ....................................................................................................................................24
6.1.5 Operating mode of the movement detector...........................................................................................24
6.1.6 Input actuator status..............................................................................................................................24
6.1.7 Input Slave............................................................................................................................................25
6.1.8 Input Slave takes the brightness into consideration..............................................................................25
6.1.9 Setting the brightness-value threshold via ............................................................................................25
6.1.10 Setting the switch-off delay via..............................................................................................................25
6.1.11 Overwrite settings during download......................................................................................................25
6.1.12 Sensitivity of the movement detector ....................................................................................................25
6.1.13 Enable with ...........................................................................................................................................25
6.1.14 Brightness threshold internal (lux).........................................................................................................25
6.1.15 Detection independent of brightness after return of bus voltage...........................................................25
6.1.16 Switch-off delay.....................................................................................................................................27
6.1.17 External push-button object ..................................................................................................................27
6.1.18 Object for switch-off delay.....................................................................................................................27
6.1.19 Object for external brightness threshold................................................................................................27
6.1.20 Object for detection independent of brightness.....................................................................................27
6.1.21 Object for internal brightness threshold.................................................................................................27
6.1.22 Manual mode object..............................................................................................................................27
6.1.23 Activating sensors.................................................................................................................................27
6.1.24 Status LED............................................................................................................................................ 27
6.1.25 Pause time (ms)....................................................................................................................................28
6.1.26 Value for switching off........................................................................................................................... 28
6.1.27 Value for switching on........................................................................................................................... 28
6.1.28 Cyclical repeat time (s)..........................................................................................................................28
6.2 Objects.................................................................................................................................................. 29
7.1 Parameters ...........................................................................................................................................30
7.1.1 Cool-down time of the lamp ..................................................................................................................30
7.1.2 Number of actuator status inputs ..........................................................................................................30
7.1.3 Number of twilight thresholds................................................................................................................30
7.1.4 Warm-up time of the lamp.....................................................................................................................30
7.1.5 Output brightness/twilight switch sends at ............................................................................................30
7.1.6 Twilight threshold (lux)..........................................................................................................................30

—5 —
7.1.7 Overwrite settings during download......................................................................................................30
7.1.8 Enable object brightness/twilight switch................................................................................................30
7.1.9 Brightness detection..............................................................................................................................30
7.1.10 Hysteresis.............................................................................................................................................30
7.1.11 Lamps in the detection range................................................................................................................31
7.1.12 Minimum duration of undershoot...........................................................................................................31
7.1.13 Minimum duration of overshoot.............................................................................................................31
7.1.14 Object output ambient brightness (lux)..................................................................................................31
7.1.15 Object input brightness/twilight threshold..............................................................................................31
7.1.16 Threshold programmable via the bus (1 bit)..........................................................................................31
7.2 Objects.................................................................................................................................................. 32
8.1 Parameters ...........................................................................................................................................33
8.1.1 Cool-down time of the lamp ..................................................................................................................33
8.1.2 Number of actuator status inputs ..........................................................................................................33
8.1.3 Number of brightness/twilight thresholds ..............................................................................................33
8.1.4 Warm-up time of the lamp.....................................................................................................................33
8.1.5 Output brightness/twilight switch sends at ............................................................................................33
8.1.6 Overwrite settings during download......................................................................................................33
8.1.7 Enable object brightness/twilight switch................................................................................................33
8.1.8 Brightness/twilight threshold (lux)..........................................................................................................33
8.1.9 Brightness detection..............................................................................................................................34
8.1.10 Hysteresis .............................................................................................................................................34
8.1.11 Lamps in the detection range................................................................................................................34
8.1.12 Minimum duration of overshoot.............................................................................................................34
8.1.13 Minimum duration of undershoot...........................................................................................................34
8.1.14 Object output ambient brightness (lux)..................................................................................................34
8.1.15 Object input brightness/twilight threshold..............................................................................................34
8.1.16 Threshold programmable via the bus (1 bit)..........................................................................................34
8.2 Objects.................................................................................................................................................. 35
9.1 Parameters ...........................................................................................................................................36
9.1.1 Number of temperature thresholds .......................................................................................................36
9.1.2 Output temperature switch sends at......................................................................................................36
9.1.3 Overwrite settings during download......................................................................................................36
9.1.4 Enable object temperature switch.........................................................................................................36
9.1.5 Hysteresis.............................................................................................................................................36
9.1.6 Minimum duration of overshoot.............................................................................................................36
9.1.7 Minimum duration of undershoot........................................................................................................... 36
9.1.8 Object input temperature threshold.......................................................................................................36
9.1.9 Threshold programmable via the bus (1 bit).......................................................................................... 36
9.1.10 Temperature reading.............................................................................................................................36
9.1.11 Temperature threshold °C..................................................................................................................... 36
9.2 Objects.................................................................................................................................................. 37
=== Ende der Liste für Te xtmarke TOC ===

—6 —
Pos: 6.1 /#Neustruktur #/Modul-Struktur/Onlin e-Dokumentation/Ü berschriften/1. Ebene/S - T/Sich erheit @ 18\mod_1302612 791790_15.docx @ 10335 7@ 1 @ 1
Pos: 6.2/ #Neustruktur#/Mo dul-Struktur/Onlin e-Dokumentation/ Sicherheit( ++F ür alleD okumente ++)/W arnhinweise/Sicherh eit- 2 30V @ 18\ mod_1302606816750_1 5.docx@ 1 03308 @ @ 1
Warning
Electric voltage!
Risk of death and fire due to electrical voltage of 230 V.
–Work on the 230V supply system may only be performed by authorised electricians!
–Disconnect the mains power supply prior to installation and/or disassembly!
Pos: 7.1 / #Neustruktur #/Modul-Str uktur/Onlin e-Dokumenta tion/Überschri ften (--> Für alle Dokumente <--)/ 1.Eb ene/A -F/ Bestimmungsge mäßer Gebrauch @ 18\mod_130 2763321316_15.doc x@ 1034 83@ 1 @ 1
Pos: 7.2/ #Neustruktur#/Online-D okumentation (+KNX)/Bestim mungsgemäßer Gebrauch/ Waechter/Bestimmungsg emaesser Gebrauch - Waech ter @ 24\mod_1338445 013210_15.docx @ 214451 @ @ 1
The Control4 Movement Detector 220 SMs are passive infrared movement detectors which switch loads via the
KNX bus when sources of heat move within its detection range.
The Movement Detector 220 SM is not an intrusion or attack alarm.
Pos: 8.1/ #Neustruktur #/Modul-Struktur/O nline-Dokumentatio n/Überschriften (Für all eDoku mente)/1. Ebene/A - F/Benut zerinformationen @ 20\mod_132 4371581731_15.doc x@ 112 462 @ 1@ 1
Pos: 8.2/ #Neustruktur #/Modul-Struktur/O nline-Dokumentatio n/Benutzerinfor mationen( -->Für alle Dokume nte< --)/Hinweise/Hin weis - Haft ungsausschlus s @ 20\mod_132 4364717075_15.doc x@ 1 12392 @ @ 1
Disclaimer
The content of this printed material has been checked for compliance with hardware and software.
However, no liability can be assumed for any deviations that may still occur. Any necessary
corrections will be implemented in future versions of this manual.
Please advise us of any suggestions you may have concerning the manual's improvement.
Pos: 9.1/ #Neustruktur #/Modul-Struktur/O nline-Dokumentatio n/Überschriften (--> Für alle D okumente <--)/1. Ebene /U- Z/Um welt@ 1 8\mod_13026141 58967_15.docx @ 103383 @ 1 @ 1
Pos: 9.2 /#Neustruktur #/Online-Doku mentation (+KNX)/ Sicherheitshinweis e undHi nweise (--> Für all eD okumente <--)/Hin weise/Hinweis - Umwelt - Hinweis Elektrogerä te@ 1 8\mod_13027639 73434_15.docx @ 103500 @ @ 1
Consider the protection of the environment!
Used electric and electronic devices must not be disposed of with domestic waste.
–The device contains valuable raw materials which can be recycled. Therefore, dispose of the
device at the appropriate collecting depot.
Pos: 9.3 /#Neustruktur #/Online-Doku mentation (+KNX)/ Sicherheitshinweis e undHi nweise (--> Für all eD okumente <--)/Hin weise/Hinweis - Umw elt- En tsorgung Elektroger äte @ 20\mod_132 5760695972_15.doc x@ 136583 @ @ 1
All packaging materials and devices bear the markings and test seals for proper disposal. Always dispose of the
packaging material and electric devices and their components via the authorized collecting depots and disposal
companies.
The products meet the legal requirements, in particular the laws governing electronic and electrical devices and
the REACH ordinance.
(EU Directive 2002/96/EC WEEE and 2002/95/EC RoHS)
(EU REACH ordinance and law for the implementation of the ordinance (EC) No.1907/2006)
Pos: 10 /#Neustruktur# /Online-Dokumentati on( +KNX)/Steuerm odule- O nline-Dokumentatio n(--> Für alle D okumente <--)/+++ +++++++ ++ Seitenumbruch +++++++ +++++ @ 9\ mod_1268898668 093_0.docx @ 52 149 @ @ 1

—7 —
Pos: 11 /#Neustru ktur#/Online-Doku mentation (+KNX)/Üb erschriften (--> Für alle D okumente <--)/1. Ebene/ A- F/Bedi enung @ 11\mod_12791855 41649_15.docx @ 83043 @ 1 @ 1
Pos: 12 /#Neustru ktur#/Online-Doku mentation (+KNX)/B edienung/Waecht er/Bedienung - 617 9_220-MasterLINE pre mium KNX @ 26 \mod_1342091 726094_15.doc x@ 22369 4@ 22 2@ 1
Fig.
1
: Control elements
No.
Function
1
LED
C4-KNX-WD220-AP
On
- Programming mode
Special flashing (repeated cyclically)
- Detection in test mode
—
Continuous flashing
- Special boot mode in the event of a fault or simultaneous programming and test mode of the potentiometers during a reset
2
Lens
3
Trim potentiometer for switch-off delay, programming mode
4
Trim potentiometer for brightness value, test/standard operation
5
Screw for dismantling safety
Fig.
2
: Standard operation
The lighting during twilight remains switched on for 3 minutes after the last detection (at a twilight value of 5 lux).
Note
After activating the mains supply voltage the device remains in test mode for 10 minutes (see
chapter "Activation test").

—8 —
Fig.
3
:
Set the values for the activation threshold (brightness) and the switch-off delay (on period of the light after the last
detection).
Icon
Function
Switching at approximately 300 lux
Switching at nightfall (approximately 5 lux)
Switching during darkness
Prog.
Programming mode
Pos: 13 /#Neustru ktur#/Online-Doku mentation (+KNX)/S teuermodule - Online-Do kumentation (--> Für alle Do kumente <--)/++++ ++++++++ Seitenum bruch+ +++++++ ++++ @ 9\mod _126889866809 3_0.docx @ 521 49@ @ 1

—9 —
Pos: 14 /#Neustru ktur#/Online-Doku mentation (+KNX)/Üb erschriften (--> Für alle D okumente <--)/1. Ebene/ G- L/H andsender @ 24\mod_13384 71401020_15.doc x@ 214714 @ 1 @ 1
Pos: 18.1 /#Neustru ktur#/Modul-Stru ktur/Online-Doku mentation/Übersc hriften/1. Ebene/S - TTec hnische Daten @ 11\ mod_12791853863 20_15.docx @ 83019 @ 1 @ 1
Pos: 18.2 /#Neustru ktur#/Modul-Stru ktur/Online-Doku mentation/Technisc he Daten/KNX/Busc h-Wächter - 617 9Technische Daten - BJE @ 1 9\mod_13212789 14230_15.doc x@ 109 741 @ @ 1
Designation
C4-KNX-WD220-AP
Power supply:
(via bus line)
24 V DC
Bus subscribers:
1 (< 12 mA)
KNX connection
Bus connecting terminal, screwless
Monitoring density:
92 sectors with 368 switching
segments
Adjustable switch-off delay
•via potentiometer (only for movement detectors)
•Parameterizable via software (seconds to hours)
10 seconds … 30 minutes
10 seconds … 18 hours
Switch-on time after switch-off (parameterizable
via software)
0.1 seconds … 60 seconds
Adjustable brightness range
•via potentiometer
(only for movement detector)
~ 1 … 300 lux
•parameterizable via software:
(movement detector)
1 … 1000 lux
•parameterizable via software:
(twilight switch)
1 … 1000 lux
•parameterizable via software:
(brightness switch)
—
Horizontal detection:
220°
Maximum transmission range:
(installed 2.5 m high)
16 m
Detection range:
•Frontal: 16 m
•Lateral: 16 m
Control elements:
2 Trim potentiometer
•Brightness limit value,
Test/standard operation
•Switch-off delay, programming mode
Protection type:
IP 55
Temperature range:
-25 … 55°C
Dimensions:
(H x W x D)
115 mm x 125 mm x 141 mm
Remote control possible via:
—
KNX product standard
EN 60669-2-1
Pos: 19 /#Neustru ktur#/Online-Doku mentation (+KNX)/S teuermodule - Online-Do kumentation (--> Für alle Do kumente <--)/++++ ++++++++ Seitenum bruch+ +++++++ ++++ @ 9\mod _126889866809 3_0.docx @ 521 49@ @ 1

—10 —
Pos: 20 /#Neustru ktur#/Online-Doku mentation (+KNX)/Üb erschriften (--> Für alle D okumente <--)/1. Eb ene/A- F /Aufbau und Fun ktion@ 1 1\mod_12791 85435352_15.doc x@ 83027 @ 1 @ 1
Pos: 21 /#Neustru ktur#/Online-Doku mentation (+KNX)/Üb erschriften (--> Für alle D okumente <--)/2. Eb ene/A- F /Funktions- und Aus stattungsmer kmale @ 23\mod_1336 557630140_15.doc x@ 2 09136 @ 2 @ 1
Pos: 22 /#Neustru ktur#/KNX-Produkthandbücher/Busc h-Bewegungsm elder/Busch-Wächter AP/2 20Pr ofessionalLINE/Fu nktionsübersicht/Fun ktionsübersicht @ 19\mo d_1321280080759_ 15.docx @ 109767 @ @ 1
Movement Detector 220 SM
C4-KNX-WD220-AP
Detection angle
220°
Monitoring levels
4
Creep zone protection
●
Rearfield detection
●
Zone 1
●
Transmission range frontal (maximum)
1 –16 m
Transmission range lateral (maximum)
1 –16 m
Zone 2
●
Transmission range frontal (maximum)
1 m
Transmission range lateral (maximum)
1 m
Sensitivity adjustable
●
Automatic range stabilisation
●
Dazzleproof
●
Integrated test function
●
Temperature range
–25 …55°C
Twilight sensor
●
Switch-off delay
●
Forced switch-off after 90 minutes
●
Short-time pulse (1 s)
●
Water-resistant
IP 55
Wall mounting
●
Ceiling mounting1
●
Corner mounting1
●
Blind (protective foil)
●
Remote control operated
—
Temperature switch (triple threshold switch)
—
Brightness switch
—
Twilight switch
●
Movement channels
2
Freely programmable IR channels
—
1 With ceiling / corner adapter 6868-xxx
The individual functions are explained in the following.
Pos: 23 /#Neustru ktur#/Online-Doku mentation (+KNX)/S teuermodule - Online-Do kumentation (--> Für alle D okumente <--) /++++++++ ++++ Seitenumbruch +++++ +++++++ @ 9 \mod_1268898 668093_0.doc x @ 52149 @ @ 1

—11 —
Pos: 24.1 /#Neustru ktur#/Online-Do kumentation (+KN X)/Überschriften (--> Für all eD okumente <--)/2. Eben e/S- TTec hnik@ 1 9\mod_13212813 03331_15.docx @ 109830 @ 2 @ 1
Pos: 24.2 /#Neustru ktur#/Elektronik/B ewegungsmelder/B usch-Wächter AP/6179 -- 220M asterLINE KNX/Tec hnik/Technik @ 19\mod_1 321340914186_15.doc x@ 1 09894@ @ 1
Basics
The Control4 Movement Detector 220 SM is a passive infrared movement detector and detects invisible infrared
heat radiation. If the registered energy pattern changes as the result of movement, a pulse is activated. The
transmission range depends on the intensity of the infrared radiation and on the direction of movement. The
reception is influenced by weather conditions. The sophisticated electronics of the Movement Detector 220 SM
detects this and compensates for the fluctuations in the transmission range. Detection is impaired by obstacles
such as glass or plants.
The detection principle
All warm bodies give off infrared heat radiation. The more distinctly the infrared heat radiation stands out from its
surroundings, the better the sensors used in the Movement Detector 220 SM detect this infrared heat radiation.
The Movement Detector 220 SM responds to fast and large changes in temperature. Slow changes in
temperature and constant temperatures, such as the cooling of a car engine, do not trigger a pulse. If a person
moves directly towards the sensor, the heat radiation gets slowly and constantly more intensive, and the unit does
not, therefore, activate immediately. That is why the Movement Detector 220 SM should preferably be mounted
crosswise to the direction of movement. Humidity, such as fog, can reflect the infrared radiation and reduce the
sensitivity of the sensor.
Optics
The range and the detection angle is mainly determined by the optics of a movement detector, i.e. the
arrangement and design of the sensors and of the lens used. In the Movement Detector 220 SM, it is two highly
sensitive sensors in connection with a mirror system and a lens that is optimally adapted to it which determine the
detection range of 220°. The lens and the mirror system bundle the infrared radiation striking the device and
project it onto the sensor. The sensitivity to movement within the detection range is determined mainly by the
number and optical design of the lens segments. The available range is the result of the size of the lens segments
(optical magnification) and the electrical amplification factor. The Movement Detector 220 SM also offers the
option of monitoring the frame "backwards" without loss of frontal range by mounting it directly above doors or
windows. This is especially convenient when leaving the house.
The following factors should be taken into account during the planning stage:
The installation site should be chosen in such a way that the most frequent direction of movement is
crosswise to the detection range.
A mounting height of 2.5 m ensures an optimum surveillance function and is the basic height for the technical
specifications of the transmission range.
Self-test
A further advantage of the Movement Detector 220 SM is the integrated testing function. Each time the supply
voltage is activated or the device is switched on, a complete self-test is carried out. When the Movement Detector
220 SM is fully functional, it switches itself on for confirmation for approximately one minute or for the set switch-
off delay.
The test function is not dependent on brightness. During a test of the normal operating mode the switch-off delay
is two seconds when triggered. During an active activation test function the integrated red LED flashes when
triggered.

—12 —
Detection levels
To fully cover the detection range, the Fresnel lens splits the range into several overlapping levels.
Levels 1 and 2 cover remote detection and ensure
uninterrupted detection when the range is entered
from the outside.
Level 3 covers creep zone protection to prevent
undetected entry of the detection range close to
the wall.
Level 4 covers the rearfield detection and
provides activation when the front door is opened
from the inside.
Additional protection for windows and doors up to
the wall of the house is guaranteed by the
rearfield detection - even when mounted directly
above doors and windows.
Pos: 25 /#Neustru ktur#/Online-Doku mentation (+KNX)/S teuermodule - Online-Do kumentation (--> Für alle Do kumente <--)/++++ ++++++ ++ Seitenumbruc h ++++++++++++ @9 \mod_12 68898668093_0.doc x@ 52149 @ @ 1

—13 —
Pos: 26 /#Neustruktur#/KN X-Produkthandbüc her/Busch-Be wegungsmelder/Busch- Wächter AP/220 Profession alLINE/Funktionen/D ämmerungsschalter @ 19\ mod_1321342961 127_15.docx @ 109922 @ @ 1
Twilight switch (APWB-11)
The twilight switch integrated in the Movement Detector 220 SM senses light when the ambient brightness gets
too low. At the onset of twilight, the Movement Detector 220 SM responds independent of movement. The device
has three channels that can be occupied with the "twilight switch" application independent of each other.
Several setting options are available to implement this function. This allows the brightness value for switching on
the light to be supplemented by a hysteresis.
If the ambient brightness value drops below the set value less the hysteresis, the artificial light is switched on.
Conversely, the Movement Detector 220 SM switches off when the brightness-value threshold plus the hysteresis
is exceeded. The value for the hysteresis in percent is either added or subtracted to the appropriate twilight
threshold. A set value of 300 lx with a hysteresis of 11% results in an upper limit of 333 lx and a bottom limit of
267 lx.
Fig.
4
: Hysteresis
A special intelligence of the Movement Detector 220 SM takes the artificial light content of the surroundings into
account. This prevents the lamps from remaining on longer than required.
The twilight switch makes the status inputs available. These must monitor the switching states of the lamps that
are in the detection range of the brightness sensor. If such a lamp is switched on, the Movement Detector 220 SM
responds by remembering the switch-on brightness value.
Since the full brightness is not immediately present in some lamps when they are switched on, the time between
being switched on and attaining the full brightness must be taken into account. The same applies to switching off.
Various lamps also have different warm-up or cool-down periods, which must be taken into account.
It is recommended to send the switch-on and switch-off telegrams to the actuator time-delayed. This ensures that
when the brightness-value threshold is briefly exceeded or undershot, lamps are not immediately switched on or
off one after the other. Such brief fluctuations of the light conditions can be caused by vehicles or clouds.
Pos: 27 /#Neustruktur# /Online-Dokumentati on( +KNX)/Steuerm odule- O nline-Dokumentatio n(--> Für alle D okumente <--)/+++ +++++++ ++ Seitenumbruch +++++++ +++++ @ 9\ mod_1268898668 093_0.docx @ 52 149 @ @ 1

—14 —
Pos: 28 /#Neustru ktur#/Online-Doku mentation (+KNX)/Üb erschriften (--> Für alle D okumente <--)/1. Ebene/M - O/Mo ntage und elektrischer Anschluss @ 23\ mod_1336477157864 _15.docx @ 209033 @ 1 @ 1
Pos: 29 /#Neustru ktur#/Online-Doku mentation (+KNX)/Üb erschriften (--> Für alle D okumente <--)/2. Ebene/ A- F/Betrie bssicherheit /Betriebssic herheit /S törfaktoren @ 19\mod _1321282239751_1 5.docx@ 1 09845@ 2 @ 1
Pos: 30 /#Neustru ktur#/KNX-Produ kthandbücher/Busc h-Bewegungsm elder/Busch-Wächt er AP/220 Profession alLINE/Betriebssic herheit/Betriebssich erheit @ 19\mod _1321341318087 _15.docx @ 109901 @ @ 1
External light protection
With the Twilight sensor set to "dark", the Movement Detector 220 SM could be deactivated by a light source
(torch or car headlights). To avoid this situation and increase safety, the Movement Detector 220 SM leaves its
current surveillance function unchanged for 90 seconds if the light conditions suddenly change.
Faulty switching
The principle of the passive infrared movement detector means that its function depends on the physical
conditions prevailing in the detection range. Moving heat sources always cause triggering when the sensitivity
threshold of the Movement Detector 220 SM is exceeded. Sunlight has a high percentage of natural infrared
radiation. If the sun shines onto a bush or a tree in the detection range, for example, and this bush or tree moves
in the wind, this may cause a movement detector to trigger. Sunlight reflecting off glass or water, a heat source
cooling down (e.g. a lamp mounted nearby) or animals in the detection range can also trigger detection.
Range fluctuations
Extreme weather conditions can cause changes in the detection range. High outside temperatures and poor visual
conditions due to fog, rain or snow can temporarily reduce the range. Excessively long ranges are caused by
sources of extreme heat, such as lorries or busses, or at very low outside temperatures and good visual
conditions. Important here is to adapt the detection range to the necessary area during installation with an
appropriate inclination of the Movement Detector 220 SM sensor and possibly adapt the use of the Movement
Detector 220 SM blind. The automatic range stabilization of the Movement Detector 220 SM counteracts the
effects described above; however, it cannot guarantee consistent triggering behaviour under all conditions.
Pos: 31 /#Neustruktur# /Online-Dokumentati on( +KNX)/Steuerm odule- O nline-Dokumentatio n(--> Für alle D okumente <--)/+++ +++++++ ++ Seitenumbruch +++++++ +++++ @ 9\ mod_1268898668 093_0.docx @ 52 149 @ @ 1

—15 —
Pos: 32 /#Neustru ktur#/Online-Doku mentation (+KNX)/Üb erschriften (--> Für alle D okumente <--)/2. Ebene/ A- F/Erf assungsbereiche @ 19\m od_1320393658466_1 5.docx @ 109558 @ 2@ 1
Pos: 33 /#Neustru ktur#/KNX-Produ kthandbücher/Busc h-Bewegungsm elder/Busch-Wächt er AP/220 Profession alLINE/Erfassungs bereich/Erfassu ngsbereich - 6179 @ 19\m od_132134190 1325_15.docx @ 1099 15@ 33 @ 1
The transmission range of the sensors is constant. Only the mounting height and the inclination result in different
widths at the height of the detection level. This to be planned at a height of 1.5 m. The optimum mounting height
is 2.5 m.
Fig.
5
: Transmission range
Fig. 6: Loss of transmission range in dependence of mounting height
Mounting height (m)
Transmission range (m)
1.5
16.0
2.5
15.8
4.0
15.5
5.0
15.2
6.0
14.8
8.0
13.9
10.0
12.5
The transmission range is reduced at a mounting height of over 2.5 m. An inclination of the movement detector
leads to losses at close range.

—16 —
Fig.
7
: Installation sites
•Bushes, trees, etc., reduce the detection range.
•Adhere to a minimum distance of 1.5 m when mounting near illuminants.
•The movement detection of the device is optimal if the detection range is intersected by the person to be
detected. Therefore, mount the device not above a door, but offset next to it.
Pos: 34 /#Neustru ktur#/Online-Doku mentation (+KNX)/S teuermodule - Online-Do kumentation (--> Für alle Do kumente <--)/++++ +++++++ + Seitenumbruch+ +++++++ ++++ @ 9\mod _126889866809 3_0.docx @ 521 49@ @ 1

—17 —
Pos: 35 /#Neustru ktur#/Online-Doku mentation (+KNX)/Üb erschriften (--> Für alle D okumente <--)/2. Ebene/M - O/Mo ntage @ 18\mod_130261596 0458_15.docx @ 103424 @ 2 @ 1
Pos: 36 /#Neustru ktur#/Online-Doku mentation (+KNX)/Mo ntage/Waechter/M ontage - 6197_2 20Mas terLINE premium @ 3 1\mod_13503 68040342_15.doc x@ 243257 @ 333333 @ 1
Caution
Risk of damaging the device!
The lens of the device is sensitive and
can easily sustain damage.
- Do not press on the lens when
opening or closing the device.
To prepare the installation of the device, perform the following steps:
Fig.
8
: Preparing the installation
- Remove the locking screw (1) (if installed).
- Press in the clamps (2 - 5) on the sides of the housing with a suitable tool.
- Carefully remove the front of the device.

—18 —
Fig.
9
: Water drainage
Depending on where the device is installed, the water drain may have to be opened.
- To do this, pierce the plastic membrane on the bottom of the device.
The installation is prepared.

—19 —
Fig.
10
: KNX cable
•One KNX socket is enclosed!
Fig.
11
: Mounting screws
•Do not use countersunk head screws for mounting to the wall.
Fig.
12
: Mounting the bottom of the device
Fig.
13
: Attaching the upper part of the device
•Latch the upper part of the device onto the base.

—20 —
Fig.
14
: Securing the device
•Option:
To protect the device against unauthorized opening, the enclosed screw can be used on the bottom of the device.
Pos: 37 /#Neustru ktur#/Online-Doku mentation (+KNX)/Üb erschriften (--> Für alle D okumente <--)/2. Ebene/ A- F/El ektrischer Anschluss @ 21\mod_ 1328177051724_ 15.docx @ 138042 @ 2@ 1
Pos: 38 /#Neustru ktur#/KNX-Produ kthandbücher/Busc h-Bewegungsm elder/Busch-Wächt er AP/220 MasterLIne /Anschluss/Anschl uss- 6179 @ 26\ mod_134209256398 0_15.docx @ 223745 @ @ 1
Fig.
15
: Connection
Connection of the integrated bus coupler.
Pos: 39 /#Neustruktur# /Online-Dokumentati on( +KNX)/Steuerm odule- O nline-Dokumentatio n(--> Für alle D okumente <--)/+++ +++++++ ++ Seitenumbruch +++++++ +++++ @ 9\ mod_1268898668 093_0.docx @ 52 149 @ @ 1
This manual suits for next models
1
Other Contro l4 Security Sensor manuals
Popular Security Sensor manuals by other brands

Buckleys
Buckleys Wet Roof Pro' operating instructions

PCB Piezotronics
PCB Piezotronics ICP 113A22 Installation and operating manual

Tattletale
Tattletale GLASS BREAK DETECTOR quick start guide

Heiman
Heiman HM-715NVS-AC manual

Sun Microsystems
Sun Microsystems FI316 user manual

Dräger
Dräger Pac 7000 Instructions for use