manuals.online logo
Brands
  1. Home
  2. •
  3. Brands
  4. •
  5. Cooke & Lewis
  6. •
  7. Oven
  8. •
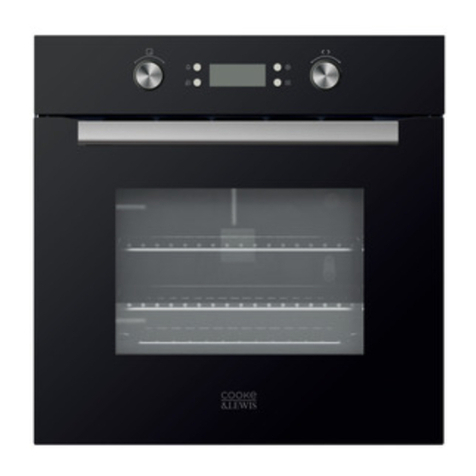
  9. Cooke & Lewis CLELDO105 User manual

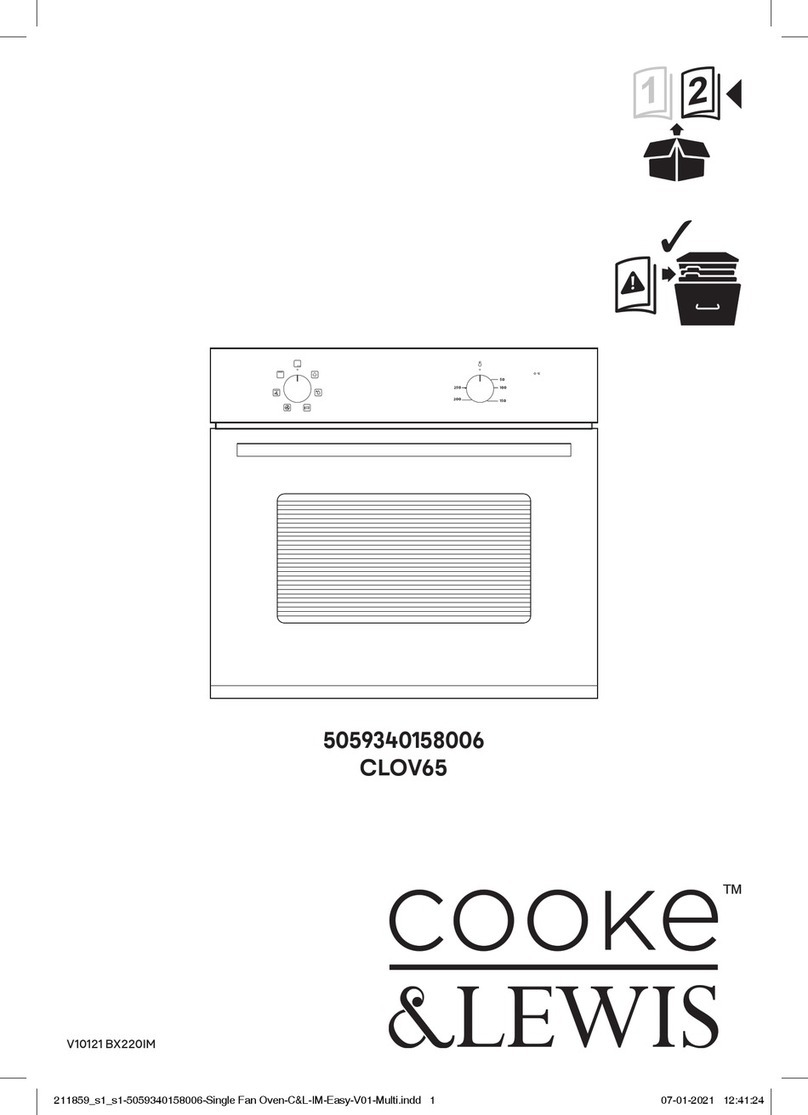
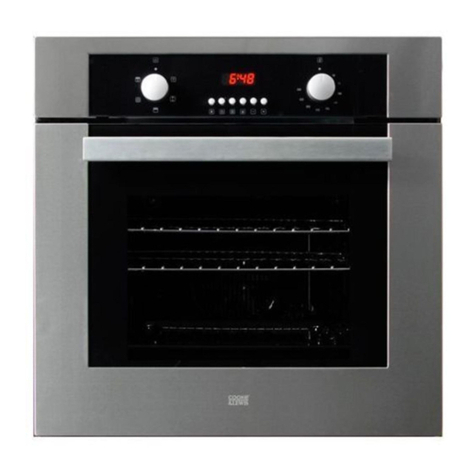
Cooke & Lewis CLELDO105 User manual

V21020 BX220IM
5059340094090
CLELDO105
5059340094090-C&L-A4-IM-Easy-V06.indd 15059340094090-C&L-A4-IM-Easy-V06.indd 1 29/10/2020 3:18 PM29/10/2020 3:18 PM
Contents
Installation 4
Use 10
Care and Maintenance 17
5059340094090-C&L-A4-IM-Easy-V06.indd 25059340094090-C&L-A4-IM-Easy-V06.indd 2 29/10/2020 3:18 PM29/10/2020 3:18 PM
12
x 2
EN IMPORTANT- Please read carefully the separate safety guide before use.
[04] x 1
[02] x 3
[05] x 1 [06] x 2 [07] x 2 [08] x 2
[01] x 1
[03] x 1
12
5059340094090-C&L-A4-IM-Easy-V06.indd 35059340094090-C&L-A4-IM-Easy-V06.indd 3 29/10/2020 3:18 PM29/10/2020 3:18 PM
4
Installation
EN Before you start
• This appliance must be installed correctly by a qualified person, strictly following the manufacturer’s instructions.
WARNING: Danger of electric shock! The power supply must be cut off before the appliance is
installed completely.
• Only a qualified person in compliance with the instructions provided can install the appliance. The manufacturer
declines all responsibility for improper installation, which may harm persons and animals and cause damage.
• Check the package and make sure you have all of the parts listed.
• Decide on the appropriate location for the appliance.
• This appliance contains glass. Please take care when fitting or handling to prevent personal injury or damage to the
appliance.
• Do not lift the appliance by the door handle.
• While every care is taken to eliminate burrs and raw edges from this product, please take care when handling.
• We recommend the use of protective gloves during installation.
• Take care when lifting it into the housing unit; always use an appropriate method of lifting.
• The specifications plate is available on this appliance. This plate displays all the necessary identification information for
ordering replacement parts.
• If you sell the appliance, give it away, or leave it behind when you move house, make sure you also pass on this manual so
that the new owner can become familiar with the appliance and its safety warnings.
5059340094090-C&L-A4-IM-Easy-V06.indd 45059340094090-C&L-A4-IM-Easy-V06.indd 4 29/10/2020 3:18 PM29/10/2020 3:18 PM
5
Installation
01
[01] x 1
550mm
870mm
≥885mm
≥550mm
564mm
548mm
594mm
885mm
563mm
Installation of Built-in Ovens
• For correct installation, this appliance must be fitted in a tall oven housing unit.
• Caution! The panels of the adjacent cabinets must be made of heat-resistant material. In particular, the adhesive that
bonds the plastic laminate to the furniture must be able to withstand temperatures of not less than 120°C to avoid
delamination. The appliance must be housed in heat-resistant cabinets.
• Be sure to observe the minimum installation height of the kitchen unit. Pay attention to the minimum dimensions of the
openings.
• Remove the back of the kitchen unit to ensure an adequate current of air circulates around the appliance.
5059340094090-C&L-A4-IM-Easy-V06.indd 55059340094090-C&L-A4-IM-Easy-V06.indd 5 29/10/2020 3:18 PM29/10/2020 3:18 PM
6
Installation
02
EN It is essential when installing your oven there is adequate air circulation around the appliance
to ensure the correct operation of the appliance. Inadequate air circulation will greatly
impair the performance of the appliance and can affect adjacent cabinets due to the rise
in temperature. The panels of the kitchen unit that are next to the oven must be made of a
heat resistant material. Ensure that the glues of units that are made of veneered wood can
withstand temperatures of at least 120°C. Remove the back of the kitchen unit to ensure an
adequate current of air circulates around the oven.
≥35 mm
≥885 mm
5059340094090-C&L-A4-IM-Easy-V06.indd 65059340094090-C&L-A4-IM-Easy-V06.indd 6 29/10/2020 3:18 PM29/10/2020 3:18 PM
7
Installation
03
EN Important: Do not lift the appliance by the door handle to avoid potential damage to the glass
and hinges.
Caution! If the supply cord is damaged, it must be replaced by the manufacturer, its service
agent or similarly qualified persons in order to avoid safety hazards.
5059340094090-C&L-A4-IM-Easy-V06.indd 75059340094090-C&L-A4-IM-Easy-V06.indd 7 29/10/2020 3:18 PM29/10/2020 3:18 PM
8
Installation
04
EN Once the oven has been lifted into place inside the appliance housing, locate the two holes in
the casing of the oven and fix it into place using [06], [07] and [08].
Caution: Do not over-tighten the screws [06] to avoid damage to the oven or appliance
housing – use a screwdriver only!
[06] x 2
[07] x 2
[08] x 2
[08]
[06]
[07]
5059340094090-C&L-A4-IM-Easy-V06.indd 85059340094090-C&L-A4-IM-Easy-V06.indd 8 29/10/2020 3:18 PM29/10/2020 3:18 PM
9
Installation
Electrical Installation
All installation must be carried out by a competent person or qualified electrician. Before connecting the mains supply
ensure that the mains voltage corresponds to the voltage on the rating plate.
Direct Connection
The appliance must be connected directly to the mains using an omnipolar circuit breaker with a minimum opening of
3mm between the contacts.
The installer must ensure that the correct electrical connection has been made and that it complies with the wiring
diagram.
The cable must not be bent or compressed.
Regularly check the power cord for damage. If the supply cord becomes damaged, it must be replaced by the
manufacturer, its service agent or similarly qualified persons in order to avoid a hazard.
WARNING: This is a Class I appliance and MUST be earthed.
The appliance is supplied with a 3-core mains cable and must be connected to the electricity supply via a double pole
switch having a 3 mm minimum contact gap on each connector.
This appliance requires a 25 Amp Miniature Circuit Breaker (MCB).
The wires in the mains lead are coloured in accordance with the following code:
Brown = L - Live
Blue = N - Neutral
Green and Yellow = - Earth
UK
FUSE ON
DOUBLE POLE SWITCHED
FUSED SPUR OUTLET
USE A 25 AMP FUSE
To avoid the risks that are always present when you use an electrical appliance it is important that this appliance is
installed correctly and that you read the safety instructions carefully to avoid misuse and hazards. Please keep this
instruction booklet for future reference and pass it on to any future owners. After unpacking the appliance please
check that it is not damaged. If in doubt, do not use the appliance but contact Customer Services - see end of Care &
Maintenance section for details.
5059340094090-C&L-A4-IM-Easy-V06.indd 95059340094090-C&L-A4-IM-Easy-V06.indd 9 29/10/2020 3:18 PM29/10/2020 3:18 PM
10
Use
EN Before you start
WARNING: Read the instructions before using the appliance.
CAUTION: Accessible parts may be hot when the grill is used – keep young children away.
CAUTION: Always use oven gloves when removing cookware from the oven.
Oven layout
1 Control panel
2 Mains cable (at rear, not shown)
3 Fixing holes (x2)
4 Top side rails (x2)
5 Top door
6 Top door handle
7 Carrying handles (x2) (at sides, not shown)
8 Main side rails (x2)
9 Top oven lamp
10 Top shelf level markings
11 Main oven lamp
12 Main shelf level markings
13 Fan
14 Main door
15 Main door handle
1
9
2
3
4
7
8
6
5
10
11
12
14
15
13
• Note: This diagram may be slightly different from the layout of the appliance. Shelf levels are numbered from the bottom
up and the most upper two levels are used mainly for grilling and browning of food. Refer to the cooking guides provided
throughout this manual to determine the appropriate shelf levels for your dishes.
5059340094090-C&L-A4-IM-Easy-V06.indd 105059340094090-C&L-A4-IM-Easy-V06.indd 10 29/10/2020 3:18 PM29/10/2020 3:18 PM
11
Use
Oven controls
1 2 3 4 5
1 Function control knob of Top oven 2 Temperature control knob of Top oven
3 Control panel 4 Function control knob of Main oven
5 Temperature control knob of Main oven 6 Temperature indicator of Top oven
7 Temperature indicator of Main oven
7
6
Operational modes
Top oven
Icon Function / Feature Description
Oven light Use when cleaning the oven.
Single grill Use when grilling small portions of food; place the food in the centre of the trivet.
Double grill Use when grilling larger portions of food; the full width of the trivet can be used.
Convection oven Use for traditional convection cooking when roasting or baking.
Main oven
Icon Function / Feature Description
Oven light Use when cleaning the oven.
Defrosting and cooling For defrosting, keep the door closed. For cooling prior to refrigeration, leave the
door open.
Fan assisted grill Circulates heat around the food, use with the door closed.
Double grill Use when grilling larger portions of food; the full width of the trivet can be used.
Single grill Use when grilling small portions of food; place the food in the centre of the trivet.
Convection oven with fan Suitable for baking bread and cakes.
5059340094090-C&L-A4-IM-Easy-V06.indd 115059340094090-C&L-A4-IM-Easy-V06.indd 11 29/10/2020 3:18 PM29/10/2020 3:18 PM
12
Use
Convection oven Use for traditional convection cooking when roasting or baking.
Bottom element only Use for crisping the bases of pizza and cake at the end of cooking.
Fan assisted oven Use for fan assisted cooking and even temperature distribution.
Control panel
5 7
6
8
9
1 2 3 4
Turn on the power supply at the main consumer unit, and your oven is ready for its initial set up.
Note: the Clock must be set before first use.
1 Function button 6 Cooking duration icon
2 Minus button 7 Controls locked icon
3 Plus button 8 Clock icon
4 Lock button 9 End time icon
5 Alarm icon
Setting the Clock
• When the power is first switched on, the oven will beep and the Clock icon will flash with “0:00” displayed in a
24hour clock format.
• Press the “+” or “-” buttons to set the initial time within the first few seconds. Holding each button will scroll quickly
through the set time.
• Once the time is set, the Clock icon will stop flashing and the time is set.
• To access the Clock set menu again, press the Function button in this sequence:
Once Alarm icon
Twice Cooking duration icon
Three times End time icon
Four times Clock icon
Setting the Alarm
• Press the Function button once to access the Alarm and the icon will flash with”0:00” shown in the display.
• Press the “+” or “-” buttons to set the Alarm time. Holding each button will scroll quickly through the set time.
• Once the time is set, the icon will stop flashing and the Alarm time is set.
• The Alarm range is from 0:01-23:59 and after countdown “0:00” will be displayed.
• The oven will beep every few seconds for two minutes before stopping; alternatively press any button to finish the alert
ear l y.
5059340094090-C&L-A4-IM-Easy-V06.indd 125059340094090-C&L-A4-IM-Easy-V06.indd 12 29/10/2020 3:18 PM29/10/2020 3:18 PM
13
Use
Setting the Cooking duration and End times - Main oven only
These functions can be used to program the cooking times in the Main oven so that cooking finishes as required and the
oven switches off the power automatically.
Cooking duration can be set for a finite length of time. Additionally, the End time can be set so that the Cooking duration
then finishes at the time you need.
You can select the temperature and oven function before or after you program Cooking duration and End time.
Important: if you turn the oven on first, then once the program has been set, the oven will then switch off and wait in
Standby mode until the start time. If turned on after programming, the oven enters Standby automatically.
Cooking duration
• Press the Function button twice to access the Cooking duration and the icon will flash with”0:00” shown in the
display.
• Press the “+” or “-” buttons to set the Cooking duration time. Holding each button will scroll quickly through the set time.
• Once the time is set, the icon will stop flashing and the Cooking duration time is set.
• The Cooking duration range is from 0:01-23:59 and after countdown “0:00” will be displayed.
• The oven will switch off the power and beep every few seconds for two minutes before stopping; alternatively press any
button to finish the alert early.
• To check or alter the programmed time, press the Function button as before.
Example settings:
Current time: 15:30
Required Cooking duration: 1:00
Required End time: 16:30
• Program the Cooking duration at 1:00.
• Choose the cooking mode and set the temperature.
• Place the food in the oven and close the door.
• The oven starts to cook for one hour and turns itself off at 16:30.
End time
• Press the Function button three times to access the End time and the icon will flash with the current time shown in
the display.
• Press the “+” or “-” buttons to set the End time. Holding each button will scroll quickly through the set time.
• Once the time is set, the icon will stop flashing and the End time is set.
• The End time cannot be set longer than 23:59.
• The oven will switch off the power and beep every few seconds for two minutes before stopping; alternatively press any
button to finish the alert early.
• To check or alter the programmed time, press the Function button as before.
Example settings:
Current time: 14:30
Required Cooking duration: 2:00
Required End time: 17:30
• Program the Cooking duration at 2:00.
• Program the End time for 17:30.
• Choose the cooking mode and set the temperature.
• Place the food in the oven and close the door.
• The oven enters Standby mode and will turn itself on in an hour at 15:30, cook for two hours and turn itself off at 17:30.
Note:
1. If the master Clock is altered when the Alarm, Cooking duration or End time are set, these programs will be cancelled.
2. If all three programs are set together, only the Alarm time will be displayed.
3. The programmed times can be checked or altered by pressing the Function button the required number of times.
5059340094090-C&L-A4-IM-Easy-V06.indd 135059340094090-C&L-A4-IM-Easy-V06.indd 13 29/10/2020 3:18 PM29/10/2020 3:18 PM
14
Use
Lock function
• Press and hold the Lock button for three seconds to freeze the Control Panel. Press and hold the button again for
three seconds to unfreeze the panel.
• Once the Control panel is locked, the oven will beep if any button is pressed.
IMPORTANT: the rotary controls will still operate in Locked mode.
Using the Grill - Top oven
CAUTION:
• Do not touch any heating elements when in use and take extra care when opening the doors as hot
air will be emitted.
• Do not lean over the door opening and always use oven gloves.
1. Select Single Grill or Double Grill on the left rotary control, and set the temperature to high.
2. For thinner pieces of food place the grill tray at the top, and for for thicker pieces of food place it lower down.
3. When grilling is finished, reset both rotary controls to Off.
WARNING: Do not use aluminium foil in the grill tray as this creates a fire hazard.
Automatic Cooling Fan
• The thermostat will automatically turn the cooling fan on and off during use.
• It is normal for the fan to continue operating after cooking has finished.
Using the Convection oven - Top oven
Do not allow children to use or play with the oven.
1. Select Convection oven on the left rotary control.
2. Select the temperature required on the left rotary control and the Indicator light will come on to allow pre-heating to
start. This can take up to fifteen minutes before the correct temperature is reached.
3. The Indicator light will stay on until the required temperature is reached, and then the thermostat will maintain this by
periodically switching on and off.
4. After use, return both controls to off.
IMPORTANT: Never put items directly on the base of the oven or cover the oven base with foil, as
this may cause the element to overheat. Always use the grill tray or shelf.
5059340094090-C&L-A4-IM-Easy-V06.indd 145059340094090-C&L-A4-IM-Easy-V06.indd 14 29/10/2020 3:18 PM29/10/2020 3:18 PM
15
Use
Using the Fan assisted oven - Main oven
1. Select Fan assisted oven on the right rotary control.
2. Select the temperature required on the right rotary control and the Indicator light will come on to allow pre-heating to
start. This can take up to fifteen minutes before the correct temperature is reached.
3. The Indicator light will stay on until the required temperature is reached, and then the thermostat will maintain this by
periodically switching on and off.
4. After use, return both controls to off.
Using the Grill - Main oven
The grill in the Main oven uses the internal top element only. It is important to preheat the oven for 5-10 minutes before use
and the door must be kept closed.
Select Single grill , Double grill or Fan assisted grill as required.
Moving the oven shelves
• Always use the shelf markings on the oven carcass as a guide. Ensure that the shelves are always level and the rear
upstand faces upwards in use.
Choice of cookware
• For best results, always use good quality roasting tins and baking trays. Poor quality cookware that is too thin can warp
in use and cause a safety hazard.
Using Defrosting and cooling - Main oven
1. Select Defrosting and cooling on the right rotary control.
2. For defrosting, place the food in the centre of the oven and close the door.
3. For cooling, leave the door open.
Defrosting times - guidance only
• Small pieces of meat of fish will take approximately 1-2 hours.
• Larger pieces of meat or casseroles can take between 3-5 hours dependent upon their size.
• Do not defrost larger pieces of meat or poultry greater than 2Kg in the oven.
IMPORTANT: Always ensure food is completely thawed before cooking and cooked thoroughly
before consumption. Use the cooking times in recipes and on food packets as a guide only, and
always ensure food is piping hot before serving. Adjust the cooking time and/or temperature to
achieve the perfect results.
5059340094090-C&L-A4-IM-Easy-V06.indd 155059340094090-C&L-A4-IM-Easy-V06.indd 15 29/10/2020 3:18 PM29/10/2020 3:18 PM
16
Use
01
02
03
[04] x 1
[05] x 1
[05] x 1
[02] x 3
[02]
[03]
[05]
[03] x 1
[04]
[05]
5059340094090-C&L-A4-IM-Easy-V06.indd 165059340094090-C&L-A4-IM-Easy-V06.indd 16 29/10/2020 3:18 PM29/10/2020 3:18 PM
17
Care and Maintenance
EN General
• It is important to clean the product regularly as excessive fat and grease can affect performance and cause a fire
hazard.
• Always switch off your appliance and allow it to cool down before cleaning.
• Do not use undiluted bleaches, products containing chlorides, wire wool or abrasive cleaners on aluminum, stainless
steel or plastic/painted parts as they can damage the appliance. Nylon pads can also be unsuitable and use a soft cloth
and hot soapy water only.
• Take extra care when cleaning over symbols on front panels. Excessive cleaning can lead to the symbols fading.
• If your product is fitted with stainless steel-cladded strips, you may notice a small white residue on the outer edges, this
can be removed with a non-abrasive wipe.
Stainless steel surfaces
• Only use a clean cloth wrung out in hot soapy water, and dry with a soft cloth.
• Stubborn marks can be removed using a stainless steel cleaner.
• Sharp objects can mark the surface of stainless steel, but will become less noticeable with time.
• Wipe any spillage immediately, taking care to avoid burning your hands.
• Some foods are corrosive – e.g. vinegar, fruit juices and especially salt – they can mark or damage the metal if they are
left on the surface.
• Do not use steam cleaners.
Enamel surfaces
• Clean with warm, soapy water and a clean cloth.
• If larger splashes of fat do not readily disappear, you can use a mild cream cleaner to remove them.
• Rinse well and dry with a soft clean towel or cloth.
• Do not use steam cleaners.
Glass surfaces
WARNING: Do not use harsh abrasive cleaners or sharp metal scrapers to clean the oven door glass
since they can scratch the surface, which may result in shattering of the glass.
• Only use a clean cloth wrung out in hot soapy water or a specialist glass cleaner.
• Rinse away any excess cleaner and dry with a soft cloth.
Chrome plated surfaces
• Clean with hot soapy water and a soft cloth.
5059340094090-C&L-A4-IM-Easy-V06.indd 175059340094090-C&L-A4-IM-Easy-V06.indd 17 29/10/2020 3:18 PM29/10/2020 3:18 PM
18
Care and Maintenance
Cleaning the side rails and covers
1. Remove all the accessories from the inside of the oven.
2. Carefully remove the side rails from the covers as shown.
3. Remove the side covers from the inside of the oven.
4. Clean the rails and covers with hot soapy water and a sponge. Wipe dry with a damp cloth.
5. Reattach the side covers and side rails before returning the accessories.
5059340094090-C&L-A4-IM-Easy-V06.indd 185059340094090-C&L-A4-IM-Easy-V06.indd 18 29/10/2020 3:18 PM29/10/2020 3:18 PM
19
Care and Maintenance
Removing oven parts for cleaning
• To remove the door, open the door to the maximum angle. Then pull the buckle at the door hinge backward.
• Close the door to an angle approximately 30°. Hold the door with one hand on each side. Lift up and slowly pull the door
out from the oven.
1
2
• The inner door glass panel can be removed for cleaning but it must be replaced the right way up. The silkscreen on the
glass must face inwards.
• Always make sure that the glass is pushed fully into the stop position.
• To remove the glass panel, open the door wide, push the clips on the left and right sides of door bracket. Then remove
the plastic top cover. Hold the glass and slide it out along the door bracket.
1
2
WARNING: Do not operate the appliance without the glass panel correctly fitted.
• For your safety, glass door panels are made of toughened glass. This ensures that, in the unlikely event that a panel
breaks, it does so into small fragments to minimize the risk of injury. Please take care when handling, using or cleaning
all glass panels, as any damage to the surfaces or edges may result in the glass breaking without warning or apparent
cause at a later date. Should any glass panel be damaged, we strongly recommend that it is replaced immediately and
please contact Customer Services, as shown on the last page.
5059340094090-C&L-A4-IM-Easy-V06.indd 195059340094090-C&L-A4-IM-Easy-V06.indd 19 29/10/2020 3:18 PM29/10/2020 3:18 PM
20
Care and Maintenance
Bulb replacement - cold oven only
1. Switch off the power at the main circuit breaker.
2. Carefully unscrew the cover by turning it counter-clockwise.
3. Replace the bulb and screw the cover back in place.
NOTE: Only use 25-40W / 220 V-240V, T300°C G9 halogen lamps. Handle with a soft cloth to avoid
premature failure.
5059340094090-C&L-A4-IM-Easy-V06.indd 205059340094090-C&L-A4-IM-Easy-V06.indd 20 29/10/2020 3:18 PM29/10/2020 3:18 PM

This manual suits for next models

1

Other Cooke & Lewis Oven manuals

Cooke & Lewis DMF90CL User manual

Cooke & Lewis

Cooke & Lewis DMF90CL User manual

Cooke & Lewis CLCPSTa User manual

Cooke & Lewis

Cooke & Lewis CLCPSTa User manual

Cooke & Lewis CSB60 User manual

Cooke & Lewis

Cooke & Lewis CSB60 User manual

Cooke & Lewis CLEF3SS-C User manual

Cooke & Lewis

Cooke & Lewis CLEF3SS-C User manual

Cooke & Lewis CLMF2BK-CR1 User manual

Cooke & Lewis

Cooke & Lewis CLMF2BK-CR1 User manual

Cooke & Lewis 5059340094090 User manual
Cooke & Lewis

Cooke & Lewis 5059340094090 User manual

Cooke & Lewis CLMFBI User manual

Cooke & Lewis

Cooke & Lewis CLMFBI User manual

Cooke & Lewis CLPYRO65UK User manual

Cooke & Lewis

Cooke & Lewis CLPYRO65UK User manual

Cooke & Lewis EFA60BKL Instruction Manual

Cooke & Lewis

Cooke & Lewis EFA60BKL Instruction Manual

Cooke & Lewis CLFDT60 User manual

Cooke & Lewis

Cooke & Lewis CLFDT60 User manual

Cooke & Lewis CLBUDO89 User guide

Cooke & Lewis

Cooke & Lewis CLBUDO89 User guide

Cooke & Lewis CLMF1BK-CR1 User manual

Cooke & Lewis

Cooke & Lewis CLMF1BK-CR1 User manual

Cooke & Lewis 5059340158006 CLOV65 User manual

Cooke & Lewis

Cooke & Lewis 5059340158006 CLOV65 User manual

Cooke & Lewis CLOVIPK-A User manual

Cooke & Lewis

Cooke & Lewis CLOVIPK-A User manual

Cooke & Lewis CLBUDO89 Instruction Manual
Cooke & Lewis

Cooke & Lewis CLBUDO89 Instruction Manual

Cooke & Lewis OVFO60 User manual

Cooke & Lewis

Cooke & Lewis OVFO60 User manual

Cooke & Lewis CLMF2BK-C User manual

Cooke & Lewis

Cooke & Lewis CLMF2BK-C User manual
Cooke & Lewis CLFNBK60 User manual

Cooke & Lewis

Cooke & Lewis CLFNBK60 User manual

Cooke & Lewis CLMFBI User manual

Cooke & Lewis

Cooke & Lewis CLMFBI User manual

Cooke & Lewis CLEF4BK-C User manual

Cooke & Lewis

Cooke & Lewis CLEF4BK-C User manual

Cooke & Lewis CLMFSS60 User manual

Cooke & Lewis

Cooke & Lewis CLMFSS60 User manual

Cooke & Lewis CLOV65 User manual

Cooke & Lewis

Cooke & Lewis CLOV65 User manual

Cooke & Lewis CLMFBK60 User manual

Cooke & Lewis

Cooke & Lewis CLMFBK60 User manual

Cooke & Lewis CLEF2SS-C User manual

Cooke & Lewis

Cooke & Lewis CLEF2SS-C User manual
Popular Oven manuals by other brands

Miele H4842BP Product dimensions

Miele

Miele H4842BP Product dimensions

NEFF B1881N2GB How to connect

NEFF

NEFF B1881N2GB How to connect

Pelgrim OAS560 Series manual

Pelgrim

Pelgrim OAS560 Series manual

AEG COMPETENCE B8920-1 Installation and operating instructions

AEG

AEG COMPETENCE B8920-1 Installation and operating instructions

Rational SelfCookingCenter whitefficiency Training manual

Rational

Rational SelfCookingCenter whitefficiency Training manual

NeoDen IN12C user manual

NeoDen

NeoDen IN12C user manual

Westinghouse WVEP6918DD user manual

Westinghouse

Westinghouse WVEP6918DD user manual

Heinner HCE-S37DKA user manual

Heinner

Heinner HCE-S37DKA user manual

Holland Green Science Hephaestus V094 user manual

Holland Green Science

Holland Green Science Hephaestus V094 user manual

Merrychef s Service & parts manual

Merrychef

Merrychef s Service & parts manual

Zanussi ZCG 6200 Operating and installation instructions

Zanussi

Zanussi ZCG 6200 Operating and installation instructions

Viking Professional VEOS100TSS use and care manual

Viking

Viking Professional VEOS100TSS use and care manual

Blodgett Double 1000 Specification sheet

Blodgett

Blodgett Double 1000 Specification sheet

Frigidaire PLEB30T9D Factory parts catalog

Frigidaire

Frigidaire PLEB30T9D Factory parts catalog

Viking Range Built-In Electric 30" Single and Double... Use & care manual

Viking Range

Viking Range Built-In Electric 30" Single and Double... Use & care manual

NEFF U1ACE2H.0B User manual and installation instructions

NEFF

NEFF U1ACE2H.0B User manual and installation instructions

Wood Stone WS-TS-5-RFG-(IR)-(W) Installation and operation manual

Wood Stone

Wood Stone WS-TS-5-RFG-(IR)-(W) Installation and operation manual

Beko BIE32300XP user manual

Beko

Beko BIE32300XP user manual

manuals.online logo
manuals.online logoBrands
  • About & Mission
  • Contact us
  • Privacy Policy
  • Terms and Conditions

Copyright 2025 Manuals.Online. All Rights Reserved.