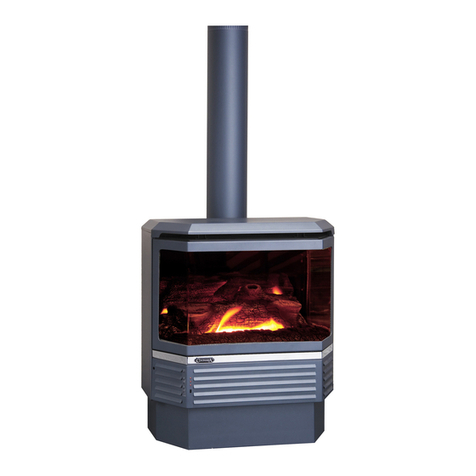
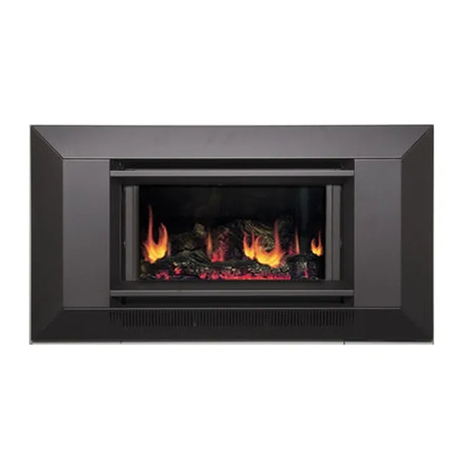
Coonara Settler 600 MKII Series Manual

Revised: 23/11/2019 Printed: 26/11/2020
1
Settler 600 Series MKII
INSTALLATION
&
OPERATING INSTRUCTIONS
Serial Number of Heater: ________________________ Model: ___________________
SETTLER
WOODHEATERS ARE AUSTRALIAN OWNED & MANUFACTURED
BY
SHAMIC SHEETMETAL
SHAMIC SHEETMETALSHAMIC SHEETMETAL
SHAMIC SHEETMETAL
(AUST.) PTY. LTD.
PO BOX 8, KILSYTH, VIC. 3136
PH: 03 9737 5300
h ps://shamic.com
C600 MKII Ranch - Freestanding
I600 MKII - Inbuilt C600 MKII - Freestanding

Revised: 23/11/2019 Printed: 26/11/2020
2
SAVE THESE INSTRUCTIONS
INSTALLATION AND OPERATION INSTRUCTIONS
Have your heater installed by a registered or licensed installer, and advise your insurers for
inclusion in your household contents policy.
In some states the installer is required to issue a certificate of compliance on the installation; -
ensure you obtain this if applicable!
COONARA SETTLER Woodheaters should not be modified in any way!
Do not operate the heater with the door open for extended periods.
Always operate with door closed except when lighting or refuelling, and maintain all seals in
good condition!
Keep children away from the heater when operating! SETTLER Dealers can advise on
heater / door shield accessories for your unit.
WARNING: When in operation heater door glass is extremely hot!
WARNING: SETTLER WOODHEATERS AND DEALER SPECIFIED FLUES SHALL BE
INSTALLED IN ACCORDANCE WITH THE AUSTRALIAN STANDARD AS 2918 AND THE
APPROPRIATE REQUIREMENTS OF THE LOCAL BUILDING REGULATORY
AUTHORITY.
WARNING: DO NOT USE FLAMMABLE LIQUIDS SUCH AS PETROL, KEROSENE, OR
ENGINE OIL TO START OR REKINDLE THE FIRE!
WARNING: “BURN ONLY HARDWOOD”
CAUTION: MIXING OF APPLIANCE OR FLUE SYSTEM COMPONENTS FROM
DIFFERENT SOURCES OR MODIFYING THE DIMENSIONAL SPECIFICATIONS OF
COMPONENTS MAY RESULT IN HAZARDOUS CONDITIONS. WHERE SUCH ACTION IS
CONSIDERED, THE MANUFACTURER SHOULD BE CONSULTED IN THE FIRST
INSTANCE!
CAUTION: THE USE OF SOME TYPES OF PRESERVATIVE TREATED WOOD AS FUEL
CAN BE HAZARDOUS (for example: treated radiata pine).
CAUTION: DO NOT STORE FUEL WITHIN THE HEATER INSTALLATION CLEARANCES
OR WITHIN THE SPACE REQUIRED FOR FUEL CHARGING OR ASH REMOVAL!
CAUTION: OPEN AIR SLIDE AND TURN FAN OFF BEFORE OPENING DOOR!
DISCLAIMER
The information supplied by this company is our interpretation of AS 2918 and we do not
accept responsibility for any errors or omissions.
All SETTLER Woodheaters have been tested in accordance with and comply to AS 4013.
Please read and thoroughly understand these instructions prior to operating this
appliance!
Please store these instructions in a safe place for future reference.

Revised: 23/11/2019 Printed: 26/11/2020
3
INSTALLATION INSTRUCTIONS - FREESTANDING MODELS ONLY
Select the position of your heater carefully, taking into consideration all combustible materials
in the roof; eg. ceiling joists, roof trusses, etc.
Floor Protector/Hearth
Determine flue location through the ceiling:
Position the hearth correctly, then place the heater on the hearth so that the flue spigot on the
heater is correctly aligned with the flue location from the ceiling.
Clearance to combustible surfaces:
Dimensions in mm

Revised: 23/11/2019 Printed: 26/11/2020
4
INSTALLATION OF INBUILT MODELS ONLY
The heater must only be installed in either a sound concrete or masonry fireplace, connected
to a chimney, both of which must be inspected for soundness and thoroughly cleaned before
the heater is installed, or the
tested and approved Shamic
ShamicShamic
Shamic Zero Clearance Box in conjunction
with a triple skin flue system. After removing the packaging, slide the heater into the fireplace
opening. A standard, default triple skin flue system must be connected to the heater, providing
free and effective discharge of combustion by-products outside the building and any enclosed
or confined space.
The stainless steel ring (supplied with the heater) must be fitted to the flue spigot of all inbuilt
models for correct location of the flue.
The power cord may be relocated from the right-hand front side of the heater to the left-hand
side.
Installation in a Fireplace

Revised: 23/11/2019 Printed: 26/11/2020
5
Installation using the Shamic Zero Clearance Box

Revised: 23/11/2019 Printed: 26/11/2020
6
Firebox Internal Set Up
Step 1. Install the top baffle plate, place both hands underneath the plate lift either the right
or left hand side of the plate up so it is on an angle. Lift up over the locating tab on the side of
the firebox then lift up the other side and push the plate to the back of the firebox. PLEASE
MAKE SURE THE RIBS ON THE BAFFLE PLATE ARE FACING DOWN.
Step 2. Install the secondary air tube, in front of the baffle plate you will see a channel on
each side of the firebox, lift the burn tube up into place ensuring it is sitting in the channel with
the holes facing down.
Step 3. Install the rear and side liners, for the 500 you will have a one piece rear liner, for
the 600 you will have a 2 piece rear liner. Put your rear liner or liners into the back of the
firebox then put in your side liners in to hold the rear liner or liners in place. Make sure the
smooth side of the liners are up against the firebox and the ribs are facing into the
firebox running horizontally.
Step 4. Install bottom firebricks, install the 4 firebricks horizontally into the bottom of the
firebox.
***Please note when cleaning your ash out of your heater leave an inch of ash over the
top of your firebricks***

Revised: 23/11/2019 Printed: 26/11/2020
7
FIRST FIRE
YOUR HEATER HAS BEEN SPRAYED WITH HIGH TEMPERATURE
PAINT. TO ENSURE THAT THE PAINT IS PROPERLY “CURED IN”,
PLEASE FOLLOW THESE STEPS WHEN LIGHTING THE FIRST
FIRE IN THE HEATER:
•ENSURE THE AIR CONTROL SLIDE IS FULLY OPEN.
•OPEN THE DOOR AND PLACE A MINIMUM OF 12 PIECES OF DRY KINDLING
WOOD ON TOP OF FIRELIGHTERS OR PAPER.
•LIGHT THE FIRE, LEAVING THE DOOR SLIGHTLY OPEN. THIS WILL HELP TO
CURE THE PAINT AROUND THE DOOR AND PREVENT THE DOOR SEAL
STICKING TO THE FIREBOX. IF THE DOOR SEAL HAPPENS TO COME OUT OF
THE DOOR SIMPLY PUSH IT BACK IN. TO ENSURE THE SAFETY OF YOUR
HOME, PLACE A SAFETY SCREEN IN FRONT OF THE HEATER OR STAY NEAR
THE FIRE WHILE THE DOOR IS OPEN.
•WAIT UNTIL THE KINDLING WOOD HAS CAUGHT ON THEN ADD ONE SMALL
PIECE OF HARDWOOD.
•LET THAT BURN DOWN TO HOT COAL AND ADD ANOTHER SMALL PIECE OF
HARDWOOD.
•AFTER 40 MINUTES CLOSE THE DOOR, SET THE AIR CONTROL TO HALFWAY
AND TURN THE FAN ON TO THE LOW SETTING.
•CONTINUE TO ADD ENOUGH WOOD TO MAINTAIN A SMALL FIRE
•PLEASE NOTE THAT AS YOU CURE THE FIREBOX THE HEATER WILL PRODUCE
AN ODOUR. OPEN A WINDOW OR DOOR TO HELP REDUCE THE SMELL.
•HAVING A SMALLER FIRE WILL HELP CURE THE FIREBOX & THE DOOR ROPE
PROPERLY AND WILL ALSO REDUCE THE SMELL OF THE PAINT CURING.
•IT WILL TAKE BETWEEN FOUR TO SIX HOURS TO CURE IN YOUR HEATER.

Revised: 23/11/2019 Printed: 26/11/2020
8
Operating Information
Fuel
Ignition: A supply of firelighters or newspapers.
Kindling: 10 mm – 20 mm diameter light, split, pieces of dry wood.
Start-up wood: 30 mm – 75 mm diameter medium size, split pieces of dry wood.
“BURN ONLY HARDWOOD”.
Starting a fire
Fully open the air slide, lift the door handle upward and open the door slowly.
To build a fire, place firelighters or crumpled balls of newspaper in the firebox. Half fill the
firebox with dry kindling.
Light the fire and close the door.
When the kindling is well alight add some start up wood, which will prepa
re the fire to take larger
sized firewood.
Switch on the fan after the firebox has heated up. (This could take up to 30 minutes).
Loading
When the start-up wood is well alight add a load of dry firewood.
Your
Coonara
heater will burn any diameter logs which fit in the firebox.
Large logs will take longer to ignite but will burn longer.
Once these logs are alight, adjust the air control to the desired level.
As well as keeping recommended firewood sizes in mind, the way you load the fuel will affect
the operating characteristics of your
Coonara
heater. Always ensure adequate air is
provided for combustion and, to reduce creosote, a smaller intense fire is preferable to a large
smouldering one.
If a large log is placed across the width of the firebox, more often than not the wood will
smoulder rather than burn effectively. This is because the primary burn air enters the
Coonara
firebox above the door opening and travels down the door glass effectively
‘washing the glass’ (i.e. minimising carbon, soot and creosote deposits), before travelling
through the fuel load.
Should the primary burn air intake be restricted in travelling through the fuel load, for example
by a large piece of wood lying across the firebox, it follows that the correct combustion process
will not take place.
It is better to place 2-3 smaller diameter pieces of wood front to back with a minimum spacing
of 20mm as a load and a larger piece or pieces across these.
Note: The fan fitted to the heater should be operating whenever a fire is burning
(except on start up). Failure to do so may overheat the unit and void warranty.

Revised: 23/11/2019 Printed: 26/11/2020
9
Use of the fan
Coonara
heaters are fitted with a 3-speed fan for efficient distribution of warmth.
Operating the fan in your wood heater is critical at all stages of use except at startup, where
the follow steps apply:
•
When the fire has been underway for 30 minutes turn the fan on to low
•
Once the fire is established, increase the fan speed to medium to heat the room
•
Once the desired room temperature has been reached, turn the fan back to low
•
DO NOT TURN THE FAN OFF
at any time during the burning period
•
The fan should remain on during overnight burns.
Note
The use of the fan is critical to removing the hot air generated by the fire into the space to be
heated. This is called convection heat, compared to other types of wood heaters which are
designed to heat up the fireplace and provide radiant heat. The objective of your wood heater
is to heat the room, not the fireplace.
The use of the fan on high speed (3) is OK for a short period if required, but if the air is driven
too quickly through the system it does not have sufficient time to gather heat before being
expelled through the vents.
The cost of running the fan while using the heater is negligible compared to the air pollution
caused by inefficient burning as well as the potential damage to baffles, seals, glass and the
integrity (buckling) of the steel firebox that may be caused by producing heat without an
effective outlet via the fan.
Generally, an established fire should warm the required area with the fan on the low setting
.
Reloading
The firebox should be loaded to a minimum of 2/3 full, preferably when the fuel has burnt down
to a bed of coals. Attempting to reload part way through a burn period risks smoke, coals, or a
log rolling from the heater.
Before reloading, it is important to position the air inlet control to high. Open the door carefully
and slowly. Rake over the coals and load the fuel as recommended. After reloading, close the
door securely and leave the air inlet fully open on high until the fuel load is well alight. Then
the air inlet control can be adjusted to your desired heat output.
Do not throw wood into the firebox
This is an unsafe practice and may dislodge the baffle plate in the heater. It may also cause
sparking or dislodge burning wood, which could ignite any combustible materials in the area
surrounding the heater (e.g. carpet).
Do not slam the door closed
Wood may be protruding from the firebox and cause the glass to break. It will also diminish
the longevity of the door seal.

Revised: 23/11/2019 Printed: 26/11/2020
10
Preparing for a low (overnight) burn
For an extended low burn ensure a maximum fuel load is placed into the heater, following the
reloading procedure outlined previously. The greater the fuel load the longer the burn. After
reloading close the door and leave the air inlet fully open (high) until the load is alight. The air
inlet should then be turned down to the low setting.
The optimum air flow setting to achieve an overnight burn may vary for different reasons.
Experiment to find the best result.
The fan should remain on low setting during overnight burns.
Self cleaning through high firing
It is perfectly normal for the glass door to experience some blackening after extended periods
of low burning. High firing helps burn the door glass clean and minimise soot, carbon and
creosote formation on the baffle plate and flue as well. High firing can be done daily during the
heating season and morning is usually the best time.
Just start or rebuild the fire with the firebox at least 2/3 full, set the air inlet control to high and
let the heater operate in this manner for at least 90 minutes.
Replacement parts
Consult your
Coonara
Dealer regarding any of the normally replaceable components of the
heater i.e. handle, baffle plate, door glass, fans, door seal and bricks.

Revised: 23/11/2019 Printed: 26/11/2020
11
Maintenance
Paint surfaces
After the curing process has taken place, little maintenance is required other than dusting off
with a cotton cloth. Most marks can be buffed out with a cotton cloth without the need for
retouching. NOTE: Do not use abrasive cleaners or harsh solvents (such as methylated
spirits). Should you experience scuffing or scratching, or discolouration due to incomplete
curing, the high temperature paint can be touched up and matching spray cans may be
purchased from your
Coonara
dealer. To retouch scratches that are down to bare metal,
gently sand the surrounding area, with 400 wet and dry sandpaper and respray. Remember, if
you retouch your
Coonara
, the surface will require curing and may smoke slightly during this
process. This is normal.
CAUTION: DO NOT ATTEMPT TO RESPRAY THE HEATER WHILST IT IS IN
OPERATION.
Door glass
It is usual for creosote and/or smoke deposits to form on the door glass, particularly after an
extended period of low burn. Creosote deposits are combustible and can be burnt off through
high firing. If any deposits remain, they can be cleaned using any non-abrasive household
cleaner. Some experienced users also recommend household vinegar or wet newspaper
dipped in the fire ash being most effective. If you experience heavy tar like deposits, then
inspect your fuel and review your operating methods.
Wet or green wood
will cause heavy
creosote deposits on the glass as well as the flue system and will severely restrict your
heaters performance.
WARNING: DO NOT OPERATE THE HEATER IF THE DOOR GLASS IS CRACKED.
Door glass seal
Before lighting the first fire of the heating season, test this seal by opening the firebox door
and placing a hand either side of the door glass. Your hands should be positioned together
with the glass resting between both palms. Gently try to move the glass around within the
doorframe, taking care not to use force. If you can move the glass, consult your
Coonara
dealer as the sealing tape may need replacing.

Revised: 23/11/2019 Printed: 26/11/2020
12
Door adjustment
The door is unlikely to become misaligned unless it is knocked and attempts at adjustment
may cause rather than solve a problem. Always consult your
Coonara
dealer before
attempting any adjustment to the door.
1. Remove door by opening fully and lifting door up off the hinge. (Freestanding models
require top panel to be propped up prior to lifting door).
2. Loosen the top & bottom screws securing the door hinge to the front of the firebox
upright.
3. Move the hinge left or right as necessary and re-tighten the screws.
4. In some cases, to enable adequate adjustment, it may be necessary to also loosen the
centre to relocate the entire hinge.
5. Mark door sealing edge with coloured chalk and close the door. Re-open and check the
door is aligned properly via the chalk mark left on the fibreglass door seal of the heater.
NOTE: The door handle may pull the door down on the right-hand side. Compensate for this
situation during adjustment.
Flue system
Under normal conditions, using dry hardwood and employing correct operating procedures,
annual flue maintenance should take place prior to the heating season. If your heater’s
performance deteriorates, or if it smokes excessively after a trouble-free period of operation,
the cause may be creosote. The creosote may have built up to a level where the gases are
restricted from exiting the flue pipe because it is partially blocked.
CAUTION:
THE FLUE PIPE MUST BE KEPT CLEAN AND IN GOOD CONDITION. ALL
SOLID FUEL BURNING APPLIANCES NEED TO BE CLEANED FREQUENTLY BECAUSE
SOOT, CREOSOTE AND ASH MAY ACCUMULATE. IN THE EVENT OF A SOOT OR
CREOSOTE FIRE IN THE FLUE, IMMEDIATELY CLOSE THE AIR INLET CONTROL TO
STARVE THE FIRE OF OXYGEN. IT IS RECOMMENDED THAT YOU CALL THE FIRE
BRIGADE FOR FUTHER ASSISTANCE AND ADVICE. WHEN THE FIRE IS OUT, HAVE
THE FLUE INSPECTED BY A QUALIFIED INSTALLER TO ENSURE THERE HAS NOT
BEEN ANY DAMAGE TO THE FLUE SYSTEM.
For cleaning the flue, you may purchase a flue brush from your
Coonara
dealer, or you can
engage the services of a chimney sweep.

Revised: 23/11/2019 Printed: 26/11/2020
13
Fan
At the end of the heater season you should clean and vacuum the fan and fan tray. Dust and
hair can accumulate, especially if you have a pet.
Turn the mains power off and disconnect the power lead from the wall socket.
Console Model
1. To access the fan on console model, remove the two screws on the left hand and
right side of the pedestal cover and put them aside in a safe place.
2. Remove the pedestal cover.
3. This allows easy access to the fan and the fan tray. Thoroughly clean the fan and
surrounding components to remove all debris, whilst being careful not to apply
undue force on hardware or cabling. A vacuum cleaner with a soft brush fitting is
best for this job.
4. Once clean, replace the pedestal cover and tighten screws.
5. Plug the power lead back into the mains wall socket.
Your fan should now be good to go for another season.
Inbuilt Models
At the end of the heater season the fan and fan tray should be cleaned using a vacuum
cleaner. Dust and hair can accumulate, especially if you have a pet.
We recommend the use of a qualified service agent to perform fan maintenance for inbuilt
models. Accessing the fan involves removal of the door and the fascia surround.
If you wish to conduct this maintenance yourself, please contact Shamic Sheetmetal (Aust) Pty
Ltd on phone (03) 9737 5300 for detailed instructions.

Revised: 23/11/2019 Printed: 26/11/2020
14
Baffle plate removal
The baffle plate is held in place with four locating tabs – 2 either side, front and rear of the
firebox.
WARNING: ALLOW THE HEATER TO COOL IF HOT BEFORE ATTEMPTING BAFFLE
PLATE REMOVAL.
Cast Iron Baffles
Removal of firebricks may be necessary if
fitted.
1. Lift the front of the baffle up and pull
forward over the supports until the
baffle clears the locating slots in the
back wall of the firebox.
2. Lower the rear of the baffle to drop
down and rest on the floor of the
firebox.
3. Lower the front of the baffle until it
clears the support brackets & remove it
from the firebox.
DO NOT USE HEATER IF TOP BAFFLE IS DAMAGED

Revised: 23/11/2019 Printed: 26/11/2020
15
TABLE 1: FIREWOOD SPECIES AND THEIR PROPERTIES
Firewood
Species
Forest Type Heat
Avail.
Per Unit
Volume
(%)
Density
(Dry Air)
Ib/ft3/
Kg/m3
Splitting Ignitability Coals Sparks Avail.
Ma
l
lee Roots
M
allee
100
N.A
Difficult
Poor
Excellent
Few
Good
Belah, Buloke Mallee
Box
-
Ironbark
100 70 /
1121
Good Poor Excellent Few Limited
Grey
Box
Box-Ironbark 100 70 /
1121
Difficult Poor Excellent Few Good
Black
Box
Box-Ironbark 97 69 /
1105
Difficult Poor Excellent Few Limited
Red
Ironbark
Box-Ironbark 97 69 /
1105
Difficult Poor Excellent Few Good
Yellow
Box
Box-Ironbark 91 65 /
1041
Difficult Poor Excellent Few Good
Red
Box
Box-Ironbark 91 67 /
1073
Difficult Poor Excellent Few Good
Yellow
Gum
Box-Ironbark 90 60 /
993
Difficult Poor Excellent Few Good
River
Red Gum
River
Red Gum
80 56 /
897
Difficult Poor Excellent Moderate Good
Blue
Gum
Foothill 80 61 /
977
Fair Fair Good Few Good
Red
Stringy Bark
Foothill 72 54 /
865
Good Good Good Few Good
Messmate
Foothill 68 45 /
721
Good Good Good Few Good
Mountain
Ash
Mountain 53 42 /
673
Excellent Excellent Fair Moderate Good
White Cypress
Pine
Box-Ironbark 60 42 /
673
Good Excellent Poor Many Limited
Radiata
Pine
Foothill
P
lantati
o
ns
45 32 /
512
Fair Excellent Poor Many Good
KNOW YOUR WOOD
A piece of dry wood produces an incredible amount of heat when burnt correctly. A piece of dry wood, however is also
like a sponge and can absorb up to 70% of its weight in water if exposed to the elements.
The fact that all wood heaters rely on dry fuel to perform at their best, cannot be over-emphasized as it is critical to your
heater’s performance. The relevant moisture content (wetness) of wood is indicated in the following table.
M
o
isture Conte
n
t
Fuel Suitability
Below 10% Very dry. Wood burns but less efficiently as some moisture is needed for
ideal combustion.
10% - 18% Ideal. Wood burns efficiently and economically
18% - 25% Wood will burn, but less efficiently
Above 25 % Wood too wet to burn efficiently
It is extremely difficult to light, let alone maintain, a fire using wet or green wood. A firebox filled with 20kg, wet or green
wood could contain up to 10 litres of water. As a result, the heater would naturally perform very poorly as most of the heat
generated would be directed to vaporizing the water. Be aware that if you purchase wood with 50% moisture content, the
50% of the money you paid for the wood, in fact, purchased water.
Ideally, firewood should be organised in the spring and under cover by mid-autumn. If you obtain next year’s wood in
spring, it should be open air dried over summer for a minimum of six months. The wood should then be stacked under
cover in such a way that air can flow between the pieces. A plastic sheet or tarpaulin is not sufficient as condensation
may account for a high moisture content in the wood.
It is important to select firewood that will build a good base or bed of coals. It is actually the coals and not the flames,
which form the hottest part of the fire and provide the heat source for your heater.
Dry wood has over twice the density of pine, so double the volume of pine is required to provide the same amount of
heat. Firewood that has had the bark removed produces less ash. The table above provides a good indication of the
properties of various common type of firewood.

Revised: 23/11/2019 Printed: 26/11/2020
16
How to Make a Warranty Claim
Coonara, Heatcharm, Arrow and Settler Heaters.
The full Warranty Statement for your heater is contained in the Installation and Operating Instructions booklet
that was provided with the product.
1.
Check the details of the warranty statement
2.
Determine if you think the problem is covered by warranty
3.
Ensure that you have proof of purchase
4.
Contact the retailer that sold you the heater
5.
Advise them of the specific problem
6.
Provide the details that your retailer requests to complete a Warranty Claim Form. This must include the
heater model, serial number and installation compliance certificate, if applicable in your State.
7.
Your retailer will forward your claim to Shamic Sheetmetal (Aust) Pty Ltd, the manufacturer of the
above heater brands
8.
Shamic will contact you to acknowledge that they have received the claim, if the claim has been
accepted and the next steps involved in fixing the problem
9.
Parts and/or service is provided
10.
Contact your retailer if the problem has not been fixed.

Revised: 23/11/2019 Printed: 26/11/2020
17
SETTLER WOODHEATERS WARRANTY – CONSOLE & INBUILT MODELS
DESIGNATION OF WARRANTOR. This warranty is extended by Shamic Sheetmetal (Aust) Pty. Ltd with respect to SETTLER Woodheaters
PRODUCT. This SETTLER heater is comprised of the heater proper (including components and firebox), fan assembly, speed control switch, electrical
components, firebricks, seals and moving parts. Except where specifically excluded from coverage hereunder, this warranty covers all components
designed.
See exclusions and qualifications below for further information on product coverage.
WARRANTY:
1) Shamic Sheetmetal (Aust) Pty. Ltd, warrants the firebox to be free of defects in materials and workmanship of a period of ten (10) years from
the date of purchase.
2) Shamic Sheetmetal (Aust.) Pty.Ltd., warrants that all other components of the unit to be free of defects in material and workmanship for a
period of one (1) year from date of purchase, excluding door glass.
3) If this SETTLER heater is found to be defective in material or workmanship Shamic will repair or replace such defects in the SETTLER heater
at Shamic’s option in accordance with SETTLER’s warranty policy during the period on this warranty. If the defect is found not to meet the
Consumer Guarantee requirements and constitutes a major failure, the purchaser may be able to choose to repair or replace the defective
heater or part or obtain a refund.
4) Exclusions and qualifications. This warranty is subject to the following exclusions and qualifications.
a) This warranty extends only to the original consumer purchaser, who has purchased the heater from an authorised SETTLER
dealer.
b) This warranty does not apply to, and SETTLER assumes no responsibility for any damages that result due to, installation or
operation of the heater not in accordance with both the installation and operation instructions furnished with the unit.
c) This warranty does not cover any damage caused by water from any source.
d) This warranty does not apply to any heater, which has been modified or damaged in shipping or by improper handling, improper
operation, abuse, misuse, accident or unworkmanlike repairs.
e) Shamic Sheetmetal (Aust.) Pty.Ltd. does not warrant the structural performance of the heater when fuel products with abnormal
burning characteristics, including but not limited to synthetic logs, coal , wood treated with flammable liquid, logs made from
pressed wood, driftwood or any materials containing salt or corrosives, rubbish or garbage are used. Flammable liquid fuels are
explosive and should never be used in this product.
f) Shamic Sheetmetal (Aust.) Pty.Ltd. Expressly excludes any liability hereunder for defects or damage caused by the installation or of
any components not expressly authorised and approved by Shamic. Shamic further assumes no liability for defects or damage
caused by any modification not expressly authorised and approved by Shamic. Unauthorised components or modifications could
create a fire hazard by altering the safety design of the heater.
g) Building Codes. Since building code requirements vary, users should determine in advance whether there are any building code
restrictions on the installation or use of the heater. Shamic makes no representation of warranty regarding building code
compliance and shall not be responsible for compliance therewith.
h) Shamic will only accept claims under this warranty in strict accordance with the conditions set out below.
5) Shamic Sheetmetal (Aust.) Pty.Ltd. shall not be liable for any breakages of glass components, transit damage or, where it can be shown that
the consumer guarantee obligations as the manufacturer have been met, for any claim by any person for incidental or consequential damages
caused by defects in the SETTLER heaters. Whether such damage occurs or is discovered before or after replacement or repair, and
whether or not such damage is caused by SETTLER negligence. Normal wear and tear items such as routine surface maintenance, door
ropes, seals and door glass are also excluded from this warranty.
6) Shamic goods come with guarantees that cannot be excluded under Australian Consumer Law. The purchaser is entitled to a replacement or
a refund for a major failure and compensation for any reasonably foreseeable loss or damage. The purchaser is also entitled to have the
goods repaired or replaced if the goods fail to be of acceptable quality and the failure does not amount to a major failure.
7) This warranty applies only to units purchased from an authorised dealer and the duration of this implied warranty, including merchantability,
applicable to this SETTLER heater is limited to the duration of the foregoing warranty.
8) Before Shamic Sheetmetal (Aust.) Pty.Ltd. will recognise or accept a claim under this warranty, you must provide proof of purchase. On
purchase of the heater, despatch your warranty card to Shamic Sheetmetal (Aust.) Pty.Ltd.
9) Your authorised dealer must be notified of any defect in the heater, for investigation of the claim. Your authorised dealer will be able to explain
the process of making a warranty claim and any costs associated with returning goods. In the event where a remedy is necessary and the
claims under warranty are accepted, the purchaser may be required to return the goods to the authorised dealer for repair, replacement or
refund.
---------------------------------------------------------------------------------------------------------------------------------------------------------------------------------------------------
DETACH AND RETURN BY MAIL OR EMAIL
NAME ________________________________________________________________________________________________________________
ADDRESS _______________________________________________________________________________________________________________
CITY / STATE / POSTCODE _________________________________________________________________________________________________
PURCHASED AT (Dealer name & address) ____________________________________________________________________________________
DATE PURCHASED ________________________ MODEL ___________________________________ SERIAL NO _______________________
WHERE DID YOU HEAR ABOUT SETTLER WOODHEATERS? RADIO, TELEVISION, NEWSPAPER, DEALER, WEBSITE, OTHER - Please
provide details.
_________________________________________________________________________________________________________________________
WOODHEATER BY
SHAMIC SHEETM
SHAMIC SHEETMSHAMIC SHEETM
SHAMIC SHEETME
EE
ETAL
TALTAL
TAL
(
((
(AUST
AUSTAUST
AUST) Pty Ltd
) Pty Ltd) Pty Ltd
) Pty Ltd
PO BOX 8 KILSYTH, VIC. 3136
Ph: 03 9737 5300
This manual suits for next models
2
Table of contents
Other Coonara Heater manuals
Popular Heater manuals by other brands

ALPATEC
ALPATEC PRMD 1000 user manual

Schuss
Schuss SHX49HEAT2022 operating manual

Haul-All Equipment
Haul-All Equipment SURE FLAME S400 Service and maintenance manual

Rheem
Rheem RXHK-D01 installation instructions

ambiance
ambiance pc14ss owner's manual

BPC
BPC Dimplex TDTR Series Installation and operating instructions

usha
usha TFH LED instruction manual

Stelpro
Stelpro APCH series user guide

Intertec Data Systems
Intertec Data Systems SL QUADRATHERM DE.A operating instructions

Klimatronic
Klimatronic Heat Block PTC manual

Nemco
Nemco 6150-24 Operating and maintenance instructions

Timberk
Timberk TOR 51.1507 BTM instruction manual