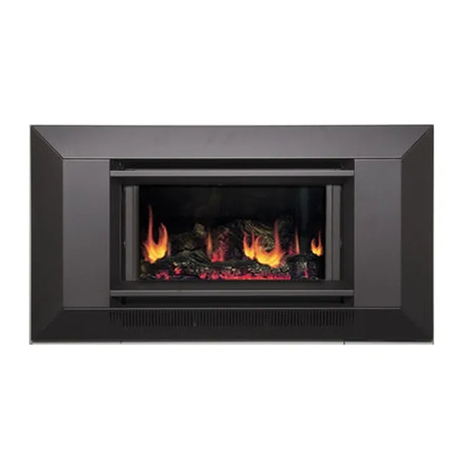
Coonara grange User manual

Revised: 01/09/2016 13/02/17
1
Coonara “Grange”
One of the world’s most powerful efficient gas
log space heaters
CUSTOMER OPERATING INFORMATION
&
INSTALLATION INSTRUCTIONS
Serial Number of Heater
: ____________
Model:
________________
Grange Gas Heaters
ARE AUSTRALIAN OWNED & MANUFACTURED
BY
SHAMIC SHEETMETAL
SHAMIC SHEETMETALSHAMIC SHEETMETAL
SHAMIC SHEETMETAL
(AUST.) PTY. LTD.
PO BOX 8, KILSYTH, VIC. 3137
PH: 03 9737 5300 FAX: 03 9761 6 55
https://shamic.com

Revised: 01/09/2016 13/02/17
2
WARNING
THE FOLLOWING INSTRUCTIONS MUST BE CARRIED OUT
OR WARRANTY BECOMES VOID.
Heater must be installed by a Coonara authorised technician. List is
available on www.shamic.com You must obtain a license number from
the installer.
Heater must be placed on a flat level surface. Inbuilt models must be
placed on 6mm AC sheeting, to prevent unit from rattling.
Heater must be checked for scratches or dents prior to installation.
All glass must be fitted with a screw driver not a drill. If glass is
broken upon installation due to the screws being tightened too much, it
will not be classed under warranty.
Further safety precautions and installation instructions are contained
throughout this manual. Please read the manual before installation.

Revised: 01/09/2016 13/02/17
3
CONTENTS
PRODUCT FEATURES…………………………………………………4
SAFETY PRECAUTIONS………………………………………………5
CUSTOMER OPERATING INSTRUCTIONS………………………...6
SAFETY FEATURES……………………………………………………7-8
INSTALLATION INSTRUCTIONS……………………………………9-21
DIMENSIONS……………………….…………………………………...21-23
PRESSURE ADJUSTMENTS……………..……….…………………...24
WIRING DIAGRAM…………………………………………………….25
LOG SET………………………………………………………………….26
WARRANTY & CARE OF APPLIANCE ………………………….....27-29
TROUBLE SHOOTING GUIDE .………………………………………30
WARRANTY FORM & CONTACT DETAILS…………………….…33
PLEASE STORE THIS MANUAL IN A SAFE PLACE FOR
FUTURE REFERENCE

Revised: 01/09/2016 13/02/17
4
Product Features
COONARA “GRANGE” INBUILT AND FREESTANDING GAS LOG HEATERS
NAME PLATE
MODEL-GRANGE
GAS TYPE
NATURAL
L.P.G
Manufacturer
MODEL TYPE
GAS INPUT
HIGH
LOW
HEAT OUTPUT
HIGH
LOW
Efficiency
Injector Size
Manifold Pressure
High
Low
A.G.A Approval
No to Code
AS4553-2008
Freestanding
Inbuilt
36 MJ/h
19 MJ/h
8.9 kW
4.3 kW
86.5 %
3.3 mm
0.7 kPa
0.35 KPa
AGA 7048 G
Freestanding
Inbuilt
36 MJ/h
19 MJ/h
8.9 kW
4.3 kW
86.5 %
1.9 mm
1.9 kPa
0.70 KPa
AGA 7048 G
Shamic
Sheetmetal
(Aust.)
Pty.Ltd
.
PO BOX 8,
KILSYTH,
VIC. 3136
To be installed by
an authorized
person in
accordance with
installation
instructions
provided with the
appliance.
Electrical
Conform to AS3100 240V 50 Hz 120 Watts Max
Air Pressure Switch Aria 380 series 5471
Cut in Pressure 100 Pa
Cut out Pressure 90 Pa
Electrical Connection Standard Flex. 2 Mt. 3 Pin Plug
Coonara “Grange” Freestanding and Inbuilt Gas Log Space Heaters
Zero Clearance to Combustible Materials
5.1 Star Energy Rate
Manual or remote operated controls. Optional thermostat
Electronic ignition.
External combustion air intake - prevents de-oxygenation of room air.
Delayed start room fan - prevents cold air being circulated at start-up.
Ability to duct heat to neighbouring rooms up to 12m from the heater – optional extra
only available for inbuilt heaters
Power flue.

Revised: 01/09/2016 13/02/17
5
SAFETY PRECAUTIONS
!
DO NOT – OPERATE THIS APPLIANCE BEFORE READING THIS
INSTRUCTION MANUAL.
DO NOT – PLACE ARTICLES ON OR AGAINST THIS APPLIANCE.
DO NOT – STORE CHEMICALS, FLAMMABLE MATERIALS OR SPRAY
AEROSOLS NEAR THIS APPLIANCE
DO NOT – OPERATE WITH PANELS, COVERS OR GUARDS REMOVED
FROM THIS APPLIANCE.
DO NOT – ENCLOSE THIS APPLIANCE.
DO NOT – MODIFY THIS APPLIANCE
THE SAFETY GUARD IN THE GLASS DOOR IS FITTED TO THIS APPLIANCE TO
REDUCE THE RISK OF FIRE OR INJURY FROM BURNS AND NO PART OF IT
SHOULD BE PERMANENTLY REMOVED. IF WHEN REMOVING SAFETY GUARD
FASCIA IS SCRATCHED THESE SCRATCHES ARE NOT COVERED UNDER
WARRANTY.
FOR PROTECTION OF YOUNG CHILDREN OR THE INFIRMED, A SECONDARY
GUARD IS REQUIRED.
THIS APPLIANCE SHALL ONLY BE INSTALLED BY AN AUTHORISED PERSON
IN ACCORDANCE WITH AS/NZS 5601 (GAS INSTALLATION STANDARD),
MANUFACTURERS INSTALLATION INSTRUCTIONS,
LOCAL GAS FITTING REGULATIONS AND MUNICIPAL BUILDING CODES.

Revised: 01/09/2016 13/02/17
6
Customer Operating Instructions
The Coonara Grange Gas log space Heater has been designed for a simple and efficient
operation to provide you with a higher heat output than most other heaters in the market.
The dual operation system (manual or remote controlled) and the optional heat transfer kit
means that at a touch of a button your heater will provide you with a fully controlled
modulated supply of heat, from a pleasant and steady warmth to the strongest heat output, to
reach almost any corner of your home.
PRE OPERATIONS CHECKS
Prior to operating the heater, ensure that the flue terminal is not obstructed. Furthermore,
make sure there are no combustible objects leaning against, resting on, or within the
immediate vicinity of the unit. Check that the heater main power and gas supply are
connected and switched on.
OPERATING THE HEATER
During first time firing of this appliance, an odour may be noticed for a short period of time
while the paint cures. It is advisable to leave the windows open during the first few hours of
the very first operation only.
This heater is operated by the room thermostat
1 - To ignite your heater press PowerButton on the thermostat and the heater will
automatically start the ignition sequence. Please refer to the Thermostat Operating
Manual supplied for further instructions. After approximately 30 seconds of self-
checking the heater will ignite.
2 - The heater will always start in the low heat setting and (unless already warm) the heater
will warm up for at least 2 minutes before automatically going to the higher flame
setting.
3 – The Room fans will not start till at least 2minutes of warming up period.
4- During first time firing of this appliance, an odour may be noticed for a short period of
time while the paint cures. It is advisable to leave the windows open during the first few
hours of the very first operation only.
TURNING THE APPLIANCE OFF
Press power button on thermostat once. The room fan will continue to operate for a period of
about 8 minutes while the heater cools down.
Please note:
1 - This appliance cannot be operated without the fan running.
2 - Due to the performance and efficiency of the heater, steam may be noticed coming from
the flue terminal on cool days.
3 - As this appliance has a luminous effect some slight carbon deposition may occur.

Revised: 01/09/2016 13/02/17
7
SAFETY PRECAUTIONS
IMPORTANT POINTS:
! DO NOT place articles or clothing on or against this appliance
! DO NOT use or store flammable materials near this heater
! DO NOT place any item containing liquid on the heater
! DO NOT spray aerosol in the vicinity of this appliance when it is in operation
! ALWAYS supervise young children near the appliance
It is recommended that a secondary guard be used, to prevent access to the appliance by
children, as outer panels of this appliance may reach high temperatures.
NOTE: In the event the electricity supply cord is damaged, it must be replaced with the
original Coonara part obtainable from your authorised dealer.
SAFETY FEATURES:
Automatic Pre-purge: Before heater ignition this operation is done to evacuate any remains
of gas or flue products from inside the firebox that could be the cause of a mishap.
Automatic Shut-off: Should the flame extinguish for any reason there is an automatic shut
off of the gas supply.
Over temperature protection: In the event of the room fan failing, blockage of airways or
incorrect gas installation, the gas supply will automatically shut off to prevent the appliance
from over-heating.
Warning
:
This appliance must be installed to comply with AS/NZS 5601 standard
and only by an authorised person who is responsible for its correct
operation at the time of installation and final Commissioning.

Revised: 01/09/2016 13/02/17
8
For your own convenience please record the following information in the space provided:
Purchased from:
Name…………………………………………………………………………
Address………………………………………………………………………
Phone No…………………………………..Date of purchase:…….………
Serial No of appliance:…………………………………………………………..
To be completed by the installer:
Name……………………………………………..Licence No……………………..
Address……………………………………………………………………………..
Phone No……………………………………. Installation Date…………………
WARNING
Heater must be checked for scratches or dents prior to installation.
Once the Heater is installed scratches or dents are NOT covered by warranty.
Heater must be placed on a flat level surface.
Inbuilt models must be placed on AC sheeting, to prevent unit from rattling.

Revised: 01/09/2016 13/02/17
9
INSTALLATION OPTIONS:
* ONLY TO BE CARRIED OUT BY AN AUTHORISED PERSON!
The Grange inbuilt Heater is a zero clearance appliance and can be optionally installed in a
false fireplace or wall cavity made of combustible materials such as wood or chipboard.
Coonara provide the heater with their own flue kit, of flexible pipes of 60mm and 50mm
diameter for the inlet and exhaust. For the gas supply a flexible hose is provided and must be
used.
Notice: For Horizontal flue installations more than 1 meter long, the
Air intake restrictor plate, located in the gas cowl inlet connection, must be removed by
using a Tin-Snip or similar tool. See page 13.
SERVICE INSTRUCTIONS - INBUILT/FREESTANDER
To access flue fan, over temp switch and the thermistor, the heater needs to be removed. To
access all other components the following steps apply:
To remove tray for service:
1. Undo gas connection going into gas valve and flow tube at firebox.
2. Pull out igniter cable x 2 and heat sensor cable x 1. These are clipped into blue box
and RH side.
3. Unclip plastic wire connections (plugs) x 3.
4. Pull silicone tubes off pressure switch x 2.
5. Undo two wing nuts. Lift fan up and pull forward. The tray will come free for
service.
6. To access firebox, read installation instructions Page 11 and 12.
To refit tray
7. Undo hex nut holding fan down. The nut is located behind the capacitor. Slide tray
back in and pull forward. Then lock down with two wing nuts. Turn fan on slight
angle so LH corner enters cut out first. Twist fan into position and fix with hex nut.
Then follow dismantling procedure in reverse.
ALL INBUILT MODELS ARE TO BE PLACED ON A FLAT LEVEL
SURFACE TO PREVENT RATTLES
3
3
4
3
4
2
2
2
1
5
1

Revised: 01/09/2016 13/02/17
10
VERTICAL FLUE INSTALLATION
INBUILT MODEL
1. Connect flue terminal to both flexible flue pipes.
2. Feed both flexible pipes down the flue cavity.
3. Fix flue terminal securely to top of flue cavity and seal to prevent water entry. Seal
with Hi temperature waterproof silicon sealant prior to cementing to chimney top,
pop rivet circular flange to the collector box. (Chimney installation only).
Chimney top plate
Collector box
COLLECTORBOX
Grange Inbuilt Flue
Installation

Revised: 01/09/2016 13/02/17
11
Rear vent Flue Installation
1. Determine the exact location for the heater.
2. Mark the exact location for the wall penetration
a. Determine that you will not be cutting through any vertical wall studs.
b. Check that the location of the wall-mounted terminal conforms to the
requirements of AS/NZS 5601 – Location of a Flue Terminal.
3. Cut 2 holes 70mm in diameter at 160mm centres holes to be side by side in the
horizontal.
4. Use the back of the cowl as a template for fixing holes.
5. Fit flex flue to spigots on the rear of the cowl using provided hose clamps and seal
with silicone.
NOTE- it may be necessary to trim the flue depending on wall thickness.
6. Attach the back of the cowl to the wall. Silicone around outside.
INSTALLATION - GAS PRESSURE TO GAS VALVE
NAT 1.1 KPA / LPG 2.75 KPA
Inbuilt & Freestanding Models
Only to be carried out by an authorised person!
1. Unpack flue kit and log set. (Packed inside with heater).
2. Carefully remove the cardboard carton surrounding the heater then remove the heater
from the pallet.
3. Remove louver panel by undoing 2 screws located each side of the panel. Unclip
connection to circuit board gently, by squeezing plug.
4. Connect flue pipes to unit. Connect gas to gas valve and check pressure coming in.
Minimum pressure required – NAT GAS = 1.1 KPA & LPG = 2.75KPA. High and low
settings on gas valve are factory set and should be correct (refer to page 4 for Pressure
Settings). Check these settings are correct, and adjust if necessary.
5. ACCESS – FREESTANDING MODEL
To access fire box, remove 1 self-tapping screw on underside front of each panel. Pull the
bottom of the side panel away from the heater and unclip 4 locking brackets.
6. ACCESS – INBUILT MODEL
To access fire box, the heater needs to be approximately 100mm out from its final
position. Remove bottom panel by undoing 2 screws, one on the left and one on the right.
Slide fascia panel up and remove.
Undo the 2 screws on top and bottom of front side panels, 2 on the left and 2 on the right.
Unclip H locking brackets and remove door.
7. Manually start by pressing top button. Top & bottom light will come on and heater will
not light for approx 1 minute. Once the firebox gets warm the middle light comes on the
NOTE: AIR INTAKE RESTRICTOR PLATE MUST BE REMOVED
FOR FLUE LENGTHS OF MORE THAN 1 METER.

Revised: 01/09/2016 13/02/17
12
heater goes to high. If you wish to go to low, press bottom button. If the heater does not
stay alight, switch off, by top button and start again. This may have to be done 2 – 3
times, until unit is purged.
8. Once heater is working, unpack log set and place in firebox, making sure you do not
move the sensor or sparker when placing the logs.
9. Re-assemble heater in reverse order. Make sure the clips are fastened correctly at the rear
of the Free Standing model. Make sure that the door on the Freestanding/Inbuilt model
are sitting on 2 pins located at the front of the fire box.
INSTRUCT CUSTOMER OF CORRECT OPERATING PROCEDURE
DOOR ASSEMBLY
1. SIT THE DOOR ON THE 2 PINS LOCATED AT THE
FRONT OF THE FIREBOX, MAKING SURE THE DOOR IS
PERFECTLY SQUARE.
2. SIMULTANEOUSLY CLIP THE BOTTOM LEFT AND
RIGHT CLIPS CLOSED.
3. REPEAT THE SAME ACTION ON THE TOP 2 CLIPS.
THIS WILL ENSURE THAT NO EXTRA TENSION IS PUT
ON OTHER SIDE

Revised: 01/09/2016 13/02/17
13
INSTALL INTO A STUD WALL CAVITY
1. Mark the exact location of where the heater is to be located with an outline 750mm wide
by 650mm high
2. Check that location for the flue terminal conforms to the requirements of AS/NZS5601
Location of a Flue Terminal.
3. Cut out the plaster board and timber supports (re-position supports if necessary)
4. Continue as described on previous page.
INSTALLATION THROUGH A WALL
THAT REQUIRES A WEATHER COVER
1. Mark the exact location of where the heater is to be located with an outline
720mm wide by 615mm high.
2. Check that location for the flue terminal conforms to the requirements of AS/NZS 5601
Location of a Flue Terminal.
3. Cut out the plasterboard and timber supports (re-position if necessary). Cut out the outer
brickwork.
4. Feed the gas line through the hole located at the lower right hand side of the outer
weather cover (provided) and the flue pipes through the pre-punched hole for the flue
pipes on the upper left hand side.
5. Locate the appliance. Connect gas.
6. Fit the outer weather cover over the exposed heater body and screw to the outer wall.
Also use a silicon sealant.
7. Ensure the inner flue to 50mm longer than the outer flue.
8. Fit the cowl back to the outer weather cover (Also use a silicon sealant).
9. Fit the cowl to the flue pipes and then to the weather cover.
10. Install heater as instructions on page 11.
EXTERNAL WEATHER COVER
1. The weather cover has in the bottom RH corner a moveable plate for gas connections.
2. Pre punch holes to take cowl.
3. Weather cover must be sealed with silicone to stop water entry.
Note: when the weather cover and cowl are attached it is necessary to seal the
top and side edges with silicone to prevent water entry.

Revised: 01/09/2016 13/02/17
14
EXISTING FIREPLACE OR ROOF PENETRATION
WITH SHAMIC VERTICAL FLUE KIT
Heater Mantle Piece
Balanced Flue Gas Cowl
REAR VIEW HORIZONTAL THROUGH WALL

Revised: 01/09/2016 13/02/17
15
6mm Cement Sheeting required for floor installation.

Revised: 01/09/2016 13/02/17
16
Fluecoverbox
(optional)
CONSOLE INSTALL WITH EXPOSED
VERTICAL FLUE PIPE
PICTURED WITH
OPTIONAL
FLUE BOX COVER
Flue cover box
(optional)

Revised: 01/09/2016 13/02/17
17
FALSE FIREPLACE ON CONCRETE SLAB AND WALL
PENETRATION WITH SHAMIC HORIZONTAL FLUE KIT
SHOWING OPTIONAL AIR TRANSFER SYSTEM
6mm Cement Sheeting required for floor installation.

Revised: 01/09/2016 13/02/17
18
FALSE FIREPLACE ON STUMP FLOOR AND WALL PENETRATION
WITH SHAMIC HORIZONTAL FLUE KIT
SHOWING OPTIONAL AIR TRANSFER SYSTEM

Revised: 01/09/2016 13/02/17
19
INTERNAL WALL - UNDER FLOOR INSTALL WITH HORIZONTAL FLUE

Revised: 01/09/2016 13/02/17
20
REAR FLUE INSTALLATION WITH OPTIONAL OFFSET FLUE BOX
The Offset Flue Box is used only when wall flue penetration has less than
300mm high from outside floor
Table of contents
Other Coonara Heater manuals
Popular Heater manuals by other brands

Kogan
Kogan SMARTERHOME KASHTCWF18BA user guide

RADSON
RADSON DELTA LASERLINE E - MOUNTING Instruction

Milwaukee
Milwaukee M12 HJM OGX Operator's manual

Anslut
Anslut KEROSENE HEATER operating instructions

Paramount Fitness
Paramount Fitness HCH500 instruction manual

Kogan
Kogan KAHTP20 A Series quick start guide