Cooper Atkins HACCP Manager ENTERPRISE 37200 User manual

iv
ENTERPRISE

50
e Cooper-Atkins HACCP ManagerTM Enterprise Tool/Bridge* is part of the HACCP Manager Enterprise Database system. It is
used to program network settings into your Handheld, assist in communication between the non-Wi-Fi Handheld and the database,
and update rmware for both types of Handheld.
One of the roles the HACCP Manager Network Tool is used for is programming the address of the HACCP Manager Enterprise
Database, as well as your Wi-Fi network credentials, into a Wi-Fi enabled HACCP Manager Handheld (model 37500). is is done on
the “Network Settings” tab.
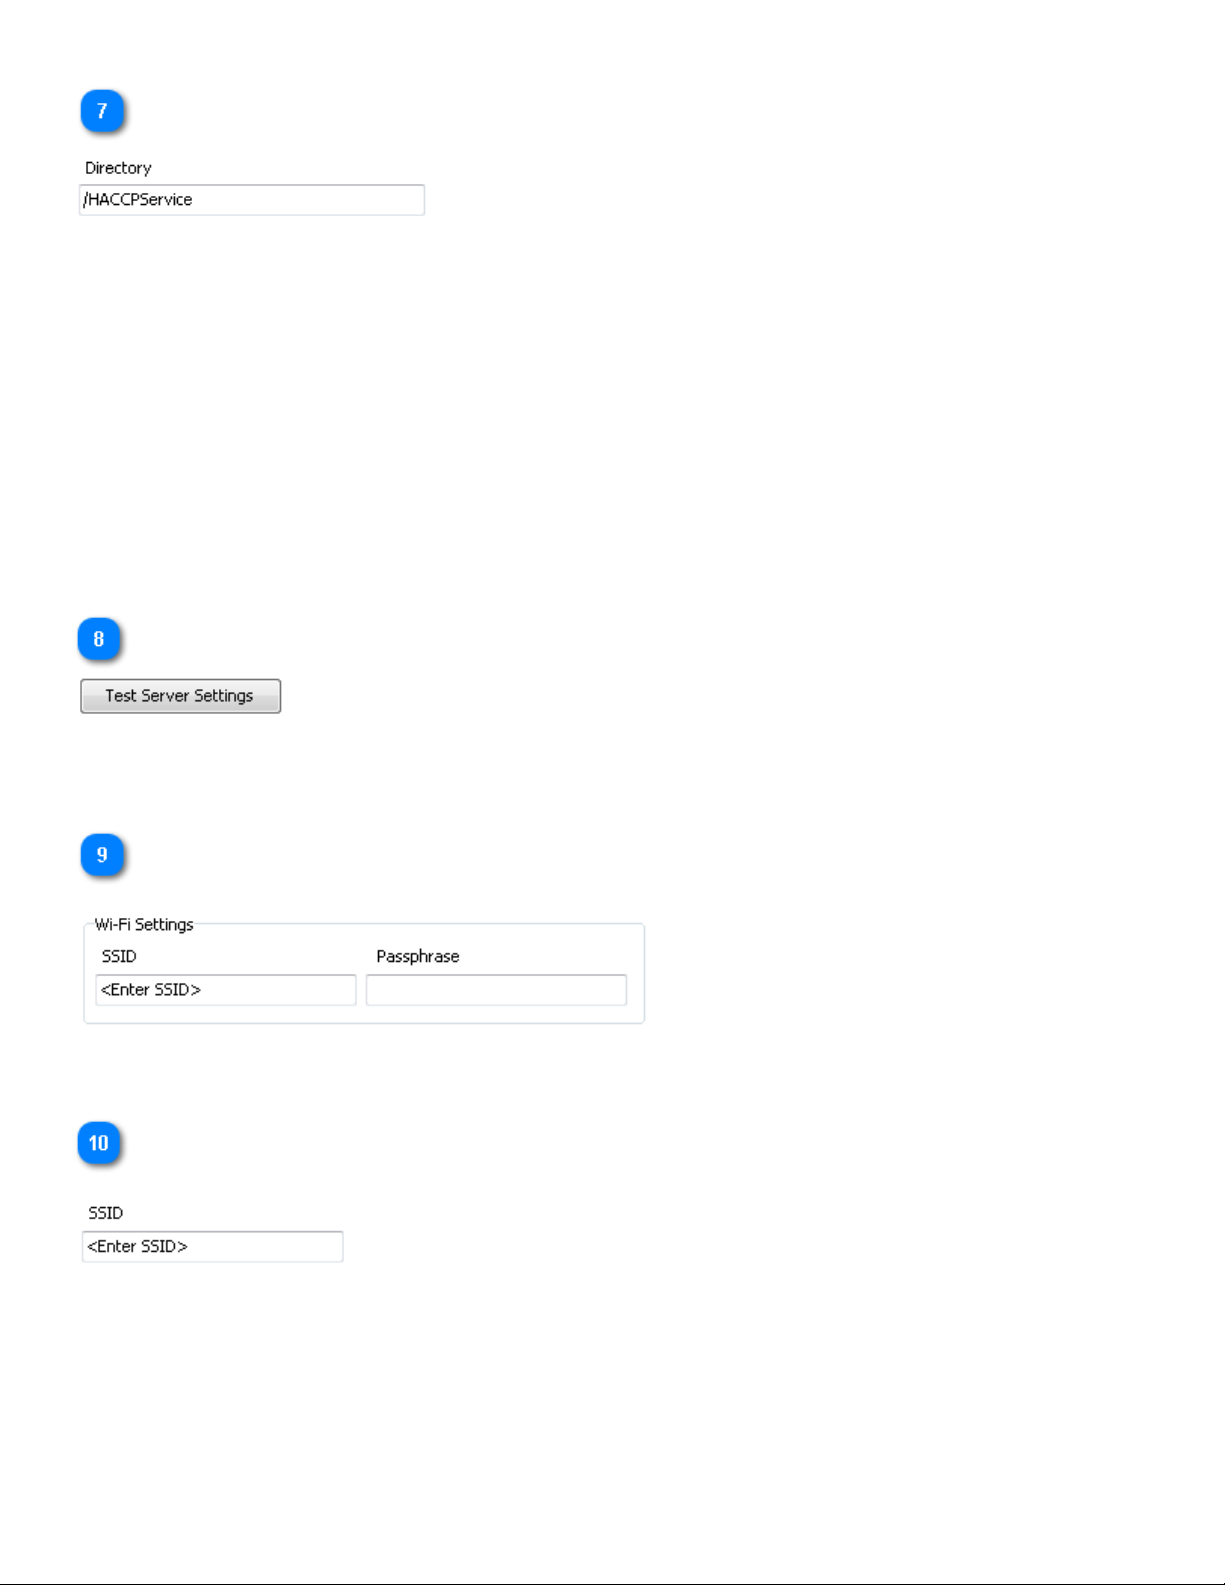
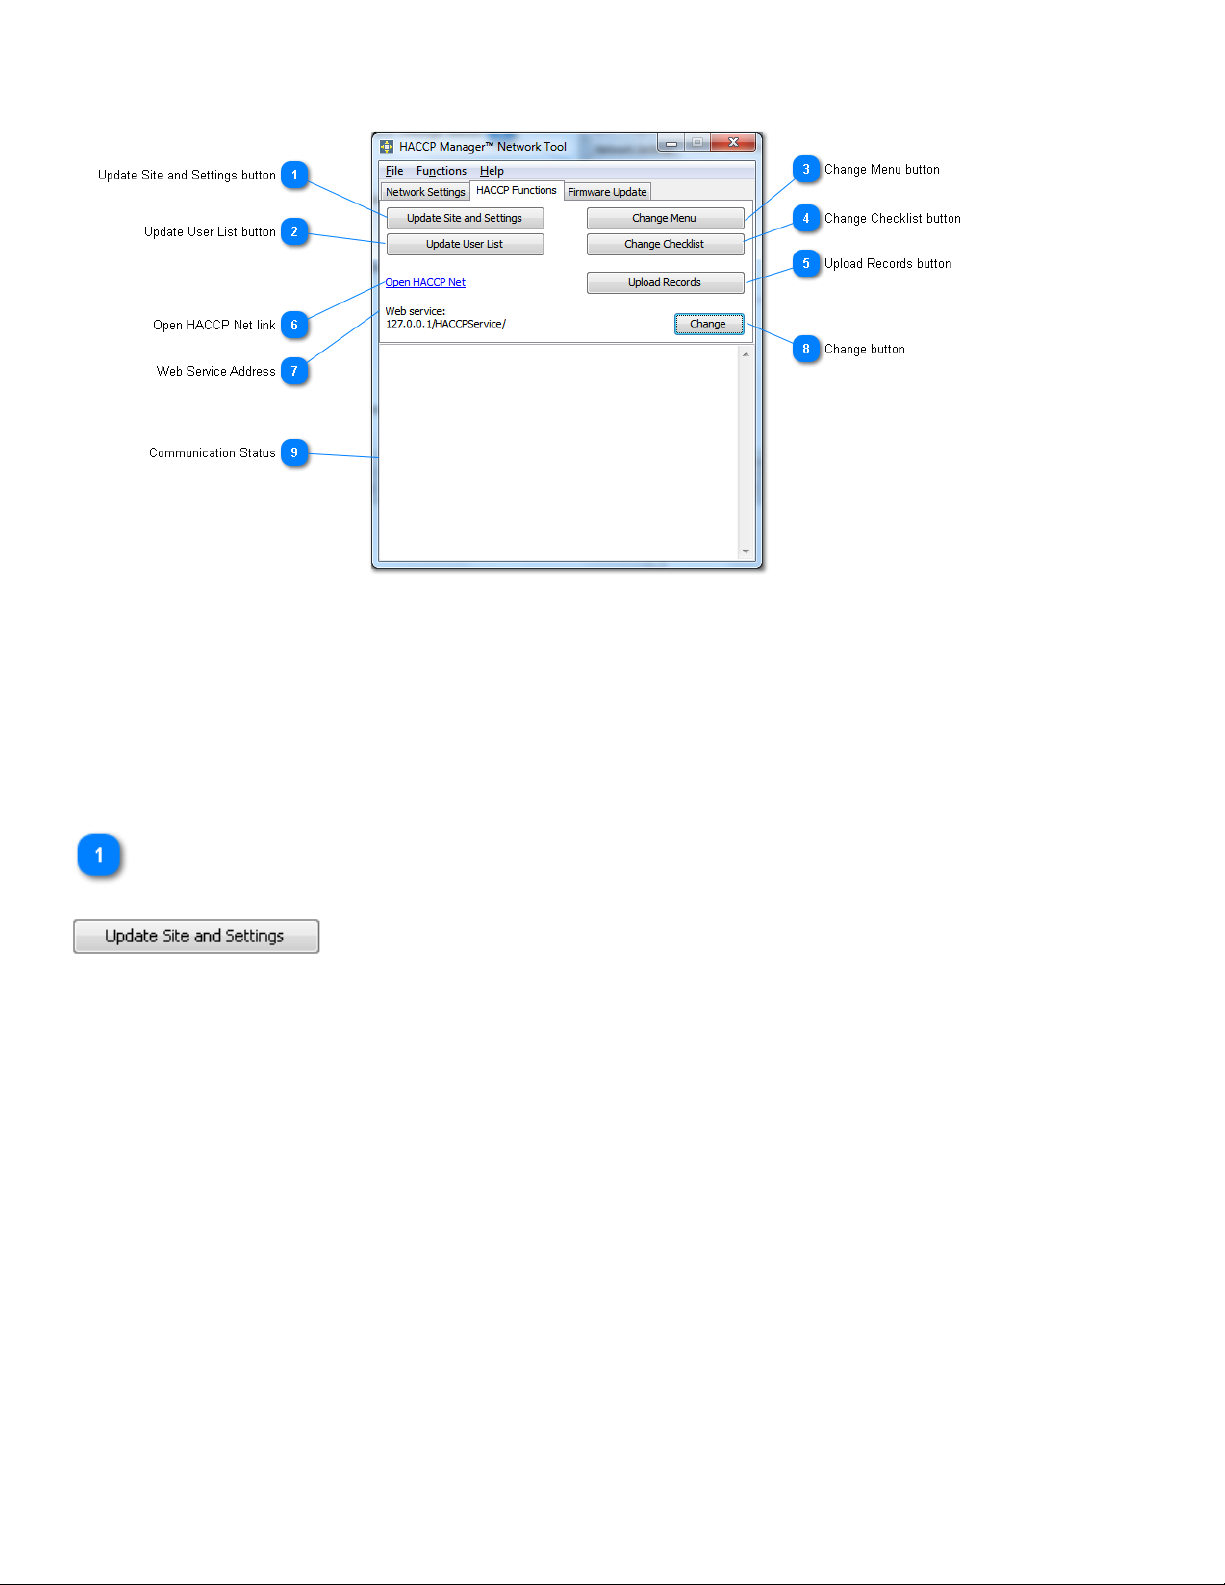
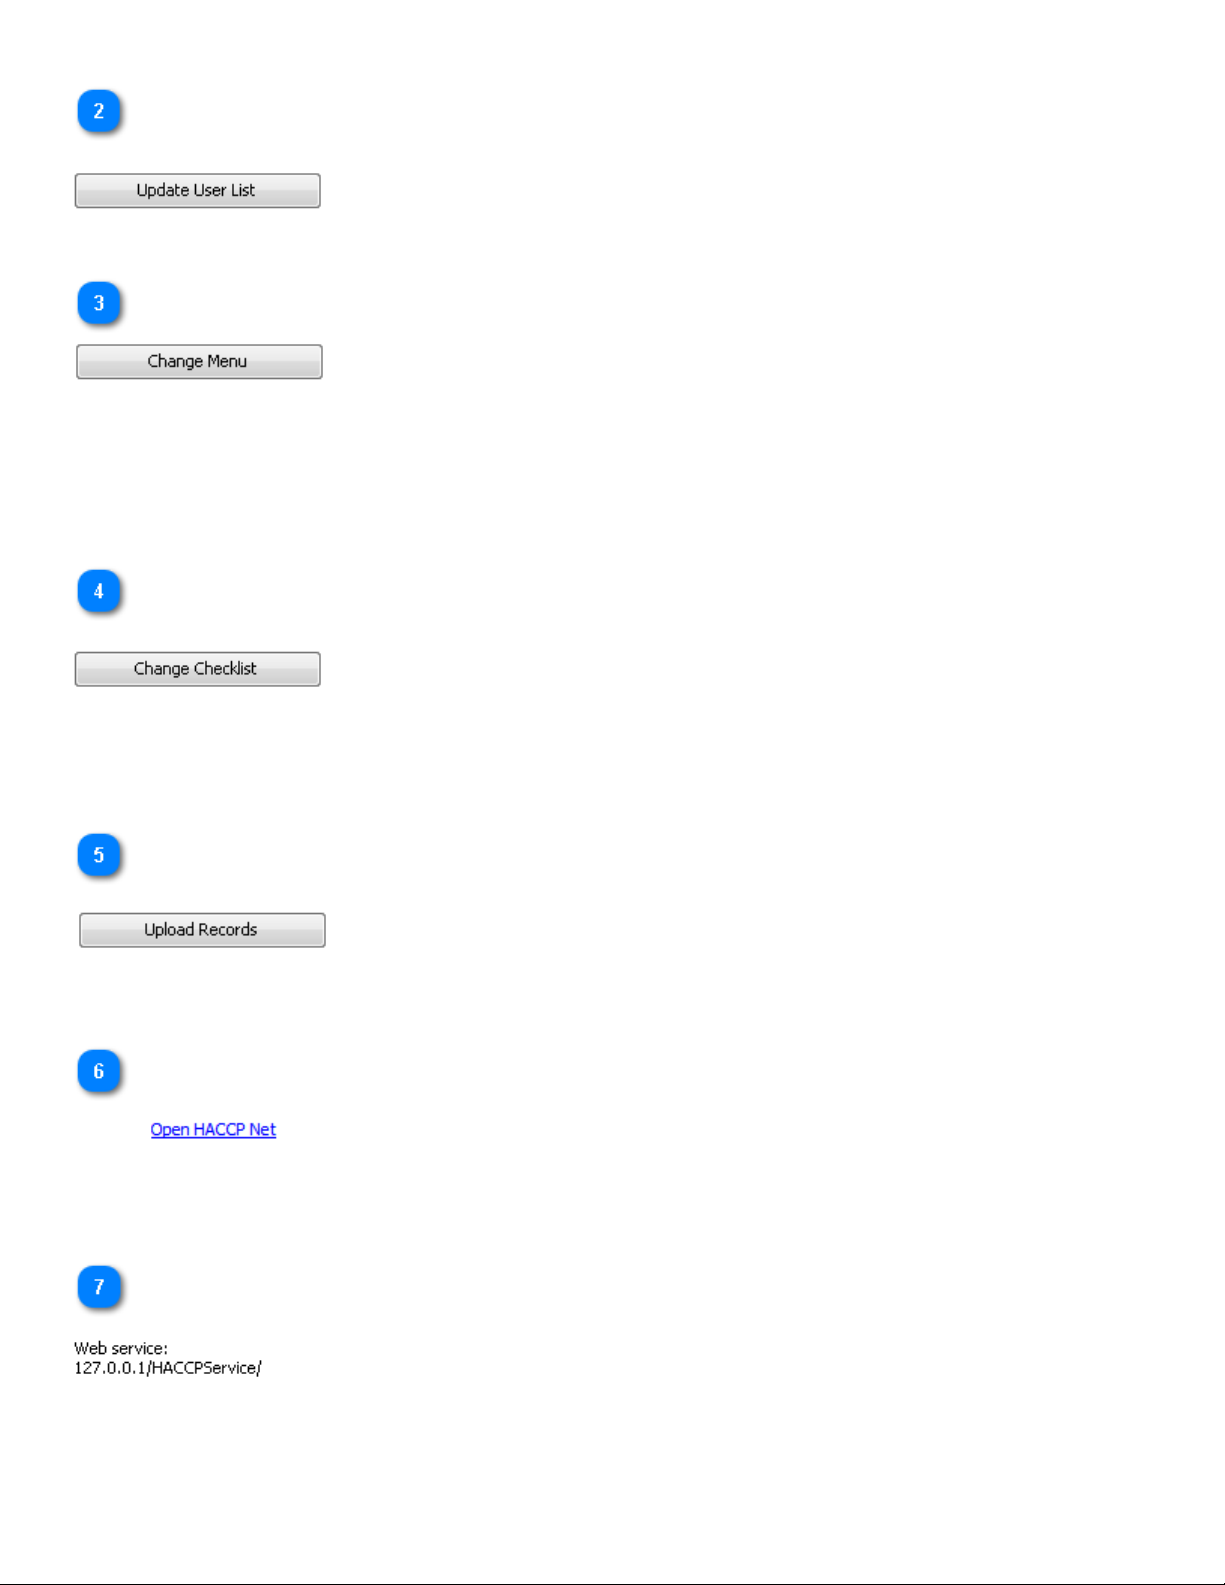
e HACCP Manager Network Tool can also be used to allow a non-Wi-Fi enabled Handheld (model 37200) to communicate with
the HACCP Manager Enterprise Database through a USB cable and the computer’s existing network connection. In this respect, the
HACCP Manager Enterprise Tool bridges the communication gap between a USB-only Handheld and the web-based database. As
such, the HACCP Manager Network Tool is sometimes referred to as the “Bridge”. e controls for this are located on the “HACCP
Functions” tab.
Lastly, the HACCP Manager Enterprise Tool can be used to update the rmware of your Handheld. Periodically Cooper-Atkins will
release updates to the Handheld rmware, which may include bug-xes or feature enhancements. ese updates can be downloaded
from the Internet and loaded into your Handheld using the controls on the “Firmware Update” tab. By upgrading the rmware in a
HACCP Solo Handheld (model 37100) using the Bridge, you can make it a HACCP Manager Enterprise Handheld instrument (model
37200).
*e two terms, “HACCP Manager Network Tool,” and “Bridge,” are synonymous�
Denitions
37200
e model 37200 is a basic HACCP Manager Handheld. is Handheld communicates via USB cable and requires the Bridge to
communicate with the HACCP Manager Enetrprise Database.
37500
e model 37500 is similar to the basic 37200 HACCP Manager Handheld, with the addition of a Wi-Fi module. is handheld’s
primary means of communication with the HACCP Manager Enterprise Database is via a Wi-Fi connection, however, the instrument
can also communicate via USB cable using the Bridge in the event a Wi-Fi connection cannot be established.
Bridge
Another name for the HACCP Manager Network Tool.
Device ID
A unique string of characters used to identify a particular HACCP Manager Handheld. is string is set at the factory and cannot be
changed.
HACCP Manager Network Tool
An application used to program network settings into your Handheld, assist in communication between the Handheld and the
database, and update Handheld rmware. is application is also referred to as the Bridge.
SSID
SSID stands for Service Set Identier and is the public name of a wireless network.
Web service
A standardized means of communicating with a web application.
HACCP Manager™ Enterprise Tool/Bridge

51
Network Settings
e Network Settings tab is used for setting the address of the HACCP Manager Enterprise Database, as well as sending this address
along with your Wi-Fi network credentials to a Wi-Fi enabled HACCP Manager Handheld (model 37500).
Server Settings
e Server Settings area in the Network Settings tab is used to set the location of the HACCP Manager web service. is information
gets sent to a Wi-Fi-enabled HACCP Manager Handheld and is also used by the Bridge when sending HACCP function requests to
the web service.
Server Naming Convention
e server naming convention radio buttons are used to select how you will identify the HACCP Enterprise server: by hostname or IP
address. e elds in the Server Settings area will change depending on which naming convention is selected.
Protocol
e protocol box allows you to select which protocol you will use when accessing the web services on you HACCP Enterprise Server.
is eld is only available if “Host Name” is selected as the naming convention.

52
HTTP communicates through port 80 on the server. HTTPS communicates through port 443 on the server. To use a port other than
80 or 443, select “IP Adress and Port” as the naming convention.
See also:
• Host Name
• Directory
•
Host Name
is is where you specify the hostname of the HACCP Enterprise server. is eld is only available if “Host Name” is selected as the
naming convention.
See also:
• Protocol
• Directory
Server IP Address
e Server IP Address edit eld is used to set the IP address of the server hosting the HACCP Manager web services. is eld is only
available if “IP Address and Port” is selected as the naming convention.
See also:
• Port
• Directory
Port
e Port edit eld is used to set the port which the HACCP Manager web server is congured to allow HTTP connections through.
e default is 80.
is eld is only available if “IP Address and Port” is selected as the naming convention.
See also:
• Server IP Address
• Directory
HTTPS is not available for all versions of HACCP Bridge
e hostname can only be up to 32 characters. If the hostname of the HACCP Enterprise server is longer than 32 characters,
select “IP Address and Port” as the naming convention and enter the server IP address.

53
Directory
If the HACCP Manager web services are installed in a virtual directory or sub-directory of the web server indicated in the Server IP
Address eld, type the path to the directory here. For example, if the web services (ProcessRequest.svc) are located:
127.0.0.1/HACCPService/ProcessRequest.svc
You would enter:
“127.0.0.1” as the Server IP Address and
“/HACCPService” as the Directory.
For hosted solutions, the default virtual directory is “/HACCPService.” If the web services are installed in the root of the server, leave
this eld blank.
See also:
• Server IP Address
• Port
Test Server Settings button
Once you have either the Protocol, Host Name, and Directory or the Server IP Address, Port, and Directory set correctly, you can test
access to the web services on the HACCP Enterprise server with this button. A success or failure message will be displayed in the
Server Connection Status box.
Wi-Fi Settings
e Wi-Fi Settings area in the Network Settings tab is used to set the credentials of your Wi-Fi network. is information gets sent to
a Wi-Fi enabled HACCP Manager Handheld so it can access the web services through your Wi-Fi network.
SSID
Your Wi-Fi network access credentials need to be programmed into your Wi-Fi enabled HACCP Manager handheld instruments. To
do so, enter the name of your Wi-Fi network here in the SSID eld.
See also:
• Passphrase

54
Passphrase
Your Wi-Fi network access credentials need to be programmed into your Wi-Fi enabled HACCP Manager handheld instruments. To
do so, enter the password or passphrase of your Wi-Fi network here in the Passphrase eld.
See also:
• SSID
Send to Handheld button
Once your Wi-Fi settings and Server settings have been entered correctly, click this button to send these credentials to a Wi-Fi
enabled HACCP Manager handheld instrument.
Note: is button is only enabled when a Wi-Fi enabled HACCP Manager handheld instrument is powered on and connected to the
PC via USB cable.
Aer sending your Network Settings to the Handheld, you must apply and test the settings on the Handheld. To do this, disconnect
the Handheld from the PC and choose “Test Wi-Fi Settings” from the “Wi-Fi Menu” accessible from the Handheld’s “Main Menu.”
Server Connection Status
is box displays information regarding your connection when you click the Test IP/Port Connection button or the Test Web Service
button.

55
HACCP Functions
e HACCP Functions tab provides a way for all HACCP Net handheld instruments (model 37200 and 37500) to communicate with
the HACCP Manager Networked Database through a USB cable, using the PC’s existing network connection.
In order to use the functions on this tab, the handheld instrument’s Device ID must be registered to a Site through the HACCP
Manager Networked Database system’s web application, and the address of the web service must be set on the Network Settings tab.
You would typically then update the Handheld’s site information, settings, and user list next, using the Update Site and Settings and
Update User List buttons.
Update Site and Settings button
e rst step in using the Bridge to communicate with the database is to associate the Handheld with the site it is registered to by
clicking Update Site and Settings. is retrieves the site name and other information from the web server and sends the information
to the Handheld. is function also sets the Handheld time and date. Aer retrieving site information, the Bridge retrieves Handheld
settings from the web server and applies them to the Handheld.
e combination of site information and Handheld settings includes the following:
• Backlight intensity
• Auto-o timer
• Custom information
• Temperature scale
• Auto-advance setting
• Record preview setting
• User PIN requirement
• Time & Date
• Time Zone
• Site Name
e Handheld site information and settings cannot be changed while the Handheld has records. You must rst upload the records
with the Upload Records button.

56
Update User List button
e Update User List button retrieves a list of Handheld users from the web server and sends it to the Handheld.
e user list cannot be changed while the Handheld has records. You must rst upload the records with the Upload Records button.
Change Menu button
To change the menu loaded in the Handheld, click the Change Menu button. e Bridge will retrieve a list of available menus from
the web server and present them to you. Select the menu you want loaded into the Handheld and click Ok.
e selected menu will be loaded into the Handheld along with the corrective action list.
e menu cannot be changed while the Handheld has temperature records. You must rst upload the records with the Upload
Records button.
Change Checklist button
To change the checklist loaded in the Handheld, click the Change Checklist button. e Bridge will retrieve a list of available check-
lists from the web server and present them to you. Select the checklist you want loaded into the Handheld and click Ok.
e checklist cannot be changed while the Handheld has checklist records. You must rst upload the records with the Upload
Records button.
Upload Records button
To upload the records in the Handheld, click the Upload Records button. is will read all of the temperature and checklist records
from the Handheld and send them to the web server. Once all of the records have been conrmed by the web server, the records are
cleared from the Handheld.
Open HACCP Net link
Clicking this link opens the login page of your HACCP Net application. By default, the link uses the IP address you entered in the
Network Settings tab. You can manually edit the address this link uses by clicking “File” in the menu bar and selecting “Change
Login URL.”
Web Service Address
is displays the address of the web service the Bridge communicates with. If you get error messages in the Communication Status
box, these settings may be incorrect. You can modify the address by clicking the Change button.

57
Change button
Click the Change button to bring up the Network Settings page, where you can modify the address of the web service which the
Bridge communicates with.
Communication Status
is is where you can view messages and status updates related to the HACCP functions.
Firmware Update
Cooper-Atkins may release periodic updates to the Handheld rmware, which could include bug-xes or feature enhancements.
ese updates can be downloaded from the Internet and loaded into your Handheld.
Depending on your IT security environment, you may need to whitelist the HTTP le server or allow access through your rewall for
the HACCP Manager Network Tool. e rmware download consists of ve text les downloaded via HTTP from:
http://www� cooper-atkinsupdates� com

58
Check for updates button
To check for updated versions of the HACCP Manager Handheld rmware, click the Check for updates button. is will cause the
application to download the latest version of the Handheld rmware.
To load the recently downloaded rmware into your Handheld, click the Update Handheld button.
Update Handheld button
e Update Handheld button puts the HACCP Manager Handheld unit into “bootloader”mode and loads in the appropriate rm-
ware. To get the latest version of rmware for your Handheld, click the Check for updates button. While in “bootloader” mode, the
display on the Handheld is disabled and the unit appears to be o. Do not disconnect the Handheld until the rmware update is
complete and the Handheld screen comes back on.
e rst time your Handheld enters “bootloader”mode, Windows will launch the “Found New Hardware Wizard� ”Wait for the
device driver installation to complete. e “Found New Hardware” message will indicate when the driver is installed.
Progress bar
e progress bar will show you the progress of writing and verifying the Handheld rmware update. Do not disconnect the Hand-
held until the update process is complete.
Firmware Update Status
e Firmware Update Status box will display progress and status messages regarding the update operation.

59
Converting Menus & Checklists from HACCP Solo
When migrating from HACCP Solo to HACCP Enterprise, it is not necessary to rebuild all of your existing menus and checklists.
Using the Bridge, you can convert existing HACCP Solo menus (*� hmm) and HACCP Solo checklists (*� chk) into a format that can
be imported into HACCP Enterprise.
Convert HACCP Solo Menu
To convert an existing HACCP Solo menu into a format that can be imported into HACCP Enterprise, simply click on the Convert
HACCP Solo Menu option on the File menu and select the menu to convert. A le of the same name, but with a le extension of *.
xml will be created in the same folder. So for instance, if you are converting a menu le called “MondayTemperatures� hmm,”the new
le will be called “MondayTemperatures� xml� ”
Select the new *� xml le when importing to HACCP Enterprise.
Convert HACCP Solo Checklist
To convert an existing HACCP Solo checklist into a format that can be imported into HACCP Eneterprise, simply click on the
Convert HACCP Solo Checklist option on the File menu and select the checklist to convert. A le of the same name, but with a le
extension of *. xml will be created in the same folder. So for instance, if you are converting a checklist le called “ClosingChecklist�
chk,”the new le will be called “ClosingChecklist� xml� ”
Select the new *� xml le when importing to HACCP Enterprise.

60
The HACCP Manager Handheld
e Splash Screen is displayed for 5 seconds every time the Handheld is powered on, or when the user presses the le navigation
arrow button from the Main Menu. e user may press the power/select button on the keypad to dismiss the splash screen
immediately.

61
Firmware Version
Indicates the rmware version operating on the Handheld.
Site Name
Displays the name of the site to which this Handheld is registered. e Site Name is sent to the Handheld when the “Update Site and
Settings” button is clicked.
Custom Information
Line 1 & Line 2 of Custom Information will be displayed when the Handheld is rst powered on, or when the splash screen is
displayed. Each line can be up to 24 characters. is may be any information that describes the Restaurant name, the department or
shi that the Handheld is assigned to, or any other internal, custom information that is meaningful.
e Custom Information is sent to the Handheld when the “Update Site and Settings” button is clicked.
Device ID
e Device ID# is a unique, read-only value, assigned during the manufacturing process, and is used to identify which Handheld
device was used to collect specic temperature records.
Calendar/Clock
e Handheld has an internal clock and calendar that is used to mark the time and date of the temperature records. e time and
date are set when the “Update Site and Settings”button is clicked. e calendar will compensate for leap year up to 2099. However,
the clock does not adjust for Daylight Saving Time. If the server adjusts for Daylight Saving Time then the Handheld clock can be
adjusted by selecting the “Update Site and Setting” option.
Keypad

62
Scroll Up Key
Use this keypad button to move the list selection up.
Navigate Left
Use this keypad button to navigate between screens or other options.
Scroll Down Key
Use this keypad button to move the list selection down.
Navigate Right
Use this keypad button to navigate between screens or other options.
Power / Select
Use this button to turn the Handheld power on or o. To turn o the Handheld, press and hold this button for two seconds. is
keypad button is also used to select the highlighted list or menu item.
USB Connector
Data communication between the database and the 37200 Handheld is accomplished using the Universal Serial Bus (USB) and the
HACCP Manager Network Tool. For Wi-Fi users using the 37500 Wi-Fi Handheld, communication is as above with the option of
utilizing Wi-Fi.

63
The Main Menu
Select User
In this example “Barbara” has elevated permissions (indictated by the “+”).
Select User Window
In this example “Barbara” has non-elevated permissions. Use the up and down scroll arrows on the keypad to move the selection,
then press the power/select button to select the highlighted user name.
Select
Press the power/select button on the Handheld keypad to select the highlighted user.
Changing Menu/Checklist in the main menu requires elevated permissions. Users with elevated permissions are identied by the “+”
next to their name.

64
Go to the Main Menu
Press the le navigation arrow button on the keypad to return to the Main Menu.
Scroll Down
is indicates that the keypad down arrow may be used to scroll down to the next user name. Use the up arrow to scroll up to the
previous user name.
Battery Life Indicator
Indicates battery life remaining before recharge is required. When the battery gets low the indicator will turn to red and a message
will appear on the display once every minute to remind the user to recharge soon. Use of the Handheld can continue until the battery
life reaches a critical point. e Handheld will not permit further use until the battery is recharged.
See also:
• Battery Charging
Select Location
Checkmarks
Checkmarks are shown when items (or equipment) in a location have been recorded.
On the Select Location menu, a dot will appear beside a location to indicate that some items in that location have been checked.
When all items in a location have been checked, a checkmark will appear beside the location.

65
Scroll Up
is indicates that the keypad up arrow may be used to scroll up to the previous location.
Use the up and down navigation arrows on the keypad to move the selection, then press the power/select button to select the high-
lighted location.
Select
Press the power/select button on the keypad to select the highlighted location.
Items and equipment in this location will appear on the display (See, “items & Equipment on the Handheld”).
Main Menu
Press the le arrow button on the keypad to navigate to the Main Menu.
Select Item or Equipment
Scroll Up/Down
Press the up or down scroll arrows to move the selection to the desired list item.
Checkmarks
Checkmarks are shown when the item (or equipment) has been recorded.
See also:
• Clear All Checkmarks
• Select Location

66
Select
To choose an item from the list, press the power/select button on the keypad.
Locations
To return to the Select Location list, press the le arrow button on the keypad.
Measure the Temperature
Item Description
is is the description of the selected item or equipment.
Temperature Limits
is is the allowable temperature range for the selected item- here the allowable range for a “good” temperature can be from140°F to
170°F. An item may have a minimum, maximum, both, or neither.
Measurement Stability Indicator
Reaching a “stable” temperature ensures that your HACCP Manager system is collecting valid data. Recording a temperature before
it stabilizes adds unnecessary risk. As the reading stabilizes, the center line moves closer to horizontal. Once stable, the HACCP
Manager Handheld will determine if that stable reading falls within your preset limits and display in blue (too cold), red (too hot), or
green (within limits).

67
Current Temperature
e current temperature of the item being measured- here the current temperature of the “Drawer 1”- is 154. 0°F and is within the
allowable range, and the measurement stability indicator will be displayed in green.
Available Memory
is indicates how many more records the Handheld memory can accept before it is full. When the memory is full, no additional
temperatures can be recorded. e Handheld must be uploaded to the database and the Handheld memory must then be cleared.
While the Handheld memory is full, temperatures may still be measured using the ermometer mode.
Current Date & Time
is is the current date and time settings of the Handheld and is also used to “time stamp” each temperature record.
Keypad Options
To return to the Select Item list, press the le navigation arrow button. To record the temperature, press the power/select button.
To mark this item as not applicable, press the right navigation arrow button.
Record the Temperature
While measuring the temperature of an item or piece of equipment, press the power/select button.

68
Record Preview
e Record Preview screen displays the information that will be saved with the temperature record. It allows you to be certain you
have selected the proper corrective action, or if not, to change the corrective action.
Use the up/down scroll buttons to select either “Save” or Change Corrective Action option and then press the power/select button.
When the temperature is within limits and no corrective action is required, the record preview screen may be skipped to save time.
Corrective Actions on The Handheld
When a temperature is recorded that is outside of the allowable temperature range, a corrective action must be added to the tempera-
ture record to later indicate what action was performed to address the out of range temperature.
Temperature Data
e allowable temperature range for this item is between 35°F (shown in blue) and 40°F (shown in red).
e measured temperature for this item is 30. 0°F shown in blue because it is below the minimum allowed temperature, and a correc-
tive action must be selected.
Corrective Actions Window
e available corrective actions are listed. Use the up and down scroll arrow buttons on the
keypad to highlight the appropriate action. Here the “Notify Manager” action is
is highlighted.
e auto shuto feature is disabled while the Corrective Actions screen is displayed.
This manual suits for next models
1
Table of contents
Other Cooper Atkins Measuring Instrument manuals
Popular Measuring Instrument manuals by other brands

Emerson
Emerson MICRO MOTION HFVM Series Configuration and Use Manual

SIGRIST
SIGRIST AquaScat 2 WTM Series instruction manual

PCB Piezotronics
PCB Piezotronics IMI SENSORS ICP M628F01 Installation and operating manual

Pulsar
Pulsar FlowCERT LITE instruction manual

emitor
emitor DIGIAIR PRO user manual

Hanna Instruments
Hanna Instruments BL 7916 instruction manual