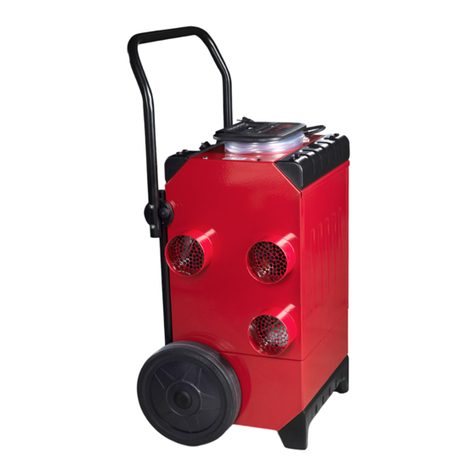
CorroVenta K5 ES HP PX User manual

K5 ES HP PX
CONDENSING DRIER
USER MANUAL

CORROVENTA LTD
Unit 29, Irlam Business Centre, Irlam, Manchester,
England, M44 6GP • Tel +44 (0) 161-2449523
www.corroventa.com
DO YOU HAVE ANY QUESTIONS OR DO YOU NEED OUR SUPPORT?
Please visit www.corroventa.com or call us at +44 (0)161-244 95 23 and speak to an expert.
We have the knowledge and the equipment to find a solution as eciently as possible.
Corroventa develops, manufactures, sells and hires out high quality products for
dealing with water damage, moisture, odours and radon. We are market leaders
and specialise in innovation within the industry. Our products are compact, eec-
tive, ergonomic and energy ecient. In emergency situations and during flooding,
Corroventa’s customers have access to one of the largest rental parks in Europe.
We have sales oces and machine depots in several locations throughout Europe.
All our manufacturing takes place in Bankeryd, Sweden.
www.corroventa.com

© Corroventa Ltd.
2017.07
1 (31)
Table of Contents
Area of use........................................................................................................................................... 2
Delivery check ..................................................................................................................................... 2
Manufacture directive......................................................................................................................... 3
Safety information............................................................................................................................... 4
This is how the dryer works................................................................................................................. 5
Overview, controls and connections................................................................................................... 7
Electrical connection ........................................................................................................................... 8
Starting and operating......................................................................................................................... 8
User instructions ES product family .................................................................................................... 9
Intended use.................................................................................................................................... 9
ES product family, menus and operation.......................................................................................... 10
Control mode and hysteresis ............................................................................................................ 20
Alarms................................................................................................................................................ 22
Network functions............................................................................................................................. 23
Connecting machines to a Network .................................................................................................. 24
Service reminder ............................................................................................................................... 25
Transportation................................................................................................................................... 25
Storage .............................................................................................................................................. 26
Bucket................................................................................................................................................ 27
Maintenance and service .................................................................................................................. 28
Accessories and consumables ........................................................................................................... 30
Fault tracing........................................................................................................................................... 30
Technical data ....................................................................................................................................... 31

© Corroventa Ltd.
2017.07
2 (31)
User instructions K5 ES HP PX
Area of use
Condensing dryer K5 ES HP PX is primarily intended for professional use. It has been specially
developed for use in occupied areas in event of emergency damage or where it is difficult to
eliminate the humid air from an adsorption dehumidifier or run-off water from a more stationary
condensing dryer. K5 ES HP PX has a built-in pump to allow continuous operation and a bucket for
occasions when it is difficult to get rid of condensation water. K5 ES HP PX is compatible with and can
be used together with Supervision for remote control and monitoring.
Properties:
•High capacity level
•Robust
•Fan has high and low speeds, quiet
operation
•Demand controlled defrosting
•Easy to transport
•Stackable
•Service-friendly
•Easy-to-understand user interface
•Very compact
•Low weight
•Ergonomic
•Energy efficient
•Portable and rollable
•Digital interface with network
function
•Energy and time meter –resettable
work counter
•K5 ES HP PX has an extra heater with
full temperature control that
improves the drying effect
Delivery check
K5 ES HP PX is delivered fully assembled and ready to use.
The packaging contains:
Designation
K5 ES HP PX Dryer Corroventa

© Corroventa Ltd.
2017.07
3 (31)
Manufacture directive
Condensing dryer K5 ES HP PX is CE approved.
Disclaimer
•Incorrect installation and/or incorrect use can cause property damage as well as injury.
•The manufacturer assumes no liability for damage arising as a result of failing to follow these
instructions. Such damage is not covered by the warranty.
•Changes or modifications to the machine must not be performed without written
permission from Corroventa Avfuktning AB.
•The product, technical data and/or installation and operating instructions are subject to
change without notice.
•These user instructions contain information protected by copyright laws. No part of this
document may be reproduced, stored in an information storage system or transmitted in
any way or by any means without Corroventa AB's written consent.
Any comments regarding the content of this document must be sent to:
Corroventa Avfuktning AB Tel +46 (0) 36-37 12 00
Mekanikervägen 3 Fax +46 (0) 36-37 18 30

© Corroventa Ltd.
2017.07
4 (31)
Safety information
The device can be used by children over 8 years old and people (including children) with reduced
physical, sensory or mental capabilities, or lack of experience or knowledge, if they have received
guidance or information on how to use the device safely and understand the risks that may occur.
Children must not play with the device. Cleaning and maintenance must not be carried out by
children without the supervision of an adult.
Electrical installations carried out in connection with the dryer installation must be done by a
qualified electrician in accordance with local and national regulations.
1. The dryer is only intended for indoor use.
2. The dryer must not be covered during operation, as this may cause overheating and fire.
3. The dryer's protective covers and shields must always be in place during operation.
4. The dryer must not be used as a work table, trestle or stool.
5. The dryer is not intended to stood or climbed on.
6. Never operate the dryer without installing the filter as this may damage the dryer. Ensure
that the filter is clean. If it is blocked, the machine may overheat.
7. Avoid sucking oil, grease or similar into the dryer.
8. The dryer may not be used in areas where it can produce explosive gases.
9. Do not insert objects into the intake or exhaust vents as this could damage the dryer and
people.
10. The machine must be used and transported upright.
11. The dryer must always be upright when it is in operation. Place the dryer on a firm and flat
surface so that it cannot overturn.
12. Do not damage the electrical cable. Extension cables must be intact and of the right quality
and dimension. They must nor run through water or over sharp edges.
13. Never carry or drag the dryer by the electrical cable or the drain hose.
14. Using electrical equipment in very damp or wet conditions can be dangerous. Do not operate
the dryer if it is standing in water.
15. Always use an earth-fault breaker to minimise the risk of electric shock.
16. Water must not come into contact with the dryer's electrical components. If it does, ensure
that they are dried thoroughly before the dryer is used again.
17. Never open the dryer for cleaning or service without first ensuring that the dryer is
disconnected from power.
18. Repairs and maintenance of the dryer's cooling system must be performed by a qualified
refrigeration engineer.
19. Repairs and maintenance of the dryer's electrical system must be performed by a qualified
electrician.
20. The dryer must not be used with accessories other than those described in this manual or
approved by Corroventa Avfuktning AB.
21. The dryer must be placed at a distance of at least half (0.5) a metre from walls and ceilings to
ensure that air can circulate.
Contact the supplier of this dryer for further advice on the safety and use of the product.

© Corroventa Ltd.
2017.07
5 (31)
This is how the dryer works
5
2
9
4
1
1. Process air filter
2. Evaporator
3. Condenser
4. Drip tray/condensation filter
5. Overflow sensor
6. Float
7. Bucket
8. Compressor
9. Fan
10. Water pump
11. Additional heater
12. Defrosting valve
13. Electronic control
10
6
7
3
8
11
13
12

© Corroventa Ltd.
2017.07
6 (31)
The integrated fan (9) circulates the room air through the dryer. When the moist air passes through
the evaporator (2) it is cooled down to dew point and condensation water is deposited. The water
runs down into the bucket (7) via a condensation filter (4). The condensation water is evacuated from
there automatically
by the integrated water pump (10), which can manage a height of up to five metres. The pump runs
continuously and if it does not manage to drain the water because of a pinched hose or other fault,
the overflow sensor (5) activates, which stops the machine.
The dry and cold air then goes through the condenser (3) where it is heated, partly by the compressor
heater and partly by the energy recovered during the previous transformation of water vapour to
water. The dry and hot air is then blown into the premises again.
For optimal operation, machine defrosting is demand controlled and is only activated when the
temperature and humidity conditions are such that frost forms on the cooling coil.

© Corroventa Ltd.
2017.07
7 (31)
Overview, controls and connections
The images below show Corroventa K5 ES HP PX with its external parts and controls.
Process air filter
Filter
Connectors for hose
connection
Folding handle as well as cable/
condensation water hose
parking
Durable feet that
allow stackability and
prevent damage to
surfaces.
Connector for
connection of network
equipment.
Menu buttons
Switch on/off
Bucket
Folding handle/
Carry handle

© Corroventa Ltd.
2017.07
8 (31)
Electrical connection
The machine is connected to the earthed 230V/50Hz socket. K5 ES HP PX can be connected to a 10A,
max 16A, fuse.
Electronic control delays the start max 2 minutes.
Starting and operating
•Operating range humidity: 30-100% RH
•Operating range temperature: +3°C to +38°C
•The dryer must reach ambient temperature before starting, if stored in colder conditions.
1. Place the dryer on a firm and flat surface where it is not at risk of overturning. The surface
should not be sensitive to water as some spillage may occur, for example when handling the
bucket and condensation water hose.
2. The dryer can be positioned against a wall as illustrated. In all other cases, the dryer must be
placed at a distance of at least half (0.5) a metre from walls and ceilings to ensure that air
can circulate.
3. If possible, close doors and windows etc. to use all the dehumidification capacity in the
intended space rather than to dry the whole house/building. To minimise power
consumption, try to ensure that the ambient temperature is approximately 20°C.
4. If using a condensation water hose, ensure that it is routed to a drain, sink or similar frost-
free runoff for continuous operation.
5. The ambient temperature must be +3°C to +38°C.
6. K5 ES HP PX is equipped with demand controlled defrosting. If ice forms on the evaporator,
the dryer defrosts automatically with help from hot gas defrosting. The machine resumes
automatically when the evaporator is clear of ice.

© Corroventa Ltd.
2017.07
9 (31)
For use on sensitive surfaces, note the following:
When the machine is turned off, any frost on the evaporator thaws and, if there is a lot of frost, this
can cause spillage because the pump is off.
User instructions ES product family
Intended use
The adsorption dehumidifiers in the ES range have been developed and designed for drying water
damage and building moisture. The dehumidifiers can be used freestanding or in combination with
turbines, for pressure and suction drying of a layered construction for example.
Via the control panel, the user of K5 ES HP PX can optimise the operation for the intended job, set
the capacity and volume, control the fan as well as use integrated or external sensors for
temperature and relative humidity to achieve the desired effect in combination with the lowest
possible energy consumption. K5 ES HP PX can also be used in networks and is prepared for remote
monitoring and remote control. The unit has a folding carry handle designed for both pulling the
machine along the ground and for lifting it. It also has handles with holders for the electrical cable
and the hose, while its light weight means it is easy to carry, roll and install. The durable but flexible
feet protect the floor surfaces and also make it possible to stack the machines. The dehumidifiers
have a naturally robust construction that gives a long service life.

© Corroventa Ltd.
2017.07
10 (31)
ES product family, menus and operation
K5 ES HP PX has an easy-to-use user interface with a display and five buttons. The two larger buttons
on each side of the display are used to select between different menus. These buttons are only
intended for navigation and cannot be used to change the settings.
The three smaller buttons are used for selection and editing and their functions are always presented
as text at the bottom of the screen. On the upper menus, the left-hand button is called the HOME
button. One push of this button takes you straight back to the standard view. In many of the views
there is an Info button that presents information that can be useful for inexperienced users.
If the display's background lighting goes out after the preset time, the first button push only
illuminates the display.
If no button is pushed for ten minutes, a keylock is activated. The machine then must be unlocked by
pushing the two upper button simultaneously. This procedure is presented as text and as an image
on the display.
Upper buttons to the left and right –Only menu navigation. Never change
any settings.
Home button Return to standard view.
Info button Presents information.
Electronic user instructions.

© Corroventa Ltd.
2017.07
11 (31)
Capacity mode
Indicates the
selected capacity
mode, Max, Eco or
ΔX.
SuperVision
Appears when the
machine is
connected to
Supervision for
remote monitoring
and remote control.
Network status
”Master” or ”slave”
If the machine is
connected to a local
network this mode is
indicated if the machine
controls the network
(Master), or if it is
controlled by another
machine and thus is
Slave.
Timer
Indicates when the
machine is set to
timer mode.
Slave –indicates
that the machine is
being controlled by
another machine.
Alarms
The machine has
detected a fault.
Drying indicator
Moves when drying is
in progress and during
defrosting. Also shows
the start delay as well
as alarm symbol in the
event of high/low
ambient temperatures.
Fan indicator
Moves when the
fan is running.
Fan mode
Cont –continuous
fan.
If this information
does not appear,
the fan only runs
when drying is
required.
Control mode
Indicates how drying is
controlled, if it is
continuous (MAN =
manual) or if it works to
a preset setpoint for
Relative Humidity (RH),
Mixing ratio (X), or dew
point (DP). It can also be
controlled from an
external hygrostat
(HYG).
If an external sensor for
relative humidity and
temperature is used,
E.RF, E.X or E.DP appears
in this mode.
Additional heater
(ESX product family)
Appears when extra
heater is activated.
The symbol moves
when the extra
heater is connected.
Setting setpoint
The left and right
buttons below the
screen are used to
increase and
decrease the
setpoint that is
shown against a
black background.

© Corroventa Ltd.
2017.07
12 (31)
Start view
When K5 ES HP PX starts up, two options appear for
the user on the display:
Start: Starts the machine with standard settings,
continuous operation with maximum capacity.
Previous settings such as use of sensor control, timer
etc.
Resume: The machine resumes operation with the
same settings that previously applied.
If the user did not press the stop button before the
power was interrupted the last time the machine was
used, the machine will automatically resume operation
when the timer has counted down to zero.
The countdown can be stopped by pressing the Stop
button, which then switches the machines to standby
until it is started manually.
Normal start
Start after power cut –
automatic resumption of operation
Standard view
When K5 ES HP PX is in operation, the machine can
always be stopped (set to standby) using the middle
button below the display.
When the machine is running in a control mode instead
of in manual mode, the setpoint (which is marked with
black background in the middle of the screen) can be
increased or decreased using the negative (-) and
positive (+) buttons.
When the compressor has stopped, the start is delayed
for at least 120 seconds. The remaining time until start
appears in the round circle to the left.
Also shown here is whether the machine is defrosting
and if it has stopped and gives an alarm for too high or
too low ambient temperature.
In the event of a dehumidification process stoppage,
the fan runs-on for post cooling for 120 seconds.
Standard view graphics. The machine is
running.

© Corroventa Ltd.
2017.07
13 (31)
Control mode
In control mode, it is determined whether drying
should occur continuously (MAN - manual mode) or is
only to be activated when necessary, on the basis of
the ambient climate.
The selected control mode is displayed in the lower,
left-hand corner in standard view.
Open the screen for selecting control mode by pressing
the upper, right-hand button.
The following basic control modes are available:
MAN
Manual, continuous drying.
RH
Dehumidification for selectable relative
humidity (%).
X
Dehumidification for selectable mixing
ratio (g/kg).
DP
Dehumidification for selectable dew point
(°C).
HYG
Dehumidification is controlled by an
external hygrostat that is connected to
the machine.
Thanks to its network functions, you can also connect
the machine to external temp. and RH sensors, and use
their values to control operation, instead of the built-in
sensor for relative humidity and temperature. The
following modes for external sensors exist for this
purpose:
E.RH
Dehumidification for selectable relative
humidity (%) according to the input
values from the external temp and RF
sensor(s) that are connected to the
machine.
E.X
Dehumidification for selectable mixing
ratio (g/kg), according to the input values
from the external sensor(s) that are
connected to the machine.
E.DP
Dehumidification for selectable dew point
(°C), according to the input values from
the external sensor(s) that are connected
to the machine.
The external control mode requires that the machine is
network connected and connected to an external temp.
and RH sensor. If the machine is not already connected

© Corroventa Ltd.
2017.07
14 (31)
to the network, the machine asks whether to create a
network.
If there are several sensors in the network and if the
<All< option has been selected (instead of a single
sensor, e.g. RHT61) the machine works on the "worst
case scenario" and runs for as long as any of the
sensors detects that the humidity is above the setpoint.
If the machine selects a mode other than MAN, the
user will note that the setpoint can be set.
When the setpoint has been reached, drying stops
automatically. If the humidity later rises above the
setpoint again, drying resumes automatically.
Hysteresis
When one of control modes; RH, DP or X is selected, a
symbol and a hysteresis value appears to the right of
the display.
The symbol shows the setpoint value's position in the
operation range as below.
↕ - centre
↓ - bottom
↑ - top

© Corroventa Ltd.
2017.07
15 (31)
Capacity mode
The drying capacity of K5 ES HP PX can be optimised for
a given work task and situation with three different
operating modes.
When setting MAX (maximum) the machine works to
remove as much water as possible. If the machine's
total power is not required, it can instead be set to ECO
(eco-mode) where the energy consumption per litre of
removed water is minimised.
For localised water damage where the dry air quantity
is not required, the machine can be set to ΔX (ΔX
mode). In this mode, the machine produces a smaller
amount of even drier air that further accelerates the
drying process.
MAX
For maximum capacity.
•High fan speed
•Hot gas defrosting
•Min temp 3°C
•Max temp 38°C
•RH min 0 %
ECO
For minimal energy consumption per
litre of removed water.
•High fan speed
•Stop defrosting
•Min temp 14°C
•Max temp 38°C
•RH min 35 %
ΔX
For maximum ΔX, as dry air as
possible. Reduced air amounts
suitable for e.g. local, isolated water
damage.
•Low fan speed
•Hot gas defrosting
•Min temp 3°C
•Max temp 38°C
•RH min 0 %
Extra heater K5 ES HP PX
K5 ES HP PX is equipped with an additional heater that
increases the dry air temperature and thus improves
the drying effect further.
When this function is selected, an icon for the extra
heater appears below the fan symbol in standard view.
The extra heater is of course only active when the fan is
active.
Note! The extra heater may not be used if dry air is fed
into another machine, because it can overheat.

© Corroventa Ltd.
2017.07
16 (31)
Timer
K5 ES HP PX has an integrated timer function that
allows the user to determine when the machine is to
run. When the timer function is used, the word Timer
appears in the standard view's upper, right-hand corner
according to the graphic to the right.
Activate the timer by pressing the right-hand arrow
button four times to open the timer menu.
Press Activate.
When the timer has been activated, the machine begins
by prompting the user to check that the time and date
have been set correctly. If they have been, press OK. If
the time or date need changing, press Edit and adjust
the values before continuing.
In the next step the user can set the time interval that
the machine is to work within. The machine remembers
the timer settings from the previous time it was used
and shows its settings as the start values.
The Other time setting determines whether the
machine, during the day's remaining hours, must be in
standby mode or run at lower fan speed for minimal
noise.
Network
Note! Install all system cables before the machines are
started.
K5 ES HP PX has network functions that enable local
interaction between machines, for example pressure
drying and use of external sensors for relative humidity
and temperature control of the machine. The network
functions also prepare the machine for a future
SuperVision system that will allow remote monitoring
and remote control of the machines via Internet.
A network is established by installing the machines in
the intended way and connecting them to each other
using system cables before they are started.

© Corroventa Ltd.
2017.07
17 (31)
Open the network menu on the machine which is to be
master, i.e. control the others.
Press Create and wait while the machine establishes
the network. This can take up to one minute.
Once the network has been established, the display
switches between the slave units in the network menu.
These are indicated by type (e.g. A4) and bus address
(e.g. 101).
To change the settings for a slave unit, press Change
and select the slave unit. The background lighting for
the selected unit starts to flash to confirm that the unit
has been selected.
Desired settings can also be made directly on the
relevant machine.
Start the master machine when all desired settings
have been made. The slaves start automatically within
one minute. The machines are stopped in the same
way. Press stop on the master machine and the slaves
stop automatically shortly afterwards.
As the network is controlled by the master machine, a
slave unit that is started manually is stopped when the
master machine is in standby. In the same way, a slave
unit that is stopped manually is restarted manually
when the master machine is in operation.
Setup and maintenance menus
The setup and maintenance menus contain functions
that are not needed for normal operations.
Date and time: Setting system date and system time:
The format is YY:MM:DD / HH:MM.
Language: Language selection for the interface.
Menu system: The menu system is set to Advanced as
standard with all functions visible and available. If it is
set to Basic, the more advanced functions are removed
from the menu system.
Keylock: Option to activate/deactivate the keylock:
RH hysteresis: Option to adjust the hysteresis settings
for control mode RH. The setpoint's position in the
operation interval and the hysteresis value can be set
from here.

© Corroventa Ltd.
2017.07
18 (31)
Dew point (DP) hysteresis: Option to adjust the
hysteresis settings for control mode dew point (DP).
The setpoint's position in the operation interval and the
hysteresis value can be set from here.
Mixing ratio (X) hysteresis: Option to adjust the
hysteresis settings for control mode mixing ratio (X).
The setpoint's position in the operation interval and the
hysteresis value can be set from here.
Run built-in test: A built-in self-test that is available to
service technicians.
Reset service time: The machine is set to remind you
about a service once a year. Once the service has been
carried out, the service reminder can be reset using this
function.
See sensor data: Function intended for service
technicians.
Table of contents
Other CorroVenta Dryer manuals
Popular Dryer manuals by other brands

Whirlpool
Whirlpool LE5770XW Use and care guide

GE
GE Profile DPGT750 Owner's manual and installation instructions

Maytag
Maytag Atlantis MDG7400A user guide

Frigidaire
Frigidaire GLEQ221A Factory parts catalog

Parker
Parker domnick hunter DNC200 user guide

Quincy
Quincy QPNC354 Instruction and maintenance manual

Whirlpool
Whirlpool Duet GEW9250PW Use & care guide

Candy
Candy GO DV58GF Instruction book

Miele
Miele TXD 160 WP operating instructions

Fast Mover
Fast Mover FMT6900 Series instruction manual

American Dryer Corp.
American Dryer Corp. MLG-122DR installation manual

Bosch
Bosch WTWH762BY User manual and installation instructions