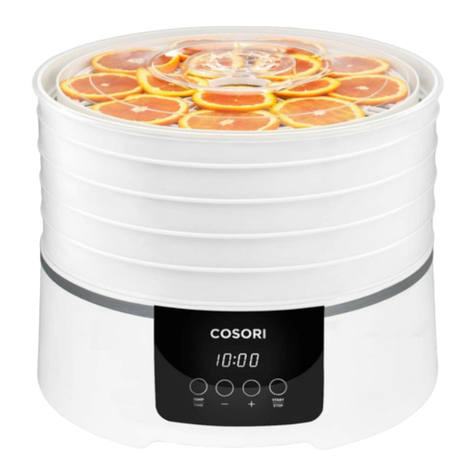
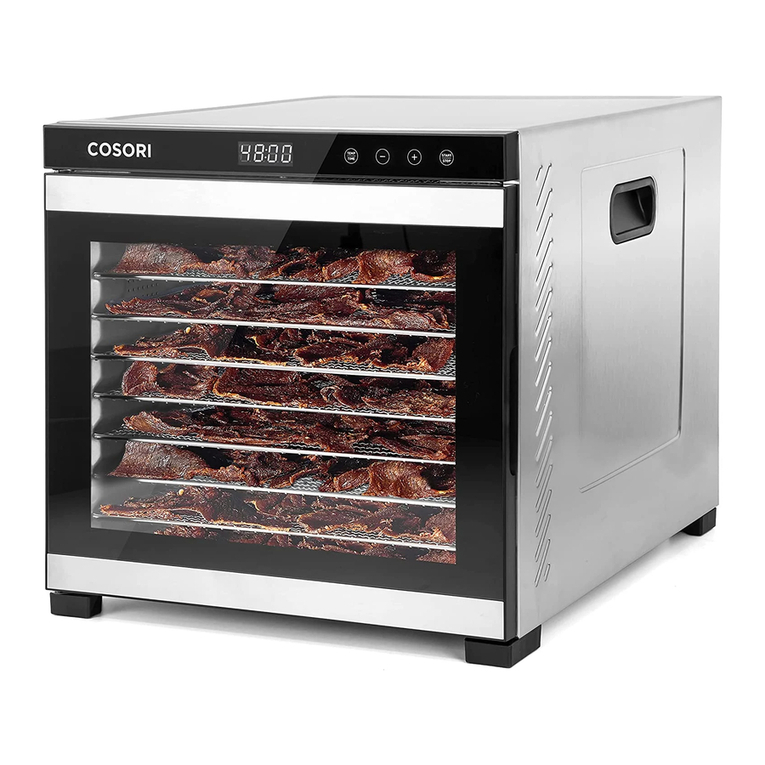
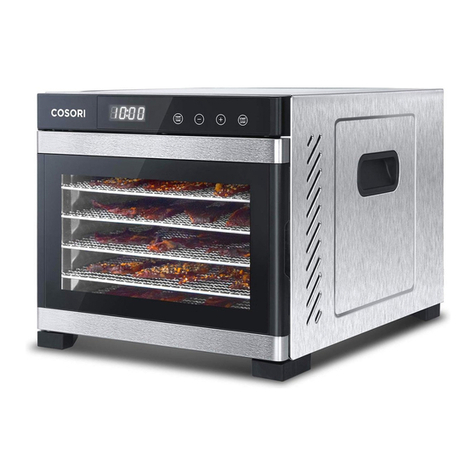
Cosori CO165-FD User manual

2
Table of Contents Package Contents
Specifications
Package Contents
Specifications
Important Safeguards
Getting to Know Your Dehydrator
Display
Before First Use
Using Your Dehydrator
·Operation
·Tray Liners
·Overheat Protection
·Tips
Care & Maintenance
Troubleshooting
Warranty Information
Customer Support
2
2
5
6
7
7
8
8
9
9
9
10
11
12
12
Power Supply AC 220–240V, 50Hz
Rated Power 420–500W
Temperature
Range 35°C–75°C
Product Size 350 x 350 x 300 mm
(13.8 x 13.8 x 11.8 in)
1 x Original Food Dehydrator
5 x Trays
1 x Fruit Roll Sheet
1 x Mesh Screen
1 x Recipe Book
1 x User Manual
1 x Warranty Card
ENGLISH
EN

3
Inhaltsverzeichnis Lieferumfang
Technische Daten
Lieferumfang
Technische Daten
Wichtige Sicherheitshinweise
Ihr Dörrautomat
Display
Vor der ersten Benutzung
Benutzung Ihres Dörrautomaten
·Gebrauch
·Einlegeböden
·Überhitzungsschutz
·Tipps
Pflege und Wartung
Problemlösung
Garantie
Kundendienst
3
3
15
17
18
18
20
20
21
21
21
22
23
24
24
Stromversorgung AC 220–240 V, 50 Hz
Leistung 420–500 W
Temperaturbereich 35 °C–75 °C
Produktgröße 350 x 350 x 300 mm
(13.8 x 13.8 x 11.8 in)
1 Original-Dörrautomat
5 Dörretagen
1 Fruchtrollenboden
1 Maschensieb
1 Rezeptheft
1 Bedienungsanleitung
1 Garantiekarte
DEUTSCH
DE
ENGLISH
DEUTSCH
FRANÇAIS
ESPAÑOL
ITALIANO

4
join
join the Cosori Cooks Community on Facebook
facebook.com/CosoriUK
(We hope you love our new food dehydrator as much as we do.)
Our helpful, in-house chefs are ready to assist
you with any questions you might have!
On behalf of all of us at Cosori,
CONTACT OUR CHEFS
Email: [email protected]
explore
explore our recipe gallery
www.cosori.com/recipes
enjoy
enjoy weekly, featured recipes
made exclusively by our in-house chefs
EN

5
Always follow basic safety precautions when using your dehydrator.
Read all instructions.
IMPORTANT SAFEGUARDS
General Safety
Plug and Cord
• Do not touch hot surfaces.
• Do not immerse cord, plug, or base in water or other liquid.
• Closely supervise children near the dehydrator.
• Unplug when not in use, and before cleaning. Allow to cool before putting on or taking o
parts.
• Do not use dehydrator if it is damaged, not working, or if the cord or plug is damaged.
Contact Customer Support (see page 12).
• Using third-party parts or accessories may cause injuries.
• Do not use outdoors.
• Do not place on a stove, near gas or electric burners, or in a heated oven.
• Be extremely cautious when moving the dehydrator if it contains hot liquids, and when
removing trays if they contain hot liquids.
• Do not clean base with metal scouring pads. Metal fragments can break o the pad and
touch electrical parts, creating a risk of electric shock.
• Do not run the dehydrator for more than 48 hours at a time. After 48 hours, unplug and
allow to cool for 2 hours before using again.
• Do not allow liquids to drip into the vents in the base of the dehydrator.
• Not for commercial use. Household use only.
• Only use the dehydrator as directed in this manual.
• Do not let cord (or any extension cord) hang over the edge of a table or counter, or touch
hot surfaces.
• This dehydrator uses a short power-supply cord to reduce the risk of entangling or tripping.
Use extension cords with care.
• The marked electrical rating of an extension cord should be at least as high as the rating of
the dehydrator (see page 2).
SAVE THESE INSTRUCTIONS
EN

6
Your Cosori dehydrator features an automatic fan, which circulates warm air to evenly dry
food. Dried foods are a great treat to snack on, because they keep almost all their nutritional
value and flavor. Dehydrating is the perfect way to preserve snacks, fruit, vegetables, bread,
and even flowers.
GETTING TO KNOW YOUR DEHYDRATOR
Food Dehydrator Diagram
A
E
C
F
D
B
G
H
A. Cover
B. Trays
C. Underpan
D. Base
E. Control Panel
F. Power Cord
G. Mesh Screen
H. Fruit Roll Sheet
EN

7
DISPLAY
BEFORE FIRST USE
Setting Up
Controls
1. Remove all packaging from your dehydrator and its accessories. Make sure all package
contents are included (see page 2).
2. Clean the base and trays with a moistened cloth.
NOTE:
The trays can be washed in the top rack of a dishwasher only if you remove them
before the drying cycle starts. Do not wash the base, cover, mesh screen, or fruit roll sheet in
a dishwasher. Do not immerse the base in water.
3. Place the dehydrator base on a solid, level surface. Plug in. Stack the drying trays on top of
the base.
4. Run the dehydrator for 30 minutes at any temperature, without adding any food. Make
sure that the room has sucient ventilation, in case the dehydrator produces any smoke or
smells. This is normal.
5. Rinse the trays in water. Dry all parts.
NOTE:
You only need to do this the first time you use the dehydrator.
• Press TEMP/TIME once and use the –and +buttons to change the temperature.
• Press TEMP/TIME a second time and use the –and +buttons to change the time.
• Press START/STOP to start or stop the dehydrator.
EN

8
Operation
USING YOUR DEHYDRATOR
1. Place food on trays. The trays can hold up to 0.5 kg (1.1 lb) of food. Place food on the bottom
tray first, and use the top tray last. Be careful not to overload the trays.
2. Plug in. The dehydrator will beep, and the display will show “88:88”. The dehydrator will
switch to standby mode after 3 seconds, and the display will show “00:00”.
3. Press TEMP/TIME to choose temperature. You must press TEMP/TIME first before you can
use any other buttons. The temperature will blink on the display, and the –and +buttons
will light up. Use –and +to change the temperature (35°C–75°C).
NOTE:
Temperature changes in 1°C increments. Press and hold
–and +
to change the
temperature rapidly.
4. Press TEMP/TIME again to choose time. The time will blink on the display, and the –and +
buttons will light up. Use –and +to change the time (0:30–48:00).
NOTE:
Time changes in increments of 30 minutes. Press and hold
–
and
+
to change the
time rapidly.
5. Press START/STOP to start dehydrating. The dehydrator will start heating. START/STOP will
stay lit, and the other buttons will turn o. Temperature and time will cycle on the display
every 3 seconds.
NOTE:
If you press START/STOP again to stop dehydration, the timer countdown will reset
and the dehydrator will go into standby mode.
6. Optionally, you can change the time and temperature at any time by pressing TEMP/TIME.
7. When the timer finishes, the display will show “End” and heat will turn o. The dehydrator
will beep 5 times, and the fan will continue running for 5 seconds before stopping.
NOTE:
The dehydrator will always remember your previous temperature and time settings.
NOTE:
Use the dehydrator in a warm, dry room. Depending on humidity in the air and moisture
in the food, dehydration time may vary.
EN

9
Tray Liners
Overheat Protection
Tips
Your dehydrator comes with 2 tray liners: a fruit roll sheet and a mesh screen.
1. Place a tray liner on a dehydrator tray. Place food on the tray.
2. Once the food is dehydrated, lift the tray liner out of the tray, using the cutouts on the side of
the liner.
3. Remove food. Bending the screen is helpful for removing sticky foods.
• Use for making fruit rolls and strips from fresh, frozen, or canned fruit. You can also use this
liner when dehydrating purées.
NOTE: Do not
allow any liquid to drip into the vents in the base of the dehydrator.
• Overheating is extremely rare. If the dehydrator overheats, it will automatically shut down
as a safety feature, and will no longer turn on. If this happens, contact Customer Support
(see page 12).
• Fruit and vegetables dried in your food dehydrator will look dierent from those sold in
stores. This is because homemade dried foods do not use preservatives, artificial colouring,
or artificial additives.
• Check out the Recipe Book for many more tips on dehydrating foods.
• Use for foods that shrink when dried. This liner will prevent them from falling through tray
grates, while still allowing air circulation.
Fruit Roll Sheet
Mesh Screen
EN
USING YOUR DEHYDRATOR (CONT.)

10
CARE & MAINTENANCE
NOTE: Do not
clean any part of the
dehydrator with abrasive chemicals, as
this will damage the surface.
1. Unplug the dehydrator and allow it to
cool before cleaning.
2. If you used a recipe that left traces
of liquid or other residues, use paper
towels to wipe down the trays and tray
liners before cleaning.
3. Soak trays in hot, soapy water for easy
removal of food residue.
4. Use a soft brush to clean the trays and
tray liners.
NOTE: The trays can be washed in the
top rack of a dishwasher only if you
remove them before the drying cycle
starts. Do not wash the base, cover,
mesh screen, or fruit roll sheet in a
dishwasher. Do not immerse the base
in water.
5. Clean the surface of the dehydrator base
with a damp cloth.
6. Dry all parts before storing or using the
dehydrator.
7. When storing, turn the base upside
down and wrap the cord around the
centre of the base. Secure the cord
under the clips. [
Figure 1.1
]
8. Set the base back upright and stack the
trays on top of the dehydrator as normal.
Figure 1.1
EN

11
TROUBLESHOOTING
Problem Possible Solution
The dehydrator will not turn
on, or the fan is not working.
Unplug the dehydrator and plug it in again.
The dehydrator may be damaged or malfunctioning.
Contact Customer Support (see page 12).
“ERR” indicator appears on
the display.
The dehydrator may be damaged or malfunctioning.
Contact Customer Support (see page 12).
Foods are dried unevenly.
Food placed in the lower trays will cook faster. Rotate
the trays every few hours.
Cut foods evenly to ensure that they all finish drying at
the same time.
Follow the recipes and tips in the Recipe Book.
EN

12
Arovast Corporation
1202 N Miller St. Suite A, Anaheim, CA 92806, USA
Email: [email protected]
* Please have your order confirmation number ready before
contacting Customer Support.
CUSTOMER SUPPORT
WARRANTY INFORMATION
Cosori warrants all products to be of the highest
quality in material, craftsmanship, and service for
a minimum of 2 years, eective from the date of
purchase. Warranty lengths may vary between
product categories.
Should you encounter any issues or have any
questions regarding your new product, feel free to
contact our helpful Customer Support Team. Your
satisfaction is our goal!
EN

13
We hope this has been helpful to you. We can’t wait to see your beautiful
results, and we think you’ll want to share glam shots! Others already in the
community await your uploads—just pick your platform of choice below.
Snap, hashtag, and tag away, Cosori chef!
MORE COSORI PRODUCTS
If you’re happy with this food dehydrator, the line doesn’t stop here.
Check out www.cosori.com for a line of all our beautiful and thoughtfully
designed cookware. They might be right at home in your kitchen, too!
@cosoricooks
Cosori Appliances
#iCookCosori
Considering
what
to cook? Many recipe ideas are available,
both from us and the Cosori community.
SHOW US WHAT YOU’RE MAKING
EN

14
Werden Sie Mitglied
Werden Sie Mitglied der Cosori Cooks
Community auf Facebook
facebook.com/CosoriGermany
(Wir hoen, dass Sie genauso viel Gefallen an unserem neuen
Dörrautomaten finden wie wir.)
Unsere hilfsbereiten hauseigenen Köche sind
gerne bereit, all Ihre Fragen zu beantworten!
Im Namen aller Mitarbeiter
von Cosori
KONTAKTIEREN SIE UNSERE KÖCHE
E-Mail: [email protected]
Lassen Sie sich verfuhren
Lassen Sie sich verfuhren in unserer Rezeptgalerie
www.cosori.com/recipes
GenieBen Sie
GenieBen Sie wöchentlich neue Rezepte
exklusiv vorbereitet von unseren
hauseigenen Köchen
DE
Gutes Kochen
Vielen Dank fur
Ihren Kauf
Vielen Dank fur
Ihren Kauf
Gutes Kochen

15
Befolgen Sie bei der Benutzung des Dörrautomaten immer unsere
Sicherheitshinweise. Lesen Sie sämtliche Anweisungen.
WICHTIGE SICHERHEITSHINWEISE
Allgemeine Sicherheit
• Berühren Sie heiße Oberflächen nicht.
• Tauchen Sie Kabel, Stecker oder Unterteil nicht in Wasser oder eine andere Flüssigkeit
ein.
• Beaufsichtigen Sie Kinder in der Nähe des Dörrautomaten.
• Ziehen Sie den Stecker vor der Reinigung ab und wenn der Automat nicht benutzt wird.
Lassen Sie den Automaten abkühlen, bevor Sie Teile anbringen oder entfernen.
• Benutzen Sie den Dörrautomaten nicht, wenn er beschädigt ist, nicht funktioniert oder
der Stecker beschädigt ist. Wenden Sie sich an unseren Kundendienst (siehe Seite 24).
• Die Verwendung von Teilen und Zubehör anderer Hersteller kann zu Verletzungen führen.
• Benutzen Sie den Automaten nicht im Freien.
• Stellen Sie den Automaten nicht auf eine Herdplatte, in die Nähe von Gas- oder
Elektrobrennern oder in einen erhitzten Ofen.
• Gehen Sie mit besonderer Vorsicht vor, wenn der Dörrautomat bewegt wird, wenn er heiße
Flüssigkeiten enthält oder wenn Dörretagen mit heißen Flüssigkeiten herausgenommen
werden.
• Reinigen Sie das Unterteil nicht mit Metallschwämmen. Metallfragmente können vom
Schwamm abbrechen und mit elektrischen Teilen in Berührung kommen, wodurch
Stromschlaggefahr entsteht.
• Lassen Sie den Dörrautomaten nicht länger als 48 Stunden an einem Stück laufen. Ziehen
Sie nach 48 Stunden den Stecker ab und lassen Sie die Einheit zwei Stunden lang abkühlen,
bevor Sie sie erneut benutzen.
• Verhindern Sie, dass Flüssigkeiten in die Entlüftungsönungen im Unterteil des
Dörrautomaten gelangen.
• Nicht für den gewerblichen Gebrauch. Nur für den Hausgebrauch.
• Verwenden Sie den Dörrautomaten ausschließlich wie in dieser Bedienungsanleitung
beschrieben.
DE

16
BEWAHREN SIE DIESE
ANWEISUNGEN AUF
DE
WICHTIGE SICHERHEITSHINWEISE
(FORTS.)
Stecker und Kabel
• Lassen Sie dieses Kabel (oder ein Verlängerungskabel) nicht über die Seite eines Tisches
oder einer Theke hängen oder mit heißen Flächen in Berührung kommen.
• Dieser Dörrautomat wird mit einem kurzen Netzkabel geliefert, um Verhedderungs- oder
Stolpergefahr zu reduzieren. Verlängerungskabel sind mit Vorsicht zu verwenden.
• Die angegebene elektrische Leistung des Verlängerungskabels muss mindestens so hoch
wie die Leistung des Dörrautomaten sein (siehe Seite 3).

17
Ihr Cosori Dörrautomat ist mit einem Elektrogebläse versehen, das warme Luft zirkuliert,
um Lebensmittel gleichmäßig zu trocknen. Getrocknete Lebensmittel sind eine köstliche
Nascherei, da sie alle ihre Nährwerte und Aromen bewahren. Dörren ist die perfekte Methode,
Snacks, Obst, Gemüse, Brot und sogar Blumen haltbar zu machen.
IHR DÖRRAUTOMAT
Schaubild des Dörrautomaten
A
E
C
F
D
B
G
H
A. Abdeckung
B. Dörretagen
C. Auangschale
D. Unterteil
E. Bedienfeld
F. Stromkabel
G. Maschensieb
H. Fruchtrollenboden
DE

18
DISPLAY
VOR DER ERSTEN BENUTZUNG
Einrichtung
Bedienungstasten
1. Entfernen Sie das gesamte Verpackungsmaterial von Ihrem Dörrautomaten und seinem
Zubehör. Stellen Sie sicher, dass alle im Lieferumfang enthaltenen Teile vorhanden sind
(siehe Seite 3).
2. Reinigen Sie das Unterteil und die Dörretagen mit einem angefeuchteten Tuch.
HINWEIS: Die Dörretagen können nur dann im oberen Gestell einer Geschirrspülmaschine
gewaschen werden, wenn diese vor Beginn des Trocknungsvorgangs entnommen werden.
Das Unterteil, die Abdeckung, das Maschensieb oder den Fruchtrollenboden nicht in der
Geschirrspülmaschine reinigen. Das Unterteil nicht in Wasser tauchen.
• Drücken Sie TEMP/TIME (TEMP./ZEIT) einmal und ändern Sie die Temperatur anhand der
Tasten –und +.
• Drücken Sie TEMP/TIME (TEMP./ZEIT) ein zweites Mal und ändern Sie die Uhrzeit anhand
der Tasten –und +.
• Drücken Sie START/STOP (START/STOPP), um den Dörrautomaten zu starten oder
anzuhalten.
DE

19
3. Stellen Sie den Dörrautomaten auf eine solide, ebene Fläche auf. Schließen Sie den
Automaten an die Stromversorgung an. Stapeln Sie die Dörretagen auf dem Unterteil.
4. Lassen Sie den Dörrautomaten 30 Minuten lang bei beliebiger Temperatur laufen, ohne
Lebensmittel hinzuzugeben. Stellen Sie sicher, dass der Raum über ausreichende Ventilation
verfügt, für den Fall, dass der Dörrautomat Rauch oder Gerüche abgibt. Dies ist normal.
5. Spülen Sie die Dörretagen mit Wasser ab. Trocknen Sie alle Teile.
HINWEIS:
Diese Vorgehensweise ist nur bei der ersten Benutzung des Dörrautomaten
erforderlich.
DE
VOR DER ERSTEN BENUTZUNG
(FORTS.)

20
Gebrauch
BENUTZUNG IHRES DÖRRAUTOMATEN
1. Geben Sie Lebensmittel auf die Dörretagen. Die Dörretagen können bis zu 0,5 kg (1,1 lb)
aufnehmen. Legen Sie die Lebensmittel zuerst auf die unterste Dörretage und zuletzt auf die
oberste. Vermeiden Sie, die Dörretagen zu überfüllen.
2. Schließen Sie den Automaten an die Stromversorgung an. Der Dörrautomat gibt einen Ton
von sich und auf dem Display wird „88:88“ angezeigt. Nach drei Sekunden schaltet der
Dörrautomat in den Standby-Modus um und auf dem Display wird „00:00“ angezeigt.
3. Drücken Sie TEMP/TIME, um die Temperatur auszuwählen. Sie müssen TEMP/TIME
drücken, bevor Sie irgendeine andere Taste benutzen können. Die Temperatur blinkt auf
dem Display auf und die Tasten –und +leuchten auf. Ändern Sie die Temperatur anhand
der Tasten –u +(35 °C–75 °C).
HINWEIS:
Die Temperatur ändert sich in Schritten von 1 °C. Halten Sie die Tasten
–und +
gedrückt, um die Temperatur schnell zu ändern.
4. Drücken Sie nochmals TEMP/TIME, um die Zeit festzulegen. Die Zeit blinkt auf dem Display
auf und die Tasten –und +leuchten auf. Ändern Sie die Zeit anhand der Tasten –und +
(0:30–48:00).
5. HINWEIS:
Die Zeit ändert sich in Schritten von 30 Minuten. Halten Sie die Tasten
– und +
gedrückt, um die Zeit schnell zu ändern.
6. Drücken Sie START/STOP, um den Dörrvorgang zu starten. Der Dörrautomat beginnt, sich
zu erwärmen. START/STOP leuchtet weiter auf und alle anderen Tasten erlöschen. Die
Temperatur- und Zeitanzeige auf dem Display wechselt alle drei Sekunden.
HINWEIS:
Wenn Sie START/STOP nochmals drücken, wird das Countdown des Timers
zurückgesetzt und der Dörrautomat begibt sich in den Standby-Modus.
7. Wahlweise können Sie Zeit und Temperatur jederzeit ändern, indem Sie TEMP/TIME
drücken.
8. Nach Ablauf des Timers zeigt das Display „End“ an und die Erwärmung wird abgeschaltet.
Der Dörrautomat gibt fünf Töne von sich und das Gebläse läuft weitere fünf Sekunden,
bevor es sich abschaltet.
HINWEIS:
Der Dörrautomat ruft immer Ihre vorherigen Temperatur- und
Zeitweinstellungen wieder auf.
HINWEIS:
Benutzen Sie den Dörrautomaten in einem warmen, trockenen Raum. Die Dörrzeit
variiert je nach Luftfeuchtigkeit und Eigenfeuchte der Lebensmittel.
DE
Other manuals for CO165-FD
2
Table of contents
Languages:
Other Cosori Kitchen Appliance manuals
Cosori
Cosori CP267-FD-RXS User manual

Cosori
Cosori CP267-FD User manual

Cosori
Cosori CP267-FD User manual

Cosori
Cosori CP001-SC User manual

Cosori
Cosori CO165-FD User manual
Cosori
Cosori CP267-FD User manual

Cosori
Cosori C361-VS User manual
Cosori
Cosori CFD-N051-W User manual

Cosori
Cosori CO165-FD User manual

Cosori
Cosori CP267-FD User manual