manuals.online logo
Brands
  1. Home
  2. •
  3. Brands
  4. •
  5. Costway
  6. •
  7. Indoor Furnishing
  8. •
  9. Costway HV10417 User manual

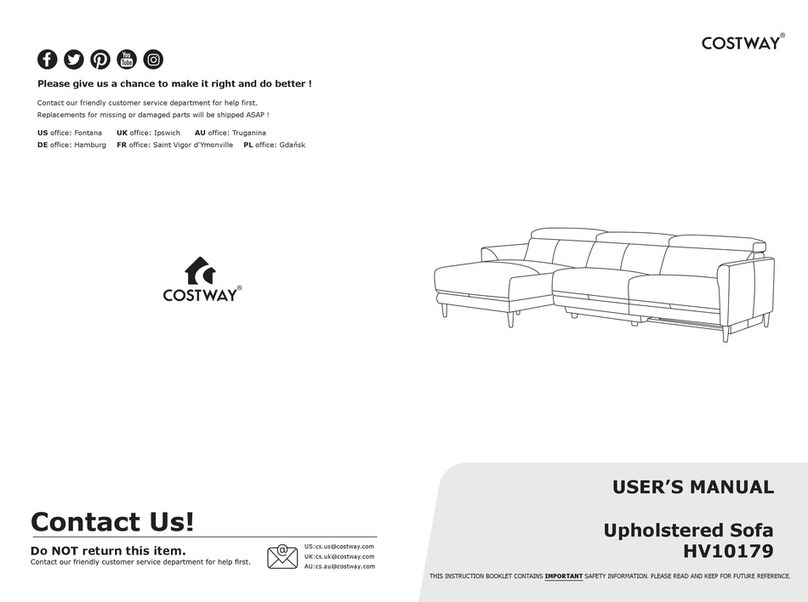
Costway HV10417 User manual

HV10417
Adjustable Sofa Bed/Verstellbarer Schlafstuhl/
Canapé-lit Réglable/Sofá Cama Ajustable/
Divano Letto Regolabile/Regulowany rozkładany fotel
If you're having difficulty, our friendly
customer team is always here to help.
USA:[email protected]
AUS:cs.au@costway.com
FRA:cs.fr@costway.com
DEU:cs.de@costway.com
ITA:cs.it@costway.com ESP:cs.es@costway.com
POL:sklep@costway.com
GBR:cs.uk@costway.com
DEU office: FDS GmbH, Neuer Höltigbaum 36, 22143 Hamburg, Deutschland
ITA office: Milano
FRA office: Saint Vigor d'Ymonville
POL office: GdańskGBR office: IpswichAUS office: TruganinaUSA office: Fontana
THIS INSTRUCTION BOOKLET CONTAINS IMPORTANT SAFETY INFORMATION. PLEASE READ AND KEEP FOR FUTURE REFERENCE.
Before You Start
Please read all instructions carefully.
Retain instructions for future reference.
Separate and count all parts and hardware.
Read through each step carefully and follow the proper order.
We recommend that, where possible, all items are assembled near to the area in
which they will be placed in use, to avoid moving the product unnecessarily once
assembled.
Always place the product on a flat, steady and stable surface.
Keep all small parts and packaging materials for this product away from babies
and children as they potentially pose a serious choking hazard.
EN
DE
Bitte lesen Sie alle Anweisungen sorgfältig durch.
Bewahren Sie die Anweisungen zum zukünftigen Verwendung auf.
Überprüfen Sie, ob alle Teile und Zubehörteile vorhanden sind.
Lesen Sie jeden Schritt sorgfältig durch und befolgen Sie die richtige Reihenfolge.
Wir empfehlen, alle Teile möglichst in der Nähe des Aufstellungsortes zu
montieren, um unnötige Bewegungen nach der Montage zu vermeiden.
Stellen Sie den Artikel immer auf eine ebene, feste und stabile Fläche.
Halten Sie alle kleinen Teile und Verpackungsmaterialien fern von Babys und
Kindern, ansonsten besteht Erstickungsgefahr.
Vor dem Beginnen
FR
Veuillez lire attentivement toutes les instructions.
Conservez les instructions pour vous y référer ultérieurement.
Vérifiez toutes les pièces et les accessoires.
Lisez attentivement chaque étape et suivez l’ordre correct.
Nous recommandons que, dans la mesure du possible, tous les produits soient
assemblés à proximité de la zone où ils seront utilisés, afin d’éviter tout
déplacement inutile du produit une fois assemblé.
Placez toujours le produit sur une surface plane et stable.
Conservez toutes les petites pièces de ce produit et les matériaux d’emballage
hors de portée des bébés et des enfants, car ils pourraient présenter un risque
d’étouffement.
Lea atentamente todas las instrucciones.
Conserve las instrucciones para futuras consultas.
Separe y cuente todas las piezas y los accesorios.
Lea detenidamente cada paso y siga el orden correcto.
Recomendamos que, siempre que sea posible, todos los elementos se monten
cerca de la zona en la que se van a utilizar, para evitar mover el producto
innecesariamente una vez montado.
Coloque siempre el producto sobre una superficie plana, estable y firme.
Mantenga todas las piezas pequeñas y los materiales de embalaje de este
producto lejos de los bebés y los niños, ya que pueden representar un grave
riesgo de asfixia.
ES
Avant de Commencer
Antes de Empezar
02 03
Si prega di leggere attentamente tutte le istruzioni.
Conservare le istruzioni per riferimento futuro.
Separare e contare tutte le parti e gli accessori.
Leggere attentamente ogni passo e seguire l'ordine corretto.
Si consiglia, ove possibile, di assemblare tutti gli articoli vicino alla zona in cui
verranno posti in uso, per evitare di spostare inutilmente il prodotto una volta
assemblato.
Posizionare sempre il prodotto su una superficie piana, stabile.
Tenere tutte le piccole parti e i materiali di imballaggio di questo prodotto lontano
dalla portata di neonati e bambini, in quanto possono costituire un serio pericolo
di soffocamento.
Zapoznaj się z instrukcją.
Zachowaj instrukcję do wglądu.
Posortuj części i upewnij się, że zestaw jest kompletny.
Zapoznaj się ze sposobem montażu i postępuj zgodnie z instrukcją.
Zalecamy, aby montaż odbywał się możliwie najbliżej miejsca docelowego
położenia produktu, aby uniknąć niepotrzebnego przesuwania.
Upewnij się, że produkt znajdzie się na płaskiej i stabilnej po wierzchni.
Upewnij się, że materiały wykorzystane podczas pakowania produktu.
oraz jego elementy znajdują się poza zasięgiem dzieci.
IT
PL
Prima di Iniziare
Instruction for use
Zanim Zaczniesz
● You can choose the Angle you
like from the six stages in the
picture from①to⑥.
● Press backrest backward like
picture ⑥, tatami can back to
picture①.
● The free adjustment between①(0
degrees) and ⑥(85 degrees) will be
adjusted to 17 degrees for each
stage.
● The handrail can be pulled
forward and turned over as shown
in the diagram.
● The armrest can be used as the
forefoot of the SOFA bed when it is
turned over.
● UNZIP your back and remove the
folded foot. Open to a vertical 90
degrees will hear a “Click”, that the
folding foot has been locked.
● When retracting the folding foot,
make sure to retract the foot after
pressing the button at the bottom of
the folding foot.
● Pull back the foot and ZIP up the
ZIPPER.
Angle adjustment method
Method of seat cushion opening
How to open the invisible folding foot
EN
04 05
Product Parts List Assembly drawing
AX2 BX2
CX4 DX4
EX8 FX1
M8*40 M8*30
Sofa foot Armrest of SOFA
Bolt Bolt
Gaskets Spanner
ENEN
06 07
Don't jump on the product, otherwise you may get
hurt and wear out the product.
Please be careful not to get hurt when children are
in use.
Don't put it in an uneven place, or you may fall
and damage the product.
Please use tatami in a flat place and place it on
a carpet,in order to protect the floor surface.
Use caution
● Do not move body fiercely on the product, otherwise you may fall down
and slide.
● Please do not use backrest and seat cushion to play.
● Do not sit on the backrest or handrail of the product, otherwise it may fall
off.
● Make sure you are safe when adjusting the angle.
● Please don't open the zipper.
● Products should avoid direct sunlight and heat.
● If you are sensitive to the smell of the product, please place the product in
a ventilated place. (the smell is not harmful.)
Attention
EN Gebrauchsanweisung
●Sie können den gewünschten
Winkel aus den sechs Stufen in der
Abbildung von①bis⑥wählen.
●Drücken Sie die Rückenlehne
nach hinten wie in der Abbildung
⑥, die Tatami kann wieder in die
Abbildung ①.
●Die freie Einstellung zwischen①(0
Grad) und ⑥(85 Grad) wird für jede
Stufe auf 17 Grad eingestellt.
●Der Handlauf kann nach vorne
gezogen und umgedreht werden,
wie in der Abbildung gezeigt.
●Die Armlehne kann als Vorderfuß
des Schlafstuhls verwendet
werden, wenn es umgedreht ist.
●Öffnen Sie Ihren Rücken und
entfernen Sie den Klappfuß. Öffnen
Sie zu einem vertikalen 90 Grad wird
ein "Klick" zu hören, dass der
Klappfuß gesperrt wurde.
●Achten Sie beim Einziehen des
Faltfußes darauf, dass Sie den Fuß
einfahren, nachdem Sie den Knopf an
der Unterseite des Faltfußes gedrückt
haben.
●Ziehen Sie den Fuß zurück und
schließen Sie den Reißverschluss.
Methode der Winkeleinstellung
Verfahren zum Öffnen des Sitzkissens
So öffnen Sie den unsichtbaren Faltfuß
DE
Druckknopf
08 09
Produkt Teileliste Montagezeichnung
AX2 BX2
CX4 DX4
EX8 FX1
M8*40 M8*30
Sofa Fuß Armlehne des Schlafstuhls
Schraube Schraube
Dichtungen Schraubenschlüssel
DEDE
10 11
Springen Sie nicht auf das Produkt, sonst könnten
Sie sich verletzen und das Produkt verschleißen.
Bitte achten Sie darauf, dass Sie sich nicht
verletzen, wenn Kinder im Einsatz sind.
Stellen Sie das Gerät nicht an einer unebenen
Stelle auf, sonst könnten Sie fallen und das Gerät
beschädigen.
Bitte verwenden Sie die Tatami an einem flachen
Ort und legen Sie sie auf einen Teppich, um die
Bodenoberfläche zu schützen.
Vorsicht
● Bewegen Sie Ihren Körper nicht zu heftig auf dem Produkt, sonst könnten
Sie herunterfallen und ausrutschen.
● Bitte benutzen Sie Rückenlehne und Sitzkissen nicht zum spielen.
● Setzen Sie sich nicht auf die Rückenlehne oder den Handlauf des
Produkts, da es sonst herunterfallen kann.
● Achten Sie darauf, dass Sie beim Einstellen des Winkels sicher sind.
● Bitte öffnen Sie den Reißverschluss nicht.
● Produkte sollten direkte Sonneneinstrahlung und Hitze vermeiden.
● Wenn Sie empfindlich auf den Geruch des Produkts reagieren, legen Sie
es bitte an einen belüfteten Ort. (Der Geruch ist nicht schädlich.)
Achtung
DE Instructions d'Utilisation
●Vous pouvez choisir l'angle qui
vous convient parmi les six
positions de l'image ①à ⑥.
● Appuyez sur le dossier en arrière
comme sur l'image ⑥, le tatami
peut revenir à l'image ①.
●Le réglage libre entre ①(0 degré)
et ⑥(85 degrés) sera ajusté à 17
degrés pour chaque position.
● La main courante peut être tirée
vers l'avant et retournée comme
indiqué sur le schéma.
● L'accoudoir peut être utilisé
comme l'avant-pied du canapé-lit
lorsqu'il est retourné.
●Décompressez le dos et retirez la
jambe pliée. Lorsqu'il est ouvert à 90
degrés verticalement, vous entendrez
un "clic", ce qui signifie que le pied
pliant a été verrouillé.
●Lorsque vous rétractez le pied de
pliage, veillez à rétracter le pied après
avoir appuyé sur le bouton situé au
bas du pied de pliage.
●Tirez le pied en arrière et fermez la
fermeture éclair.
Méthode de réglage de l'angle
Méthode d'ouverture du coussin de siège
Comment ouvrir le pied pliant invisible
FR
Druckknopf
12 13
Liste des pièces du produit Illustration du montage
AX2 BX2
CX4 DX4
EX8 FX1
M8*40 M8*30
Pied de canapé Accoudoir du canapé
Boulon Boulon
Joints Clé à molette
FRFR
14 15
Ne sautez pas sur le produit, sinon vous risquez
de vous blesser et d'user le produit.
Veuillez l'utiliser avec précaution pour éviter que
les enfants ne se blessent en l'utilisant.
Ne le placez pas dans un endroit inégal, sinon
vous risquez de tomber et d'endommager le
produit.
Veuillez utiliser le tatami dans un endroit plat et
le placer sur un tapis afin de protéger la surface
du sol.
Soyez prudent
● Ne bougez pas votre corps farouchement sur le produit, sinon il risque de
tomber et de glisser.
● Veuillez ne pas utiliser le dossier et le coussin du siège pour jouer.
● Ne vous asseyez pas sur le dossier ou la main courante du produit, sinon
il risque de tomber.
● Assurez-vous que vous êtes en sécurité lorsque vous réglez l'angle.
● S'il vous plaît, n'ouvrez pas la fermeture éclair
● Le produit doit éviter la lumière directe du soleil et la chaleur.
● Si vous êtes sensible à l'odeur du produit, veuillez placer le produit dans
un endroit ventilé. (L'odeur n'est pas nocive).
Attention
FR Instrucciones de Uso
● Usted puede elegir el ángulo que
le gusta de las seis posiciones en
la imagen de ①a ⑥.
● Presione el respaldo hacia atrás
como en la imagen ⑥, el tatami
puede volver a la imagen ①.
● El ajuste libre entre ①(0 grados)
y ⑥(85 grados) se ajustará a 17
grados para cada posición.
● El apoyabrazos puede ser tirado
hacia adelante y volteado como se
muestra en el diagrama.
● El apoyabrazos se puede utilizar
como pata delantera del sofá cama
cuando se le da la vuelta.
● ABRA la cremallera del respaldo y
retire la pata plegada. Abra a una
posición vertical de 90 grados,
escuchará un "clic", que significa que la
pata plegable se ha bloqueado.
● Al retraer la pata plegable, asegúrese
de retraer la pata después de presionar
el botón en la parte inferior de la pata
plegable.
● Tire hacia atrás de la pata y cierre la
cremallera.
Método de ajuste del ángulo
Método de apertura del cojín de asiento
Cómo abrir la pata plegable invisible
ES
Botón de
empuje
16 17
Lista de Piezas del Producto Diagrama de Montaje
AX2 BX2
CX4 DX4
EX8 FX1
M8*40 M8*30
Pata de sofá Apoyabrazos de sofá
Perno Perno
Junta Llave
ESES
18 19
No salte sobre el producto, de lo contrario puede
lastimarse y desgastar el producto.
Tenga cuidado de no lastimarse cuando los niños
lo utilicen.
No lo coloque en un lugar irregular, o puede
caerse y dañar el producto.
Por favor, utilice el tatami en un lugar plano y
colóquelo sobre una alfombra, para proteger la
superficie del suelo.
Precaución de Uso
● No mueva el cuerpo con fuerza sobre el producto, de lo contrario podría
caerse y deslizarse.
● No utilice el respaldo ni el cojín de asiento para jugar.
● No se siente en el respaldo ni en el apoyabrazos del producto, de lo
contrario podría caerse.
● Asegúrese de estar seguro cuando ajuste el ángulo.
● Por favor, no abra la cremallera.
● El producto debe evitar la luz solar directa y el calor.
● Si usted es sensible al olor del producto, por favor coloque el producto en
un lugar ventilado. (El olor no es perjudicial.)
Atención
ES Istruzioni per l'uso
●Puoi scegliere l'angolo che ti piace
tra le sei fasi dell'immagine da ①a
⑥.
●Premere lo schienale all'indietro
come nell'immagine ⑥, il tatami
può tornare all'immagine ①.
●La regolazione libera tra ①(0
gradi) e ⑥(85 gradi) sarà regolata
a 17 gradi per ogni fase.
●Il corrimano può essere tirato in
avanti e capovolto come mostrato
nel diagramma.
●Il bracciolo può essere utilizzato
come avampiede del DIVANO letto
quando viene capovolto.
●Decomprimere la schiena e
rimuovere il piedino piegato. Aperto
a 90 gradi verticale si sentirà un
"Clic", che il piedino pieghevole è
stato bloccato.
●Quando si ritrae il piedino
pieghevole, assicurarsi di ritrarre il
piedino dopo aver premuto il
pulsante nella parte inferiore del
piedino pieghevole.
●Tirare indietro il piedino e chiudere
la cerniera.
Metodo di regolazione dell'angolo
Metodo di apertura del cuscino del sedile
Come aprire il piedino pieghevole invisibile
IT
Pulsante
di spinta
20 21
Elenco delle parti di prodotto Disegno di montaggio
AX2 BX2
CX4 DX4
EX8 FX1
M8*40 M8*30
Piedino del divano Bracciolo del divano
Bullone Bullone
Rondella Chiave a brugola
ITIT
22 23
Non saltare sul prodotto, altrimenti può farsi male
e logorare il prodotto.
Si prega di fare attenzione a non farsi male
quando i bambini sono in uso.
Non metterlo in un luogo irregolare, altrimenti
potresti cadere e danneggiare il prodotto.
Si prega di utilizzare tatami in un luogo piatto e
posizionarlo su un tappeto, al fine di proteggere
la superficie del pavimento.
Usare cautela
● Non muovere ferocemente il corpo sul prodotto, altrimenti potrebbe
cadere e scivolare.
● Si prega di non utilizzare schienale e cuscino del sedile per giocare
● Non sedersi sullo schienale o sul corrimano del prodotto, altrimenti
potrebbe cadere.
● Assicurati di essere sicuro quando regoli l'angolazione.
● Si prega di non aprire la cerniera.
● Il prodotto deve evitare la luce solare diretta e il calore.
● Se si è sensibili all'odore del prodotto, si prega di posizionare il prodotto in
un luogo ventilato. (L'odore non è dannoso.)
Attenzione
IT Instrukcja użytkowania
● Możesz wybrać najbardziej
odpowiadający ci kąt nachylenia
oparcia. Do wyboru masz 6 poziomów
oznaczonych na rysunku numerami od
①do ⑥.
● Naciśnij oparcie, gdy znajduje się w
pozycji ⑥, aby wróciło do pozycji ①.
● Każde kolejne ustawienie oparcia
różni się od poprzedniego o 17 stopni.
Oparcie w pozycji ① znajduje się pod
kątem 0 stopni. Oparcie w pozycji ⑥
znajduje się pod kątem 85 stopni.
● Pociągnij podłokietniki do siebie,
a następnie w dół, aby rozłożyć
fotel.
● Po rozłożeniu podłokietniki
pełnią funkcję dodatkowych
wsporników.
● Rozepnij zamek na oparciu, aby
wyjąć dodatkową nóżkę. Rozłóż ją pod
kątem 90 stopni. Kliknięcie oznacza, że
nóżka zablokowała się na swoim
miejscu.
● Aby złożyć dodatkową nóżkę, wciśnij
przycisk, który znajduje się u jej
podstawy.
● Schowaj nóżkę i zapnij zamek
błyskawiczny na oparciu.
Regulacja kąta nachylenia oparcia
Rozkładanie siedziska
Rozkładanie dodatkowej nóżki
PL
Naciśnij
przycisk
24 25
Lista części Montaż produktu
AX2 BX2
CX4 DX4
EX8 FX1
M8*40 M8*30
Noga fotela Podłokietnik
Śruba M8x40 Śruba M8x30
Podkładka Klucz
PLPL
26 27
Nie skacz na rozkładanym fotelu, aby uniknąć
powstania obrażeń lub uszkodzenia produktu.
Zachowaj szczególną ostrożność, jeśli z fotela
korzystają dzieci.
Nie umieszczaj rozkładanego fotela na nierównym
podłożu, aby uniknąć powstania obrażeń lub
uszkodzenia produktu.
Umieszczaj rozkładany fotel wyłącznie na płaskim
i równym podłożu. Zabezpiecz podłogę za
pomocą dywanu lub innej podkładki.
Ostrzeżenia
● Nie poruszaj się zbyt gwałtownie na fotelu, aby nie spaść lub nie
ześlizgnąć się.
● Rozkładaj ciężar swojego ciała równomiernie. Nie siadaj całym ciężarem
ciała na rozkładanych częściach.
● Nie siadaj na oparciu ani na podłokietnikach, aby uniknąć powstania
obrażeń lub uszkodzenia produktu.
● Zachowaj szczególną ostrożność podczas regulacji kąta nachylenia
oparcia.
● Nie rozpinaj zamka błyskawicznego w stanie złożonym.
● Nie wystawiaj produktu na bezpośrednie działanie promieni słonecznych
lub silnego ciepła.
● Po opuszczeniu fabryki produkt może wydzielać delikatny zapach, który
nie jest szkodliwy, ale który może być drażniący dla niektórych osób.
Umieść produkt w przewiewnym miejscu, aby zapach zniknął.
Uwaga
PL
In case a return is required, the item must be returned in original box. Without this
your return will not be accepted.
DO NOT discard the box / original packaging.
Take a photo of the box markings.
Take a photo of the damaged part (if applicable).
Send us an email with the images requested.
A photo of the markings (text) on the side of the box is required in case a part is
needed for replacement. This helps our staff identify your product number to
ensure you receive the correct parts.
A photo of the damage is always required to file a claim and get your replacement
or refund processed quickly. Please make sure you have the box even if it is
damaged.
Email us directly from marketplace where your item was purchased with the
attached images and a description of your claim.
Falls eine Rücksendung erforderlich ist, muss der Artikel in der
Originalverpackung zurückgeschickt werden. Andernfalls wird Ihre Rücksendung
nicht angenommen.
Werfen Sie den Karton / die Originalverpackung NICHT weg.
Machen Sie ein Foto von der Beschriftung des Kartons.
Machen Sie ein Foto des beschädigten Teils (falls zutreffend).
Schicken Sie uns eine E-Mail mit dem gewünschten Foto.
Für den Fall, dass ein Ersatzteil benötigt wird, benötigen wir ein Foto der
Beschriftung (Text) auf der Seite des Kartons. So können unsere Mitarbeiter Ihre
Artikelnummer identifizieren und sicherstellen, dass Sie die richtigen Teile
erhalten.
Ein Foto des beschädigten Teils ist immer erforderlich, um eine Reklamation
einzureichen und eine schnelle Bearbeitung Ihres Ersatzteils oder Ihrer
Rückerstattung zu gewährleisten. Bitte stellen Sie sicher, dass Sie den Karton
haben, auch wenn er beschädigt ist.
Schicken Sie uns eine E-Mail direkt vom Marktplatz, auf dem Sie den Artikel
gekauft haben, mit den angehängten Fotos und einer Beschreibung Ihrer
Reklamation.
EN
DE
Return / Damage Claim Instructions
Rücksendung / Beschädigung Anweisungen
28 29
Instructions De Retour / Réclamation De Dommages
Dans le cas où un retour est requis, l'article doit être retourné dans sa boîte
d'origine. Sans cela, votre retour ne sera pas accepté.
NE PAS jeter la boîte/l'emballage d'origine.
Prenez une photo des marquages de la boîte.
Prenez une photo des dommages (le cas échéant).
Envoyez-nous un e-mail avec les images demandées.
Une photo des marquages (texte) sur le côté de la boîte est requise au cas où une
pièce serait nécessaire pour le remplacement. Cela aide notre personnel à
identifier votre numéro de produit pour s'assurer que vous recevez les bonnes
pièces.
Une photo des dommages est toujours requise pour déposer une réclamation et
obtenir rapidement votre remplacement ou votre remboursement. Assurez-vous
d'avoir la boîte même si elle est endommagée.
Envoyez-nous un e-mail directement depuis le marché où votre article a été
acheté avec les images ci-jointes et une description de votre réclamation.
Instrucciones de Devolución / Reclamación de Daños
En caso de que se requiera una devolución, el artículo debe ser devuelto en la
caja original. Sin esto su devolución no será aceptada.
NO deseche la caja/embalaje original.
Tome una foto de las marcas de la caja.
Tome una foto de los daños (si procede).
Envíenos un correo electrónico con las imágenes solicitadas.
Se requiere una foto de las marcas (texto) en el lado de la caja en caso de que se
necesite una pieza para reemplazarla. Esto ayuda a nuestro personal a identificar
su número de producto para asegurarse de que recibe las piezas correctas.
Una foto de los daños es siempre necesaria para presentar una reclamación y
conseguir que su reemplazo o reembolso sea procesado rápidamente. Por favor,
asegúrese de tener la caja aunque esté dañada.
Envíenos un correo electrónico directamente desde el mercado donde se compró
su artículo con las imágenes adjuntas y una descripción de su reclamación.
FR
ES
Nel caso in cui sia richiesto un reso, l'articolo deve essere restituito nella scatola
originale. Senza la scatola originale il tuo reso non sarà accettato.
NON scartare la scatola / confezione originale.
Fare una foto dei contrassegni sulla scatola.
Fare una foto di Danno (se è applicabile).
Inviarci una mail con le immagini richieste.
È necessaria una foto dei contrassegni (testo) sul lato della scatola nel caso in
cui la parte debba essere sostituita. Questo aiuta il nostro staff a identificare il
numero del tuo prodotto per assicurarti di ricevere le parti corrette.
Una foto del danno è sempre necessaria per presentare un reclamo e ottenere
rapidamente la sostituzione o il rimborso. Assicurati di avere la scatola anche se
è danneggiata.
Inviarci un’e-mail direttamente dal mercato in cui è stato acquistato il tuo articolo
con le immagini allegate e una descrizione del tuo reclamo.
Jeśli chcesz zwrócić produkt, musi znajdować się on w oryginalnym opakowaniu.
Towar zwrócony w nieoryginalnym opakowaniu nie zostanie przyjęty.
Nie wyrzucaj oryginalnego opakowania.
Zrób zdjęcie oznaczeń na opakowaniu.
Zrób zdjęcie uszkodzonej części (jeśli dotyczy).
Skontaktuj się z nami.
Jeśli jakakolwiek część wymaga wymiany, zrób zdjęcie oznaczeń kodu produktu,
który znajduje się na opakowaniu. Pozwoli nam to zidentyfikować produkt i
dostarczyć ci właściwą część.
Jeśli chcesz złożyć reklamację, zrób zdjęcie uszkodzonej części. Pozwoli nam to
zatwierdzić reklamację i zlecić zwrot środków na twoje konto. Do złożenia
reklamacji potrzebne będzie oryginalne opakowanie.
Skontaktuj się z nami telefonicznie, mailowo lub poprzez formularz kontaktowy.
Załącz zdjęcia produktu i opis roszczenia.
IT
PL
Istruzioni Per La Restituzione / Reclamo Per Danni
Zwroty i reklamacje
30 31

Other Costway Indoor Furnishing manuals
Costway JZ10117 User manual

Costway

Costway JZ10117 User manual

Costway HW64241 User manual

Costway

Costway HW64241 User manual

Costway BC10119 User manual

Costway

Costway BC10119 User manual

Costway HW63543 User manual

Costway

Costway HW63543 User manual

Costway HW65997-13 User manual

Costway

Costway HW65997-13 User manual

Costway HW58701 User manual

Costway

Costway HW58701 User manual

Costway JZ10179 User manual

Costway

Costway JZ10179 User manual

Costway HW68449 User manual

Costway

Costway HW68449 User manual

Costway NP11163 User manual

Costway

Costway NP11163 User manual

Costway PV10015 User manual

Costway

Costway PV10015 User manual

Costway HU10079 User manual

Costway

Costway HU10079 User manual

Costway HU10585GB User manual

Costway

Costway HU10585GB User manual

Costway HW58969 User manual

Costway

Costway HW58969 User manual

Costway CB10555 User manual

Costway

Costway CB10555 User manual

Costway HV10228 User manual

Costway

Costway HV10228 User manual

Costway HW60449 User manual

Costway

Costway HW60449 User manual

Costway HW60137 User manual

Costway

Costway HW60137 User manual

Costway JZ10058 User manual

Costway

Costway JZ10058 User manual

Costway HW65877 User manual

Costway

Costway HW65877 User manual

Costway TY326399 User manual

Costway

Costway TY326399 User manual

Costway HW62955 User manual

Costway

Costway HW62955 User manual

Costway HW66892 User manual

Costway

Costway HW66892 User manual

Costway JV10134 User manual

Costway

Costway JV10134 User manual

Costway OP70261 User manual

Costway

Costway OP70261 User manual

Popular Indoor Furnishing manuals by other brands

Takara Belmont Luxury MAXIM AB-9500P Operation manual

Takara Belmont

Takara Belmont Luxury MAXIM AB-9500P Operation manual

Symphony freedom installation manual

Symphony

Symphony freedom installation manual

Night & Day Furniture Spices CINNAMON STORAGE DRAWERS Assembly instructions

Night & Day Furniture

Night & Day Furniture Spices CINNAMON STORAGE DRAWERS Assembly instructions

Furinno 13122 Assembly instruction

Furinno

Furinno 13122 Assembly instruction

Canadel QUI2SACZ087 Assembly

Canadel

Canadel QUI2SACZ087 Assembly

TYPE A 068-7699-6 Assembly instructions

TYPE A

TYPE A 068-7699-6 Assembly instructions

designer's image 211-4525 Assembly instructions

designer's image

designer's image 211-4525 Assembly instructions

Keter Harmony Table Assembly instructions

Keter

Keter Harmony Table Assembly instructions

RTA AXIS Assembly instructions

RTA

RTA AXIS Assembly instructions

Coaster 223381Q Assembly instructions

Coaster

Coaster 223381Q Assembly instructions

Furniture Solutions CAYLA Assembly instructions

Furniture Solutions

Furniture Solutions CAYLA Assembly instructions

Ace Baby Furniture MDBEW1076 Assembly instructions

Ace Baby Furniture

Ace Baby Furniture MDBEW1076 Assembly instructions

STYLEX Still Power Assembly Instructions

STYLEX

STYLEX Still Power Assembly Instructions

Whittier Wood 1220LSOc Assembly instructions

Whittier Wood

Whittier Wood 1220LSOc Assembly instructions

Rauch M2695 Assembly instructions

Rauch

Rauch M2695 Assembly instructions

Outdoor Revolution CAMPESE ORBK0060 INSTRUCTIONS & PRODUCT CARE

Outdoor Revolution

Outdoor Revolution CAMPESE ORBK0060 INSTRUCTIONS & PRODUCT CARE

Melaco Design Solutions 4 kitchen Assembly and use manual

Melaco

Melaco Design Solutions 4 kitchen Assembly and use manual

Furniture of America IDI-141006RC Assembly instructions

Furniture of America

Furniture of America IDI-141006RC Assembly instructions

manuals.online logo
manuals.online logoBrands
  • About & Mission
  • Contact us
  • Privacy Policy
  • Terms and Conditions

Copyright 2025 Manuals.Online. All Rights Reserved.