manuals.online logo
Brands
  1. Home
  2. •
  3. Brands
  4. •
  5. Costway
  6. •
  7. Indoor Furnishing
  8. •
  9. Costway HW63971NA User manual

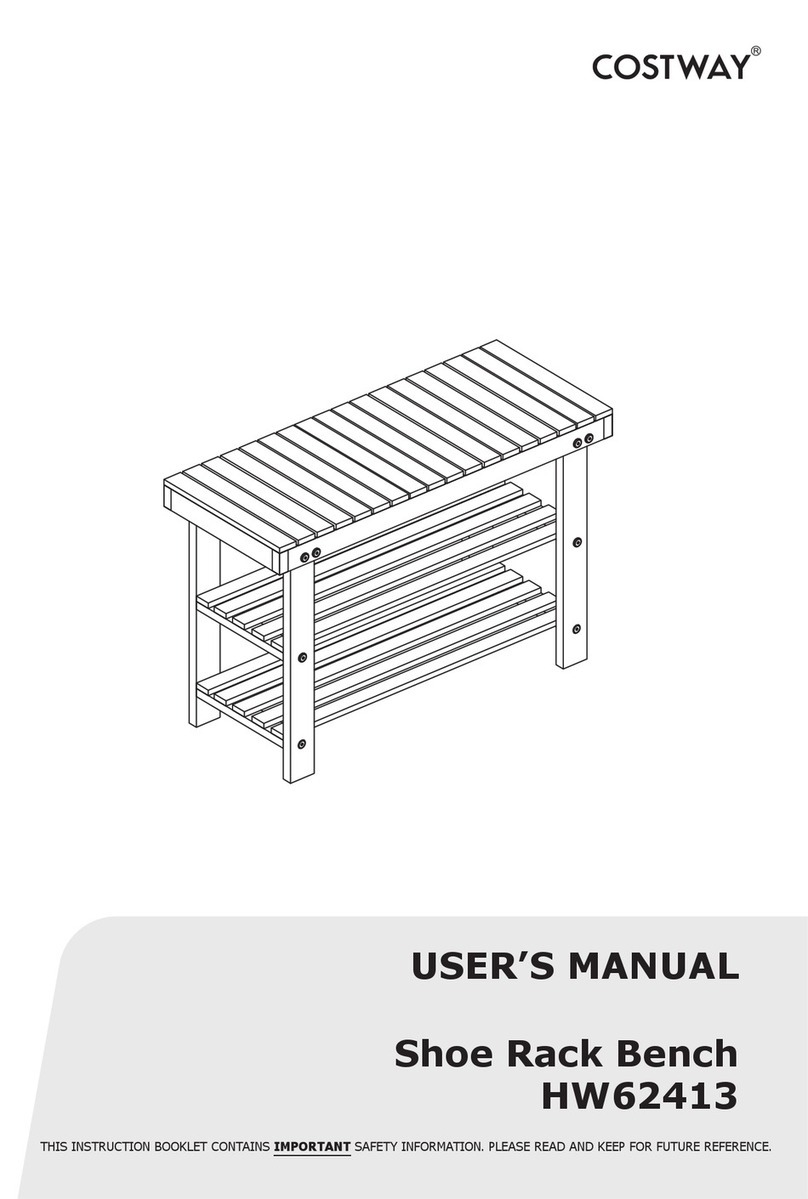
Costway HW63971NA User manual

THIS INSTRUCTION BOOKLET CONTAINS IMPORTANT SAFETY INFORMATION. PLEASE READ AND KEEP FOR FUTURE REFERENCE.
EN DEFR ES IT PL
USER'S MANUAL/HANDBUCH
/MANUEL DE L'UTILISATEUR/MANUAL DEL USUARIO
/MANUALE UTENTE/INSTRUKCJA OBSŁUGI
HW63971NA
Stackable Shoe Rack / Faltbares Schuhregal / Étagère à Chaussures /
Zapatero / Scarpiera / Szafka na buty
EN
DE
FR
ES
IT
PL
With your inspiring rating, COSTWAY will be more consistent to offer you EASY
SHOPPING EXPERIENCE, GOOD PRODUCTS and EFFICIENT SERVICE!
Mit Ihrer inspirierenden Bewertung wird COSTWAY konsistenter sein, um Ihnen EIN
SCHÖNES EINKAUFSERLEBNIS, GUTE PRODUKTE und EFFIZIENTEN SERVICE zu
bieten!
Avec votre évaluation inspirante, COSTWAY continuera à fournir une EXPÉRIENCE
D’ACHAT PRATIQUE, des PRODUITS DE QUALITÉ et un SERVICE EFFICACE !
Con su calificación inspiradora, COSTWAY será más consistente para ofrecerle
EXPERIENCIA DE COMPRA FÁCIL, BUENOS PRODUCTOS y SERVICIO EFICIENTE.
Con la tua valutazione incoraggiante, COSTWAY sarà più coerente per offrirti
ESPERIENZA DI ACQUISTO FACILE, BUONI PRODOTTI e SERVIZIO EFFICIENTE!
Dzięki twojej opinii COSTWAY będzie mógł oferować jeszcze WYGODNIEJSZE
ZAKUPY, LEPSZE PRODUKTY i SPRAWNIEJSZĄ OBSŁUGĘ KLIENTA.
US office: Fontana UK office: Ipswich AU office: Truganina
DE office: FDS GmbH, Neuer Höltigbaum 36, 22143 Hamburg, Deutschland
FR office: Saint Vigor d'Ymonville
PL office: Gdańsk
02 03
Φ17mm x24 M8 x38mm x24 Φ 6 x30mm x8
LISTA DELLE PARTI
X6
X1
X5
LISTA CZĘŚCI
X6
X1
X5
Glue 10cc x1
Kleber x1
Colle x1
Pegamento x1
Colla x1
KLEJ 10ML X1
HOLE CAP M6 x4
Lochkappe x4
Capuchon x4
Tapa x4
Coperchio x4
ZAŚLEPKA M6 X4
SAFETY BRACKET KITS x1
Sicherheitsbügel-Sets x1
Ensemble de support de sécurité x1
Kit de soporte de seguridad x1
Kit di staffa di sicurezza x1
ZESTAW MONTAŻOWY WSPORNIKA ZABEZPIECZAJĄCEGO x1
PART LIST
X6
X1
X5
TEILELISTE
X6
X1
X5
LISTE DES PIÈCES
X6
X1
X5
LISTA DE PIEZAS
X6
X1
X5
04 05
Do not fully tighten this screw.
EN
DE
FR
ES
IT
PL
Ziehen Sie die Schraube nicht ganz fest.
Ne serrez pas complètement cette vis
No apriete completamente este tornillo.
Non stringere completamente questa vite.
Nie dokręcaj tej śruby do końca
12
06 07
3
4
5
08 09
7
6
OPTIONAL
OPTIONALES
OPTIONNEL
OPCIONAL
Opzionale
OPCJONALNE
OPTIONAL HARDWARE FOR STEP NO.6
EN
DE
FR
ES
IT
PL
OPTIONALES ZUBEHÖR FÜR SCHRITT 6
ACCESSOIRE OPTIONNEL POUR L’ÉTAPE 6
ACCESORIOS OPCIONALES PARA EL PASO 6
GLI ACCESORI OPZIONALI PER IL PASSO 6
OPCJONALNE AKCESORIA DLA KROKU 6
10 11
OPTION 1: Attachment into a wall stud (preferred method)
Using a stud finder, locate a stud in the wall. Place your unit against the wall,
with the safety bracket aligned in this location. To make driving the screw
easier, you can drill a 1/8" diameter pilot hole (3mm) through the safety
bracket into the stud. Drive the screw through the safety bracket into the
wall stud. Tighten the screw that was not fully tightened in step 1.
OPTION 2: Attachment into drywall
Locate your unit where desired against a wall and mark the wall through the
safety bracket, then move your unit aside. Drill a 3/16" diameter hole (5mm)
into the wallboard. Tap the wall anchor into the hole until it is flush. Move
your unit into location and fasten the wall bracket to the wall anchor with the
screw. Tighten the screw that was not fully tightened in step 1.
FITTING OF ANTI-TIP BRACKET
IMPORTANT: THIS UNIT MUST BE SECURED TO THE WALL TO
HELP PREVENT TIPOVER. FOLLOW THESE INSTRUCTIONS TO
INSTALL THE ANTI-TIPPING SAFETY BRACKET PROVIDED WITH
THIS PRODUCT.
For Masonry, Concrete,
or other wall materials:
Consult your local hardware
store for appropriate
anchors to securely attach
the safety bracket.
hole
wallboard
EN
OPTION 1: Befestigung an einem Wandpfosten (bevorzugte Methode)
Suchen Sie mit Hilfe eines Bolzenfinders einen Bolzen in der Wand. Stellen
Sie Ihr Gerät an die Wand, wobei der Sicherheitsbügel an dieser Stelle
ausgerichtet sein muss. Um das Eindrehen der Schraube zu erleichtern,
können Sie ein Vorbohrloch mit einem Durchmesser von 3 mm durch den
Sicherheitsbügel in den Bolzen bohren. Drehen Sie die Schraube durch den
Sicherheitsbügel in den Wandpfosten. Ziehen Sie die Schraube an, die in
Schritt 1 nicht vollständig angezogen wurde.
OPTION 2: Befestigung in der Trockenbauwand
Stellen Sie das Gerät an der gewünschten Stelle an der Wand auf und
markieren Sie die Wand durch die Sicherheitshalterung hindurch, dann
schieben Sie das Gerät zur Seite. Bohren Sie ein Loch mit einem
Durchmesser von 5 mm in die Wandplatte. Klopfen Sie den Dübel in das
Loch, bis er bündig ist. Bringen Sie das Gerät an seinen Platz und befestigen
Sie die Wandhalterung mit der Schraube am Wandanker. Ziehen Sie die
Schraube an, die in Schritt 1 nicht vollständig angezogen wurde.
Anbringen des Kippschutzes
WICHTIG: DIESES GERÄT MUSS AN DER WAND BEFESTIGT
WERDEN, UM EIN UMKIPPEN ZU VERHINDERN. BEFOLGEN SIE
DIESE ANWEISUNGEN, UM DIE MIT DIESEM ARTIKEL
MITGELIEFERTE SICHERHEITSHALTERUNG GEGEN UMKIPPEN ZU
MONTIEREN. Für Mauerwerk, Beton
oder andere
Wandmaterialien:
Erkundigen Sie sich in
Ihrem örtlichen Baumarkt
nach geeigneten Dübeln,
um die Sicherheitshalterung
sicher zu befestigen.
Loch
Wand
DE
8 8
12 13
OPTION 1 : Fixation dans un poteau mural (méthode privilégiée)
À l'aide d'un détecteur de poteaux, localisez un poteau dans le mur. Placez
votre produit contre le mur, avec le support de sécurité aligné à cet endroit.
Pour faciliter l'enfoncement de la vis, vous pouvez percer un trou pilote de 3
mm de diamètre à travers le support de sécurité dans le poteau. Enfoncez la
vis à travers le support de sécurité dans le poteau du mur. Serrez la vis qui
n'a pas été complètement serrée à l'étape 1.
OPTION 2 : Fixation dans les cloisons sèches
Placez votre produit à l'endroit souhaité contre un mur et marquez le mur à
travers le support de sécurité, puis déplacez votre produit sur le côté. Percez
un trou de 5 mm de diamètre dans le panneau mural. Tapez la cheville
murale dans le trou jusqu'à ce qu'il affleure. Déplacez votre produit dans
l'emplacement et fixez le support mural à la cheville murale avec la vis.
Serrez la vis qui n'a pas été complètement serrée à l'étape 1.
MONTAGE DU SUPPORT ANTI-BASCULEMENT
IMPORTANT : CE RPDOUIT DOIT ÊTRE FIXÉ AU MUR POUR
ÉVITER LE BASCULEMENT. SUIVEZ CES INSTRUCTIONS POUR
INSTALLER LE SUPPORT DE SÉCURITÉ ANTI-BASCULEMENT AVEC
CE PRODUIT.
Pour la maçonnerie, le
béton ou d'autres
matériaux de mur :
Consultez votre quincaillerie
locale pour les chevilles
appropriées pour fixer
solidement le support de
sécurité.
Trou
Panneau mural
FR
OPCIÓN 1: Fijación en un montante de pared (método preferido)
Con un detector de montantes, ubique un montante en la pared. Coloque
el producto contra la pared, con el soporte de seguridad alineado en esta
posición. Para facilitar la fijación del tornillo, puede perforar un agujero
piloto de 3 mm de diámetro a través del soporte de seguridad en el
montante. Introduzca el tornillo a través del soporte de seguridad en el
montante de pared. Apriete el tornillo que no estaba apretado
completamente en el paso 1.
OPCIÓN 2: Fijación en paneles de yeso
Coloque el producto en la ubicación deseada contra una pared y marque la
pared a través del soporte de seguridad, luego mueva el producto a un
lado. Haga un agujero de 5 mm de diámetro en la pared. Golpee el taco
de pared en el agujero hasta que quede nivelado. Mueva el producto a su
lugar y fije el soporte de pared al taco de pared con el tornillo. Apriete el
tornillo que no estaba apretado completamente en el paso 1.
MONTAJE DEL SOPORTE ANTIVUELCO
IMPORTANTE: ESTE PRODUCTO DEBE SER FIJADO A LA PARED
PARA EVITAR EL VUELCO. SIGA ESTAS INSTRUCCIONES PARA
INSTALAR EL SOPORTE DE SEGURIDAD ANTIVUELCO QUE SE
PROPORCIONA CON ESTE PRODUCTO.
Para mampostería,
hormigón u otros
materiales de pared:
Consulte con su ferretería
local para obtener los tacos
de pared adecuados para
sujetar de forma segura el
soporte de seguridad.
Agujero
Pared
ES
8 8
14 15
OPZIONE 1: Fissaggio in un montante a parete (metodo preferito)
Utilizzando un rilevatore di montanti, individuare un montante nella parete.
Posizionare il prodotto contro la parete, con la staffa di sicurezza allineata in
questa posizione. Per facilitare l'avvitamento della vite, è possibile praticare
un foro pilota di 3 mm di diametro attraverso la staffa di sicurezza nel perno.
Spingere la vite attraverso la staffa di sicurezza nel montante a parete.
Serrare la vite che non è stata completamente serrata al passo 1.
OPZIONE 2: Fissaggio nel cartongesso
Posizionare il prodotto dove desiderato contro una parete e contrassegnare la
parete attraverso la staffa di sicurezza, poi spostare il prodotto da parte.
Praticare un foro di 5 mm di diametro nella parete. Battere l'ancoraggio a
parete nel foro finché non è a filo. Spostare il prodotto in posizione e fissare
la staffa a parete all'ancoraggio a parete con la vite. Serrare la vite che non è
stata completamente serrata al passo 1.
MONTAGGIO DELLA STAFFA ANTIRIBALTAMENTO
IMPORTANTE: QUESTO PRODOTTO DEVE ESSERE FISSATO ALLA
PARETE PER EVITARE IL RIBALTAMENTO. SEGUIRE QUESTE
ISTRUZIONI PER INSTALLARE LA STAFFA DI SICUREZZA
ANTIRIBALTAMENTO FORNITA CON QUESTO PRODOTTO.
Per muratura, cemento o
altri materiali per pareti:
Consultare il negozio di
ferramenta locale per gli
ancoraggi appropriati per
fissare saldamente la staffa
di sicurezza.
Foro
Parete
IT
OPCJA 1: Mocowanie do ściany szkieletowej (metoda preferowana)
Skorzystaj z detektora metali i przewodów. Umieść mebel przy ścianie, wraz
ze wspornikiem zabezpieczającym ustawionym również w tym samym
miejscu. Aby ułatwić mocowanie wkrętu, można wywiercić otwór prowadzący
na kołek, o średnicy 3 mm (ma przechodzić przez wspornik zabezpieczający).
Wkręć wkręt do kołka, przechodzący przez wspornik zabezpieczający. Dokręć
śrubę, która nie została całkowicie dokręcona w kroku 1.
OPCJA 2: Mocowanie do płyt kartonowo-gipsowych
Umieść mebel w wybranym miejscu przy ścianie i zaznacz umiejscowienie
wspornika zabezpieczającego a następnie odsuń mebel na bok. Wywierć
otwór o średnicy 5 mm w płycie ściennej. Wbij kotwę ścienną w otwór, aż
zrówna się z powierzchnią. Przenieś mebel na wybrane miejsce i przymocuj
wspornik do kotwy ściennej za pomocą śruby. Dokręć śrubę, która nie została
całkowicie dokręcona w kroku 1.
Dopasowanie i montaż paska zapobiegającego
przewróceniu się mebla
WAŻNE: MEBEL MUSI BYĆ PRZYMOCOWANY DO ŚCIANY, ABY NIE
ULEGŁ PRZEWRÓCENIU. POSTĘPUJ ZGODNIE Z NINIEJSZYMI
INSTRUKCJAMI, ABY ZAINSTALOWAĆ WSPORNIK
ZABEZPIECZAJĄCY, BĘDĄCY CZĘŚCIĄ ZESTAWU.
W przypadku muru,
betonu lub innych
materiałów, z których
wykonane są ściany:
Skonsultuj się z lokalnym
sklepem budowlanym, aby
uzyskać odpowiednie kotwy
do bezpiecznego
zamocowania wspornika
zabezpieczającego.
Otwór
Ściana
PL
8 8

Other Costway Indoor Furnishing manuals

Costway OP3640 User manual

Costway

Costway OP3640 User manual

Costway HW64492 User manual

Costway

Costway HW64492 User manual

Costway AP2132 User manual

Costway

Costway AP2132 User manual

Costway HU10073DK-T User manual

Costway

Costway HU10073DK-T User manual

Costway JV10864DK-2 User manual

Costway

Costway JV10864DK-2 User manual

Costway HU10416 User manual

Costway

Costway HU10416 User manual

Costway NP10278 User manual

Costway

Costway NP10278 User manual

Costway HU10501 User manual

Costway

Costway HU10501 User manual

Costway JV10015 User manual

Costway

Costway JV10015 User manual

Costway NP11055 User manual

Costway

Costway NP11055 User manual

Costway HY10099 User manual

Costway

Costway HY10099 User manual

Costway HW66212GR-2 User manual

Costway

Costway HW66212GR-2 User manual

Costway JS10029 User manual

Costway

Costway JS10029 User manual

Costway HW70832-4 User manual

Costway

Costway HW70832-4 User manual

Costway GO PLUS OP3882 User manual

Costway

Costway GO PLUS OP3882 User manual

Costway HW63844 User manual

Costway

Costway HW63844 User manual

Costway HY10182 User manual

Costway

Costway HY10182 User manual

Costway HW62861 User manual

Costway

Costway HW62861 User manual

Costway HW65410 User manual

Costway

Costway HW65410 User manual

Costway JV11598 User manual

Costway

Costway JV11598 User manual

Costway HW65113 User manual

Costway

Costway HW65113 User manual

Costway OP70342 User manual

Costway

Costway OP70342 User manual

Costway HW62413 User manual

Costway

Costway HW62413 User manual

Costway KC53547 User manual

Costway

Costway KC53547 User manual

Popular Indoor Furnishing manuals by other brands

Courtyard Creations TMS21LF Assembly instructions

Courtyard Creations

Courtyard Creations TMS21LF Assembly instructions

Teeter X Series Repacking guide

Teeter

Teeter X Series Repacking guide

Iron Age Office CARRUCA L-SHAPE Assembly instructions

Iron Age Office

Iron Age Office CARRUCA L-SHAPE Assembly instructions

VonHaus 4000211 manual

VonHaus

VonHaus 4000211 manual

Ave Six LAGUNA LAG51 Assembly instructions

Ave Six

Ave Six LAGUNA LAG51 Assembly instructions

Bontempi Casa ARTISTICO 07.74 Assembly instructions

Bontempi Casa

Bontempi Casa ARTISTICO 07.74 Assembly instructions

Walker Edison D42MAR3D Assembly instructions

Walker Edison

Walker Edison D42MAR3D Assembly instructions

Furniture of America CM3781T Assembly instructions

Furniture of America

Furniture of America CM3781T Assembly instructions

Tradecraft Specialties M3KGT-3 instruction manual

Tradecraft Specialties

Tradecraft Specialties M3KGT-3 instruction manual

Universal Furniture EXPLORE HOME 507-380 instruction sheet

Universal Furniture

Universal Furniture EXPLORE HOME 507-380 instruction sheet

New Classic Furniture PISCES 5/0 B1564-300 Assembly instructions

New Classic Furniture

New Classic Furniture PISCES 5/0 B1564-300 Assembly instructions

Rauch M2574 Assembly instructions

Rauch

Rauch M2574 Assembly instructions

Allen + Roth SUCO installation instructions

Allen + Roth

Allen + Roth SUCO installation instructions

Easy 257000 Assembly instructions

Easy

Easy 257000 Assembly instructions

Demeyere 112549 Assembly instructions

Demeyere

Demeyere 112549 Assembly instructions

Cooper Lighting PM113obi Specification sheet

Cooper Lighting

Cooper Lighting PM113obi Specification sheet

H.Wilson WPS4E manual

H.Wilson

H.Wilson WPS4E manual

John Lewis Mixit  80324203 manual

John Lewis

John Lewis Mixit 80324203 manual

manuals.online logo
manuals.online logoBrands
  • About & Mission
  • Contact us
  • Privacy Policy
  • Terms and Conditions

Copyright 2025 Manuals.Online. All Rights Reserved.