www.costway.com
1Only mul-motor system has this condion.
-----------------------------------------------------------------------------------------------------------------------------------
---------------------------------------------------------------
Warranty terms
We provide 1 year warranty service for our products. Starng from the ex work date, for
damage caused by non-human factors under normal use condions within1years, , user can
contache factory or our agenor free maintenance by showing the maintenance card, invoice
or othervalid voucher.
■Please note:
Please fill in the maintenance card correctly and keep the invoice or othervalid
voucher safe.
If return of product happens, you need to return the full set of product, and when process
returning,please make sure it can be sold for the second me.
■Below cases are not covered by the warranty term:
1. Exceeds the warranty period
2. No support ofinvoice or valid voucher, fake products
3. Damage caused by noollowing the user manual
4. Damage caused by human factor, like fall down, soaking water, violent strike, etc.
5. Damage caused by selfdisassembling or maintenance ohe product
6. Damage caused by force majeure.
User Information & Maintenance record
User
Name Address Contact info
Model Purchase
Date
Installation
Date
Mainte
nance
Times
Maintena
nce Date
Maintenanc
e Item
parts
Replacement Signature
1st
2nd
3rd
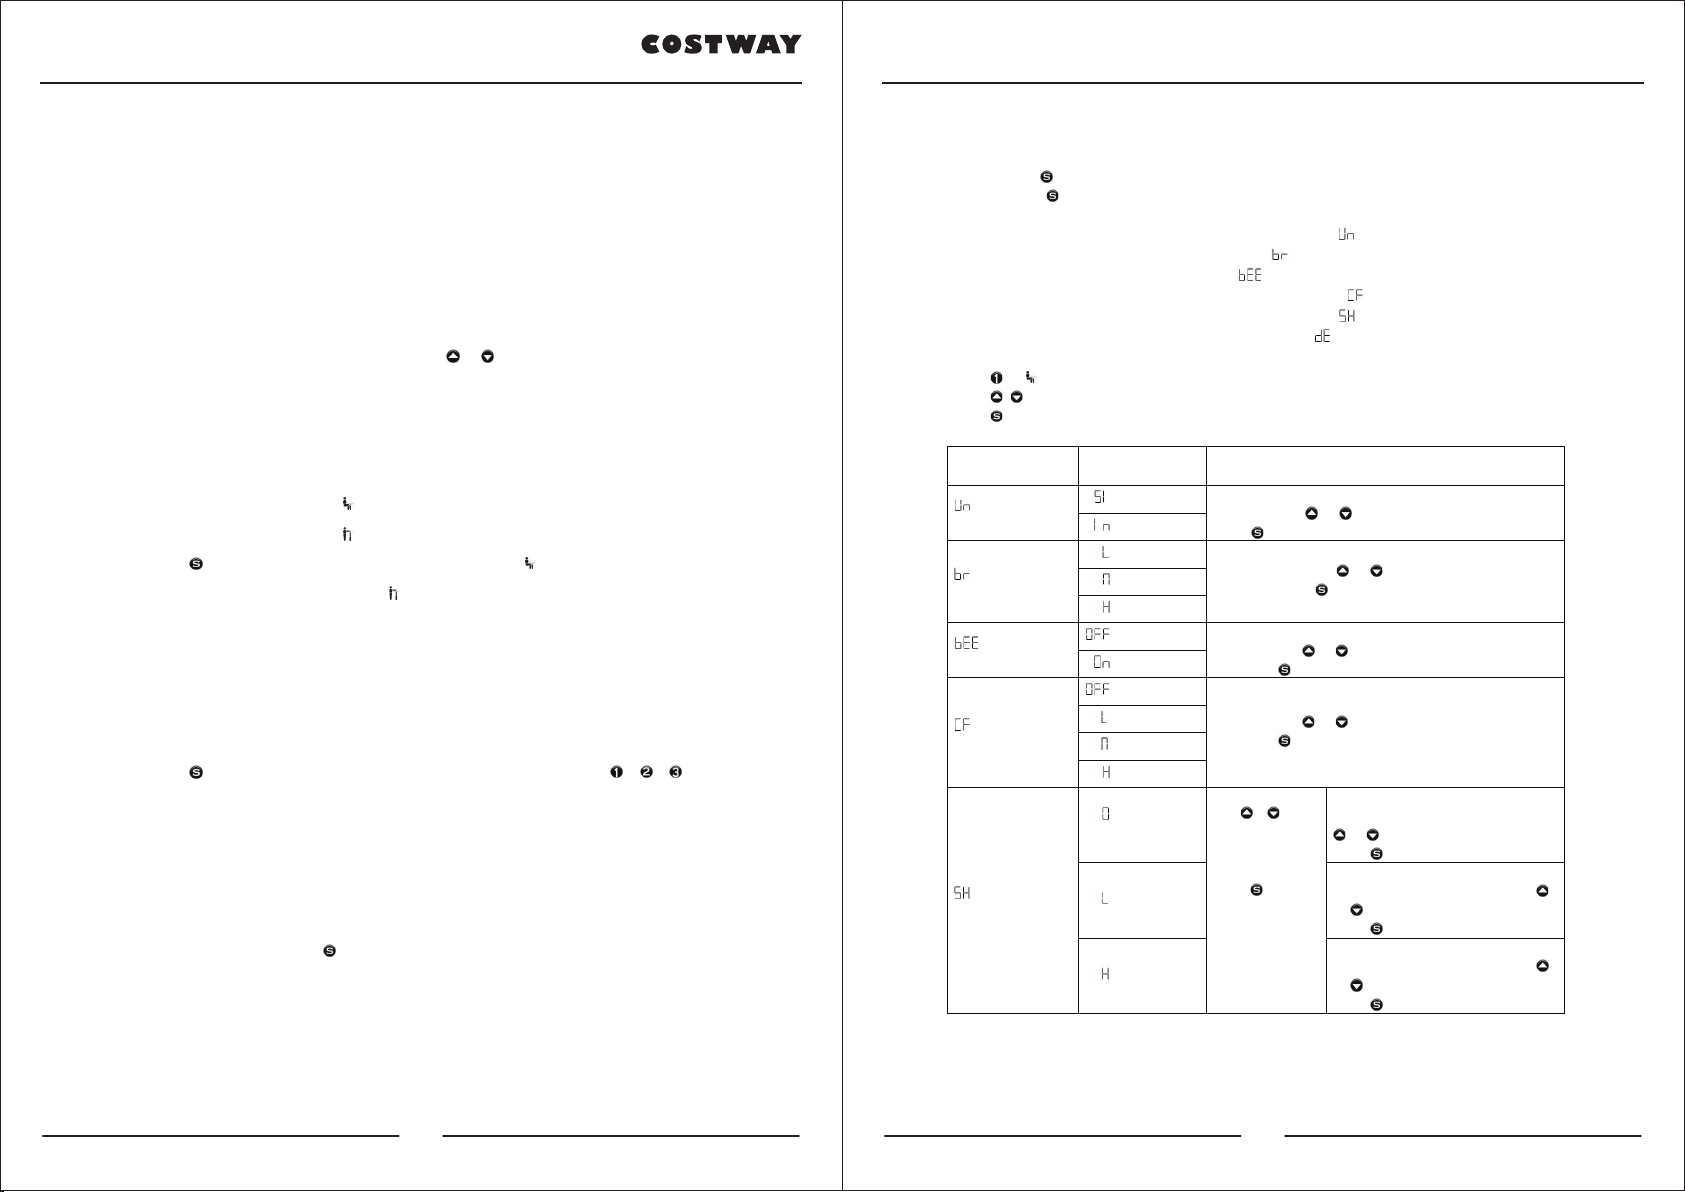
Demo
It displays
(Password)
enter your
password to
connue later
OffThe interfacedisplays last demo mode seng aer
entering. Use or to choose demo mode, and
press to confirm and save it. The system switches
to heightdisplay interface if you choose off.
Otherwise, the system switches to demo mode
interface.
Press to start-up and press to stop in demo
2min on,
18 min off
4min / cycle
6min / cycle
10min / cycle
Note:
1Adjustment resoluon is 1cm or 0.5inch.
2Original height refers to the posion aer reset, it can be adjusted between -20cm and +20cm
(or -8inch and +8inch).
3The highest limit set shall be 20cm or 8inch larger than lowest limit.
4Password is five when using WN18H45 handle.
5. Protecon and Warning
A. Block protecon: when it displays “E02”, it alarms whendesktop in vibraon, collision and
lt, auto-clear the alarm aer rebounding; or press any key to clear the alarmduring rebounding.
You should check and ensure thahe desk won’t operate in large amplitudevibraon, barrier or
lt condion, then try to run again.
B. Overheat protecon: when it displays “Hot”, this protecon may be launched aer running
for a long me, you should waior at least 18 minutes in order to use it again.
C. Motor fault protecon: when it displays “E10”, you should check and ensure thahe
connecon between motor and controller is reliable, then power it offand power it on again or
press reseo clear it.
D. Overload protecon: when it displays “E20”, you should remove some objects on the
desktop when it occurs during the rise phase; or ifit occurs during the declinephase, power it off
and power it on again or press reseo clear it.
E. Undervoltage protecon: when it displays “E31”, it alarms when the supply voltage is lower
than limit value, you should power it offand power it on again to clear it. Otherwise, it can be auto-
cleared aer voltage goes to set value.
F. Overvoltage protecon: when it displays “E32”, it alarms when the supply voltage is higher
than limit value, you should power it offand power it on again to clear it. Otherwise, it can be auto-
cleared aer voltage goes to set value.
G. Out-of-step protecon①: when it displays “E60”, you should check and make sure the
motors of each channelareidencal and their connecon to controller is reliable, then press reset
to clear it.
Note:
1Only mul-motor system has out-of-step protecon.
6. Stroke Reset
In the condion of “E10,E20 and E60①” or basic posion mode, long press 3 seconds, loosen
it unl it shows , the desk runs to the boom and rebounds to certain height, reseinishes
and shows lowest posion height.
Note:
12 13