manuals.online logo
Brands
  1. Home
  2. •
  3. Brands
  4. •
  5. Costway
  6. •
  7. Indoor Furnishing
  8. •
  9. Costway HW70448 User manual

Costway HW70448 User manual

THIS INSTRUCTION BOOKLET CONTAINS IMPORTANT SAFETY INFORMATION. PLEASE READ AND KEEP FOR FUTURE REFERENCE.
EN DEFR ES IT PL
USER'S MANUAL/HANDBUCH
/MANUEL DE L'UTILISATEUR/MANUAL DEL USUARIO
/MANUALE UTENTE/INSTRUKCJA OBSŁUGI
HW70448
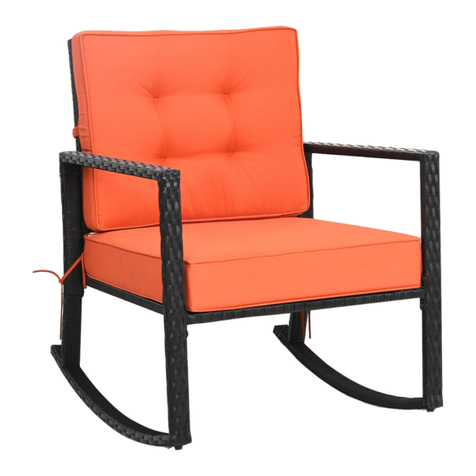
3-Piece Rattan Furniture Set /Rattan-Sofa 3er-Set
/Ensemble de Meubles en Rotin /Juego de Muebles de Ratán
/Set di Mobili in Rattan /3-częściowy zestaw mebli z rattanu
EN
DE
FR
ES
IT
PL
With your inspiring rating, COSTWAY will be more consistent to offer you EASY
SHOPPING EXPERIENCE, GOOD PRODUCTS and EFFICIENT SERVICE!
Mit Ihrer inspirierenden Bewertung wird COSTWAY konsistenter sein, um Ihnen EIN
SCHÖNES EINKAUFSERLEBNIS, GUTE PRODUKTE und EFFIZIENTEN SERVICE zu
bieten!
Avec votre évaluation inspirante, COSTWAY continuera à fournir une EXPÉRIENCE
D’ACHAT PRATIQUE, des PRODUITS DE QUALITÉ et un SERVICE EFFICACE !
Con su calificación inspiradora, COSTWAY será más consistente para ofrecerle
EXPERIENCIA DE COMPRA FÁCIL, BUENOS PRODUCTOS y SERVICIO EFICIENTE.
Con la tua valutazione incoraggiante, COSTWAY sarà più coerente per offrirti
ESPERIENZA DI ACQUISTO FACILE, BUONI PRODOTTI e SERVIZIO EFFICIENTE!
Dzięki twojej opinii COSTWAY będzie mógł oferować jeszcze WYGODNIEJSZE
ZAKUPY, LEPSZE PRODUKTY i SPRAWNIEJSZĄ OBSŁUGĘ KLIENTA.
US office: Fontana UK office: Ipswich AU office: Truganina
DE office: FDS GmbH, Neuer Höltigbaum 36, 22143 Hamburg, Deutschland
FR office: Saint Vigor d'Ymonville
PL office: Gdańsk
02 03
H
G
D
A
C
B
(2 x Chairs/Stühle/Chaise
/Silla/Sgabelli/Fotel)
I
J
I
J
K
(1 x Table/Tisch/Table
/Mesa/Tavolo/Stolik)
6. Note: If one or some screws are fully tightened during assembly,
chances are the others will not be aligned with holes. In addition, all
the holes are designed to be relatively larger to provide more space
for the adjustment of the screws.
Notice
1. 50% Tighten before fixing all screws, Allen wrench is
recommended instead of an electric drill.
2. Place the item on a flat ground to adjust and make sure it
remains stable.
3. Tighten up all screws with tools gradually.
4. If the screws are not aligned with holes during assembly, please
loosen all the other screws to 50% and continue the assembly
process.
5. If the item is not stable, please loosen all the screws, adjust it on
a flat ground and tighten up all screws again.
EN
Hinweis
1. Ziehen Sie alle Bolzen vor dem Befestigen zu 50 % an. Wir
empfehlen einen Inbusschlüssel anstelle einer elektrischen
Bohrmaschine.
2. Legen Sie den Artikel zum Einstellen auf einen ebenen Boden und
stellen Sie sicher, dass er stabil bleibt.
3. Ziehen Sie alle Bolzen mit Werkzeugen schrittweise an.
4. Wenn die Bolzen bei der Montage nicht mit den Löchern
übereinstimmen, lösen Sie bitte alle anderen Bolzen zu 50% und
setzen Sie den Montageprozess fort.
5. Wenn der Artikel nicht stabil ist, lösen Sie bitte alle Bolzen,
richten Sie ihn auf einer ebenen Fläche aus und ziehen Sie alle
Bolzen wieder fest.
6. Hinweis: Wenn eine oder mehrere Bolzen während der Montage
ganz angezogen werden, besteht die Möglichkeit, dass die anderen
nicht mit den Löchern fluchten. Außerdem sind alle Löcher relativ
groß, um mehr Platz für die Einstellung der Bolzen zu bieten.
DE
Attention
1. Serrez à 50% avant de fixer toutes les vis, une clé Allen est
recommandée au lieu d'une perceuse électrique.
2. Placez le produit sur un sol plat pour l'ajuster et assurez-vous
qu'il est stable.
FR
3. Serrez progressivement toutes les vis avec des outils.
4. Si les vis ne sont pas alignées avec les trous lors du montage,
veuillez desserrer toutes les autres vis de 50 % et poursuivre le
processus de montage.
5. Si le produit n'est pas stable, desserrez toutes les vis, placez-le
sur un sol plat et resserrez toutes les vis.
6. Remarque: Si une ou plusieurs vis sont complètement serrées
lors de l'assemblage, les autres peuvent ne pas s'aligner avec les
trous. De plus, tous les trous sont conçus pour être relativement
plus grands afin de fournir plus de place pour le réglage des vis.
Atención
1. Apriete el 50% antes de fijar todos los tornillos, se recomienda
una llave Allen en lugar de un taladro eléctrico.
2. Coloque el producto en un suelo plano para ajustarlo y asegúrese
de que se mantenga estable.
3. Apriete todos los tornillos con herramientas gradualmente.
4. Si los tornillos no están alineados con los agujeros durante el
montaje, por favor afloje todos los demás tornillos al 50% y
continúe con el proceso de montaje.
5. Si el producto no es estable, por favor afloje todos los tornillos,
ajústelo en un suelo plano y apriete todos los tornillos de nuevo.
6. Nota: Si uno o algunos tornillos están totalmente apretados
durante el montaje, es probable que los otros no estén alineados
con los agujeros. Además, todos los agujeros están diseñados para
ser relativamente más grandes para proporcionar más espacio para
el ajuste de los tornillos.
ES
Attenzione
1.Si prega di serrare al 50% prima di fissare tutte le viti, si consiglia
una chiave a brugola invece di un trapano elettrico.
2. Posizionare il prodotto su una superficie piana per regolarlo e
assicurarsi che sia stabile.
3. Stringere gradualmente tutte le viti con gli strumenti.
4. Se le viti non sono allineate con i fori durante il montaggio,
allentare tutte le altre viti al 50% e continuare il processo di
montaggio.
5. Se il prodotto non è stabile, allentare tutte le viti, posizionarlo su
una superficie piana e serrare nuovamente tutte le viti.
6. Nota: Se una o poche viti vengono serrate completamente
durante il montaggio, le altre probabilmente non sono allineate con i
fori. Inoltre, tutti i fori sono progettati per essere relativamente più
grandi per fornire più spazio per la regolazione delle viti.
IT
Uwaga
1. Dokręcaj śruby na ok. 50% przed zamontowaniem wszystkich
śrub. Zalecamy użycie klucza imbusowego zamiast wkrętarki.
2. Umieść zestaw mebli na płaskim i równym podłożu, tak aby stał
stabilnie.
3. Stopniowo dokręć wszystkie śruby za pomocą odpowiednich
narzędzi.
4. Jeśli nie można wyrównać śrub z otworami, poluzuj wszystkie
pozostałe śruby do ok. 50%, a następnie kontynuuj proces
montażu.
5. Jeśli zestaw mebli nie stoi stabilnie, poluzuj wszystkie śruby,
wyreguluj go na płaskim podłożu i ponownie dokręć wszystkie
śruby.
PL
04 05
6. Uwaga: Jeśli podczas poszczególnych etapów montażu będziesz
dokręcać śruby zbyt mocno, istnieje ryzyko, że nie będzie można
wyrównać pozostałych śrub z otworami. Otwory zostały
zaprojektowane tak, aby zapewnić więcej miejsca na regulację śrub.
Part List /Teileliste /Liste des Pièces /Lista de
Piezas /Lista di Parte /Lista części
x2Ax2Cx2B
Right Frame
/Rechter Rahmen
/Cadre droit
/Marco derecho
/Telaio destro
/Prawa rama
boczna fotela
Left Frame
/Linker Rahmen
/Cadre gauche
/Marco izquierdo
/Telaio sinistro
/Lewa rama
boczna fotela
Seat Frame
/Sitzrahmen
/Cadre du siège
/Marco de asiento
/Telaio del sedile
/Rama siedziska fotela
x2Dx2Gx2H
Back Frame
/Rückenrahmen
/Cadre du dossier
/Marco de respaldo
/Telaio di supporto
/Tylna rama fotela
Seat Cushion
/Sitzkissen
/Coussin de siège
/Cojín de asiento
/Cuscino del sedile
/Poduszka siedziska
Back Pillow
/Rückenkissen
/Coussin de dossier
/Cojín de respaldo
/Cuscino dello schienale
/Poduszka oparcia
x2Ix2Jx1K
Table Leg Frame
/Tischbeinrahmen
/Cadre de pied de table
/Marco de pata de mesa
/Struttura della
gamba del tavolo
/Noga stolika
Side Frame
/Seitenrahmen
/Cadre latéral
/Marco lateral
/Telaio laterale
/Rama boczna
stolika
Wood Table Top
/Holz-Tischplatte
/Plateau de table en bois
/Tablero de
mesa de madera
/Piano del tavolo in legno
/Blat stolika
Hardware List /Zubehör Liste /Liste des
Accessoires /Lista de Accesorios /Lista di
Accessori /Lista części montażowych
x41 x262 x43
x304 x25
/Bolt /Bolzen /Boulon
/Perno /Bullone /Śruba /Bolt /Bolzen /Boulon
/Perno /Bullone /Śruba
M6x35 mm M6x60 mm
Ø6x16x1 mm M4
M6x25 mm
Washers
/Unterlegscheiben
/Rondelle /Arandela
/Rondella /Podkładka
Allen key
/Inbusschlüssel
/Clé Allen
/Llave Allen
/Chiave a brugola
/Klucz imbusowy
06 07
FR: (2 x Assemblage de chaise)
Reliez le cadre du dossier (D) au cadre du siège (C) avec le boulon
(2) et la rondelle (4).
ES: (2 x Montaje de silla)
Conecte el marco de respaldo (D) al marco de asiento (C) con el
perno (2) y la arandela (4).
IT: (2 x Montaggio dello sgabello)
Fissare il telaio dello schienale (D) al telaio del sedile (C) con il
bullone (2) e la rondella (4).
PL: (2 x Montaż fotela)
Przymocuj tylną ramę (D) do ramy siedziska (C) za pomocą śrub (2)
i podkładek (4).
DE: Verbinden Sie das Teil aus SCHRITT 1 mit dem linken Rahmen
(B) mit Bolzen (2) und Unterlegscheiben (4)
FR: Fixez la pièce de l'ÉTAPE 1 au cadre gauche (B) avec des
boulons (2) et des rondelles (4).
ES: Conecte la pieza del PASO 1 al marco izquierdo (B) con los
pernos (2) y las arandelas (4).
IT: Fissare il pezzo di PASSO 1 al telaio sinistro (B) con i bulloni
(2) e le rondelle (4).
PL: Przymocuj części zmontowane w KROKU 1 do lewej ramy
bocznej (B) za pomocą śrub (2) i podkładek (4).
EN: (2 x Chair assembly)
Connect Back Frame (D) to
Seat Frame (C) with Bolt
(2) & Washer (4)
DE: (2 x Stuhlmontage)
Verbinden Sie den
Rückenrahmen (D) mit dem
Sitzrahmen (C) mit Bolzen
(2) und Unterlegscheibe (4)
D
C
2
4
x2
1 2
B
2
2
4
2
2
x2
EN: Connect part from
STEP 1 to Left Frame (B)
with Bolts (2) & Washers (4)
08 09
2
2
2
2
A
x2
4
3
EN: Connect part from
STEP 2 to Right
Frame (A) with Bolts
(2) & Washers (4)
DE: Verbinden Sie das Teil aus SCHRITT 2 mit dem rechten
Rahmen (A) mit Bolzen (2) und Unterlegscheiben (4)
FR: Fixez la pièce de l'ÉTAPE 2 au cadre droit (A) avec des boulons
(2) et des rondelles (4).
ES: Conecte la pieza del PASO 2 al marco derecho (A) con los
pernos (2) y las arandelas (4).
IT: Fissare il pezzo di PASSO 2 al telaio destro (A) con i bulloni (2)
e le rondelle (4).
PL: Przymocuj części zmontowane w KROKU 2 do prawej ramy
bocznej (A) za pomocą śrub (2) i podkładek (4).
3
3
B
A
D
x2
4
EN: Connect the parts of the Back Frame (D) to Right Frame (A)
and Left Frame (B) completed in STEP 3 with Bolts (3)
DE: Verbinden Sie das Teil aus SCHRITT 3 mit den Bolzen (3)
FR: Fixez le cadre du dossier (D) au cadre droit (A) et au cadre
gauche (B) complétés à l'ÉTAPE 3 avec des boulons (3).
ES: Conecte el marco de respaldo (D) al marco derecho (A) y al
marco izquierdo (B) completados en el PASO 3 con los pernos (3).
IT: Attaccare il telaio posteriore (D) al telaio destro (A) e al telaio
sinistro (B) completati in PASSO 3 con i Bulloni (3).
PL: Przymocuj tylną ramę (D) do części prawej (A) i lewej (B) ramy
bocznej zmontowanych w KROKU 3 za pomocą śrub (3).
10 11
EN: Put on Seat Cushion (G) & Back Pillow (H) to complete the
assembly of Single chair
DE: Legen Sie das Sitzkissen (G) und das Rückenkissen (H) an, um
die Montage des Einzelsessels abzuschließen.
FR: Fixez le coussin de siège (G) et le coussin de dossier (H) pour
terminer l'assemblage de la chaise simple.
ES: Coloque el cojín de asiento (G) y el cojín de respaldo (H) para
completar el montaje de la silla individual.
IT: Fissare il cuscino del sedile (G) e il cuscino dello schienale (H)
per completare il montaggio della sedia singola.
PL: Umieść poduszkę (G) na siedzisku i poduszkę (H) na oparciu.
Montaż fotela został zakończony.
5 6
H
G
x2
I
K
J
1
2
1
2
2
2
44
4
4
12 13
DE: (1 x Tischmontage)
Verbinden Sie Tischbeinrahmen (I) & Seitenrahmen (J) &
Holztischplatte (K) mit Bolzen (1), (2) & Unterlegscheiben (4)
FR: (1 x Assemblage de table)
Reliez le cadre de pied de table (I), le cadre latéral (J) et le plateau
de table en bois (K) avec des boulons (1 et 2) et des rondelles (4).
ES: (1 x Montaje de mesa)
Conecte el marco de la pata de mesa (I), el marco lateral (J) y el
tablero de mesa de madera (K) con los pernos (1 y 2) y las
arandelas (4).
IT: (1 x Montaggio di tavolo)
Collegare il telaio delle gambe del tavolo (I), il telaio laterale (J) e il
piano del tavolo in legno (K) con i bulloni (1 e 2) e le rondelle (4).
PL: (1 x Montaż stolika)
Połącz nogę (I), ramy boczne (J) i blat (K) stolika za pomocą śrub
(1 i 2) i podkładek (4).
EN: (1 x Table
assembly)
Connect Table Leg
Frame (I) & Side
Frame (J) & Wood
Table Top (K) with
Bolts (1), (2) &
Washers (4)
Adjustable
leg pads
Einstellbare Fußpolster
/Coussinets de pied réglables
/Almohadillas
ajustables para patas
/Cuscinetti di piedini
regolabili
/Regulowane podstawki
pod nóżki
I
1
1
2
2
2
2
4
4
4
4
4
4
7 8
14 15
EN: Connect part from STEP 6 to Table Leg Frame (I) with Bolts
(1), (2) & Washers (4)
DE: Verbinden Sie das Teil aus SCHRITT 6 mit dem
Tischbeinrahmen (I) mit den Bolzen (1), (2) und Unterlegscheiben
(4)
FR: Fixez la pièce de l'ÉTAPE 6 au cadre de pied de table (I) avec
des boulons (1 et 2) et des rondelles (4).
ES: Conecte la pieza del PASO 6 al marco de la pata de mesa (I)
con los pernos (1 y 2) y las arandelas (4).
IT: Fissare il pezzo di PASSO 6 al telaio della gamba del tavolo (I)
con i bulloni (1 e 2) e le rondelle (4).
PL: Przymocuj drugą nogę stolika (I) do części zmontowanych w
KROKU 6 za pomocą śrub (1 i 2) i podkładek (4).
EN: Assembly is completed.
DE: Die Montage ist abgeschlossen.
FR: L'assemblage est terminé.
ES: El montaje está terminado.
IT: Il montaggio è completato.
PL: Montaż został zakończony.

Other Costway Indoor Furnishing manuals

Costway Honey Joy HW66976 User manual

Costway

Costway Honey Joy HW66976 User manual

Costway NP10278 User manual

Costway

Costway NP10278 User manual

Costway JV10704 User manual

Costway

Costway JV10704 User manual

Costway KC53337 User manual

Costway

Costway KC53337 User manual

Costway NP11172 User manual

Costway

Costway NP11172 User manual

Costway HW67658 User manual

Costway

Costway HW67658 User manual

Costway HU10042 User manual

Costway

Costway HU10042 User manual

Costway HW61554 User manual

Costway

Costway HW61554 User manual

Costway HW66008GR User manual

Costway

Costway HW66008GR User manual

Costway HW63091 User manual

Costway

Costway HW63091 User manual

Costway HV10353WH User manual

Costway

Costway HV10353WH User manual

Costway HW61548 User manual

Costway

Costway HW61548 User manual

Costway JV10856 User manual

Costway

Costway JV10856 User manual

Costway GIANTEX HW66915 User manual

Costway

Costway GIANTEX HW66915 User manual

Costway HW53837CP User manual

Costway

Costway HW53837CP User manual

Costway JV10748 User manual

Costway

Costway JV10748 User manual

Costway HW66531 User manual

Costway

Costway HW66531 User manual

Costway HW63680 User manual

Costway

Costway HW63680 User manual

Costway HB84910 User manual

Costway

Costway HB84910 User manual

Costway JZ10069CF User manual

Costway

Costway JZ10069CF User manual

Costway CB10224 User manual

Costway

Costway CB10224 User manual

Costway HU10393 User manual

Costway

Costway HU10393 User manual

Costway TL35269 User manual

Costway

Costway TL35269 User manual

Costway CB10175DK User manual

Costway

Costway CB10175DK User manual

Popular Indoor Furnishing manuals by other brands

comfortel 8312 owner's manual

comfortel

comfortel 8312 owner's manual

Teamson F0013 quick start guide

Teamson

Teamson F0013 quick start guide

DETAIL DHS6508 quick start guide

DETAIL

DETAIL DHS6508 quick start guide

Rauch ORANGE Potsdam Assembly instructions

Rauch

Rauch ORANGE Potsdam Assembly instructions

Furniture of America Snyder CM7792N Assembly instructions

Furniture of America

Furniture of America Snyder CM7792N Assembly instructions

convenience concepts 111288 Assembly instructions

convenience concepts

convenience concepts 111288 Assembly instructions

Cooper Lighting INVUE VXS Specification sheet

Cooper Lighting

Cooper Lighting INVUE VXS Specification sheet

SEI Mirage CM915700TX Assembly instructions

SEI

SEI Mirage CM915700TX Assembly instructions

VIPACK PISBHK 10 Instructions for use

VIPACK

VIPACK PISBHK 10 Instructions for use

Harol VR1000 Mounting instructions

Harol

Harol VR1000 Mounting instructions

DIR PEDI CART 5777 instruction manual

DIR

DIR PEDI CART 5777 instruction manual

Furinno FNAK-11173 Assembly instruction

Furinno

Furinno FNAK-11173 Assembly instruction

2K Furniture Designs SHOE RACK SR 6451 Assembly instructions

2K Furniture Designs

2K Furniture Designs SHOE RACK SR 6451 Assembly instructions

Zadro SURROUND LIGHT 2000 operating instructions

Zadro

Zadro SURROUND LIGHT 2000 operating instructions

AmazonBasics B087B69492 quick start guide

AmazonBasics

AmazonBasics B087B69492 quick start guide

Boraam COLORADO 36736 Assembly instructions

Boraam

Boraam COLORADO 36736 Assembly instructions

Living Earth Crafts MIND-SYNC user manual

Living Earth Crafts

Living Earth Crafts MIND-SYNC user manual

modway EEI-2674 quick start guide

modway

modway EEI-2674 quick start guide

manuals.online logo
manuals.online logoBrands
  • About & Mission
  • Contact us
  • Privacy Policy
  • Terms and Conditions

Copyright 2025 Manuals.Online. All Rights Reserved.