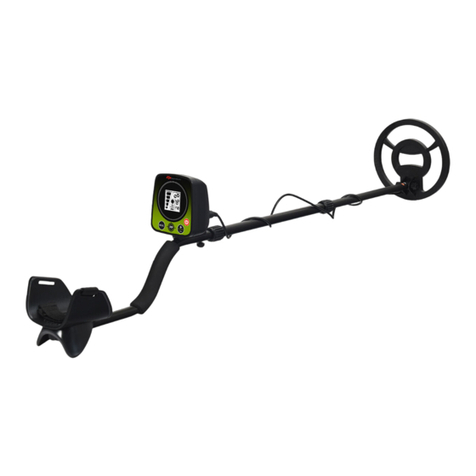
Costway SY10001 User manual

SY10001
Metal Detector
Metalldetektor
Détecteur de Métaux
Detector de Metales
Metal Detector
Wykrywacz metali
THIS INSTRUCTION BOOKLET CONTAINS IMPORTANT SAFETY INFORMATION. PLEASE READAND KEEPFOR FUTURE REFERENCE.

Before You Start
Please read all instructions carefully.
Retain instructions for future reference.
Separate and count all parts and hardware.
Read through each step carefully and follow the proper order.
We recommend that, where possible, all items are assembled near to the area in
which they will be placed in use, to avoid moving the product unnecessarily once
assembled.
Always place the product on a flat, steady and stable surface.
Keep all small parts and packaging materials for this product away from babies
and children as they potentially pose a serious choking hazard.
EN
DE
Bitte lesen Sie alle Anweisungen sorgfältig durch.
Bewahren Sie die Anweisungen zum zukünftigen Verwendung auf.
Überprüfen Sie, ob alle Teile und Zubehörteile vorhanden sind.
Lesen Sie jeden Schritt sorgfältig durch und befolgen Sie die richtige Reihenfolge.
Wir empfehlen, alle Teile möglichst in der Nähe des Aufstellungsortes zu
montieren, um unnötige Bewegungen nach der Montage zu vermeiden.
Stellen Sie den Artikel immer auf eine ebene, feste und stabile Fläche.
Halten Sie alle kleinen Teile und Verpackungsmaterialien fern von Babys und
Kindern, ansonsten besteht Erstickungsgefahr.
Vor dem Beginnen
FR
Veuillez lire attentivement toutes les instructions.
Conservez les instructions pour vous y référer ultérieurement.
Vérifiez toutes les pièces et les accessoires.
Lisez attentivement chaque étape et suivez l’ordre correct.
Nous recommandons que, dans la mesure du possible, tous les produits soient
assemblés à proximité de la zone où ils seront utilisés, afin d’éviter tout
déplacement inutile du produit une fois assemblé.
Placez toujours le produit sur une surface plane et stable.
Conservez toutes les petites pièces de ce produit et les matériaux d’emballage
hors de portée des bébés et des enfants, car ils pourraient présenter un risque
d’étouffement.
Lea atentamente todas las instrucciones.
Conserve las instrucciones para futuras consultas.
Separe y cuente todas las piezas y los accesorios.
Lea detenidamente cada paso y siga el orden correcto.
Recomendamos que, siempre que sea posible, todos los elementos se monten
cerca de la zona en la que se van a utilizar, para evitar mover el producto
innecesariamente una vez montado.
Coloque siempre el producto sobre una superficie plana, estable y firme.
Mantenga todas las piezas pequeñas y los materiales de embalaje de este
producto lejos de los bebés y los niños, ya que pueden representar un grave
riesgo de asfixia.
ES
Avant de Commencer
Antes de Empezar
02 03

Si prega di leggere attentamente tutte le istruzioni.
Conservare le istruzioni per riferimento futuro.
Separare e contare tutte le parti e gli accessori.
Leggere attentamente ogni passo e seguire l'ordine corretto.
Si consiglia, ove possibile, di assemblare tutti gli articoli vicino alla zona in cui
verranno posti in uso, per evitare di spostare inutilmente il prodotto una volta
assemblato.
Posizionare sempre il prodotto su una superficie piana, stabile.
Tenere tutte le piccole parti e i materiali di imballaggio di questo prodotto lontano
dalla portata di neonati e bambini, in quanto possono costituire un serio pericolo
di soffocamento.
Zapoznaj się z instrukcją.
Zachowaj instrukcję do wglądu.
Posortuj części i upewnij się, że zestaw jest kompletny.
Zapoznaj się ze sposobem montażu i postępuj zgodnie z instrukcją.
Zalecamy, aby montaż odbywał się możliwie najbliżej miejsca docelowego
położenia produktu, aby uniknąć niepotrzebnego przesuwania.
Upewnij się, że produkt znajdzie się na płaskiej i stabilnej po wierzchni.
Upewnij się, że materiały wykorzystane podczas pakowania produktu.
oraz jego elementy znajdują się poza zasięgiem dzieci.
IT
PL
Prima di Iniziare
Zanim Zaczniesz
Note: This product does not
include batteries, customers
need to purchase 2*9v
batteries separately.
EN
With your metal detector, you can hunt for coins, relics, jewelry, gold,
and silver just about anywhere. The detector comes with high
sensitivity and strong ability of discrimination. It is versatile and easy
to use. The detector’s features include:
LCD Display: Shows the probable type of metal, the strength of
signal, range of DISC & NOTCH, the level of SENS and VOLUME,
and battery condition. It also has numeric display for target.
Three Tone Audio Discrimination: Sounds three distinctive tones
(high, medium and low) for different types of metal.
Notch: Ignores junk metal and finds valuable items by setting the
notch range.
DISC: Discriminates the unwanted target by setting the DISC numeric
range. The detector will not detect the target beyond the numeric
setting.
PP: Pinpoints the location of the target accurately.
Super Slow Sweep Identification: With a very slow sweep of the
search coil to discriminate different types of metal.
Headphone Jack: Lets you connect headphones of 3.5mm and
operate without trouble.
Waterproof Search coil: Lets you use the detector even if you must
put it under shallow water.
Adjustable Shaft: Lets you adjust the length of shaft for comfortable
use.
Power: Your metal detector requires two 9-volt alkaline batteries.
04 05

Serach coil
Lock Knob
Connecting rod 2 Control panel
The control box
Armrest strap
Armrest
Connecting rod lock
Connecting rod 1
Adjustable shaft Adjustable armrest
Remove the fixing strap
Press the lock button
Open
Open
Pull to the
desired position
Pull to the
desired position
Open the
controller
and handle
Tum
PREPARATION
SET UP
STEP 1.Your detector requires no assembly or tools. Simply removes
the detector from the box.
STEP 3. Press down the UNLOCK button to release the handle.
STEP 4. Slide out the armrest to the desired length (typically just
under your elbow). And fully extend the lower shaft to the desired
length for your height.
STEP 2. Turn the detector 180 degree as shown in the figure. BATTERY
Please use two 9V alkaline battery.
Open the battery cover and install
the battery according to the polarity
sign in the battery box. If you are
not going to use the detector for a
long time, please remove the
battery from the battery case.
06 07

DISC numeric
indicator
Low BATT indicator MENU CONTENT
SENS indicator
DISC/NOTCH indicator
Target numeric indicator
POWER
PINPOINT
BACKLIGHT
INSTRUCTIONS FOR CONTROL PANEL
Warning:
▪Dispose of old batteries promptly and properly. Never bury or burn
them.
1.POWER switch
Press the power switch to turn on/off the detector.
2.LCD DISPLAY
Cautions:
▪Use only fresh alkaline batteries of required size.
▪Do not mix the old and new batteries or different types of batteries.
▪If you don’t plan to use the unit for a week or more time, remove the
batteries. Batteries can leak chemicals that can destroy electronic
parts.
▪Change the batteries if the battery indicator on the LCD lights.
USING HEADPHONES
1.It is recommended to choose the headphones with volume control.
2.Insert the headphones’ 3.5mm plug into the PHONE jack. At this
time the internal speaker disconnects.
Listening Safely
▪To protect your hearing, set the volume to the lowest setting.
▪Before you begin listening, adjust the volume to a comfortable level.
▪Do not listen at extremely high volume levels. Extended high volume
listening can lead to permanent hearing loss.
▪Do not wear headphones while operating your detector near
high-traffic areas. Pay attention to traffic safety.
08 09

INDOOR TESTING AND USE
3.CONTROL BUTTONS
MENU: Press MENU, LCD will display VOLUME, SENS, DISC,
NOTCH.
VOLUME: Press MENU to select VOLUME. Then press or to
adjust the level (0-4) of VOLUME. The level will be displayed on the
LCD.
SENS: Press MENU to select SENS. Then press or to adjust
the level (2-8) of sensitivity. The level will be displayed on the LCD.
DISC: Discriminates the unwanted target by setting the numeric
range. Press MENU to select DISC. Then press or to adjust the
numeric range of discrimination. The number will be displayed on
the LCD.
NOTCH: Eliminates the target you don’t want. Press MENU to
select NOTCH.Then press or to select the target to be notched.
The cursor around the selected target will flash. Press ENTER
again, the target name inside the cursor will disappear.
PP: Pinpoints the location of the target accurately.
1.Press the power switch to turn on the detector.
2.Setting the operating mode:
(1)DISC: Press MENU to select DISC, then or to set the DISC
numeric value. If the DISC value is set to 00, the detector can
detect all kinds of metal. In this case, when the detector finds a
target, the cursor around the target name lights. Also the detector
sounds a tone, low for iron, 5 cent; medium for pull tabs, 1 cent;
high for 10 cent or 25 cent. If you don’t want to find the target listed
on the LCD, you can set the relative numeric range of DISC by
pressing DISC then or . For example, the numeric target range for
5¢ is 11-25, you can simply press MENUS to select DISC, then
set the DISC number to 28 by pressing or . In this case, the
numeric range is beyond 5¢.The detector will not have response to
it. Neither will the detector have response to iron. Because the
target numeric range for iron is 0-10.
(2)NOTCH:
Press MENU to select NOTCH, then or to select the target to
be notched. The cursor around the selected target will flash. Press
ENTER again, the target name inside the cursor will disappear. It
means this target will be notched during the detection and the
detector will have no reaction to the notched target. If you want to
pick up the target notched, simply press ENTER again. Press or ,
the cursor will move from left or right. If ENTER is not pressed within
about 3 seconds, the detector will enter standby state.
3.Press MENU to select SENS, then press or to set the sensitivity.
4.Place the detector on a wooden or plastic table, then remove any
watches, rings, or metal jewelry you are wearing.
5.Adjust the search coil so the flat part points towards the ceiling.
4.BACKLIGHT switch
Press the backlight switch to turn on/off the backlight of the detector.
Note:
It is not recommended to notch all targets listed on the LCD. Because
if you notch everything, you can’t find anything.
6.Slowly sweep a sample of the material you want the detector to find
(such as a gold ring or a coin) 2-3 inches / 5-7.5cm or more above the
face of the search coil. When the detector detects any metal, it
sounds a tone and the cursor around the target name will light. Also
LCD displays the numeric value of target as well as the signal
strength of it. Please note that the signal strength is only a reference.
7.PP(PINPOINT)
After you find a metal object, you can use PP to pinpoint the target.
Press the PP button. Slowly move the search coil above the sound
area. The detector sounds and the signal indicator on the LCD
displays the level of signal. Then press PP button again to release
the PP. Sweep the search coil again, keeping the same distance of
search coil, sound disappears. Press PP button again, closer the
search coil to the sound area, the detector sounds again. Repeat the
above steps until the detector displays the stronger signal where the
location of the target is.
Note: To find the exact location of target, you need to practise more
times.
Note:
Never test the detector on a floor inside a building.
Most buildings have metal of some kind in the floor,
which might interfere with the objects you’re testing or
mask the signal completely.
Note:
If you are using a coin, the detector will detect it more easily if you
hold it so a flat side is parallel with the flat side of the search coil. A
sweep with the side of coin over search coil might cause false
indication and unstable display of target.
5.MEMORY
The detector will memorize all the settings before power is off.
10 11

TARGET INDICATIONS OUTDOOR TESTING AND USE
1.Numeric ranges of target:
2.Types of target
Note:
-IRON: It indicates that the target is probably iron.
-5¢: It indicates that the target is probably 5¢ or a nickel. Some small
gold rings might register within this range.
-P-TAB: It indicates that the target is probably a pull tab of an
aluminum can. Some small gold rings might register within this
range.
-1¢: It is indicated that the target is probably a coin of 1¢ or type of
metal of zinc alloy. Some medium sized gold rings might register
within this category.
-10¢: It indicates that the target might be a coin of 10¢. Some large
rough gold items might register within this category.
-25¢: It indicates that the target is probably 25¢ or a silver coin.
Search Coil Sweeping Hints:
▪Never sweep the search coil as if it were a pendulum. Raising the
search coil while sweeping or at the end of a sweep will cause false
readings.
Notes:
▪The detector responds with a signal when it detects most valuable
metal objects. If a signal does not repeat after you sweep the
search coil over the target a few times, the target is probably junk
metal.
▪False signals can be caused by trashy ground, electrical
interference, or large irregular piece of junk metal.
▪False signals are usually broken or non-repeatable.
▪Sweep slowly, hurrying will cause you to miss targets.
▪It’s better you sweep the search coil from side to side in an arc line
of 3 inches / 7.5 cm motion and keep the search coil parallel with the
ground.
If the detector detects the item, it sounds a tone, and the cursor
around the target name will light. Also LCD displays the numeric
range of target as well as the signal strength.
If the detector does not detect the item, make sure that the mode is
set correctly for the type of metal you’re searching for. Also make
sure that you’re moving the search coil correctly.
1.Press the power switch to turn on the detector.
2.Follow the steps of 2 described in section of Indoor Testing and Use
to set the operating mode.
3.Find an area on the ground outside where there is no metal.
4.Place a sample of the material you want the detector to find (such
as a gold ring or a coin) on the ground.
5.Hold the search coil level to the ground about 1-2 inches / 2.5-5 cm
above the surface, slowly move the search coil over the area where
you placed the sample, sweeping the search coil in a side-to-side
motion.
3.Tones
The detector comes with three tones for different types of metal.
But the built in audio identification system sounds a unique tone for
each of three categories of metal. This makes it easier to identify the
metal being detected.
A low tone is for IRON, 5¢, same as for foil, bottle cap or nickels. A
medium tone is for P-TAB, ZN, 1¢(aluminum pull tabs, zinc or copper
items). A high tone is for 10¢,25¢,same as for brass or silver items.
-IRON:
-5¢:
-P-TAB:
-1¢:
-10¢:
-25¢:
00-10
11-25
26-40
41-60
61-80
81-99
There are a wide variety of metals and
no target can be identified for certain
until unearthed. This table is for general
reference only.
Correct Wrong
12 13

Notes:
In order to detect the target deeply buried, you can adjust the SENS
to a high level. But not to set the level of SENS to Max. position, or
the detector will receive interference and false signal from
broadcast antenna and other electronic lines. The detector will have
unstable and irregular indications.
It’s difficult to have an accurate detecting result. Sometimes the
detecting may be restricted by some factors:
▪The angle of the target buried in the soil.
▪The depth of the target.
▪The level of oxidization of the target.
▪The size of the target.
▪Electromagnetic and electrical interference surrounding the target.
In area of highly mineralized ground, or fertile ground, or wet sand,
the detector will sound even if there is no metal. In this case, you
can lower the sensitivity or increase the DISC numeric value.
Meantime enhance the distance between the search coil and the
ground. In area with trashy metal, you can set DISC numeric value
to 50. In this case, most nails and small pieces of iron will be
eliminated.
Using BACKLIGHT
In dark area, you can use BACKLIGHT for better searching. Press
backlight button to turn on the backlight.
Note: As the backlight consumes more power, we suggest you turn
off the backlight in normal environment.
After you become familiar with how your detector works, it’s
important to fine tune the sensitivity to get a good effect.
Press MENU to select SENS. Then press or to increase or
decrease the sensitivity. The level will be displayed on the LCD.
Adjusting SENSITIVITY
Your metal detector is an example of superior design and
craftsmanship. The following suggestions will help you care for your
metal detector so you can enjoy it for years.
Handle the detector gently and carefully. Dropping it can
damage circuit boards and cases and can cause the
detector to work improperly.
Use the detector only in normal temperature
environments. Temperature extremes can shorten the
life of electronic devices, damage the cases of the
detector.
Wipe the detector with a damp cloth occasionally to keep
It looking new. Do not use harsh chemicals, cleaning
solvents, or strong detergents to clean the detector.
Keep the detector away from dust and dirt, which can
cause premature wear of parts.
CARE AND MAINTENANCE
Factors That Affect The Detecting
14 15

Hinweis: Dieses Produkt enthält keine
Batterien, Kunden müssen 2 * 9V-Batterien
separat kaufen.
DE
Mit Ihrem Metalldetektor können Sie fast überall nach Münzen,
Reliquien, Schmuck, Gold und Silber suchen. Der Detektor verfügt
über eine hohe Empfindlichkeit und eine starke
Unterscheidungsfähigkeit. Es ist vielseitig und einfach zu bedienen.
Zu den Merkmalen des Detektors gehören:
LCD-Display: Zeigt die wahrscheinliche Art des Metalls, die
Signalstärke, den Bereich von DISC & NOTCH, den Pegel von
SENS und VOLUME und den Batteriezustand an. Es hat auch eine
numerische Anzeige für das Ziel.
Drei-Ton-Audiounterscheidung: Ertönen drei unterschiedliche Töne
(hoch, mittel und niedrig) für verschiedene Metallarten.
Notch: Ignoriert Junk Metal und findet wertvolle Gegenstände durch
Einstellen des Notch-Bereichs.
DISC: Unterscheidet das unerwünschte Ziel durch Einstellen des
numerischen DISC-Bereichs. Der Detektor erkennt das Ziel nicht
über die numerische Einstellung hinaus.
PP: Bestimmt die Position des Ziels genau.
Super Slow Sweep Identification: Mit einem sehr langsamen Sweep
der Suchspule, um verschiedene Metallarten zu unterscheiden.
Kopfhörerbuchse: Ermöglicht den Anschluss von
3,5-mm-Kopfhörern und den problemlosen Betrieb.
Wasserdichte Suchspule: Damit können Sie den Detektor auch
dann verwenden, wenn Sie ihn unter seichtes Wasser halten
müssen.
Verstellbarer Schaft: Lässt Sie die Länge des Schafts für eine
bequeme Verwendung einstellen.
Stromversorgung: Ihr Metalldetektor benötigt zwei
9-Volt-Alkalibatterien.
VORBEREITUNG
EINRICHTEN
SCHRITT 1. Ihr Detektor erfordert keine Montage oder Werkzeuge.
Entfernt einfach den Detektor aus der Box.
Suchspule
Verriegelungsknopf
Verbindungsstange 2 Bedienfeld
Kontrollkasten
Armlehnengurt
Armlehne
Pleuelverschluss
Verbindungsstange 1
Verstellbarer Schaft Verstellbare Armlehne
Entfernen Sie das Befestigungsband
Drehen
SCHRITT 2. Drehen Sie den Detektor wie in der Abbildung gezeigt
um 180 Grad.
16 17

SCHRITT 3. Drücken Sie die UNLOCK-Taste, um den Griff freizugeben.
SCHRITT 4. Ziehen Sie die Armlehne auf die gewünschte Länge
heraus (normalerweise direkt unter Ihrem Ellbogen). Ziehen Sie den
unteren Schaft vollständig auf die gewünschte Länge für Ihre
Körpergröße aus.
BATTERIE
Bitte verwenden Sie zwei
9V-Alkalibatterien.
Öffnen Sie die Batterieabdeckung und
legen Sie die Batterie gemäß dem
Polaritätszeichen in das Batteriefach
ein. Wenn Sie den Detektor längere
Zeit nicht benutzen, entfernen Sie bitte
die Batterie aus dem Batteriefach.
Drücken Sie die Verriegelungstaste
Öffnen
Öffnen
In die
gewünschte
Position ziehen
In die
gewünschte
Position ziehen
Öffnen Sie den
Controller und
den Griff
Warnung:
▪Alte Batterien rechtzeitig und fachgerecht entsorgen. Vergrabe oder
verbrenne sie niemals.
Vorsicht:
▪Verwenden Sie nur frische Alkalibatterien der erforderlichen Größe.
▪ Mischen Sie nicht alte und neue Batterien oder verschiedene
Batterietypen.
▪Wenn Sie beabsichtigen, das Gerät eine Woche oder länger nicht zu
verwenden, entfernen Sie die Batterien. Aus Batterien können
Chemikalien austreten, die elektronische Teile zerstören können.
▪Wechseln Sie die Batterien, wenn die Batterieanzeige auf dem LCD
leuchtet.
VERWENDUNG VON KOPFHÖRERN
1. Es wird empfohlen, die Kopfhörer mit Lautstärkeregelung zu
wählen.
2. Stecken Sie den 3,5-mm-Stecker des Kopfhörers in die
PHONE-Buchse. Zu diesem Zeitpunkt wird der interne Lautsprecher
getrennt.
Sicher zuhören
▪ Um Ihr Gehör zu schützen, stellen Sie die Lautstärke auf die
niedrigste Stufe.
▪ Bevor Sie mit dem Hören beginnen, stellen Sie die Lautstärke auf
ein angenehmes Niveau ein.
▪ Hören Sie nicht mit extrem hoher Lautstärke. Längeres Hören mit
hoher Lautstärke kann zu dauerhaftem Hörverlust führen.
▪ Tragen Sie keine Kopfhörer, während Sie Ihren Detektor in der
Nähe von stark frequentierten Bereichen betreiben. Achten Sie auf
die Verkehrssicherheit.
18 19

3.STEUERTASTEN
MENU: Drücken Sie MENU, das LCD zeigt VOLUME, SENS, DISC,
NOTCH an.
LAUTSTÄRKE: Drücken Sie MENU, um LAUTSTÄRKE
auszuwählen. Drücken Sie dann oder , um den Pegel (0-4) von
VOLUME einzustellen. Der Füllstand wird auf dem LCD angezeigt.
SENS: Drücken Sie MENU, um SENS auszuwählen. Drücken Sie
dann oder , um die Empfindlichkeitsstufe (2-8) einzustellen. Der
Füllstand wird auf dem LCD angezeigt.
DISC: Unterscheidet das unerwünschte Ziel durch Einstellen des
Zahlenbereichs. Drücken Sie MENU, um DISC auszuwählen.
Drücken Sie dann oder , um den numerischen
Diskriminierungsbereich einzustellen. Die Nummer wird auf dem
LCD angezeigt.
NOTCH: Eliminiert das Ziel, das Sie nicht wollen. Drücken Sie
MENU, um NOTCH auszuwählen. Drücken Sie dann oder , um
das einzukerbende Ziel auszuwählen. Der Cursor um das
ausgewählte Ziel herum blinkt. Drücken Sie erneut ENTER, der
Zielname im Cursor verschwindet.
PP: Bestimmt die Position des Ziels genau.
4. HINTERGRUNDBELEUCHTUNG-Schalter
Drücken Sie den Schalter für die Hintergrundbeleuchtung, um die
Hintergrundbeleuchtung des Detektors ein-/auszuschalten.
5.SPEICHER
Der Detektor speichert alle Einstellungen, bevor er ausgeschaltet
wird.
ANLEITUNG FÜR DAS BEDIENFELD
1.POWER-Schalter
Drücken Sie den Netzschalter, um den Detektor ein-/auszuschalten.
2.LCD-ANZEIGE
POWER-Schalter
PIN-PUNKT
HINTERGRUNDBELEUCHTUNG
Numerische
DISC-Anzeige Niedrige
BATTERIE-Anzeige
MENÜINHALT
Sinnesindikator
DISC/NOTCH-Anzeige
Numerischer
Zielindikator
20 21

Notiz:
Es wird nicht empfohlen, alle auf dem LCD aufgelisteten Ziele
einzukerben. Denn wenn man alles einkerbt, findet man nichts.
Notiz:
Testen Sie den Detektor niemals auf einer Etage innerhalb
eines Gebäudes. In den meisten Gebäuden befindet sich
Metall im Boden, das die zu testenden Objekte stören
oder das Signal vollständig überdecken könnte.
Notiz:
Wenn Sie eine Münze verwenden, erkennt der Detektor sie leichter,
wenn Sie sie so halten, dass eine flache Seite parallel zur flachen
Seite der Suchspule ist. Ein Überstreichen mit der Seite der Münze
über der Suchspule kann zu einer falschen Anzeige und einer
instabilen Anzeige des Ziels führen.
7.PP (PINPUNKT)
Nachdem Sie ein Metallobjekt gefunden haben, können Sie PP
verwenden, um das Ziel zu lokalisieren. Drücken Sie die PP-Taste.
Bewegen Sie die Suchspule langsam über den Schallbereich. Der
Detektor ertönt und die Signalanzeige auf dem LCD zeigt den
Signalpegel an. Drücken Sie dann die PP-Taste erneut, um die PP
freizugeben. Bewegen Sie die Suchspule erneut, wobei Sie den
gleichen Abstand zur Suchspule beibehalten, der Ton verschwindet.
Drücken Sie die PP-Taste erneut, nähern Sie die Suchspule dem
Schallbereich, der Detektor ertönt erneut. Wiederholen Führen Sie
die obigen Schritte aus, bis der Detektor das stärkere Signal dort
anzeigt, wo sich das Ziel befindet.
3.Drücken Sie MENU, um SENS auszuwählen, und drücken Sie
dann oder , um die Empfindlichkeit einzustellen.
4. Legen Sie den Detektor auf einen Holz- oder Kunststofftisch und
nehmen Sie dann alle Uhren, Ringe oder Metallschmuckstücke ab,
die Sie tragen.
5.Stellen Sie die Suchspule so ein, dass der flache Teil zur Decke
zeigt.
6.Führen Sie langsam eine Probe des Materials, das der Detektor
finden soll (z. B. einen Goldring oder eine Münze), 5-7,5 cm oder
mehr über die Vorderseite der Suchspule. Wenn der Detektor Metall
erkennt, gibt er einen Ton aus und der Cursor um den Zielnamen
leuchtet auf. Außerdem zeigt das LCD den numerischen Wert des
Ziels sowie dessen Signalstärke an. Bitte beachten Sie, dass die
Signalstärke nur eine Referenz ist.
PRÜFUNG UND VERWENDUNG IM INNENBEREICH
1.Drücken Sie den Netzschalter, um den Detektor einzuschalten.
2. Betriebsart einstellen:
(1)DISC: Drücken Sie MENU, um DISC auszuwählen, und dann
oder , um den numerischen DISC-Wert einzustellen. Wenn der
DISC-Wert auf 00 eingestellt ist, Wenn der DISC-Wert auf 00
eingestellt ist, kann der Detektor alle Arten von Metall erkennen.
Wenn der Detektor in diesem Fall ein Ziel findet, leuchtet der Cursor
um den Zielnamen herum auf. Auch der Detektor lässt einen Ton
ertönen, niedrig für Eisen, 5 Cent; mittel für Zuglaschen, 1 Cent;
hoch für 10 Cent oder 25 Cent. Wenn Sie das auf dem LCD
aufgeführte Ziel nicht finden möchten, können Sie den relativen
numerischen Bereich von DISC einstellen, indem Sie DISC und
dann oder drücken. Zum Beispiel ist der numerische Zielbereich
für 5¢ 11-25, Sie können einfach MENUS drücken, um DISC
auszuwählen, und dann die DISC einstellen
Nummer bis 28 durch Drücken von oder . In diesem Fall liegt der
Zahlenbereich über 5¢. Der Detektor reagiert darauf nicht. Der
Detektor reagiert auch nicht auf Eisen. Weil der numerische
Zielbereich für Eisen 0-10 ist.
(2) KERBE:
Drücken Sie MENU, um NOTCH auszuwählen, und dann oder ,
um das einzukerbende Ziel auszuwählen. Der Cursor um das
ausgewählte Ziel herum blinkt. Drücken Sie erneut ENTER, der
Zielname im Cursor verschwindet. Dies bedeutet, dass dieses Ziel
während der Erkennung eingekerbt wird und der Detektor nicht auf
das eingekerbte Ziel reagiert. Wenn Sie das eingekerbte Ziel
aufnehmen möchten, drücken Sie einfach erneut ENTER. Drücken
Sie oder , der Cursor bewegt sich von links oder rechts. Wenn
ENTER nicht innerhalb von etwa 3 Sekunden gedrückt wird,
wechselt der Detektor in den Standby-Modus.
22 23

PRÜFUNG UND VERWENDUNG IM FREIEN
Suchspulen-Sweeping-Tipps:
▪Schwenken Sie die Suchspule niemals wie ein Pendel. Das
Anheben der Suchspule während des Sweeps oder am Ende eines
Sweeps führt zu falschen Messwerten.
1.Drücken Sie den Netzschalter, um den Detektor einzuschalten.
2. Befolgen Sie die Schritte von 2, die im Abschnitt „Testen und
Verwenden in Innenräumen“ beschrieben sind, um den
Betriebsmodus einzustellen.
3.Finden Sie draußen auf dem Boden eine Stelle, an der sich kein
Metall befindet.
4. Legen Sie eine Probe des Materials, das der Detektor finden soll
(z. B. einen Goldring oder eine Münze), auf den Boden.
5.Halten Sie die Suchspule etwa 2,5-5 cm über der Oberfläche
waagerecht zum Boden, bewegen Sie die Suchspule langsam über
den Bereich, in dem Sie die Probe platziert haben, und führen Sie
die Suchspule in einer seitlichen Bewegung aus.
Aber das eingebaute Audio-Identifikationssystem gibt für jede der
drei Metallkategorien einen einzigartigen Ton aus. Dies erleichtert
die Identifizierung des zu detektierenden Metalls.
Ein niedriger Ton ist für IRON, 5 ¢, derselbe wie für Foil, Bottle Cap
oder Nickels. Ein mittlerer Ton ist für P-TAB, ZN, 1¢
(Aluminium-Zuglaschen, Zink- oder Kupferartikel). Ein hoher Ton ist
für 10 ¢, 25 ¢, genauso wie für Messing- oder Silberartikel.
Hinweis: Um die genaue Position des Ziels zu finden, müssen Sie
mehrmals üben.
ZIELINDIKATIONEN
1. Numerische Zielbereiche:
2. Arten von Zielen
3. Töne
Hinweis:
-EISEN: Zeigt an, dass das Ziel wahrscheinlich Eisen ist.
-5 ¢: Zeigt an, dass das Ziel wahrscheinlich 5 ¢ oder ein Nickel ist.
Einige kleine Goldringe könnten in diesem Bereich registriert
werden.
-P-TAB: Zeigt an, dass das Ziel wahrscheinlich eine Zuglasche
einer Aluminiumdose ist. Einige kleine Goldringe könnten in diesem
Bereich registriert werden.
-1¢: Es wird angezeigt, dass das Ziel wahrscheinlich eine
1 ¢-Münze oder eine Metallsorte aus einer Zinklegierung ist. Einige
mittelgroße Goldringe können in diese Kategorie aufgenommen
werden.
-10¢: Zeigt an, dass das Ziel eine 10¢-Münze sein könnte. Einige
große Rohgoldgegenstände können in diese Kategorie
aufgenommen werden.
-25 ¢: Zeigt an, dass das Ziel wahrscheinlich 25 ¢ oder eine
Silbermünze ist.
Der Detektor wird mit drei Tönen für verschiedene Metallarten
geliefert.
-EISEN:
-5¢:
-P-TAB:
-1¢:
-10¢:
-25¢:
00-10
11-25
26-40
41-60
61-80
81-99
Es gibt eine Vielzahl von Metallen und
kein Ziel kann mit Sicherheit identifiziert
werden, bis es ausgegraben wird.
Diese Tabelle dient nur als allgemeine
Referenz.
Richtig Falsch
24 25

▪Sweep langsam, Eile führt dazu, dass Sie Ziele verfehlen.
▪Es ist besser, die Suchspule in einer Bogenlinie von 7,5 cm von
einer Seite zur anderen zu schwenken und die Suchspule parallel
zum Boden zu halten.
Wenn der Detektor den Gegenstand erkennt, gibt er einen Ton aus
und der Cursor um den Zielnamen leuchtet auf. Auch LCD zeigt den
numerischen Bereich des Ziels sowie die Signalstärke an.
Wenn der Detektor den Gegenstand nicht erkennt, vergewissern
Sie sich, dass der Modus für die gesuchte Metallart richtig
eingestellt ist. Stellen Sie außerdem sicher, dass Sie die Suchspule
richtig bewegen.
Einstellen der EMPFINDLICHKEIT
Faktoren, die die Erkennung beeinflussen
PFLEGE UND WARTUNG
Nachdem Sie sich mit der Funktionsweise Ihres Detektors vertraut
gemacht haben, ist es wichtig, die Empfindlichkeit fein
abzustimmen, um einen guten Effekt zu erzielen.
Drücken Sie MENU, um SENS auszuwählen. Drücken Sie dann
oder , um die Empfindlichkeit zu erhöhen oder zu verringern. Der
Füllstand wird auf dem LCD angezeigt.
Anmerkungen:
▪Der Detektor reagiert mit einem Signal, wenn er die meisten
wertvollen Metallgegenstände erkennt. Wenn sich ein Signal nicht
wiederholt, nachdem Sie die Suchspule einige Male über das Ziel
geführt haben, handelt es sich bei dem Ziel wahrscheinlich um
Altmetall.
▪Falsche Signale können durch verunreinigten Boden, elektrische
Interferenzen oder große, unregelmäßige Metallschrottstücke
verursacht werden.
▪Falsche Signale sind normalerweise unterbrochen oder nicht
wiederholbar.
Verwendung von BACKLIGHT
In dunklen Bereichen können Sie BACKLIGHT für eine bessere
Suche verwenden. Drücken Sie die Taste für die
Hintergrundbeleuchtung, um die Hintergrundbeleuchtung
einzuschalten.
Hinweis: Da die Hintergrundbeleuchtung mehr Strom verbraucht,
empfehlen wir Ihnen, die Hintergrundbeleuchtung in einer normalen
Umgebung auszuschalten.
Es ist schwierig, ein genaues Erkennungsergebnis zu erhalten.
Manchmal kann die Erkennung durch einige Faktoren
eingeschränkt sein:
▪Der Winkel des im Boden vergrabenen Ziels.
▪Die Tiefe des Ziels.
▪Der Oxidationsgrad des Targets.
▪Die Größe des Ziels.
▪Elektromagnetische und elektrische Störungen in der Umgebung
des Ziels. In Gebieten mit stark mineralisiertem Boden, fruchtbarem
Boden oder nassem Sand ertönt der Detektor auch dann, wenn
kein Metall vorhanden ist. In diesem Fall können Sie die
Empfindlichkeit verringern oder den numerischen DISC-Wert
erhöhen. Erhöhen Sie in der Zwischenzeit den Abstand zwischen
Suchspule und Boden. In Bereichen mit verschmutztem Metall
können Sie den numerischen Wert von DISC auf 50 setzen. In
diesem Fall werden die meisten Nägel und kleinen Eisenstücke
entfernt.
Ihr Metalldetektor ist ein Beispiel für überlegenes Design und
Handwerkskunst. Die folgenden Hinweise helfen Ihnen bei der
Pflege Ihres Metalldetektors, damit Sie jahrelang Freude daran
haben.
Notiz:
Um das tief vergrabene Ziel zu erkennen, können Sie SENS auf
einen hohen Wert einstellen.Aber nicht, um den Pegel von SENS
auf Max zu setzen. Position, oder der Detektor empfängt
Interferenzen und falsche Signale von der Sendeantenne und
anderen elektronischen Leitungen. Der Detektor hat instabile und
unregelmäßige Anzeigen.
26 27

Behandeln Sie den Detektor sanft und vorsichtig.
Herunterfallen kann Platinen und Gehäuse beschädigen
und dazu führen, dass der Detektor nicht mehr richtig
funktioniert.
Verwenden Sie den Detektor nur in Umgebungen mit
normaler Temperatur. Extreme Temperaturen können die
Lebensdauer elektronischer Geräte verkürzen und die
Gehäuse des Detektors beschädigen.
Wischen Sie den Detektor gelegentlich mit einem
feuchten Tuch ab, damit er wie neu aussieht. Verwenden
Sie zum Reinigen des Detektors keine scharfen
Chemikalien, Reinigungslösungen oder starken
Reinigungsmittel.
Halten Sie den Detektor von Staub und Schmutz fern, da
dies zu vorzeitigem Verschleiß der Teile führen kann.
Remarque : Ce produit n'inclut pas les piles,
les clients doivent acheter 2 piles 9V
séparément.
FR
Avec votre détecteur de métaux, vous pouvez rechercher des
pièces de monnaie, des reliques, des bijoux, de l'or et de l'argent à
peu près n'importe où. Le détecteur est livré avec une sensibilité
élevée et une forte capacité de discrimination. Il est polyvalent et
facile à utiliser. Les fonctionnalités du détecteur incluent :
Affichage LCD :Affiche le type de métal probable, la force du signal,
la plage de DISC & NOTCH, le niveau de SENS et de VOLUME, et
l'état de la batterie. Il a également un affichage numérique pour la
cible.
Discrimination audio à trois tonalités : Émet trois tonalités distinctes
(élevée, moyenne et basse) pour différents types de métal.
Encoche : Ignore le métal indésirable et trouve des objets de valeur
en définissant la plage d'encoche.
DISC : Discrimine la cible indésirable en réglant la plage numérique
DISC. Le détecteur ne détectera pas la cible au-delà du réglage
numérique.
PP : Localise précisément l'emplacement de la cible.
Identification de balayage super lent : Avec un balayage très lent de
la bobine de recherche pour discriminer différents types de métaux.
Prise casque : Vous permet de connecter un casque de 3,5 mm et
de fonctionner sans problème.
Bobine de recherche étanche : Vous permet d'utiliser le détecteur
même si vous devez le mettre sous l'eau peu profonde.
Arbre réglable : vous permet d'ajuster la longueur de l'arbre pour
une utilisation confortable.
Alimentation : Votre détecteur de métaux nécessite deux piles
alcalines de 9 volts.
28 29

PRÉPARATION
INSTALLATION
ÉTAPE 1. Votre détecteur ne nécessite aucun assemblage ni outil.
Enlève simplement le détecteur de la boîte.
Bobine de recherche
Bouton de verrouillage
Bielle 2 Panneau de
commande
Boîtier de
commande
Sangle d'accoudoir
Accoudoir
Verrou de bielle
Bielle 1
Arbre réglable Accoudoir réglable
Retirez la sangle de fixation
ÉTAPE 3.Appuyez sur le bouton de DÉVERROUILLAGE pour libérer
la poignée.
ÉTAPE 4. Faites glisser l'accoudoir à la longueur désirée
(généralement juste sous votre coude). Et étendez complètement
l'arbre inférieur à la longueur souhaitée pour votre taille.
BATTERIE
Veuillez utiliser deux piles alcalines 9V.
Ouvrez le couvercle de la batterie et
installez la batterie en respectant le
signe de polarité dans le boîtier de la
batterie. Si vous n'utilisez pas le
détecteur pendant une longue période,
veuillez retirer la batterie du boîtier de
la batterie.
Appuyez sur le bouton de verrouillage
Ouvrez
Ouvrez
Tirez jusqu'à la
position
souhaitée
Tirez jusqu'à la
position
souhaitée
Ouvrez le
contrôleur
et la poignée
ÉTAPE 2. Tournez le détecteur de 180 degrés comme indiqué sur la
figure. Tournez
30 31

Avertissement:
▪ Jetez les piles usagées rapidement et correctement. Ne jamais les
enterrer ou les brûler.
Précautions :
▪ N'utilisez que des piles alcalines neuves de la taille requise.
▪ Ne mélangez pas les anciennes et les nouvelles piles ou différents
types de piles.
▪ Si vous ne prévoyez pas d'utiliser l'appareil pendant une semaine
ou plus, retirez les piles. Les batteries peuvent laisser échapper des
produits chimiques qui peuvent détruire les composants
électroniques.
▪ Changez les piles si l'indicateur de pile sur l'écran LCD s'allume.
UTILISER DES CASQUES
1. Il est recommandé de choisir le casque avec contrôle du volume.
2. Insérez la fiche 3,5 mm du casque dans la prise PHONE. A ce
moment, le haut-parleur interne se déconnecte.
Écouter en Toute Sécurité
● Pour protéger votre ouïe, réglez le volume sur le réglage le plus
bas.
● Avant de commencer à écouter, réglez le volume à un niveau
confortable.
● N'écoutez pas à des niveaux de volume extrêmement élevés. Une
écoute prolongée à volume élevé peut entraîner une perte auditive
permanente.
● Ne portez pas d'écouteurs lorsque vous utilisez votre détecteur à
proximité de zones à fort trafic. Faites attention à la sécurité routière.
INSTRUCTIONS POUR LE PANNEAU DE COMMANDE
1. Interrupteur ALIMENTATION
Appuyez sur l'interrupteur d'alimentation pour allumer/éteindre le
détecteur.
2. AFFICHAGE LCD
ALIMENTATION
LOCALISATION
PRÉCISE
RÉTROÉCLAIRAGE
Indicateur
numérique DISC
Indicateur
de batterie faible
CONTENU DE MENU
Indicateur SENS
Indicateur DISC/NOTCH
Indicateur
numérique cible
32 33

3. BOUTONS DE COMMANDE
MENU : Appuyez sur MENU, l'écran LCD affichera VOLUME,
SENS, DISC, NOTCH.
VOLUME : Appuyez sur MENU pour sélectionner VOLUME.
Appuyez ensuite sur ou pour régler le niveau (0-4) de VOLUME.
Le niveau sera affiché sur l'écran LCD.
SENS : Appuyez sur MENU pour sélectionner SENS. Appuyez
ensuite sur ou pour régler le niveau (2-8) de sensibilité. Le niveau
sera affiché sur l'écran LCD.
DISC : Discrimine la cible indésirable en définissant la plage
numérique. Appuyez sur MENU pour sélectionner DISC. Appuyez
ensuite sur ou pour régler la plage numérique de discrimination.
Le numéro s'affichera sur l'écran LCD.
NOTCH : Élimine la cible que vous ne voulez pas. Appuyez sur
MENU pour sélectionner NOTCH. Appuyez ensuite sur ou pour
sélectionner la cible à encocher. Le curseur autour de la cible
sélectionnée clignote. Appuyez à nouveau sur ENTER, le nom de la
cible à l'intérieur du curseur disparaîtra.
PP : Localise précisément l'emplacement de la cible.
4. Interrupteur de RÉTROÉCLAIRAGE
Appuyez sur l'interrupteur de rétroéclairage pour allumer/éteindre le
rétroéclairage du détecteur.
5. MÉMOIRE
Le détecteur mémorisera tous les paramètres avant la mise hors
tension. Remarque:
Il n'est pas recommandé d'encocher toutes les cibles répertoriées
sur l'écran LCD. Parce que si vous cochez tout, vous ne trouverez
rien.
TEST ET UTILISATION EN INTÉRIEUR
1. Appuyez sur l'interrupteur d'alimentation pour allumer le
détecteur.
2. Réglage du mode de fonctionnement :
(1) DISC : Appuyez sur MENU pour sélectionner DISC, puis sur ou
pour régler la valeur numérique DISC. Si la valeur DISC est réglée
sur 00, le détecteur peut détecter toutes sortes de métaux. Dans ce
cas, lorsque le détecteur trouve une cible, le curseur autour du nom
de la cible s'allume. De plus, le détecteur émet une tonalité, basse
pour le fer, 5 cents ; moyen pour tirettes, 1 cent ; élevé pour 10
cents ou 25 cents. Si vous ne souhaitez pas trouver la cible
répertoriée sur l'écran LCD, vous pouvez définir la plage numérique
relative de DISC en appuyant sur DISC puis sur ou . Par
exemple, la plage cible numérique pour 5¢ est de 11 à 25, vous
pouvez simplement appuyer sur MENUS pour sélectionner DISC,
puis régler le numéro DISC sur 28 en appuyant sur ou . Dans ce
cas, la plage numérique est au-delà de 5¢. Le détecteur n'y
répondra pas. Le détecteur n'aura pas non plus de réponse au fer.
Parce que la plage numérique cible pour le fer est de 0 à 10.
(2) NOTCH :
Appuyez sur MENU pour sélectionner NOTCH, puis sur ou pour
sélectionner la cible à encocher. Le curseur autour de la cible
sélectionnée clignote. Appuyez à nouveau sur ENTER, le nom de la
cible à l'intérieur du curseur disparaîtra. Cela signifie que cette cible
sera entaillée lors de la détection et que le détecteur n'aura aucune
réaction à la cible entaillée. Si vous voulez ramasser la cible
cochée, appuyez simplement à nouveau sur ENTER. Appuyez sur
ou , le curseur se déplacera de gauche à droite. Si vous n'appuyez
pas sur ENTER dans les 3 secondes environ, le détecteur entrera
en état de veille.
34 35

Remarque : Pour trouver l'emplacement exact de la cible, vous
devez vous entraîner plusieurs fois.
INDICATIONS CIBLES
1. Plages numériques de cibles :
2. Types de cibles
Remarque :
- FER : Indique que la cible est probablement en fer.
- 5¢ : Cela indique que la cible est probablement 5¢ ou un nickel.
Certaines petites bagues en or peuvent s'inscrire dans cette plage.
- P-TAB : Il indique que la cible est probablement une tirette d'une
canette en aluminium. Certaines petites bagues en or peuvent
s'inscrire dans cette plage.
- 1¢ : Il est indiqué que la cible est probablement une pièce de 1¢
ou un type de métal d'alliage de zinc. Certaines bagues en or de
taille moyenne peuvent s'inscrire dans cette catégorie.
- 10¢ : Cela indique que la cible pourrait être une pièce de 10¢.
Certains gros objets en or brut peuvent s'inscrire dans cette
catégorie.
- 25¢ : Cela indique que la cible est probablement 25¢ ou une pièce
d'argent.
- FER
- 5¢
- P-TAB
- 1¢
- 10¢
- 25¢
00-10
11-25
26-40
41-60
61-80
81-99
Il existe une grande variété de métaux
et aucune cible ne peut être identifiée
avec certitude tant qu'elle n'a pas été
découverte. Ce tableau est fourni à titre
indicatif uniquement.
Remarque:
Ne testez jamais le détecteur sur un étage à l'intérieur
d'un bâtiment. La plupart des bâtiments ont une sorte
de métal dans le sol, ce qui peut interférer avec les
objets que vous testez ou masquer complètement le
signal.
Remarque:
Si vous utilisez une pièce de monnaie, le détecteur la détectera plus
facilement si vous la tenez de manière à ce qu'un côté plat soit
parallèle au côté plat de la bobine de recherche. Un balayage avec
le côté de la pièce sur la bobine de recherche peut provoquer une
fausse indication et un affichage instable de la cible.
7. PP(PINPOINT)
Après avoir trouvé un objet métallique, vous pouvez utiliser PP pour
localiser la cible. Appuyez sur le bouton PP. Déplacez lentement la
bobine de recherche au-dessus de la zone sonore. Le détecteur
sonne et l'indicateur de signal sur l'écran LCD affiche le niveau du
signal. Appuyez ensuite à nouveau sur le bouton PP pour libérer le
PP. Balayez à nouveau la bobine de recherche, en gardant la même
distance de la bobine de recherche, le son disparaît. Appuyez à
nouveau sur le bouton PP, rapprochez la bobine de recherche de la
zone sonore, le détecteur sonne à nouveau. Répétez les étapes
ci-dessus jusqu'à ce que le détecteur affiche le signal le plus fort là
où se trouve la cible.
3. Appuyez sur MENU pour sélectionner SENS, puis appuyez sur
ou pour régler la sensibilité.
4. Placez le détecteur sur une table en bois ou en plastique, puis
retirez les montres, bagues ou bijoux en métal que vous portez.
5. Ajustez la bobine de recherche de manière à ce que la partie
plate pointe vers le plafond.
6. Balayez lentement un échantillon du matériau que vous souhaitez
que le détecteur trouve (comme une bague en or ou une pièce de
monnaie) 2-3 pouces / 5-7,5 cm ou plus au-dessus de la face de la
bobine de recherche. Lorsque le détecteur détecte un métal, il émet
une tonalité et le curseur autour du nom de la cible s'allume. L'écran
LCD affiche également la valeur numérique de la cible ainsi que la
force du signal de celle-ci. Veuillez noter que la force du signal n'est
qu'une référence.
36 37

TEST ET UTILISATION EN EXTÉRIEUR
Conseils de Balayage de la Bobine de Recherche :
▪ Ne balayez jamais la bobine de recherche comme s'il s'agissait
d'un pendule. Relever la bobine de recherche pendant le balayage
ou à la fin d'un balayage entraînera de fausses lectures.
1. Appuyez sur l'interrupteur d'alimentation pour allumer le
détecteur.
2. Suivez les étapes de 2 décrites dans la section Test et utilisation
en intérieur pour définir le mode de fonctionnement.
3. Trouvez une zone au sol à l'extérieur où il n'y a pas de métal.
4. Placez un échantillon du matériau que le détecteur doit détecter
(comme une bague en or ou une pièce de monnaie) sur le sol.
5. Maintenez la bobine de recherche au niveau du sol à environ 1 à
2 pouces / 2,5 à 5 cm au-dessus de la surface, déplacez lentement
la bobine de recherche sur la zone où vous avez placé l'échantillon,
en balayant la bobine de recherche dans un mouvement latéral .
Le détecteur est livré avec trois tonalités pour différents types de
métaux. Mais le système d'identification audio intégré émet une
tonalité unique pour chacune des trois catégories de métal. Cela
facilite l'identification du métal détecté.
Une tonalité basse est pour le FER, 5¢, comme pour le papier
d'aluminium, le bouchon de bouteille ou les nickels. Une tonalité
moyenne est pour P-TAB, ZN, 1¢ (languettes en aluminium, articles
en zinc ou en cuivre). Une tonalité élevée est pour 10¢, 25¢,
comme pour les articles en laiton ou en argent.
3. Tonalités
Correct Incorrect
▪ Balayer lentement, se dépêcher vous fera manquer des cibles.
▪ Il est préférable de balayer la bobine de recherche d'un côté à
l'autre dans une ligne d'arc de mouvement de 3 pouces / 7,5 cm et
de garder la bobine de recherche parallèle au sol.
Si le détecteur détecte l'élément, il émet une tonalité et le curseur
autour du nom de la cible s'allume. L'écran LCD affiche également
la plage numérique de la cible ainsi que la force du signal.
Si le détecteur ne détecte pas l'objet, assurez-vous que le mode est
correctement réglé pour le type de métal que vous recherchez.
Assurez-vous également que vous déplacez correctement la bobine
de recherche.
Ajuster la SENSIBILITÉ
Après vous être familiarisé avec le fonctionnement de votre
détecteur, il est important d'affiner la sensibilité pour obtenir un bon
effet.
Appuyez sur MENU pour sélectionner SENS. Appuyez ensuite sur
ou pour augmenter ou diminuer la sensibilité. Le niveau sera
affiché sur l'écran LCD.
Remarques:
▪ Le détecteur répond par un signal lorsqu'il détecte les objets
métalliques les plus précieux. Si un signal ne se répète pas après
avoir balayé plusieurs fois la bobine de recherche sur la cible, la
cible est probablement du métal indésirable.
▪ Les faux signaux peuvent être causés par un sol sale, des
interférences électriques ou un gros morceau de ferraille irrégulier.
▪ Les faux signaux sont généralement interrompus ou non
répétables.
Remarque:
Afin de détecter la cible profondément enfouie, vous pouvez régler
le SENS à un niveau élevé. Mais ne pas régler le niveau de SENS
sur la position Max, sinon le détecteur recevra des interférences et
un faux signal de l'antenne de diffusion et d'autres lignes
électroniques. Le détecteur aura des indications instables et
irrégulières.
38 39
Table of contents
Languages:
Other Costway Metal Detector manuals
Popular Metal Detector manuals by other brands

Tesoro
Tesoro Stingray II Operator's instruction manual

Steinberg Systems
Steinberg Systems SBS-MD-24 user manual

Teknoloji Ekibi
Teknoloji Ekibi Delta Pulse 3S Plus user manual

Treasure Cove
Treasure Cove Vibra-Probe 585 manual

BLACKHAWK!
BLACKHAWK! DR-100 operating manual

Fisher
Fisher 1212-X operating manual