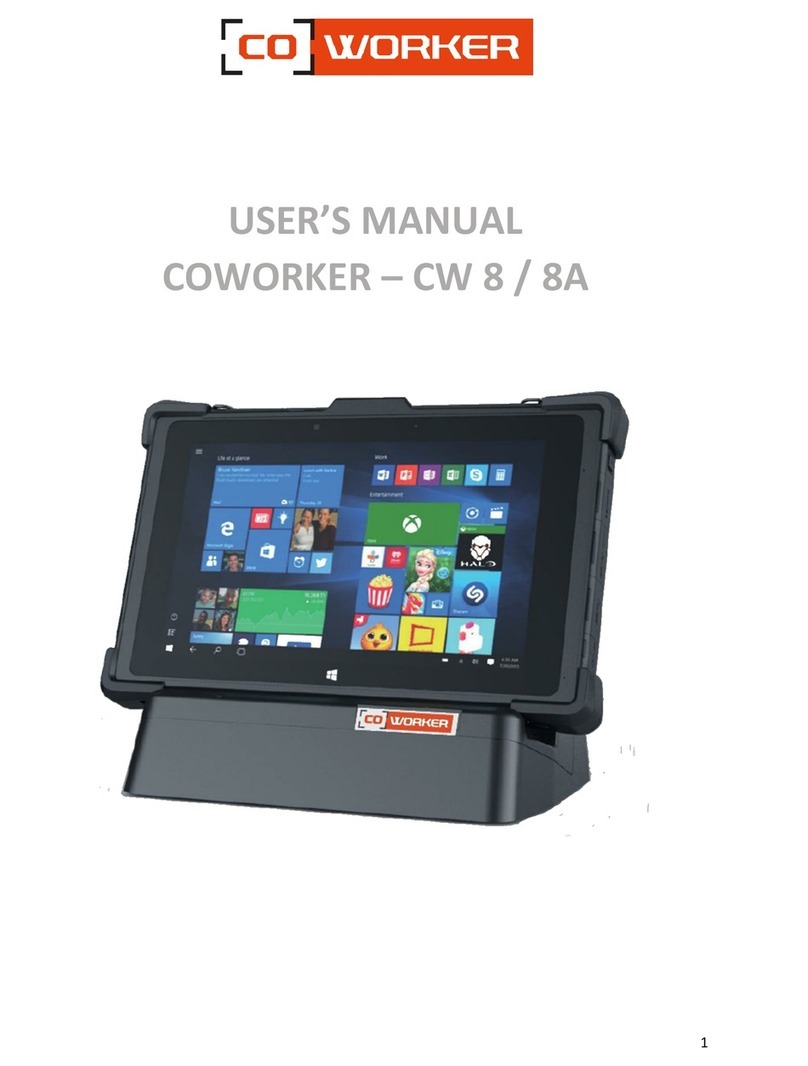
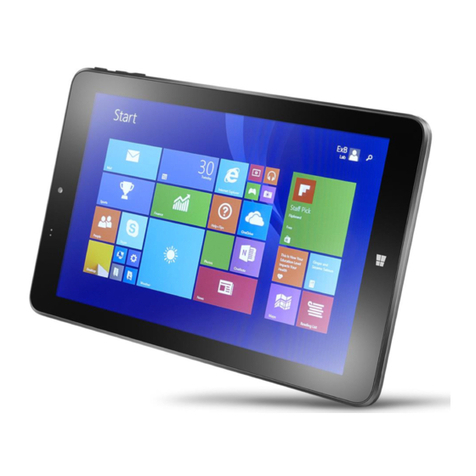
COWORKER CWH10 User manual

1
USER’S MANUAL
COWORKER - CWH10/F10

2
Table of contents
CHAPTER 1: GETTING STARTED .................................................................................................................... 3
Explanation of advisements: .............................................................................................................3
Safety instructions:............................................................................................................................3
Specifications:....................................................................................................................................4
Overview f the Coworker tablet:.......................................................................................................5
Start up:.............................................................................................................................................5
CHAPTER 2: USING COWORKER TABLETS .................................................................................................... 6
1- Managing device power:...........................................................................................................6
AC adapter: ........................................................................................................................6
Battery:...............................................................................................................................6
Checking the battery level: ................................................................................................7
Changing the battery (Hot Swap):......................................................................................7
2- Using the camera: .....................................................................................................................8
3- Using the Bluetooth : ................................................................................................................8
4- Utilisation du Wi-Fi :..................................................................................................................9
5- Using the SIM or SD card reader:............................................................................................10
6- Using cellular connectivity (optional) :...................................................................................10
7- Using GPS.................................................................................................................................11
8- Utilisation du stylet.................................................................................................................12
9- Using the RFID reader .............................................................................................................13
10- Using the NFC reader ..............................................................................................................14
11- Using the CAC card reader ......................................................................................................15
12- Using the Barcode reader .......................................................................................................16
13- eController App .......................................................................................................................17
System information..........................................................................................................17
CAC Card Reader .............................................................................................................18
RFID Reader......................................................................................................................18
NFC Reader.......................................................................................................................19
Barcode Reader................................................................................................................19
Button configuration........................................................................................................20
GPS ...................................................................................................................................20
CHAPTER 3: MAINTENANCE OF YOUR COWORKER................................................................................... 21
General maintenance:.....................................................................................................................21
Screen maintenance:.......................................................................................................................21

3
CHAPTER 1: GETTING STARTED
Thank you for choosing the Coworker CW-P10 tablet to support you in your activity.
To ensure an optimum performance of this product, please read this user’s manual carefully.
The Coworker H10/F10 is a rugged tablet intecded for medical/ commercial uses.
Explanation of advisements:
In this manual we use three levels of advisements as follows:
The Note symbol is used for notifying the user of something important or of something that needs
special attention.
The Caution symbol is used to inform of something that could cause harm to, or malfunction of the
equipment.
The Warning symbol is used to inform of something in which there is a conceivable risk of harm to
the user if the warning is ignored.
Safety instructions:
Read the safety instructions carefully and thoroughly. All cautions and warnings on the equipment or
user’s manual should be noted.
Keep this equipment away from humidity and high temperatures.
Lay this equipment on a stable surface before setting it up.
The openings on the frame are used for air convection and to prevent the equipment from overheating.
Do not cover the openings.
Do not leave the equipment in an unconditioned environment with a storage temperature above 60°C or
below -20°C, which may damage the equipment.
This unit should not be used under a maximum ambient temperature of 50ºC (120ºF) or under 60°C
(140ºF) for light loading applications.
The hereunder are requirements of the battery storage:
•If the storage duration is within 3 months, please keep the temperature between -20 ℃~45 ℃;
If the storage duration is above 3 months but within 1 year, please keep the temperature at
23℃± 2℃.
•The battery capacity should remain at 30 ± 5%.
•The storage humidity should remain at 65 ± 25%RH.
•The battery charging temperature should be between 10 ℃~45 ℃, the discharging temperature
should be between -20℃~60℃.
•For the maximum battery discharging performance, please keep the storage temperature at
25℃.

4
Make sure the power voltage is within safety range and has been adjusted properly to the value of
100~240V before connecting the equipment to the power outlet.
Always unplug the AC power cord before adding a cord or installing any module to the equipment.
Always disconnect the AC power cord or uninstall the battery pack or switch off the wall socket if the
equipment shall be left unused for a certain time to achieve zero energy consumption.
Place the power cord in a way that people are unlikely to step on it. Do not place anything on top of the
power cord.
Always keep strong magnetic or electrical objects away from the tablet.
Never put liquid into the opening, that could damage the equipment or cause an electrical shock.
If any of the following situations arise, get the equipment checked by a certified technician:
-The power cord or plug is damaged.
-Liquid has penetrated into the equipment.
-The equipment has been exposed to moisture.
-The equipment has not worked well or you can not get it work according to User’s Manual.
-The equipment has been dropped and damaged.
-The equipment has obvious signs of breakage.
Specifications:
The Coworker H10/F10 tablets are equipped with the following specifications:
Processor Intel® Pentium N4200 / Core-i5-7Y54
Windows 10 Pro
Tested to MIL STD 810G standard, drop resistance 1.2m
IP65
Hot swap battery
Hardware encryption TPM 2.0
Available options :
4G LTE multi career with GPS
NFC reader / RFID reader / Barcode reader 2D (Honeywell)
Smart card reader
Mobile dock, Office dock
Active pen

5
Overview f the Coworker tablet:
Start up:
To turn the tablet on, press and hold the power button on the front side of the tablet for 3 seconds.
For the first use of the Coworker tablet, follow the instructions that come up on the tablet. Once the
settings have been done, the desktop opens.
Now, the tablet can be used, following our terms of use.

6
CHAPTER 2: USING COWORKER TABLETS
1- Managing device power:
AC adapter:
The AC adapter accepts 100-240VAC input.
Use only the AC adapter included with your Tablet PC. Using other AC adapters may damage the
device.
Battery:
The CWH10/F10 tablet is equipped with a backup and hot-swappable battery. When hot swappable
battery has low voltage and needs to be replaced, the built-in battery will power the tablet for up to 5
minutes.
To charge the battery:
1. Connect the power cable to the charging port on the device.
2. Connect the power adapter to an electrical outlet and charge the tablet until the battery is fully
charged.
3. When the CWH10/F10 is fully charged, disconnect the charger from both the device and the
electrical outlet.
4. Additional hot-swappable batteries can be charged independently of the tablet by placing the
battery into a docking station with a battery charging bay (available separately)
NOTE: To prevent damage to batteries, please see chapter 1: Safety instructions
Battery life naturally degrades over time. Failure to follow instructions for recommended
operation temperatures, charge and discharge rates, and other instructions may accelerate
battery decay rates. If your tablet battery will not accept or hold a satisfactory charge, it may
need to be replaced.
For battery storage and charging temperatures, see chapter 1: Safety instructions

7
Checking the battery level:
To check the battery level of the CWH10/F10, you may use the battery monitor within Windows
operating system or by the voltage gauge of the hot swappable battery.
Press the battery test (1) button. The gauge will display the battery level.
Changing the battery (Hot Swap):
The CWH10/F10 battery can be replaced without interrupting your work, by use of the backup battery. It
permit to do a hot-swapping without shutting down the tablet, it takes over during 5 minutes.
To swap the battery:
- Place the tablet on a flat and non- abrasive surface
- Push the two latches towards the outside of the tablet.
- Remove and replace with a fully charged battery.
The appropriate temperature range for swapping the battery is between -10 °C and 50 °C.
If a new battery is not inserted within 5 minutes, the tablet enters Hibernation mode or may
switch off entirely.
1

8
2- Using the camera:
Take photos and record videos using the various modes and available settings.
On the taskbar, press
Camera.
Taking pictures or recording videos:
Press to take a picture or on to record a video.
To zoom in, move two fingers away from each other on the screen.
To zoom out, bring them closer together.
To use the front camera, press
3- Using the Bluetooth :
You can connect a variety of Bluetooth devices to your tablet, including: mouse, phones, speakers and
much more. To start using the Bluetooth, you must first pair your Bluetooth device with your tablet.
Examples:
To connect an audio device:
1. Turn on your Bluetooth audio device and make it visible.
The procedure for making it visible depends on the audio device. Check the audio device or visit
the manufacturer’s web site to learn how to do this.
2. Turn on the Bluetooth on your tablet if you have not already done so. To do this, on the taskbar,
select notification center > Bluetooth
3. In the notification center, select connect> and choose the name of the device.
4. Follow all the instructions on the screen. Otherwise, you’re finished and you’re connecting.
Generally, your Bluetooth device and tablet will automatically connect when the two devices are
within range of each other and turned on.
To connect a device:
1. Turn on your device and make it visible.
2. Select the start button , and then choose settings > devices > Bluetooth and other
devices .
3. Turn on the Bluetooth, then select add a Bluetooth device or another device > Bluetooth. Choose
the device and follow the additional instructions, as if so, then select OK.

9
4- Utilisation du Wi-Fi :
In order to connect to a Wi-Fi network, please follow these instructions:
In the taskbar, double click on the Wi-Fi icon in the bottom right corner.
1. Select your network (company or box) from the list of Wi-Fi networks scanned;
2. Click on « Connect »;
3. Enter the network security key;
4. Click on « Next »;
5. When the connection is established on your network, the word « Connected » appears.

10
5- Using the SIM or SD card reader:
-The SIM card/or SD card must be inserted with the tablet turned off so that it can be properly
detected.
-The SIM card and SD card slot is in the battery compartment.
-A logo on the plastic indicates the direction of insertion.
Example of SIM card insertion:
6- Using cellular connectivity (optional) :
If you have purchased your Coworker with the optional mobile broadband module, you can connect it to
high speed mobile phone network around the world, with the mobile broadband module and an internet
package subscribed with one or more mobile phone operators, you will have full access to the internet.
Note:
Before connecting to a mobile broadband network, you must have an active account with a mobile
phone operator and obtain a SIM card for mobile broadband access.
1. Turn the tablet off, insert your SIM card and turn the tablet back on. (Refer to
the previous paragraph).
2. Activate the mobile broadband function as follows:
a. Press the network icon .
b. In the network window, enable cellular.
c. Press the cellular icon to display your service provider.
d. Press the connect button to establish a connection, and enter the PIN
code.
If you want to change the operator, please follow the instructions below:
a. Press the network icon
b. Press Network & Internet settings.
c. Tap on 'Network and Internet' then tap on 'Cellular Network'.
d. Tap ‟Advanced options”.
e. Select your operator from the 'Choose Default Internet APN' drop-down list.

11
7- Using GPS
This tablet has internal GPS module for navigation, please follow instructions in the specific software for
your application for GPS application.
Whether you’re traveling by car, by foot or by bus, maps for Windows 10 tells you how to reach your
destination. Download offline maps before you leave so you can search and get directions, even without
internet access.
How to use GPS :
Get directions to the address, the landmark or the business of your choice. The maps application even
guides you to the desired address.
1. Click the start button, and then click maps.
2. Select Directions.
3. If you wish, you can change the transport mode (on foot or by public transport), and select
preferences to avoid items such as tolls or traffic jams, or to obtain a route with a public transport
with less walking.
4. In fields A (starting point) and B (destination), start typing an address, a city name, the name of a
company. Select the desired location from the choices that appear.
5. If you need to make multiple stops, select “add destination”. You can also press and hold down
(or right click) on the map, then select and add the destination. Drag the destinations to rearrange
them in the list.
6. Select « Get directions ».
7. To listen to the detailed itinerary during your trip, select OK.
8. Or, to print it, select more > print.
Offline Maps:
Download maps via Wi-Fi before you leave, then use the maps application to search and get directions,
even when you are not connected to the internet.
1. Close the maps application, select the start button, and then choose settings > Applications >
Offline maps.
2. Select Download maps, then choose the region map you wish to obtain.
If you want to check whether the GPS hardware is working correctly, you may use eController app to
test. See paragraph 13: Using the eController app.

12
8- Utilisation du stylet
The CWH10/F10 tablet can be used with a passive stylus or an active stylus.
Standard stylus
Active stylus
The standard stylus can be used for writing and selecting elements on the screen.
The active stylus works together with a specialized touch sensor panel to support functions like double
click, palm reject, hover, accurate drawing, legal signature and other special functions.
To use double click function, tap the desired point on the screen twice in quick succession with the pen.
Hoover function, if you hover the pen a little bit, you will see that the pen has corresponding mark.
Please keep the pen within 3mm from the touch screen, otherwise the mark might not be
displayed in the screen.
Palm rejection function: when you are writing using an active digitizer, the finger and the palm on the
screen won’t produce input, as the screen recognizes a difference between the input from your hand
and input from your stylus.

13
Due to the overlap features of NFC, RFID and CAC card readers, they are designed in the same
location of the tablet, so the three modules cannot be installed in the same tablet, only one
module can be selected.
9- Using the RFID reader
This tablet may include an internal RFID reader module. The RFID system involves a tag and a reader, used
for inventory management, tracking and so on.
The RDIF is localized at the top right of the tablet (overview page 5).
To use an RFID device:
Scan a smart card or RFID tag near the RFID reader, please follow the instructions in the specific
software for your application and use RFID function properly.
The RFID tag/card must be within the range of an RFID reader. AN audible beep will indicate a
successful scan.
If you experience errors while attempting to read an RFID tag with the scanner, please try a
different tag. If the error persist, contact your dealer or assistance.
If you want to check whether the RFID reader hardware is working correctly, you may use eController
app to test. See paragraph 13.

14
10-Using the NFC reader
This tablet may include an optional internal NFC module for different applications, such as checking
security tags, or communicating with smartphone.
The NFC reader is localized at the top right of the tablet (overview, page 5)
To use an NFC device:
You can scan a card or device near the NFC sensor area. Please follow the instruction in the specific
software for your application and use NFC function properly.
Below it is example for mobile payment application using NFC.
Please keep the NFC tag or cards close to the NFC area within 2.5mm, otherwise the internal NFC
module may not receive the signal from tag or card. If you hear a small beep, it means the scan is
successful.
If you cannot get the NFC function work properly, check tag or card type. If still not working,
please contact your supplier for instruction.
If you want to check the NFC hardware is working correctly, you may use eController app to test. See
paragraph 13.

15
11-Using the CAC card reader
This tablet has internal CAC card module for ID authentication, as it is shown in overview (page 5).
To use a CAC card reader:
Please can insert the smart card into the reader, please follow the instructions in the specific
software for your application and use CAC card function properly.
If you cannot get the CAC card reader function work properly, use different CAC card and check again.
Also make sure the cards are correct type and inserted fully in the slot. If still not working, please
contact your supplier for instruction
If you want to check the CAC card hardware is working correctly, you may use eController app to test.
See paragraph 13.

16
12-Using the Barcode reader
This tablet has optional internal Barcode reader module, most common 1D and 2D barcode formats can
be read. The position of the reader is shown below.
Press the barcode button located on the top edge of the tablet to activate the barcode reader, scan a
barcode. To activate and configure the barcode reader according to your needs, please use the EasySet
software on the tablet.
Configuration of the barcode reader :
Reading the “Enter Setup”barcode may allow the engine to enter setup mode. You can then scan a
number of programming barcodes to configure your engine. To exit setup mode, scan the “Exit
Setup” barcode.
France
US
UK
Italy
Spain
Germany / Australia
Belgium
Sweden
Finland
Danmark
Portugal
Norway
The maximum operating temperature for the barcode scanner is 50°C (122°F).
The barcode reader only works at close range under appropriate ambient light conditions.

17
13-eController App
The eController App is designed to quickly check if device modules are working properly. It tests the
following modules:
1. CAC (Common Access Card) Card
2. RFID Reader
3. NFC Reader
4. Barcode Reader
5. GPS
6. Assign function to programmable buttons F1 and F2
Most of the above the modules are optional items. If the eController top menu bars are greyed out
or unselectable on certain items, the related modules are not installed (or have been disable).
The eController is not application software. You need install the proper application software to use
the module for your desired functions.
System information
The system information component of the eController App will automatically check the tablet’s
information.

18
CAC Card Reader
When activated, the user may place an enabled card into the chip card reader. Users should then select
« Read » on the screen, and the screen will display whether the card was read properly or not.
If the reader indicates that the card cannot be read, please remove and reinsert the card,
checking that it is inserted fully and in appropriate orientation. If the card still cannot be read, try
a different card.
RFID Reader
Place the RFID tagged device near the indicator on the tablet, and select the « Read » button on the
screen. The RFID reader will display whether or not an RFID tag was detected and read properly. If the
tag is not detected or not read, ensure that the devices are near enough together.

19
NFC Reader
The eController can test if the NFC transmitter and receiver on the tablet is working properly.
Place any NFC device (tag, smartphone with NFC is enable, contactless EMW card, etc.) near the sensor
area of the tablet (keep distance within 2.5mm), the screen will display if NFC detection successful:
Detected or NONE.
If you cannot detect smartphone NFC, please check if the NFC is enable on the phone.
Barcode Reader
To test the barcode scanner, select the barcode test, point the scanner at a barcode (or QR code), and
press the SCAN button on the screen or press the physical scan button on the handle of the tablet.
System will quickly scan and display the barcode information on screen.
Press the button again to read the barcode again. The displayed info will refresh and display the new
barcode information.
Please aim the laser at the center of barcode. Do not place the scanner too far from barcode.
Barcode scanner uses laser technology, do not point it toward anyone’s eyes.

20
Button configuration
Button configuration can program the F1 and F2 buttons on your tablet. Select the button you want to
program, choose the desired function and press « SAVE » button to save setting, or you can select
« CANCEL » to discard the changes.
If you want to program the buttons to a function not on the list, please contact your supplier for further
instructions.
GPS
Turn on Location Services. The App will automatically run and check the GPS signal, satellite positions,
your current location, speed, heading and altitude.
In the graphic below:
1. GPS signal bar chart, showing the signal strength for each satellite detected, as well as the
accuracy and status of the GNSS network.
2. Satellite positions in the sky, shown on a rotating compass.
3. Your current location on the earth shown as text and on a world map. The current position of the
sun and the day/night transition curve is also shown.
4. Compass
5. The current time read from the GPS and the local time in your current time zone, as well as the
sunrise and sunset times at your location.
6. Your current speed, heading and altitude shown as text.
Please test GPS in an open outdoor area. Otherwise, the GPS may not work properly.
If you have any further questions about this help file, please contact the supplier.
This manual suits for next models
1
Table of contents
Other COWORKER Tablet manuals
