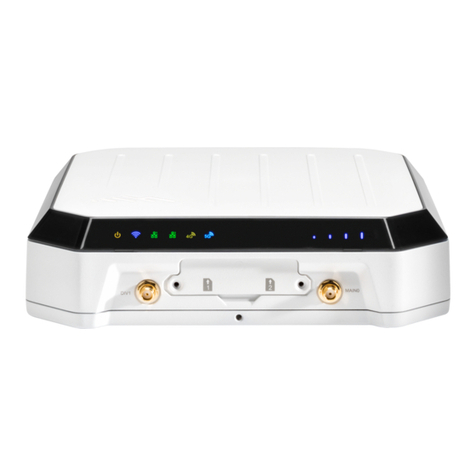
Cradlepoint W1855 Series User manual

W1855 Series 5G Wideband Adapter Quick Start Guide
Sep 12, 2023•Knowledge
Content
W1855 Series 5G Wideband Adapter
Quick Start Guide
Overview
This document provides a brief overview of the Cradlepoint W1855
Series 5G Wideband Adapter, discusses the box contents, and
provides basic setup instructions. Perform the procedures in this
guide to verify that you can get the adapter setup and working
before installing it outdoors in your planned location.
Intended Audience
This guide is provides basic knowledge and should be used only as a
reference for basic setup and testing of the Cradlepoint W1855 Series
5G Wideband Adapter. Cradlepoint recommends professional
hardware installers complete the installation, but this quick setup

can be performed by a suitable professional in your organization.
Once you have completed the basic setup, see the full W1855 Series
5G Wideband Adapter Installation Guide for in-depth setup and
installation details.
Navigation
Available Models
Before You Begin
External Device Components
Ethernet Cable Considerations
SIM Card Setup for Wireless Connectivity
Setup
Required Tools for Installation
Required Accessories (Not Included)
Step 1: Check Box Contents
Step 2: Insert an Activated 4FF-sized SIM
Step 3: Attach PoE Ethernet Cable
Step 4: Attach Cellular Antennas
Step 5: Power up the Adapter and Activate through NetCloud
Manager
Preparing the PoE Injector
Understanding the LED
Troubleshooting

Resetting the W1855 Adapter to Factory Settings
Resources
Help & Support
Terms of Service
Cradlepoint Product Disclaimer and Limitation of Liability Disclaimer
Installer Responsibility
Limitation of Liability
Available Models
This guide applies to the following products:
CRADLEPOINT W1855-5GC MODEL: S5A312A
Before You Begin
Read the following before setting up your Cradlepoint W1855 Series
5G Wideband Adapter.
External Device Components

1
Cellular Antenna N-type Connectors (1 and 2) (covers removed)
2
2.5 GbE 0 PoE Ethernet Port (cover removed)
3
2.5 GbE 1 Ethernet Port (cover removed)
4
SIM Slots
5
Reset Button
6
LED
7
Kensington Lock Port
8
Bluetooth Low Energy 5.2 Antenna (inactive, for future use)
9
Cellular Antenna N-type Connectors (3 and 4) (covers removed)
10
Grounding Lug
11
VESA-compliant Mounting Holes
12
GORE® Vent
Ethernet Cable Considerations
The Cradlepoint W1855 Series 5G Wideband
Adapterrequires shielded twisted-pair (S/FTP) Ethernet network
cabling and connectors (Cat5/Cat6/Cat6a/Cat7a) for optimal wired
network performance. Note that Ethernet cable length should not
exceed 100 meters (328 feet) to avoid signal degradation.

SIM Card Setup for Wireless Connectivity
A wireless broadband data plan must be added to your adapter for
wireless broadband connectivity. Network providers must provision
a SIM to provide wireless broadband data plans compatible for use
with Cradlepoint W1855 Series 5G Wideband Adapters. Contact your
network provider for further details.
Setup
The following steps provide general setup instructions.
Required Tools for Installation
The following tools are needed to complete the basic setup:
•Wide-bladed flathead screwdriver (for port dust covers)
•Adjustable open ended wrench (for tightening threaded end of
cable glands to adapter)
The port dust covers are not delivered preinstalled; cover any ports
you do not plan to use by screwing a dust cover into place over the
port.
Required Accessories (Not Included)

The following items are needed to complete the installation but are
not included:
•Shielded Ethernet cable long enough to reach from the adapter
installation location to the PoE injector - not to exceed 100
meters (328 feet) in length.
Step 1: Check Box Contents
Check that the following was shipped in the box. You will not need
every part for the steps in this guide, but verify now that all parts are
present:
•[1] Cradlepoint W1855 Series 5G Wideband Adapter
•[4] Cellular antennas
•[1] Device backplate and wall/pole mount assembly (two
connected pieces)
•[2] Pole mount clamps
•[2] Cable glands

•[1] PoE injector and PoE injector power cable
•[2] Ethernet port dust covers
•[1] Small Accessories Kit:
o[4] Bracket-to-device screws
o[4] Bracket-to-wall screws (pointed screws)
o[4] Wall anchors
o[1] Grounding lug
•[1] Safety, Regulatory, and Warranty Guide
•[1] Quick Start reference sheet
Step 2: Insert an Activated 4FF-sized SIM
1. Unscrew and remove the SIM cover of the W1855 Adapter.

2. Insert a 4FF-sized SIM into the slot marked with metal
contacts down and notch in. Press the SIM in until it clicks into
place.
To remove it, depress the SIM until it clicks and slides out a
short way, and then slide it out of the slot.
3. (Optional) Insert a second 4FF-sized SIM into the slot
marked for secondary/backup.
4. Replace the SIM cover.

Step 3: Attach PoE Ethernet Cable
Insert an Ethernet cable connector into the adapter's port
labeled 2.5GbE 0 PoE which must run to a PoE capable
router/switch, or to the included PoE injector.
TIP: Due to the recessed position of the Ethernet ports, any
protective boots or snag-free attachments over the connector may
make it difficult to remove the connector once inserted into the
Ethernet port once your testing is complete.
Setup of the PoE injector is shown later in this guide.
Step 4: Attach Cellular Antennas
1. Remove the four covers from the N-type antenna sockets.
2. Remove the plastic port protectors from the antennas, and
slide off the cardboard sleeves.
3. Attach the four cellular antennas to the four N-type socket
connectors. The antennas screw onto the N-type socket
connectors. Be sure that you align the antennas carefully to
avoid cross-threading the connection. Tighten until finger
tight.

Step 5: Power up the Adapter and Activate through NetCloud
Manager
The W1855 Adapterrequires Power over Ethernet and includes a PoE
injector. Prepare the PoE injector and then connect an Ethernet
cable between the PoE injector and the PoE port on the adapter.
Once powered up, activate the adapter through NetCloud Manager.
Device activation requires that you log into your NetCloud Manager
account. See Getting Started with NetCloud Manager for more
information.
Preparing the PoE Injector
When using the included PoE injector, place the injector inside the
building in an appropriate location to protect it from the elements.
The PoE injector can be mounted to a surface by adding screws
through the mount points on the injector housing, if needed. Injector
mounting screws are not included.
1. Before attaching the PoE power injector power cord, connect a
LAN cable from your network to the PoE injector's IN port.
Then connect the PoE Ethernet cable running from the
adapter's installation site into the PoE injector's OUT port.
2. When you are ready to power the PoE injector, attach the
power cable and then plug the other end into a power source.
NOTE: A router or switch that is capable of supplying 802.3at (type 2)
30 W PoE can be used in place of the supplied PoE injector.
Understanding the LED
INDICATOR
BEHAVIOR
POWER: The adapter must be powered using PoE (802.3at (type 2)
30 W).
No Light = Powered off.
Flashing White = WAN online and not
connected to NetCloud Manager.
Solid White = Connected to NetCloud
Manager.
Flashing Green = Modem is connecting.
Solid Yellow = Improper power supply (for
example, a PoE-enabled connected device is
supplying 802.3af and not 802.3at)
Flashing Yellow = Modem is in the process of
resetting.
Solid Red = Offline.

INDICATOR
BEHAVIOR
Flashing Red = Data connection error. No
modem connection possible.
Solid Blue = Carrier reject.
Flashing Blue = No SIM/SIM door open.
Flashing Cyan = Factory reset.
Troubleshooting
If the adapter takes longer than five minutes to connect to the
internet, you may need to log into the local UI of the device to make
configuration changes or start the troubleshooting process. You
must be physically co-located with the adapter to do this (or you can
take advantage of the second Ethernet cable, if you installed it).
See No Internet or Connection Issues for more information.
Note this information when connecting locally:
•The port labeled 2.5GbE 0 PoE defaults to IPPT.
•The port labeled 2.5GbE 1 is the default admin port.
Once the adapter connects to the internet, it should then connect to
your NetCloud Manager account and start its configuration
download.
Resetting the W1855 Adapter to Factory Settings
If it becomes necessary to reset your W1855 Adapter to factory
settings (for example, when told to do so by Cradlepoint Support), do
the following:
1. Remove the SIM slots cover.

2. With a dull-pointed object, press and hold the reset button for
10 seconds.
3. Replace the SIM slots cover.
The W1855 Adapter LED flashes cyan as it resets to factory
settings.
Resources
W1855 Series 5G Wideband Adapter Webpage
W1855 Series 5G Wideband Adapter Data Sheet
W1855 Series 5G Wideband Adapter Installation Guide
Help & Support
Cradlepoint Customer Connect Community
Cradlepoint Support Services
Terms of Service
Cradlepoint Terms of Service & License Agreement
Privacy Policy

GDPR Privacy Policy
Cradlepoint Product Disclaimer and Limitation of
Liability Disclaimer
Cradlepoint, Inc. (“Cradlepoint”) does not warrant that the hardware
will work properly in all environments or applications, and makes no
warranty or representation, either implied or expressed, with
respect to the quality, performance, merchantability, or fitness for a
particular purpose of the Cradlepoint W1855 Series 5G Wideband
Adapter even when installed in accordance with this installation
guide.
This installation guide is provided “AS IS,” without any warranty of
any kind. Without limiting the foregoing, to the maximum extent
permitted by applicable law Cradlepoint expressly disclaims all
representations, warranties and conditions, whether express,
implied, statutory, or otherwise, with respect to this installation
guide, including without limitation any warranty of title, non-
infringement, merchantability or fitness for a particular purpose.
While Cradlepoint has made every effort to ensure this installation
guide is accurate, Cradlepoint disclaims liability for any inaccuracies
or omissions that may have occurred and shall not be liable for any
adverse results caused, in whole or in part, by the installer’s reliance
upon the instructions in this installation guide. Information in this
installation guide is subject to change without notice and does not
represent a commitment on the part of Cradlepoint. Cradlepoint
assumes no responsibility for any inaccuracies that may be
contained in this installation guide. Cradlepoint makes no
commitment to update or keep current the information in this
installation guide and reserves the right to make improvements to
this installation guide and/or to the products described in this
installation guide, at any time without notice.
If you find information in this installation guide that is incorrect,
misleading, or incomplete, Cradlepoint would appreciate your
comments and suggestions.

Installer Responsibility
Cradlepoint hereby disclaims any liability for failure of the installer
to install the hardware properly and for any other acts and omissions
of the installer. By using this installation guide, you agree to
indemnify and hold Cradlepoint harmless from and against any and
all, liabilities, losses, damages, costs and expenses (including without
limitation attorneys’ fees and costs) incurred by Cradlepoint arising
out of or in connection with any installation work that is done other
than in accordance with the instructions in this installation guide.
Limitation of Liability
TO THE MAXIMUM EXTENT PERMITTED BY APPLICABLE LAW, IN
NO EVENT WILL CRADLEPOINT BE LIABLE TO YOU OR TO
ANYONE CLAIMING THROUGH OR UNDER YOU FOR ANY LOST
PROFITS, EQUIPMENT DOWNTIME, OR LOSS OF DATA OR
BUSINESS OPPORTUNITY, OR FOR ANY INDIRECT, SPECIAL,
EXEMPLARY, INCIDENTAL, CONSEQUENTIAL OR PUNITIVE
DAMAGES, HOWEVER CAUSED AND UNDER ANY THEORY OF
LIABILITY, ARISING IN ANY WAY IN CONNECTION WITH YOUR
INSTALLATION ACTIVITIES, EVEN IF CRADLEPOINT HAS BEEN
ADVISED OF THE POSSIBILITY OF SUCH DAMAGE. SOME
JURISDICTIONS (SUCH AS THE STATE OF NEW JERSEY) DO NOT
ALLOW THE EXCLUSION OR LIMITATION OF INCIDENTAL OR
CONSEQUENTIAL DAMAGES, SO THE ABOVE EXCLUSION OR
LIMITATION MAY NOT APPLY TO YOU. IN NO EVENT SHALL THE
AGGREGATE LIABILITY OF CRADLEPOINT AND/OR ITS AFFILIATES
ARISING UNDER OR IN CONNECTION WITH THE PRODUCT,
HOWEVER ARISING, REGARDLESS OF THE NUMBER OF EVENTS,
OCCURRENCES, OR CLAIMS GIVING RISE TO LIABILITY, EXCEED
THE PRICE PAID BY THE ORIGINAL PURCHASER OF THE PRODUCT.
THE FOREGOING LIMITATIONS WILL APPLY EVEN IF THE ABOVE
STATED REMEDY FAILS OF ITS ESSENTIAL PURPOSE.
This manual suits for next models
1
Table of contents
Other Cradlepoint Adapter manuals

Cradlepoint
Cradlepoint USB-Host to Ethernet Adapter PS6U1UHE User manual

Cradlepoint
Cradlepoint W2000 Series User manual

Cradlepoint
Cradlepoint CBA250 User manual

Cradlepoint
Cradlepoint CBA750B User manual

Cradlepoint
Cradlepoint CBA750B User manual

Cradlepoint
Cradlepoint USB-Host to Ethernet Adapter PS6U1UHE Assembly instructions

Cradlepoint
Cradlepoint CBA750 Series User manual

Cradlepoint
Cradlepoint CBA750B User manual