CreativeStar Artemis TI-CS-T11 User manual

TI-CS-T11 Quick Guide
Product By:
CreativeStar Solutions
1601 Trapelo Road Suite 260
Waltham, MA
02451
V1.0.3 June 2020

2
Computer configuration
requirements
•Recommended configuration, CPU i7, 16GB RAM
•Window 7 or Window 10
The software and electronic manuals are stored on the SD card that comes with the
package. Please unzip the files to the folder as required and install the software.

3
Hardware Installation
Quick Setup
Hardware connection
The aviation connector is used to connect the equipment.
When installing, please insert the aviation plug into the aviation receptacle, make sure
that the pins are inserted into the receptacle properly, then twist the metal lock ring
clockwise, and then complete the installation after hearing a "click".
When releasing the plug, please twist the plug counterclockwise and pull the plug away
from the receptacle.
Note:
After being powered on, the equipment needs about half an hour to warm up and adapt
to the ambient temperature, before it can accurately and stably measure temperature.
Tips:
You can power on the equipment first, and then read this quick guide.

4
Recommended installation environment
The temperature measurement principle of the infrared camera is measured by
collecting infrared radiation from the surface of the human body. The accuracy of
temperature measurement is affected by environmental conditions related to infrared
transmission, especially air flow, air transmission rate, environmental humidity, environment
temperature, and other factors.
Therefore, it is strongly recommended that you install the camera indoor and choose an
appropriate installation height and temperature measurement distance:
•Recommended height: 1.8-2 meters
•Effective working distance: 2-5 meters
•Optimal temperature measurement distance: 2-3 meters
The following figures show the recommended installation environment.

5

6
Software Installation
Quick Setup
The required software and electronic manuals are saved on a USB flash disk (or a SD card)
that comes with the package.
Thermal Scanner Software
1. Find the T11 setup software in the SD card.
2. Right-click on T11_setup_Vx.x.x.x.exe and click Run as administrator.
3. Choose your preferred language, and click OK.
4. Follow the instructions until successful installation.

7

8
Temperature Measurement Software
1. Find the ODS setup software in the SD card.
2. Right-click on ODS_setup_Vx.x.x.x.exe and click Run as administrator.
3. Choose your preferred language, and click OK.
4. Follow the instructions until successful installation.

9

10
IP Address Setup
1. Click Start Menu > Control Panel > Network and Sharing Center or Network and
Internet > Network and Sharing Center.
2. Click Change adapter settings.
3. Right-click on Ethernet, and click Properties.
4. Select Internet Protocol Version 4 (TCP/IPv4), and click Properties.

11
5. Set the IP address to 192.168.1.XXX.
Note: XXX can be set to1-255, except for 64 and 65.
6. Click OK.

12
Software Startup
1. Right-click on the Human body temperature measuring server icon, and click Run
as administrator.
Note: Please keep this server running and do NOT close the window when you
are running the T11 temperature measurement software. You can minimize the
window of the Human body temperature measuring server.
2. Right-click on the TI-CS-T11 icon, and click Run as administrator to start the
thermal scanner software.

13
3. Enter the Username and Password, and click Login.
Username: admin
Password: Abc.12345
4. Click Info Mgt >Video Manager.
5. Click Add. The Add Video dialog box displays.
6. Add IP Address:
•
192.168.1.64 for Light Video
•
192.168.1.65 for IRD Video
7. Click Save.
14
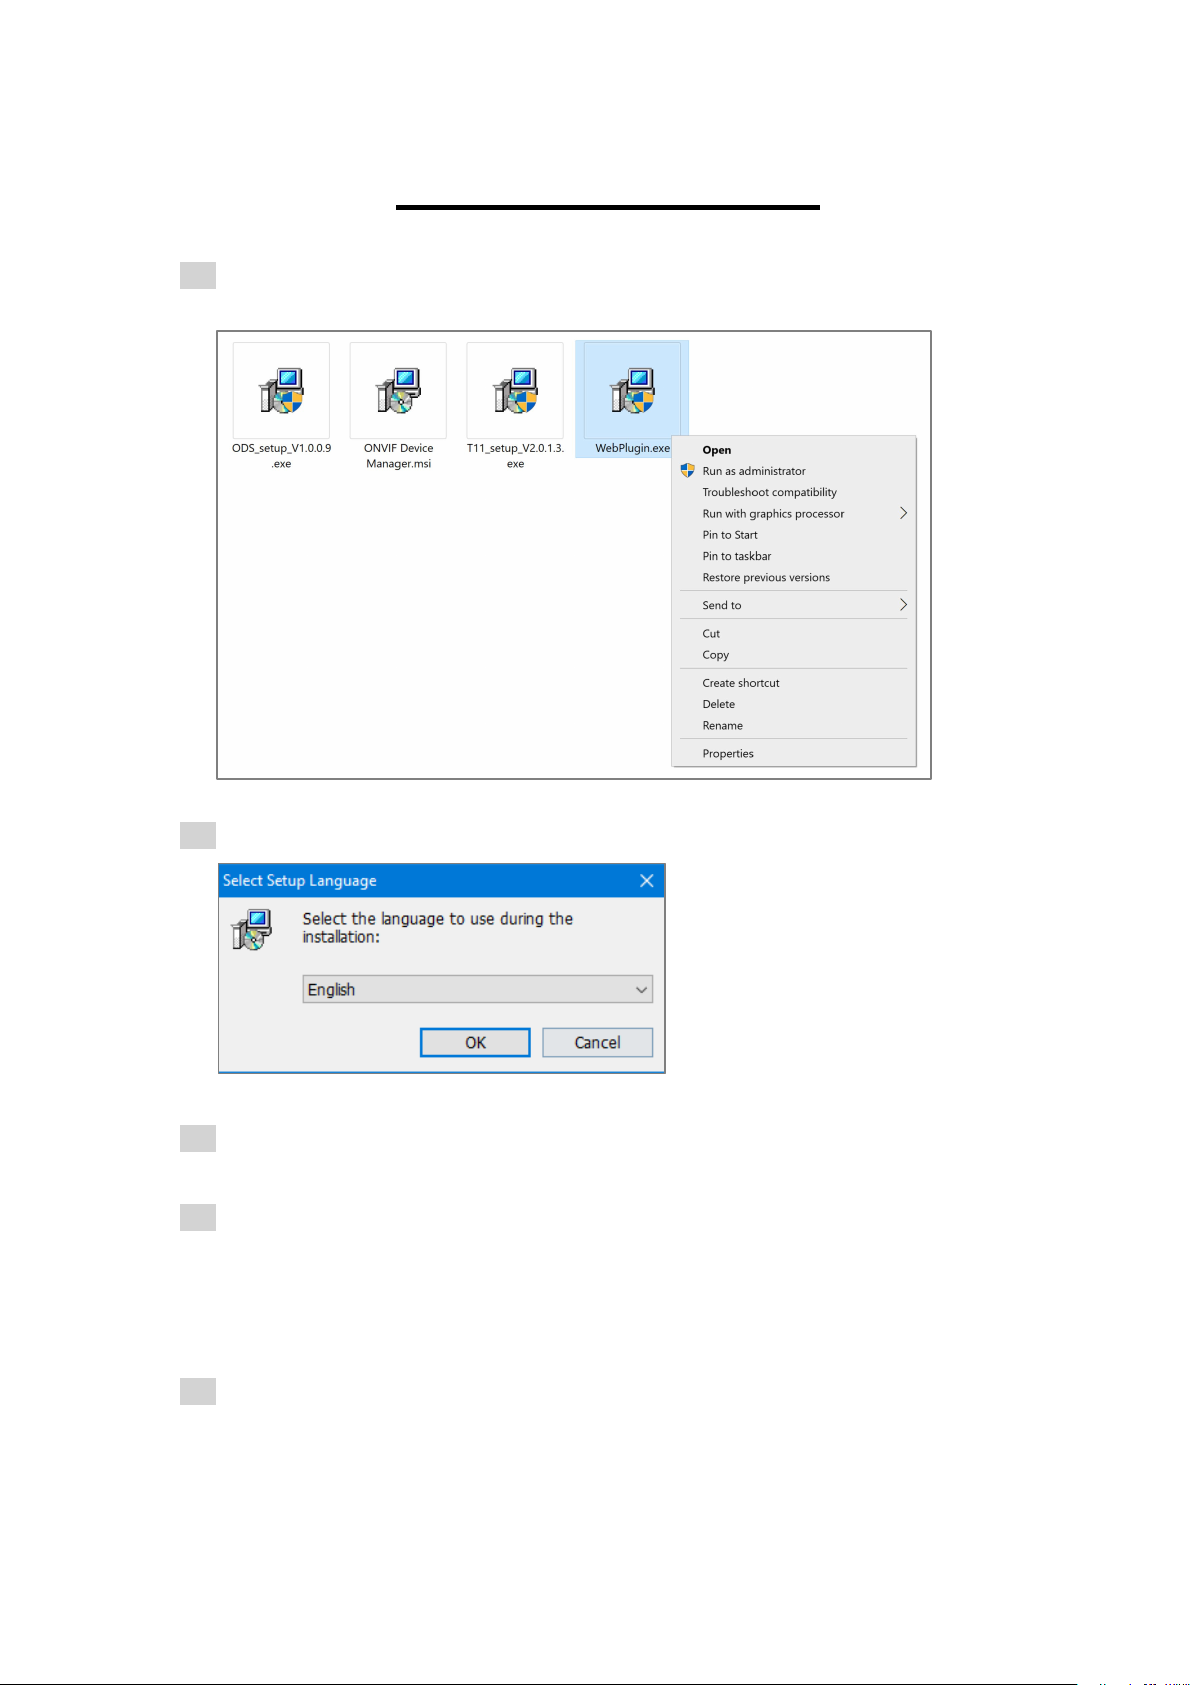
Configuration Setup
1. Right-click on WebPlugin.exe, and click Run as administrator to start installing
the web plug-in for IE browser to configure the Thermal Scanner Software.
2. Choose your preferred language.
3. Follow the instructions until successful installation.
4. Open IE browser and type in 192.168.1.65.
Note: It is recommended to use the 32-bit Internet Explorer to configure the
Thermal Scanner Software. The Google Chrome browser is also supported;
however, you may not be able to view the real-time scene.
5. Enter the username and password, and click Login.
Username: admin
Password: Abc.12345
Note: You can switch languages at the top right corner, if necessary.

15
6. Click the Setting tab.
7. On the Body temperature detection sub-tab, select the Body temperature
detection enable checkbox.

16
8. Click the Blackbody parametersub-tab, select the Blackbody real-time
calibration checkbox, and set the Blackbody temperature to the same value as
the temperature that you set on the blackbody.
Note: This step is applicable only if you use T11 together with a blackbody. If the
blackbody is not used, the Blackbody real-time calibration checkbox must be
deselected. Otherwise, the test result may be incorrect.
9. Click redraw blackbody area to draw a proper rectangle or square at the center
of the blackbody furnace.
Note: After drawing the blackbody area, the blackbody shall always be kept at the
original position. Once the blackbody is moved to a different place, you must
redraw the blackbody area to avoid incorrect temperature measurement.
10. Click OK.

17
11. After all these settings, you can run the TI-CS-T11 software to start measurement.
Note: It may take up to 2-3 minutes for the cameras to finish self-diagnosis after
each start-up. Therefore, it is recommended that you run the software 2-3 minutes
after you power on the equipment. In case the camera fails to load into the
software, please restart the software.

18
Time Synchronization
ONVIF Device Manager is an open-source software application used to administrate
network video servers and cameras.
1. Double click the Onvif Device Manager.msi software to start installing the Onvif
Device Manager.
2. Follow the instructions until successful installation.
3. Right-click on the Onvif Device Manager icon, and click Run as administrator.
4. Enter your username and password, and click Login. Your device will be
automatically detected and displayed in the device list.
Username: admin
Password: Abc.12345

19
Note: If the device has not been detected and displayed automatically:
•Check the connection and click Refresh.
•From the navigation panel, click Add to manually add the two cameras.
5. Select a device from the device list, e.g., IPC. The device menu displays.
6. Click Time settings. The Time settings screen displays to the right of the device
menu.

20
7. From the Time zone drop-down list, select your actual time zone, and select the
Automatically adjust for daylight saving time changes check box, if
applicable.
8. From the Time settings drop-down list, select the time synchronization method
as required. It is recommended to select the Synchronize with computer time
option.
9. Click Apply.
10. Repeat steps 5-9 to set up the time for the other camera.
Note: Please make sure that you use the same time settings for the two cameras.
Note:
For more detailed instructions, please refer to the full manual.
CreativeStar Solutions
1601 Trapelo Road Suite
260 Waltham, MA
02451
+1(617)326-5308
Table of contents
Other CreativeStar Thermal Camera manuals


