Crema Elio Operating and maintenance manual

elio

INDICE
INDEX
PAG. 1-2-3-4: GARANZIA E AVVERTIMENTI
PAGE 1-2-3-4: GUARANTEE AND RECOMMENDATIONS
PAG. 5: DISTINTA MATERIALI - COMPONENTI DI SERIE
PAGE 5: BILL OF MATERIAL - SERIALS
PAG. 6: BASI E OPTIONAL
PAGE 6: BASES AND OPTIONALS
PAG. 7: FASE 1 - POSIZIONARE LA BASE, INSERIRE L’OMBRELLONE E APRIRLO TIRANDO LA FUNE
FASE 2 - FISSARE L’APERTURA DELL’OMBRELLONE ALL’ALTEZZA DESIDERATA INFILANDO IL PERNO SU UNO DEI FORI
PAGE 7: STEP 1 - PLACE THE BASE, INSERT THE UMBRELLA AND OPEN IT BY PULLING THE ROPE
STEP 2 - CHOOSE THE HEIGHT OF THE PARASOL AND FIX THE LINCHPIN ON ONE OF THE HOLES
PAG. 8: FASE 3 - FISSARE L’AGEVOLATORE DELLE STECCE CON L’APPOSITA VITE GIA’ PRESENTE SUL PALO
FASE 4 - ORIENTARE L’OMBRELLONE E FISSARE IL POMELLO SULLA BASE PER BLOCCARNE LA ROTAZIONE
PAGE 8: STEP 3 - FIX THE HINGE ON THE RIBS WITH THE SPECIFIC SCREW SUPPLIED WITH THE PARASOL
STEP 4 - DIRECT THE PARASOL AND FIX THE POMMEL TO STOP THE ROTATION
PAG.9-10: * IMPIANTO ELETTRICO - KIT TELECOMANDO
PAGE 9-10: * ELECTRICAL SYSTEM - REMOTE CONTROL
PAG.11-12: * IMPIANTO ELETTRICO - KIT BATTERIA
PAGE 11-12: * ELECTRICAL SYSTEM - BATTERY
PAG.13: * IMPIANTO ELETTRICO - ALIMENTATORE
PAGE 13: * ELECTRICAL SYSTEM - POWER SUPPLY
* FASI DA ESEGUIRE SOLAMENTE IN PRESENZA DEGLI OPTIONAL IN QUESTIONE
(PER TUTTI GLI OPTIONAL DISPONIBILI VEDI PAG. 6)
* PLEASE FOLLOW THESE STEPS ONLY IF YOU HAVE THE OPTIONALS
(SEE PAGE 6 TO CHECK THE AVAILABLE OPTIONALS)

1 - ITA
LIBRETTO DI MONTAGGIO USO E MANUTENZIONE DEL PRODOTTO
Genle Cliente,
La ringraziamo per aver scelto un prodoo Crema, un prodoo creato grazie alla collaborazione con abili
professionis, realizzato con materiali tecnici e di qualità per uso professionale.
Si riene fondamentale prendere visione e rispeare le istruzioni riportate nel presente documento per
mantenere le prestazioni dichiarate e garanre l’uso in sicurezza.
Il proprietario del prodoo dovrà verificare che lo stesso sia ulizzato in modo correo anche dalle persone
a cui viene messo a disposizione, evitandone gli usi scorre.
Conservare le presenti istruzioni!
La corretta installazione è responsabilità dell’utilizzatore.
Conservate questo manuale per eventuali referenze future (richieste di pezzi di ricambio)
Per ogni dubbio e/o per ogni richiesta che non soddisfi quanto indicato nel presente documento o nei suoi
allegati si deve contattare il produttore.
È vietato a chiunque divulgare, riprodurre e/o modificare il presente manuale senza specifica
autorizzazione.
Per evidenziare alcune parti di testo di rilevante importanza o per evidenziare alcune specifiche, sono stati
adottati alcuni simboli il cui significato viene di seguito descritto.
Indica situazioni di grave pericolo che, se trascurate, possono mettere seriamente a rischio
la salute e la sicurezza delle persone.
Indica che è necessario adottare comportamenti adeguati per non mettere a rischio la
salute e la sicurezza delle persone e non provocare danni.
Indica informazioni tecniche di particolare importanza da non trascurare.
Le operazioni che necessitano di una attenta lettura delle indicazioni fornite sul manuale
uso e manutenzione sono evidenziate tramite il simbolo a fianco.
Il prodotto dovrà essere pertanto utilizzato solo per quanto definito nel presente documento. Ogni
altro uso/impiego è da considerarsi IMPROPRIO e pertanto pericoloso.
Il prodotto è destinato esclusivamente all’uso come ombrellone parasole.
Il costruttore si esime da qualsiasi responsabilità per danni a cose, persone o al prodotto stesso per
incidenti causati da un uso non previsto e/o dal mancato rispetto delle presenti istruzioni.

2 - ITA
REGOLE PER LA SICUREZZA
E
’ vietato appesanre il prodoo con carichi aggiunvi non previsper la struura.
E
’ vietato apportare modifiche al prodoo
S
icurezza durante le fasi di montaggio e smontaggio:
-Ulizzare guanper proteggere le mani.
-Prestare aenzione alle parda collegare, potrebbero causare schiacciamento o taglio
-Le operazioni di movimentazione e “rotazione” devono essere eseguite in più persone
-Durante la movimentazione controllare che gli spazi di manovra siano adegua
-Se si ulizzano scale o sgabelli, non appoggiarsi alla struura.
-Rispeare le sequenze riportate nel manuale
-Posizionarsi in piano durante le avità di montaggio e smontaggio.
-Qualora il prodoo venga ceduto ad un nuovo utente, fornire prontamente le presenistruzioni.
-Effeuare le avità di manutenzione indicate nella sezione “manutenzioni”
-Dopo ogni montaggio e/o sollecitazione significave controllare il correo fissaggio dei componen
e delle vidi fissaggio.
-Prestare sempre aenzione ad eventuali cartelli / echee affissi sullo prodoo.
M
ontaggio
N
elle successive sezioni del presente manuale sono riportate le fasi di montaggio con specifiche illustrazion
i
g
rafiche. Accertarsi di rispearle e di averle comprese prima di procedere con il montaggio.
A
l termine del montaggio controllare che tue le visiano fissate, questo perché in alcune fasi si rend
e
n
ecessario un loro allentamento.
A
NCORAGGIO DEL PRODOTTO DOPO IL MONTAGGIO
S
e il prodoo viene posizionato in aree esterne deve essere ancorato a terra mediante l’uso di zavorre
fi
ssate ai rispevi pundi fissaggio indicanel manuale.
R
egole importanPER L’USO
-Non agganciare prodoo parche possano compromeere la struura
-Non ulizzare accessori non autorizza
-Non ulizzare sorgendi calore come fuoco, grill, stufe o lampade ad elevata potenza in prossimità
del prodoo: alcune parpossono essere infiammabili
-Non ulizzare i prodoin condizioni ambientali che comportano pendenze superiori al 10%
-Non movimentare alcuna parte e non procedere a spostamen se non si è cer di aver
allontanato eventuali persone non interessate alle operazioni e/o se ci sono sistemi di fissaggio
che potrebbero creare pericoli per la movimentazione
-
Le fasi di posizionamento devono essere eseguite in modo che nessuna parte del corpo possa
essere soggea a schiacciamento (vedi figure illustrave per le corree posizioni).

3 - ITA
In caso di condizioni meteorologiche avverse:
-Chiudere / raccogliere tui teli
-Coprire con le apposite fodere proteve
-Controllare l’ancoraggio
I
n caso di condizioni meteorologiche parcolarmente avverse o qualora non si possa garanre la stabilit
à
d
el prodoo durante le condizioni avverse, il prodoo deve essere sistemato in aree protee ed
e
ventualmente smontato.
S
montaggio
P
er lo smontaggio è sufficiente seguire a ritroso le fasi indicate tenendo
p
resente che alla fine dello smontaggio è opportuno controllare il buono stato dei vari componen, i
n
p
arcolar modo degli elemendi collegamento della struura.
S
toccaggio
O
gni qualvolta il prodoo viene smontato tui componendovranno essere riposin un luogo asciuo,
a
l riparo dagli agenatmosferici e disposin modo tale da non essere a streo contao l’uno con l’altro .
P
er i teli è preferibile riporli lontani anche dalla luce solare direa, in modo da preservare tue le
c
araerische per un tempo più lungo.
M
anutenzione
S
i raccomanda di effeuare periodicamente quanto segue:
-Verificare l’integrità di tui componen;
-Verificare che gli elemendi collegamento tra i vari pezzi siano integri e compledei rispevi
elemendi bloccaggio.
-Verificare l’integrità dei teli di copertura e laterali; in caso di strappi e/o roure rivolgersi al
costruore per l’eventuale riparazione o sostuzione
-Verificare l’assenza di anomalie e/o deformazioni sulle pardel prodoo
-Verificare che non si siano usurate pardel prodoo in modo tale da renderle tagliene/o pericolose
-Verificare periodicamente il correo fissaggio e ancoraggio.
-Ulizzare solo ricambi con pari caraerische e riconosciudal produore
-Verificare che le condizioni ambientali e climache non abbiamo comportato usure e/o corrosioni tali
da richiedere ulteriori manutenzioni e/o avità di pulizia
S
e si rilevano alcune delle situazioni sopra riportate o ogni altra anomalia, contaare personale addeo
a
lla manutenzione e vietare l’uso del prodoo in aesa del suo riprisno/riparazione.
P
ulizia
I
n funzione dell’ulizzo e degli ambienin cui è posizionato, si devono effeuare le seguenavità di
p
ulizia per mantenere le caraerische dei prodo.
-PARTI IN TELO/TESSUTO:
- Lavaggio al cloro ammesso in soluzione diluita 10% - acqua 90%
- Ammesso solo lavaggio a mano, a freddo, senza smontare la tela. Non lavare a macchina. E’
ammesso l’uso di idropulitrice a bassa pressione. Detergere con sapone neutro e risciacquare con
abbondante acqua
- Il prodoo non può essere lavato a secco
- Il prodoo non sopporta la sratura
- Il prodoo non può essere asciugato a macchina
- Durante l’inverno riporre in un luogo asciuo e venlato

4 - ITA
-PARTI IN METALLO/PLASTICA:
-Lavaggio con soluzione di sapone neutro e acqua
-Non usare spugne abrasive
-E’ consento l’uso di detergenleggermente acidi
-Lasciare asciugare tue le pardel prodoo prima dell’ulizzo o stoccaggio
-Non traare i teli con vernici, coloran, impermeabilizzan, insecidi, deodorano smacchiatori
in genere
NON ulizzare altri prodocorrosivi o con specifiche tali da ledere le caraerische dei materiali
indicanel presente documento o nelle schede tecniche.
Le frequenze delle avità di pulizia sono variabili in funzione dell’ulizzo e delle condizioni ambientali, in
ogni caso devono essere eseguite prima dello stoccaggio.
SPECIFICHE TECNICHE PER IL PRODOTTO:
TESSUTO COPERTURA
STRUTTURA OMBRELLONE
COMPONENTI
TRATTAMENTI SUPERFICIALI
VERNICIATURA A POLVERI EPOSSIDICHE, ZINCATURA
NYLON PA6, ACCIAIO INOX AISI304, POLIAMMIDE
SOLUTION DYED ACRYLIC
ALLUMINIO 6060, S235JR
SPECIFICA TECNICA
PARTE

1 - EN
INSTALLATION, MAINTENANCE AND OPERATING
G
UIDELINES
D
ear Customer,
T
hank you for choosing a Crema’s product. Thanks to the collaboraon with a qualified team of experts,
O
mbrellificio Crema achieves this top product using high-quality materials for professional use.
I
n order to ensure safety and declared performances, please read carefully the following instrucons.
T
he owner of the product should pay aenon to the proper use of the item including the use by other
o
perators in order to protect the product from misuse.
P
lease keep these instrucons!
T
he user is responsible for the correct installaon.
P
lease keep these guidelines for future reference (e.g. for spare parts).
F
or further request or doubts which do not sasfy what is indicated in these guidelines, please contact the
p
roducer.
I
t is forbidden to divulge, copy and/or modify the present guidelines without authorizaon.
I
n order to highlight important parts or specific details, some symbols have been used:
Serious danger: if you do not follow this advice, people’s health and safety could be in danger.
Behave in a proper way: you should have a responsible behaviour to protect health and safety
of other people and to cause no damage.
Technical information which are important to know.
Please read carefully the instrucons marked by this symbol in these installaon, maintenance
and operang guidelines.
T
his product must be used only for the purpose specified in the current manual. Any other use is improper
a
nd therefore dangerous.
This product is exclusively intended as umbrella .
T
he producer is exempt from any responsibility for damage to people, goods or the product itself due to
i
mproper use.

2 - EN
SAFETY INSTRUCTIONS
It is forbidden to put extra load on the product.
It is forbidden to make changes to the product.
Safety rules during assembly and disassembly:
-Use gloves to protect your hands;
-Pay aenon to the conjuncons, they could cut or hurt your hands;
-Handling and “rotaon” operaons need the presence of more than one person;
-During the handling of the product, make sure you have enough space;
-If you use stairs or stools, do not lean on the structure;
-Follow the procedure shown in the guidelines;
-Assembly and disassembly must be done on a flat area;
-If you give the product to another customer, please handle also these instructions;
-Take care of the maintenance shown in the secon “maintenance”;
-Aer each installaon or/and change of posion, check the components and the screw fixing;
-Pay aenon to possible warnings on the products.
Installaon
In the following pages, you will find the step to follow to assemble the item with specific pictures. Please be
sure to read them carefully before starng the installaon.
At the end of the installaon please check that all screws are ghtened; that is why during some
procedures they need to be slackened.
FIXING THE PRODUCT AFTER INSTALLATION
If you place the product outside, please make sure it is fixed to the ground through specific weights placed
as shown in the guideline.
IMPORTANT RULES
-Do not hook products or other items that can compromise the structure;
-Do not use not authorized accessories;
-Do not use heat sources such as fire, barbecue, stove, heater or lamp next to the product: some
components are flammable;
-
-
Do not use the product in areas where you have
Do not move the product or any of its components if you note the presence of other people in
the area and/or any weights or anchoring systems which could be dangerous
10% incline;
-When you place the product please make sure that you do not hurt yourself (please see the
correct posions in the pictures)

3 - EN
In case of bad weather:
-Close / collect all the fabrics;
-Use the cover to protect the product;
-Check the fixaon of the product to the ground.
I
n case of very bad weather and if you cannot guarantee the stability of the product, you have to store it
i
n a protected area (eventually disassembled).
D
isassembling
I
n order to disassemble the product you just need to follow backwards the steps specified in the paragraph
“
Installaon”. Please make sure that at the end of disassembling the components are in good condions,
e
specially the conjuncon components.
S
torage
E
very me you disassemble the product all components have to be stored in a dry place, protected from
b
ad weather, and placed safely not closed to each other. The fabric need to be stored away from the sun
l
ight in order to preserve its characteriscs for a long me.
M
aintenance
P
eriodically follow these recommendaons:
-Check that the components are undamaged;
-Check that the conjuncons are in good condions and with all their screws;
-Check the condions of the fabrics; in case of tears or break, please contact the producer;
-Check that the product has no anomaly or deformaon;
-Check that the use of the item has not damaged some components by making them dangerous or
sharp;
-Check periodically the correct placing and anchoring;
-Use only spare parts recognised by the producer;
-Check that the weather condions have not caused damage due to use and/or corrosion that need
further maintenance and/or extra cleaning.
I
f you realize that some of the condions above occur, please contact the maintenance and avoid the use
o
f the product before its reparaon.
C
leaning
A
ccording to the use and the place where it is located , you should clean the product as follows in order to
p
reserve its condions:
F
ABRICS:
-Chlorine washing is acceptable in water soluon: 10% chlorine and 90% water.
-Only cold hand washing is permied, without removing the fabric. Do not use the washing
machine. You can use low pressure hydro-washer. Use neutral soap and rinse with plenty of water.
-Dry cleaning is not allowed.
-Don’t iron.
-Don’t use a dryer.
-In winter please store in a dry and airy place.

4 - EN
FABRIC
UMBRELLA STRUCTURE
COMPONENTS
SURFACE
EPOXY POWDER VARNISHING
PA6 NYLON, STAINLESS STEEL AISI304, POLYAMIDE
SOLUTION DYED ACRYLIC
6060 ALUMINIUM, S235JR
TECHNICAL DETAILS
COMPONENTS
ALUMINIUM/PLASTIC COMPONENTS:
-Wash with neutral soap and water.
-Don’t use abrasive sponge.
-You can use slightly acidic cleanser.
-All components should be dry before storage or use.
-Do not use any paint, colorant, waterproofing, inseccide, deodorant or stain remover.
DO NOT USE any corrosive or other product that could damage the materials and components shown in
the guidelines.
The regularity of cleaning depends on the use and on the weather condions, in any case it should be
done before storage.
TECHNICAL DETAILS

5
DISTINTA MATERIALI - COMPONENTI DI SERIE
BILL OF MATERIAL - SERIALS
A
A = 1X
OMBRELLONE CON PALO
UMBRELLA WITH POLE

6
BASI E OPTIONAL
BASES AND OPTIONALS
1 2 3
4 5
1 = BASE IN ACCIAIO ZINCATO CON POSSIBILITA’ DI FISSAGGIO A PAVIMENTO
BASE OF ZINC-PLATED STEEL WITH POSSIBILITY TO FIX ON THE GROUND
2 = BASE DA INTERRARE (ERBA, SABBIA)
UNDERGROUND BASE (GRASS, SAND)
3 = BASE DA INTERRARE
UNDERGROUND BASE
4 = COVER OMBRELLONE
PARASOL PROTECTING COVER
5 = ILLUMINAZIONE LED
LED LIGHTING SYSTEM

FASE 1: POSIZIONARE LA BASE, INSERIRE L’OMBRELLONE E APRIRLO TIRANDO LA FUNE
STEP 1: PLACE THE BASE, INSERT THE UMBRELLA AND OPEN IT BY PULLING THE ROPE
INSERIRE IL PERNO NEL FORO DESIDERATO
PER FISSARE L’APERTURA DELL’OMBRELLONE
INSERT THE LINCHPIN IN THE HOLE AND OPEN THE PARASOL
FASE 2: FISSARE L’APERTURA DELL’OMBRELLONE ALL’ALTEZZA DESIDERATA INFILANDO IL PERNO SU UNO DEI FORI
DEL PALO VERTICALE, COME IN FIGURA
STEP 2: CHOOSE THE HEIGHT OF THE PARASOL AND FIX THE LINCHPIN ON ONE OF THE HOLES OF THE VERTICAL POLE,
AS SHOWN IN THE PICTURE
7

FASE 3: FISSARE L’AGEVOLATORE DELLE STECCHE CON L’APPOSITA VITE GIA’ PRESENTE SUL PALO
STEP 3: FIX THE HINGE ON THE RIBS WITH THE SPECIFIC SCREW SUPPLIED WITH
8
FASE 4: ORIENTARE L’OMBRELLONE E FISSARE IL POMELLO SULLA BASE PER BLOCCARNE LA ROTAZIONE
STEP 4: DIRECT THE PARASOL AND FIX THE POMMEL TO STOP THE ROTATION

9
ATTENZIONE!
Assicurarsi che la prolunga di alimentazione sia provvista di presa Schuko IP 44.
Assicurarsi di avvitare la ghiera tra presa e spina filettata fino a fine corsa per garantire il
grado di impermeabilità garantito dal costruttore.
Assicurarsi che durante l’apertura e la chiusura dell’ombrellone i cavi non vengano
pizzicati all’interno delle stecche.
Assicurarsi di fissare bene il gruppo ricevitore con le apposite fascette elettriche.
In corrispondenza dei punti mobili delle stecche il fissaggio dei cavi deve avere spazio
sufficiente così da impedirne lo strappo durante l’apertura e la chiusura.
Assicurarsi di usare il radiocomando a una distanza massima di 15 metri.
ATTENTION!
Please make sure that the extension cable for the power supply has the Schuko IP 44
socket.
Please make sure to screw the threaded plug and the ring nut up to the end in order to have
total impermeability.
Please make sure that during the umbrella opening and closing the cables are not
stuck into the ribs.
Please make sure to fix in the proper way the HF receiver with the nylon ties provided.
In correspondance of the rib joints, the cables need to have sufficient space in order
to avoid breakage during opening/closing.
Please make sure to use the romote control at a maximum distance of 15 meters.
TELECOMANDO PER REGOLAZIONE LUCI
REMOTE CONTROL FOR LIGHT REGULATION
MANUALE DI ISTRUZIONI - INSTRUCTIONS
Tasto di
accensione
On
Intensità massima
Maximum intensity
Tasto di
spegnimento
Off
Intensità media
Medium intensity
Intensità minima
Minimum intensity
Pannello
touch screen per
la regolazione
dell’intensità
luminosa
Touch screen
panel to control
light intensity

RF Wireless Touching LED Remote controller
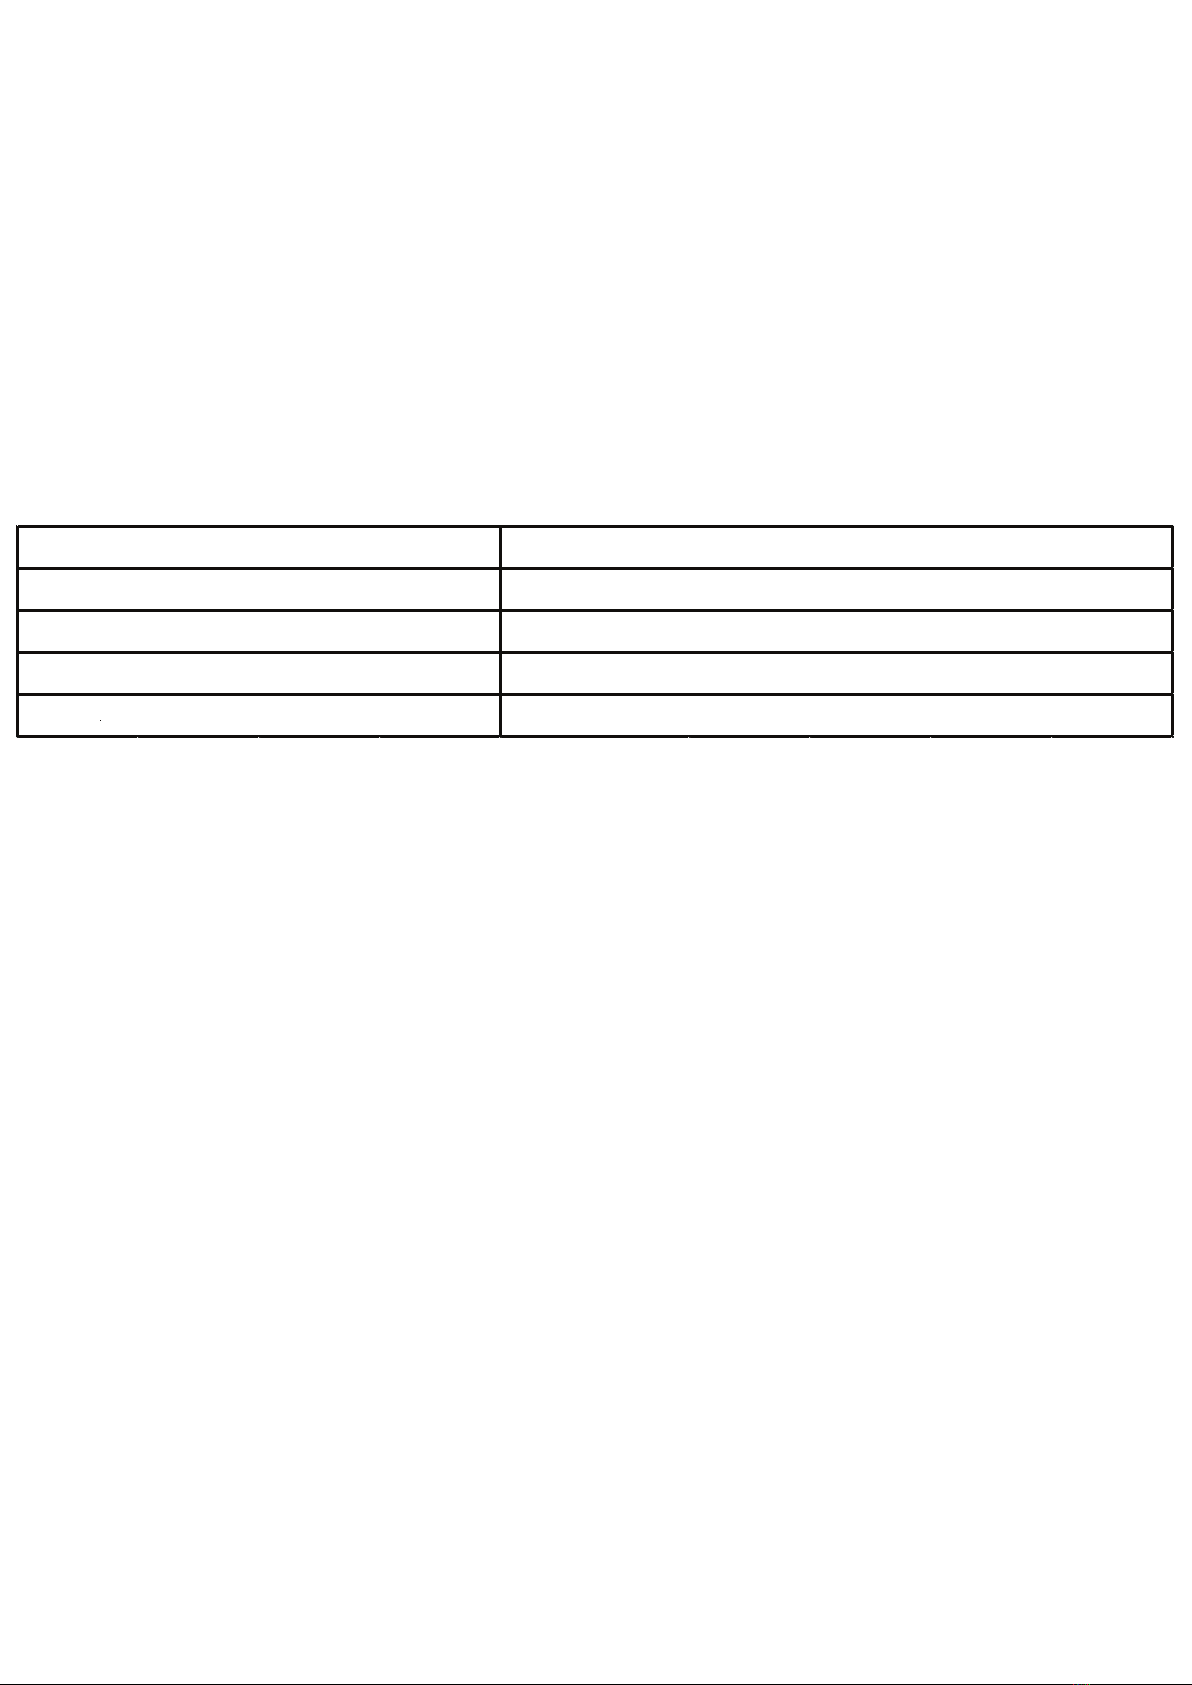
1. Technical Parameters (remote control):
1:Power supply: AAA battery*2pcs
2: Cover material: ABS
2. Technical Parameters (controller):
1: Working voltage: DC12V-24V
2: Output control: 1 circuit
3: Control current: 6A/circuit
4: Dimension: L85*W45*H22mm
5: Receiving range: 30 meters
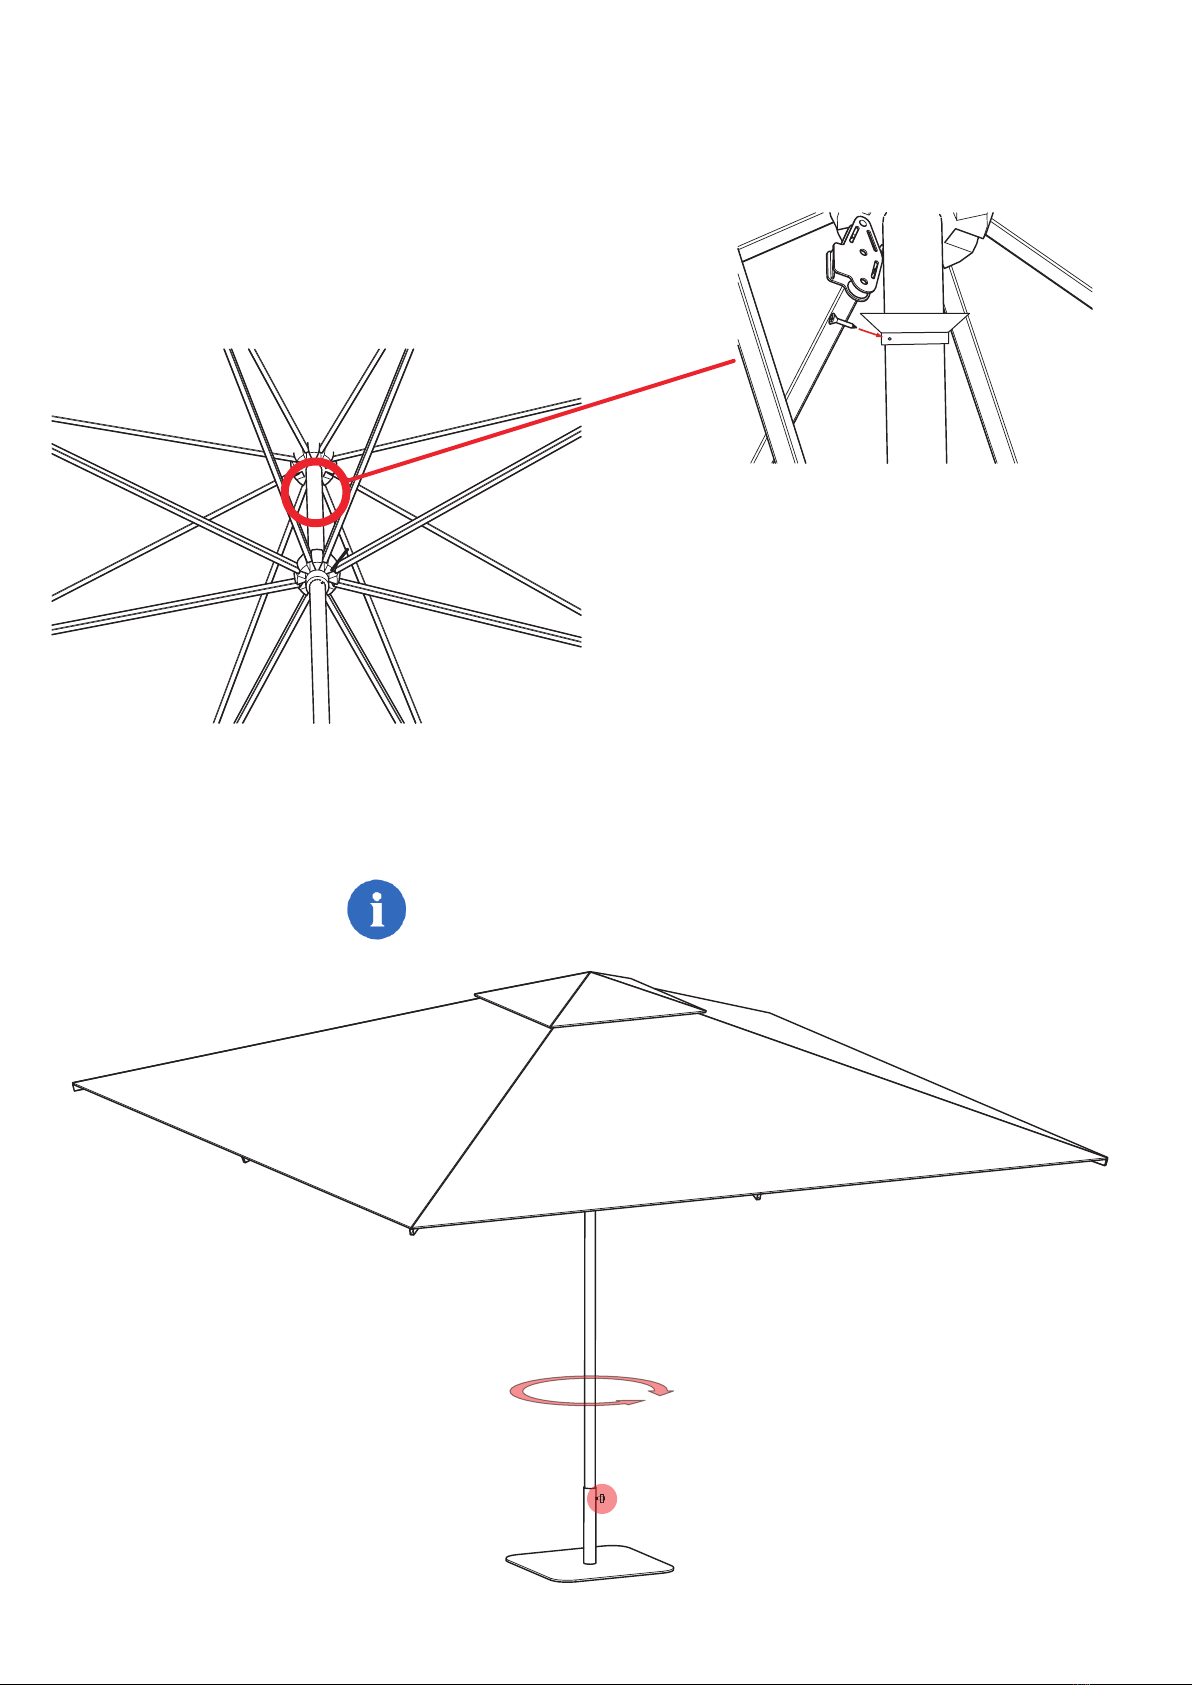
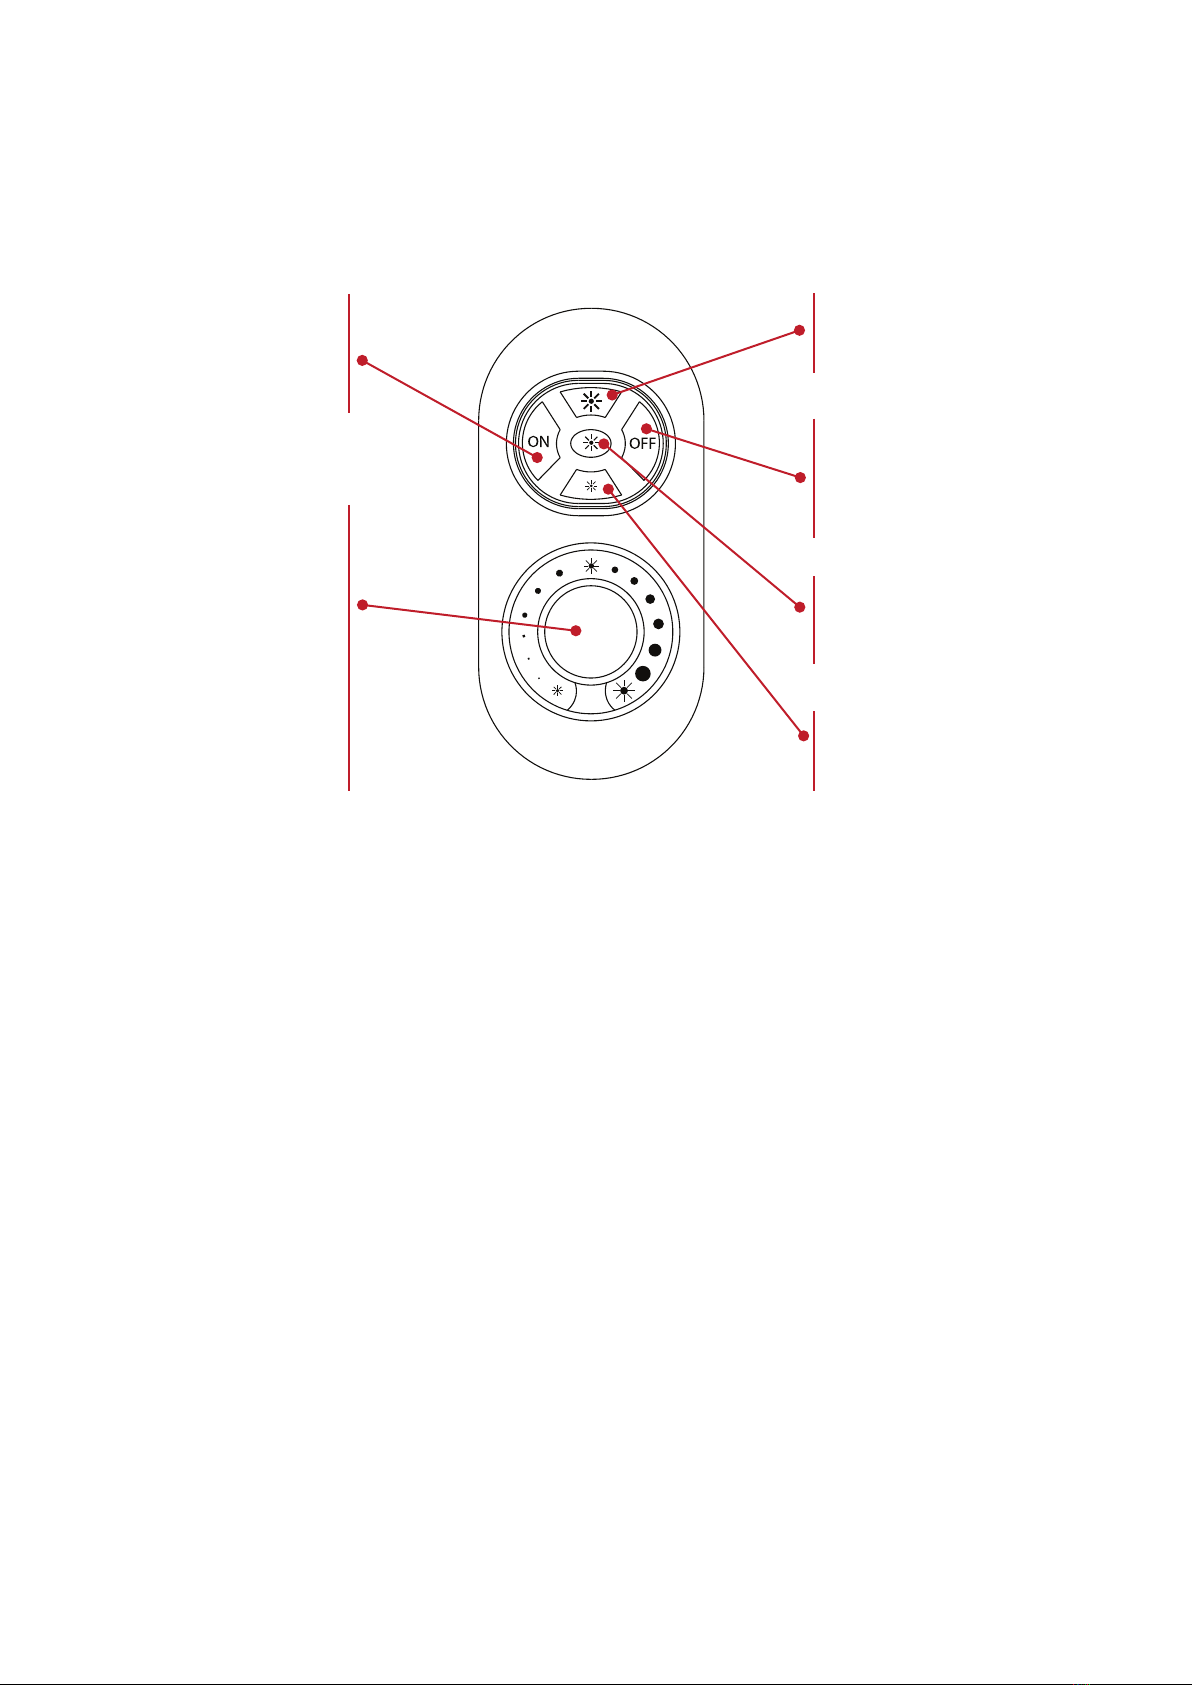
3. Functions of Keys:
1: Key 1: on
2: Key 2: o
3: Key 3: higest brightness
4: Key 4: medium brighteness
5: Key 5: lowest brightness
4. How to use:
1: Use your nger to touch the color ring, you can
change the brightness from the highest to the
lowest (100%-1%, 50 grades to adjust).
2: Resume function. The previous settings will be
resumed while power on again.
3: Matching code.
Use Key 3 once within 3 seconds when power on
again, the light will blink 3 times if matching is
successful
Clearing code.
Press key 3 ve times within 3 seconds when
power on again; the light will blink 6 times if
clearing is successful
5. Caution:
Please don’t touch or press the color ring while
loading the battaries to protect the sensitiveness.
Please use the remote controller 3 seconds after
the battaries are loaded.
Please reload the battaries when you nd the
color ring is not sensitive.
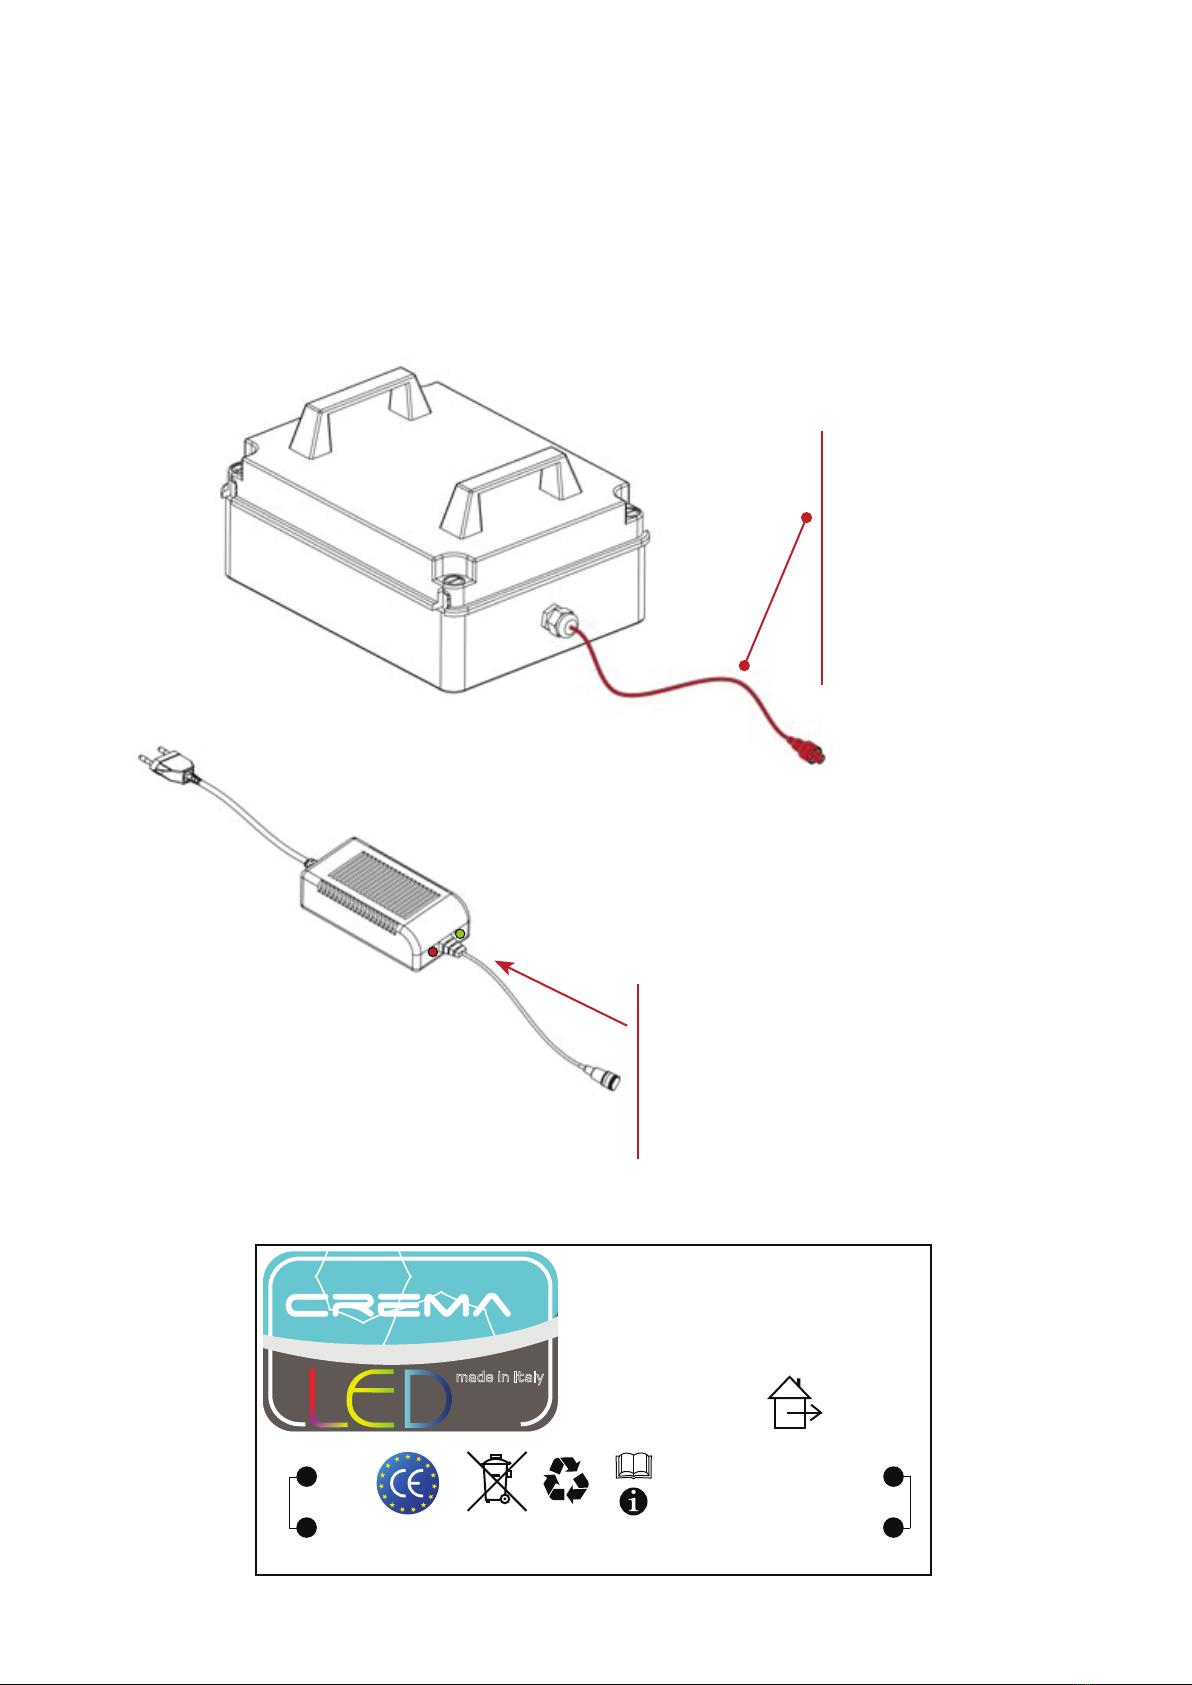
6. Connecting chart
10
AC
DC12V/24V
POWER 1
POWER 2
LED -
LED +
LED -
LED +
LED -
LED +
LED -
LED +
+
-
AC TO DC
Telecomando RF Wireless Touching LED
1. Parametri tecnici (telecomando):
1:Alimentazione: batterie AAA*2 pezzi
2: Materiale esterno: ABS
2. Parametri tecnici (centralina):
1: Voltaggio di funzionamento: CC12V-24V
2: Controllo di uscita: 1 circuito
3: Corrente di controllo: 6A/circuito
4: Dimensioni: H85*L45*P22mm
5: Gamma di ricezione: 30 metri
3. Funzioni dei tasti:
1: Tasto 1: acceso
2: Tasto 2: spento
3: Tasto 3: luminosità massima
4: Tasto 4: luminosità media
5: Tasto 5: luminosità minima
4. Utilizzo:
1: E’ possibile regolare la luminosità dalla massima
alla minima (100%-1%, 50 livelli di regolazione)
usando il pannello touch screen
2: Recupero. Le ultime impostazioni saranno
recuperate riaccendendo le luci
3: Corrispondenza codice.
Premi il tasto 3 entro 3 secondi da quando si
riaccende, la luce lampeggerà tre volte se la
corrispondenza è avvenuta
Codice di pulizia.
Premi il tasto 3 cinque volte entro 3 secondi da
quando si riaccende; la luce lampeggerà sei volte
se la pulizia è avvenuta
5. Avvertenza:
Si prega di non toccare o premere il touch screen
durante il caricamento delle batterie per
proteggere la sensibilità. Utilizzare il telecomando
3 secondi dopo che le batterie sono caricate.
Ricaricare le batterie quando si trova diminuita la
sensibilità del touch screen
6. Schema di collegamento
1 2
3
4
5

11
KIT BATTERIA
(composto da batteria e carica batteria)
Sostituisce l’alimentatore
nei luoghi dove non è possibile
portare la corrente di rete 220 V.
Spina con ghiera
da connettere
direttamente
al gruppo radio.
Plug with ring nut to
connect directly to
the receiver.
BATTERIA - BATTERY
Spia Verde: carica di mantenimento
Spia Rossa: carica veloce
Green light: float charge
Red light: fast charge
Per una carica completa,
il gruppo batteria deve rimanere
connesso per almeno 12 ore.
In order to reach full charge,
please recharge the battery at
least for 12 hours.
CARICA BATTERIA
BATTERY CHARGER
BATTERY KIT
(composed of battery and charger)
This kit replaces the power supplier
where it is not possible
to have 220 V electricity.
made in Italy
Waterproof LED battery
model: 24V-28 ah
-
+
output
red
brown
blue
black
input : DC 13.4 V 3.0 A
output :DC 24V 14 A
IP 56
light
-
+
input
red
brown
blue
black
Pb Pb
SEALED LEAD BATTERY INSIDE
Telecomando RF Wireless Touching LED
1. Parametri tecnici (telecomando):
1:Alimentazione: batterie AAA*2 pezzi
2: Materiale esterno: ABS
2. Parametri tecnici (centralina):
1: Voltaggio di funzionamento: CC12V-24V
2: Controllo di uscita: 1 circuito
3: Corrente di controllo: 6A/circuito
4: Dimensioni: H85*L45*P22mm
5: Gamma di ricezione: 30 metri
3. Funzioni dei tasti:
1: Tasto 1: acceso
2: Tasto 2: spento
3: Tasto 3: luminosità massima
4: Tasto 4: luminosità media
5: Tasto 5: luminosità minima
4. Utilizzo:
1: E’ possibile regolare la luminosità dalla massima
alla minima (100%-1%, 50 livelli di regolazione)
usando il pannello touch screen
2: Recupero. Le ultime impostazioni saranno
recuperate riaccendendo le luci
3: Corrispondenza codice.
Premi il tasto 3 entro 3 secondi da quando si
riaccende, la luce lampeggerà tre volte se la
corrispondenza è avvenuta
Codice di pulizia.
Premi il tasto 3 cinque volte entro 3 secondi da
quando si riaccende; la luce lampeggerà sei volte
se la pulizia è avvenuta
5. Avvertenza:
Si prega di non toccare o premere il touch screen
durante il caricamento delle batterie per
proteggere la sensibilità. Utilizzare il telecomando
3 secondi dopo che le batterie sono caricate.
Ricaricare le batterie quando si trova diminuita la
sensibilità del touch screen
6. Schema di collegamento

TELECOMANDO PER REGOLAZIONE LUCI
12
CARICABATTERIE PER BATTERIE AL PIOMBO
MANUALE DI ISTRUZIONI
INDICATORI LED:
VERDE: acceso, carica di mantenimento
ROSSO: carica veloce
CORRETTA PROCEDURA DI CARICA:
TENSIONE D’INGRESSO: 240 VCA, 50/60 Hz
Assicurarsi che l’uscita del caricabatterie sia adeguata alla
tensione di ingresso della batteria.
Inserire la spina del caricabatterie prima di collegare i
connettori di uscita alla batteria.
Il led verde indica che il caricabatterie è acceso.
Dopo aver collegato la batteria, il led rosso si accenderà
indicando la carica veloce.
Il led verde si accenderà quando la carica passerà da
carica veloce a carica di mantenimento.
Scollegare prima la spina e poi la batteria.
Evitare di lasciare collegata la batteria per lunghi periodi al
caricabatterie anche se non più in carica.
IMPORTANTI INFORMAZIONI DI SICUREZZA
:
Usare sempre le normali precauzioni, soprattutto fare molto
attenzione alla corretta polarità delle connessioni, positivo
(rosso) con positivo, negativo (nero) con negativo.
Leggere le istruzioni e le informazioni riguardo alla carica
prima di utilizzare il caricabatterie.
Tenere lontani i bambini dal caricabatterie quando è in
funzione.
Usare il caricabatterie solo in luoghi chiusi.
A carica completata scollegare il caricabatterie.
Evitare al caricabatterie di subire urti e contatti con l’acqua.
N.B.: NON ADATTO PER ALIMENTARE
APPARECCHIATURE ELETTRONICHE.
BATTERY CHARGER FOR SEALED LEAD ACID BATTERIES
INSTRUCTIONS
LED INDICATORS:
GREEN: power on, float charge
RED: fast charge
PROPER CHARGING PROCEDURES:
INPUT VOLTAGE: 240 VCA, 50/60 Hz
Please make sure the output voltage of the charger
matches the input voltage of the battery.
Remember to plug in the charger before connecting the output
leads to the battery. GREEN LED indicates power is ON.
After connecting the battery to the charger, RED LED will
light up indicating FAST CHARGE.
GREEN LED will appear when charger has switched to FLOAT
CHARGE indicating that battery is close to be fully charged.
Disconnect the charger first from the plug, secondly from
the battery.
Avoid leaving the charger plugged in for extendend periods
when the battery is not charging.
IMPORTANT SAFETY INFORMATION:
Always use basic precaution such as paying close attention
to proper matching of charger and battery and correct
polarity connection, positive (RED) to positive, negative
(BLACK) to negative.
Read the instructions and charging information before
using any charger.
Keep children away from charging set-up.
Indoor use only. When charge is completed, please
disconnect the battery charger.
Avoid shock and water.
NOTE: DO NOT USE TO CHARGE
ELECTRONIC DEVICES.
32
30
28
26
24
22
20

TELECOMANDO PER REGOLAZIONE LUCI
HLG-240H-24
L
N
input
green &
brown
blue
-
+
output
red
black
yellow INPUT: 100-240VAC 4.0A 50/60 hz
277VAC 1.2A 50/60Hz
(277VAC for North America only)
OUTPUT: +24V 12.5 A 10A
tc: 90°C
ta: 50°C F110 SELV IP67
C US
E334687
Type HL
C US
E183223 C US
E127738
13
ALIMENTATORE
POWER SUPPLY

Crema Outdoor S.r.l.
Via Dell’Industria, 15
35044 Montagnana (PD) ITALY
Tel. +39 0429 81413 | Fax +39 0429 800642
www.ombrellificiocrema.com
info@cremaoutdoor.com
Table of contents
Languages:
Other Crema Patio Furniture manuals
Popular Patio Furniture manuals by other brands

Kettler
Kettler VANCOUVER operating instructions

Costco
Costco 2327729 Assembly instructions

Hartman
Hartman DOVE 13402164 Assembly instructions

Royalcraft
Royalcraft 5020125294554 Assembly instructions

Grandinroad
Grandinroad 43674 AQU Assembly instructions

Garden Oasis
Garden Oasis 813-1717-186 owner's manual

Safavieh Outdoor
Safavieh Outdoor San Salvador CPT1019A Assembly

Alice's Garden
Alice's Garden HU3X4LED manual

Doppler
Doppler Active Auto Tilt 210 manual

Hanover
Hanover San Marino SMAR4PCFP-TAN-WG owner's manual

VENTURE DESIGN
VENTURE DESIGN Peter 9610-076 Assembly instruction

Hanover
Hanover Brigantine Dining Table owner's manual