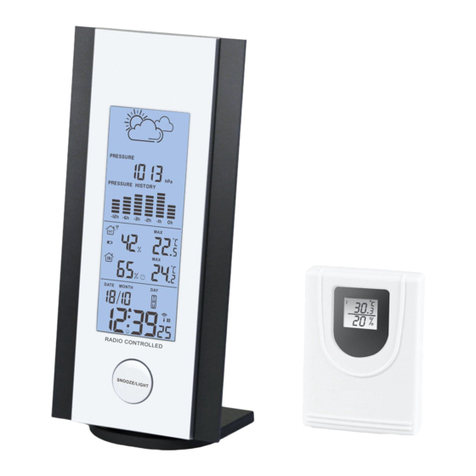
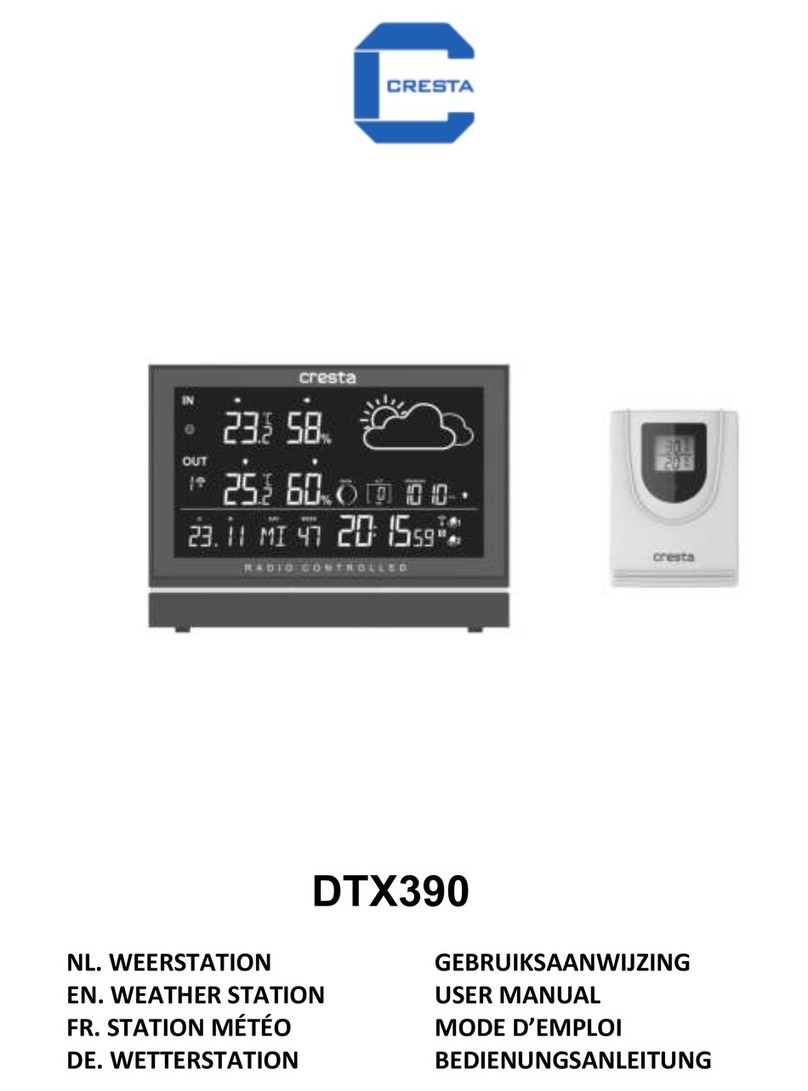
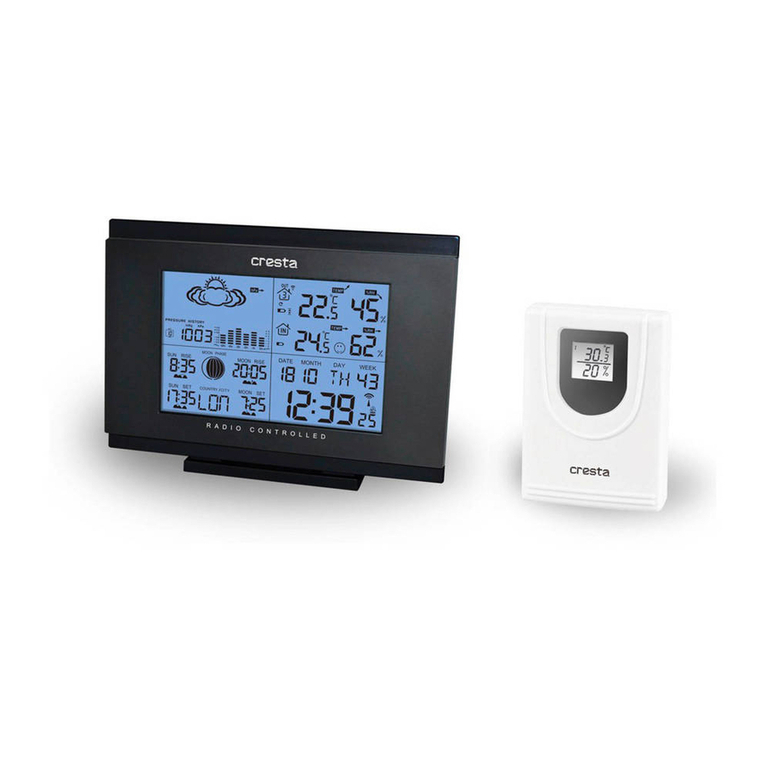
Cresta DTX250 User manual

1
DTX250
NL.WEERSTATION GEBRUIKSAANWIJZING
EN.WEATHERSTATION USERMANUAL
FR.STATIONMÉTÉO MODED’EMPLOI
DE.WETTERSTATION BEDIENUNGSANLEITUNG

2
GEBRUIKSAANWIJZING
Wij feliciteren u met de aankoop van ons CRESTA digitale weerstation DTX250 en
bedanken u voor het in ons merk en onze producten gestelde vertrouwen.
Wij zijn ervan overtuigd dat u met deze aankoop een hoogwaardig kwaliteitsproduct
heeft aangeschaft waarvan u van het gebruik gedurende vele jaren plezier zult hebben.
Indien u na het lezen van deze gebruiksaanwijzing toch nog vragen heeft over dit
product en het juiste gebruik ervan stuurt u uw vraag dan naar onderstaand emailadres:
Leest u deze gebruiksaanwijzing eerst zorgvuldig door voordat u het product in gebruik
neemt, ook wanneer u met het soort product al vertrouwd bent.
Het geeft u bruikbare tips om uw product optimaal te gebruiken. Bewaart u deze
gebruiksaanwijzing op een makkelijk te bereiken plaats voor mogelijke toekomstige
raadpleging, samen met uw aankoopbon, garantiekaart en verpakking.
VEILIGHEIDSVOORSCHRIFTEN
Dit product is uitsluitend bestemd voor gebruik waarvoor het ontworpen is en zoals in
deze gebruiksaanwijzing aangegeven. Gebruikt u dit product niet voor andere
doeleinden.
Controleer voor gebruik eerst of het product onbeschadigd is. In geval van twijfel neemt
u dan contact op met de serviceafdeling via bovenstaand e-mailadres.
Laat het product niet onbeheerd achter en houd het buiten bereik van kinderen.
Indien de batterijen vervangen dienen te worden vervang dan alle batterijen tegelijk
voor nieuwe. Mix geen oude en nieuwe batterijen en plaats batterijen van één soort bij
voorkeur alkaline batterijen.
SPECIFICATIES VAN UW WEERSTATION
Uw weerstation is voorzien van 6 bedieningstoetsen voor: MODE, +, -, MAX/MIN,
CHANNEL, SNOOZE/ LIGHT.
Zendergestuurde tijd
Automatische ontvangst van het DCF77 tijdsignaal voor weergave van de juiste
tijd
Automatische instelling van zomer – en wintertijd
Tijd Weergave in 12 - of 24 uur formaat
+/- 12 totaal 24 tijdzones instelbaar
Kalender ingesteld tot 2099
Weergave van Datum, Maand en dag van de week
Dag van de week weergave Engels
Alarm met repeteerfunctie – interval 5 minuten

3
Weergave weervoorspelling door middel van 4 iconen: zonnig, half bewolkt,
bewolkt, regen
Barometer en gegevens van de luchtdrukontwikkeling van de afgelopen 12 uur
Weergave van de binnen – en buitentemperatuur en luchtvochtigheid
Weergave Minimum - en Maximumtemperatuur en luchtvochtigheid
Temperatuurbereik binnen °C tot +50 °, buiten -20 °C ~ +60 °C
Temperatuurweergave instelbaar in ° Celsius of ° Fahrenheit
Aanduiding voor lage batterij spanning
Blauwe display verlichting
Werking op 2 AAA-batterijen 1,5 V – niet inbegrepen
Buitensensor:
Frequentie 433 MHz
Werking op 2 AAA-batterijen 1,5 V – niet inbegrepen

4
1. Weervoorspelling 2. Luchtdruk 3. Barometer grafiek 4. Max/Min buiten temperatuur
en luchtvochtigheid 5. Buiten temperatuur 6. Max/Min binnen temperatuur en
luchtvochtigheid 7. Binnen temperatuur 8. Comfort indicatie 9. Weekdag 10.
Zomertijd 11. RCC symbool 12. Snooze/Light 13. Snooze symbool 14. Tijd 15. Alarm
16. Dag/maand 17. Binnen luchtvochtigheid 18. Binnenshuis indicatie 19. Lege batterij
indicatie voor de buitensensor 20. Buitenshuis indicatie 21. RF symbool 22. Buiten
luchtvochtigheid
A= MAX/MIN B= C=
D=MODE E= CHANNEL
Onderstaande afbeelding toont hoe de u standaard op het basis station aanbrengt
BASIS BEDIENING
Open het batterijvakje aan de achterzijde van het basisstation en van de sensor.
Plaats de batterijen en let hierbij op de + en – aanduidingen op de batterijen en in het
batterijvakje.
Het basisstation zoekt nu verbinding met de buiten sensor. Dit proces duurt ongeveer
3 minuten. Daarna verschijnen de buiten temperatuur en luchtvochtigheid in het
display van het basisstation, als dit niet gebeurt, drukt u op de “CHANNEL“ toets
gedurende 3 seconden om opnieuw een verbinding te maken.
De automatische ontvangst van het DCF tijd signaal begint 3 minuten nadat de
gegevens van de buitensensor zijn ontvangen.
De ontvangst procedure wordt weergegeven door een knipperend antenne symbool
in de tijd display.
Zodra de ontvangst van het signaal succesvol is, stopt het antenne symbool met
knipperen en blijft constant in het display zichtbaar

5
HANDMATIGE TIJD INSTELLING.
Let op: het belangrijkst is dat u de ontvangst van het radio signaal uitschakelt door de “▬″
toets 3 seconden ingedrukt te houden, dit ingeval het antenne symbool knippert voor het
Instellen
Wanneer vanwege een slechte ontvangst, geen tijd signaal ontvangen kan worden, kunt
u de volgende stappen ondernemen om de tijd handmatig in te stellen.
Houd de “MODE“ toets gedurende 3 seconden ingedrukt.
De jaar uitlezing knippert, gebruik de “+ “en “-“ toetsen om het jaar in te stellen.
Druk op de “MODE“ toets om te bevestigen.
De maand uitlezing knippert, gebruik de “+ “en “-“ toetsen om de maand in te
stellen.
Druk op de “MODE“ toets om te bevestigen.
De dag uitlezing knippert, gebruik de “+ “ en “-“ toetsen om de dag in te stellen.
Druk op de “MODE“ toets om te bevestigen.
De tijdzone uitlezing knippert, gebruik de “+ “ en “-“ toetsen om de tijdzone te kiezen
(-12 tot +12).
Druk op de “MODE“ toets om te bevestigen.
De uur uitlezing knippert, gebruik de “+ “ en “-“ toetsen om het uur in te stellen.
Druk op de “MODE“ toets om te bevestigen.
De minuten uitlezing knippert, gebruik de “+ “ en “-“ toetsen om de minuten in te
stellen.
Druk op de “MODE“ toets om te bevestigen.
INFORMATIE:
De klok uitlezing gaat automatisch van de instelstand naar de tijduitlezing stand als u
gedurende 20 seconden geen toets indrukt.
Verklaring van de tijdzone uitlezing:
U kunt de tijd handmatig instellen voor de tijdzone van een bepaald land gelegen tot
1500 km van Frankfurt/Main in Duitsland waar het DCF signaal ontvangen kan worden
maar waar de actuele tijd verschilt van de ontvangen tijd.
Als bijv de tijd in een bepaald land 1 uur voorloopt op de Duitse tijd, stelt u de tijdzone
in op 01. De tijd is nu DCF radio gestuurd maar geeft 1 uur later aan.
DAGELIJKS ALARM INSTELLEN
Druk op de “MODE” toets om te schakelen van de tijd uitlezing naar de AL uitlezing.
Houd de “MODE” toets 3 seconden ingedrukt, de alarmtijd knippert.
De uur uitlezing van de alarmtijd knippert, gebruik de “+“ en “-“ toetsen om het uur in
te stellen.
Druk op de “MODE” toets om te bevestigen.
De minuten uitlezing van de alarmtijd knippert, gebruik de “+“ en “-“ toetsen om de
minuten te kiezen,
Druk op de “MODE” toets om te bevestigen.
DAGELIJKS ALARM AAN / UIT
Met de display in de AL stand, druk op de “-“ toets om het alarm te activeren - het
alarm symbool licht op.

6
Om het alarm uit te zetten drukt u opnieuw op de “-“ toets in de AL stand
INFORMATIE
De klok uitlezing gaat automatisch van de instelstand naar de tijduitlezing stand als u
gedurende 20 seconden geen toets indrukt.
Het alarm gaat gedurende 2 minuten af als u geen toets indrukt en stopt automatisch
SLUIMER – REPETEER FUNCTIE
Om de repeteer functie te activeren gaat u als volgt te werk:
Als het alarm afgaat, druk op de “SNOOZE/LIGHT“ toets om de repeteer functie aan
te zetten.
Als de functie aanstaat knippert het Snooze symbool.
Het alarm stopt maar gaat 5 minuten later opnieuw af.
U kunt de sluimer functie stoppen door een willekeurige toets in te drukken.
12/24-UUR UITLEZING
De tijd kan worden ingesteld op 12 uur AM/PM aanduiding - of 24 uur uitlezing, druk op
“+” om tussen de uitlezingen te schakelen.
°C/°F TEMPERATUUR UITLEZING
De temperatuur kan worden uitgelezen in °C of °F. Druk op de “-“ toets om te schakelen
tussen deze uitlezingen.
MAX/ MIN VOOR DE BINNEN – EN BUITENTEMPERATUUR EN
LUCHTVOCHTIGHEID
Druk herhaaldelijk op de “MAX/MIN” toets voor de MAX/MIN-temperatuur en
luchtvochtigheid voor binnen en buiten.
4 WEERVOORSPELLINGEN
Zonnig Halfbewolkt Bewolkt Regen
Opmerking:aangezien de weervoorspelling gebaseerd is op de temperatuur, de
luchtvochtigheid en de luchtdruk, kunnen er verschillen ontstaan met de actuele
weergesteldheid en het getoonde icoon.

7
BAROMETER EN BARGRAFIEK GESCHIEDENIS VAN DE LUCHTDRUK
OVER DE AFELOPEN 12 UUR.
De grafiek uitlezing is in hPa, u kunt de geschiedenis van de afgelopen 12 uur uitlezen.
DISPLAY VERLICHTING
Druk op de “SNOOZE/LIGHT“ toets om de displayverlichting gedurende 5 seconden te
activeren.
LEEFRUIMTE LUCHTVOCHTIGHEID
Het weerstation gebruikt opgeslagen gegevens om de luchtvochtigheid in de leefruimte
te bepalen en toont de volgende symbolen:
comfortabel, droog, vochtig
LEGE BATTERIJ INDICATIE
Het weerstation toont het lege batterij symbool om u eraan te herinneren dat de
batterijen van het basis station en/of de buiten sensor vervangen dienen te worden.
Wij adviseren u om indien er een batterij wissel wordt aangegeven alle batterijen, dus van
zowel sensor als basisstation te wisselen.
Symbool voor lege batterij in de buiten sensor: verschijnt in het buiten temperatuur
scherm
DRAADLOZE VERBINDING MET DE BUITEN SENSOR
Druk op de “CHANNEL“ toets om een kanaal te kiezen wanneer u meer dan 1 buiten
sensor heeft aangesloten. U kunt tot 3 sensoren uitlezen op het basisstation.
Houd de “CHANNEL“ toets 3 seconden ingedrukt om een buitensensor verbinding tot
stand te brengen .
ONTVANGST VAN HET ZENDERGESTUURDE TIJDSIGNAAL
Het zoeken naar het DCF tijd signaal start automatisch ongeveer 3 minuten nadat u
de batterijen vervangen heeft. Het antenne symbool knippert.
Houd de “-“ toets langer dan 3 seconden ingedrukt om de signaal ontvangst te
starten of te stoppen.
De klok synchroniseert automatisch met het DCF tijd signaal dagelijks van 1:00 tot 3:00
AM om een eventueel tijdsverschil te corrigeren. Als de synchronisatie niet succesvol is
afgerond en het antenne symbool verdwijnt, wordt een volgende poging gedaan
tussen 4:00 en 5:00 uur tot het signaal ontvangen wordt. Dit proces wordt herhaald tot
5:00 AM. Als het signaal dan nog niet is ontvangen, stopt de ontvangst en kunt u de

8
tijd handmatig instellen. Als het signaal daarna alsnog wordt ontvangen, wordt de
handmatig ingestelde tijd overschreven.
INFORMATIE
Een knipperend antenne symbool betekent dat het DCF tijd signaal wordt gezocht.
Een continue antenne symbool betekent dat het DCF tijd signaal succesvol is
ontvangen.
Gelieve een minimum afstand van 2.5 meter in acht te nemen met storingsbronnen
zoals televisie’s of computerschermen.
De signaal ontvangst in ruimtes met betonnen wanden zoals bijv kelders of
kantoorgebouwen is zwakker. In extreme gevallen kunt u het weerstation het beste in
een raamkozijn plaatsen.
`s Nachts zijn er minder atmosferische storingen. In die tijd kan een tijd signaal het
beste worden ontvangen. Één synchronisatie per dag is voldoende om de tijd correct
en tot op 1 seconde nauwkeurig weer te geven.
TIP
U kunt de tijd handmatig instellen als u geen DCF tijd signaal kunt ontvangen bijvoorbeeld
door storingen, grote afstand tot de DCF zender, obstakels zoals bergen, enz. Zodra het
radio signaal kan worden ontvangen wordt de tijd automatisch bijgesteld.
Het DCF tijd signaal heeft een bereik van 1.500km vanaf de zender in Frankfurt/Main in
Duitsland.
MILIEUVRIENDELIJKEVERWIJDERING
Volgens de Europese regelgeving 2002/96/EC met betrekking tot elektrisch - en
elektronisch afval mogen huishoudelijke apparaten niet bij het ongesorteerde huisvuil
worden weggegooid, maar dienen bij uw plaatselijke inzamelpunt te worden
ingeleverd, zodat diverse onderdelen weer kunnen worden hergebruikt en zo minder
milieubelastend zijn.
Het doorgestreepte afvalbak symbool bij dit product herinnert u aan
deze verplichting. Neemt u voor informatie over uw plaatselijke regelgeving contact
op met uw gemeente.
DRUKFOUTEN EN TUSSENTIJDSE WIJZIGINGEN VOORBEHOUDEN.

9
INSTRUCTION MANUAL
We thank you for buying one of our radio-controlled weather stations. It shows your
confidence in our brand and our products. Please be assured you have bought a
high-quality product which you will enjoy using for many years to come.
If you require technical support and or have questions about the functioning of the
product, please contact our After Sales Service via the email address mentioned
here under:
Read this manual thoroughly before first use, even if you are familiar with this type of
product.
It provides you several tips to make optimal use of your product. Keep this manual, your
receipt and packaging in a safe place for future reference.
SAFETY PRECAUTIONS
Please only use this product for its design purpose. Do not use for any other purpose.
Before the first use inspect the product to make sure it is not damaged. In case you have
a doubt please contact our After Sales Service via the above-mentioned email address.
If the batteries need to be renewed, please renew all batteries. Do not mix old - and new
batteries. Preferably replace the old batteries by new batteries of one type; we advise to
use alkaline batteries.
SPECIFICATIONS OF YOUR WEATHER STATION
Your weather station is equipped with 6 operation buttons: MODE, +, -, MAX/MIN,
CHANNEL, SNOOZE/ LIGHT.
Radio Controlled Clock
Automatic receipt of the DCF 77-time signal to display the most accurate time
Automatic switch from Summer - to Wintertime vice versa
Time display selectable in 12 - or 24 hours format
24 adjustable time zones selectable (-12 / + 12)
Continuous perpetual calendar up to 2099
Display of Date, Month and Weekday
Display of Weekday available in English
Alarm with snooze function with 5 minutes alarm interruption
4 weather forecasts: sunny, slightly cloudy, cloudy, rainy
Barometer and data of 12 hours history for air pressure
Indoor /outdoor temperature and humidity
Minimum / Maximum of temperature and humidity
Thermometer measuring range inside: °C to +50 °C, outside -20°C~60 °C
Temperature display selective in °C or °F
Low battery indication
Blue display lighting

10
Battery: 2 x AAA, LR03, 1.5V – not included
Outdoor sensor:
Frequency: 433 MHz
Battery: 2 x AAA, LR03, 1.5 – not included
EXPLANATION OF THE WEATHER STATION SYMBOLS
1. Weather 2. Air pressure 3. Bar for barometer 4. Max/Min TEM and HUM for outdoor
5. Outdoor temperature 6. Max/Min.for indoor TEM and HUM 7. Indoor temperature
8.Comfort 9. Day of week 10. Summer time 11. RCC symbol 12. Snooze/Light
13. Snooze symbol 14. Time 15. Alarm 16. Date/Month 17. Indoor humidity
18. Indoor 19. Low battery for outdoor sensor 20. Outdoor 21. RF symbol 22. Outdoor
humidity
A=MAX/MIN B= - C= + D=MODE E=CHANNEL

11
The below picture shows how to connect the stand with the main unit.
INITIAL OPERATION
Open the battery compartment located on the rear side of the devices.
Place the batteries in the battery compartment. Observe the shown polarity.
The station is now connecting to the outdoor sensor. This process takes about 3
minutes. Then the display shows the outdoor temperature and humidity, in case of
failure of reception, pls press “CHANNEL“ for more than 3 seconds to receive again.
the automatic receiving of the DCF time signal begins after 3 minutes of outdoor
reception.
This RCC reception process is going on,the flashing symbol “radio tower“ appears in
the time display area at the same time.
Once the time signal receiving is successful, the display shows the symbol “radio
tower“ continuously and stops flashing.
If, due to bad reception, or no RCC automatic time reception is possible, follow the steps
below to set the time manually.
MANUAL TIME SET-UP
The most important is to quit the reception of the radio controlled signal by
holding together “-for 3 seconds in case of the radio towersymbol is
flashing before set-up
Press and hold the “MODE“ key for 3 seconds.
The display for the year is flashing. Use “+ “ and “-“ to select the year.
Press “MODE“ to confirm.
The display for the month is flashing. Use “+ “ and “-“ to select the month.
Press “MODE“ to confirm.

12
The display for the date is flashing. Use “+ “ and “-“ to select the date.
Press “MODE“ to confirm.
The display for the time zone is flashing. Use “+ “ and “-“ to select the time zone
(-12 to +12).
Press “MODE“ to confirm.
The display for the hour is flashing. Use “+ “ and “-“ to select the hour.
Press “MODE“ to confirm.
The display for the minutes is flashing. Use “+ “ and “-“ to select the minutes.
Press “MODE“ to confirm.
INFORMATION:
The clock automatically changes from the set-up mode to the time display mode if no
keys are pressed for 20 seconds.
Explanation for the time zone display:
You can manually adjust the clock to the time zone of a country (up to 1500km
distance to Frankfurt/Main) where the clock receives the DCF signal but where the
actual time differs from the time received.
If, e.g. the time in a given country is 1 hour ahead of the German time, set the time
zone display to 01. The clock is now DCF controlled but the time showing is one hour
ahead.
DAILY ALARM SET-UP
Press “MODE” to switch from the time display to the AL display
Press and hold the “MODE” key for 3 seconds, the flashing alarm time is shown
The hour display of the alarm time is flashing. Use “+“ and “-“ to select the hour.
Press “MODE” to confirm.
Then follow the minutes. Use “+“ and “-“ to select the minutes,
Press “MODE” to confirm.
DAILY ALARM ON / OFF
When the AL alarm time is showing, press “-“ to activate the alarm with the alarm
symbol showing in the display
Press “-” again to cancel the alarm when in AL
INFORMATION:
The clock automatically changes from set-up mode to time mode if no keys are
pressed for 30 seconds.
The alarm sounds for 2 minutes if no key is pressed to stop it.
SNOOZE FUNCTION
To activate the snooze function, please follow the steps below
Press the key “SNOOZE/LIGHT“, while the alarm sounds, to activate the snooze
function.
If the snooze function is activated, a Snooze symbol is flashing.
The alarm repeats after 5 minutes.
The snooze function can be stopped by pressing any key.

13
12/24 HOURS MODE
The time display can be in 12 - AM/PM - or 24 hours mode. Press “+” for exchange
between 12/24 hours.
°C/°F TEMPERATURE DISPLAY
The temperature display can be in °C or °F. Press “-“ to switch between the mode.
MAX./ MIN. FOR THE INDOOR/OUTDOOR TEMPERATURE AND HUMIDITY
Press “MAX/MIN” for displaying the indoor/outdoor max./min. temperature and humidity.
WEATHER FORECAST
SUNNY SLIGHTLYCLOUDY CLOUDY RAIN
ATTENTION: as the weather is forecasted by temperature, humidity and air press only,
the display will have discrepancy with the actual weather.
BAROMETER AND BAR DATA AND DATA OF HISTORY FOR THE PAST 12
HOURS OF AIRPRESSURE.
Air pressure can be in hPa and shows the past 12 hour air pressure.
ILLUMINATION
Press the key “SNOOZE/LIGHT“ to activate the display illumination for 5 seconds.
LIVING SPACE HUMINDITY
The weather station uses saved data to determine the humidity in the living space and
shows the respective symbols.

14
comfortable dry humid
LOW BATTERY CONDITION DISPLAY
The weather station displays the low battery condition symbol to remind the batteries of
the outdoor sensor need to be exchanged.
Outdoor sensor low battery condition display: in the outdoor area of the display
WIRELESS CONNECTION TO THE OUTDOOR SENSOR
Press the key “CHANNEL“ to select a channel. You can read the data of up to 3
sensors at one weather station.
Press and hold the “CHANNEL“ key for 3 seconds to search for the outdoor sensor .
RECEPTION OF THE RADIO CONTROLLED SIGNAL
The DCF time signal search starts automatically about 3 minutes after the battery
exchange. The “radio tower” signal is flashing.
Press “-“ for more than 3 seconds to enter or quit the Radio controlled signal reception
The clock synchronizes with the DCF time signal automatically and daily from AM 1:00
to 3:00 to correct potential time deviations each hour. If the synchronization is
unsuccessful – the “radio tower“ symbol disappears, a further synchronization attempt
is made from 4:00 and 5:00 until success. This process is repeated up until 5:00 AM. If still
not success, daily reception stops.
INFORMATION
The flashing “radio tower” symbol stands for DCF radio signal reception has started.
Continuous “radio tower” symbol stands for DCF radio signal reception has been
successful.
Please observe a minimal distance of 2.5m to sources of interference such as
televisions or computer screens.
The radio signal reception is weaker in rooms with concrete walls, e.g. in the
basement and in office buildings. For extreme cases, please put the clock near a
window.
There are less atmospheric disturbances at night. A radio time signal reception is
usually possible at that time. One synchronisation per day is sufficient to keep the time
display accuracy at 1 second.

15
TIP
You can adjust the time manually in case the clock cannot receive the DCF time signal
due to interferences, large distance to the sender, obstructions like mountains, etc. As
soon as the time signal can be received, the clock will be adjusted automatically.
Time signal sender coverage up to 1500km distance to Frankfurt/Main.
ENVIRONMENT FRIENDLY DISPOSAL
The European Directive 2002/96/EC on Waste Electrical and Electronic Equipment – WEEE
– requires that old household electrical appliances must not be disposed of in the normal
unsorted municipal waste stream. Old appliances must be collected separately to
optimise the recovery and recycling of the materials they contain and reduce the impact
on human health and the environment.
The crossed out “wheeled bin” symbol on the product reminds you of your obligation that
when you dispose of the appliance, it should be separately collected. Contact your local
authority for information concerning the correct disposal of your old appliance.
PRINTING ERRORS AND MODIFICATIONS RESERVED

16
MODE D’EMPLOI
Merci d’avoir acheté l’une de nos stations de météo radiocommandées. Nous vous
remercions de la confiance dont vous faites ainsi preuve envers notre marque et nos
produits. Vous avez acquis un produit de qualité qui vous sera d'une grande utilité
pendant de nombreuses années.
Pour toute demande d'assistance technique ou si vous avez des questions au sujet du
fonctionnement du produit, contactez notre service après-vente à l’adresse e-mail
ci-dessous :
Lisez attentivement ce manuel avant la première utilisation, même si vous avez
l'habitude des produits de ce type.
Vous y trouverez des conseils pour utiliser ce produit de manière optimale. Conservez ce
manuel, votre preuve d’achat et l’emballage en lieu sûr pour pouvoir vous y reporter
ultérieurement.
CONSIGNES DE SÉCURITÉ
N’utilisez ce produit qu’aux fins pour lesquelles il est prévu. Ne l’utilisez pour aucun autre
usage.
Avant la première utilisation, inspectez le produit pour vous assurer qu'il n'est pas
endommagé. En cas de doute, contactez notre service après-vente à l’adresse e-mail
susmentionnée.
Si les piles doivent être remplacées, remplacez toutes les piles en même temps. Ne
mélangez pas d'anciennes piles et des piles neuves. De préférence, remplacez les piles
usagées par des piles neuves du même type. Nous conseillons l’emploi de piles alcalines.
CARACTÉRISTIQUES DE VOTRE STATION MÉTÉO
Votre station météo est équipée de 6 touches de commande : MODE, +, -,
MAX/MIN, CHANNEL, SNOOZE/ LIGHT.
Horloge radiocommandée
Réception automatique du signal horaire DCF 77 afin d’afficher l’heure la plus
précise possible
Basculement automatique entre heure d’été et heure d’hiver
Affichage de l’heure en format 12 heures ou 24 heures
24 fuseaux horaires réglables (-12 / +12)
Calendrier perpétuel jusqu’en 2099
Affichage de la date, du mois et du jour de la semaine
Affichage du jour de la semaine disponible en anglais
Alarme avec fonction de réveil répété avec interruption de l’alarme pendant 5
minutes
4 prévisions météorologiques : ensoleillé, partiellement ensoleillé, nuageux,
pluvieux
Baromètre et données historiques de 12 heures pour la pression atmosphérique

17
Température intérieure & extérieure et humidité avec tendance
Valeurs max./min. de température et d’humidité
Plage de mesure du thermomètre à l’intérieur : °C à +50 °C ; à l’extérieur : -20 °C à
60 °C
Affichage de la température en °C ou °F
Indication de piles déchargées
Afficheur V.A blanc
Piles : 2 x AAA, LR03, 1,5V – non inclus
Capteur extérieur :
Fréquence : 433 MHz
Piles : 2 x AAA, LR03, 1,5V – non inclus

18
1. Prévision météo 2. Pression atmosphérique 3. Diagramme à barres de la pression
barométrique 4. Tendance de la température extérieure 6. Température et humidité
de l’air min. & max. intérieures 7. Température intérieure 8. Indication confort 9. Jour
de la semaine 10. Heure d’été 11. Symbole RCC 12. Snooze/éclairage 13. Symbole
snooze 14. Affichage de l’heure 15. Alarme 16. jour/mois 17. Humidité de l’air intérieure
18. Symbole intérieur 19. Avertissement pile épuisée du capteur externe 20. Symbole
extérieur 21. Symbole Fréquence Radio 22. Humidité de l’air extérieure
A= MAX/MIN B= C= D=MODE E= CANAL
Le dessin ci-dessous explique comment il faut monter la station météo sur le support.

19
COMMANDES DE BASE
Ouvrez le compartiment à piles à l’arrière de la station météo et du capteur.
Installez-y les piles tout en faisant correspondre les indications de polarité + et – sur les
piles et le compartiment.
La station de base établit maintenant une connexion avec le capteur externe. Ce
processus prend environ 3 minutes après quoi la température extérieure et l’humidité
de l’air s’affichent dans le display de la station météo. Si cela ne se produit pas, il faut
appuyer sur CHANNEL pendant 3 secondes afin de lancer un nouvel essai.
Le repérage automatique du signal radio DCF commence 3 minutes après la
réception des données du capteur externe.
Dès que la réception du signal a réussie, le symbole d’antenne arrête de clignoter et
reste affiché en permanence.
Si, à cause d’une mauvaise réception, le signal radio ne peut pas être capté, vous
pouvez suivre les instructions ci-dessous pour régler l’heure manuellement.
RÉGLAGE MANUAL DE L’HEURE
Attention : le plus important est de désactiver le repérage automatique du
signal radio en appuyant sur la touche “▬″ pendant 3 secondes si le
symbole d’antenne clignote toujours).
Gardez la touche „MODE“ enfoncée pendant 3 secondes.
Lorsque l’affichage de l’année clignote, utilisez les touches + et - pour ajuster l’année.
Appuyez sur la touche “MODE” pour confirmer.
Lorsque l’affichage du mois clignote, utilisez les touches + et - pour ajuster le mois.
Appuyez sur la touche “MODE” pour confirmer.
Lorsque l’affichage du jour clignote, utilisez les touches + et - pour ajuster le jour.
Appuyez sur la touche “MODE” pour confirmer.
Lorsque l’affichage du fuseau horaire clignote, utilisez les touches + et - pour
sélectionner le fuseau horaire souhaité (-12 à +12 heures).
Appuyez sur la touche “MODE” pour confirmer.
Lorsque l’affichage de l’heure clignote, utilisez les touches + et - pour ajuster l’heure.
Appuyez sur la touche “MODE” pour confirmer.
Lorsque l’affichage des minutes clignote, utilisez les touches + et - pour ajuster les
minutes.
Appuyez sur la touche “MODE” pour confirmer
INFORMATION:
Si vous ne touchez aucun bouton pendant 20 secondes, le display passe
automatiquement du mode de réglage au mode d’affichage de l’heure.
Explication de l’affichage du fuseau horaire :
Vous pouvez fixer manuellement le fuseau horaire de votre pays (dans un rayon de
1.500 km de l’émetteur à Francfort/Main en Allemagne) où le signal horaire DCF peut
être capté, mais où l’heure locale diffère de l’heure allemande.
Si, par exemple, l’heure locale de votre pays est 1 heure en avance de l’heure
allemande, vous choisissez le fuseau horaire 01. L’horlogerie sera désormais
radio-pilotée, mais le display affichera l’heure allemande + 1.

20
RÉGLAGE DE L’ALARME JOURNALIÈRE
Appuyez sur la touche “MODE” pour passer de l’affichage de l’heure à l’affichage AL.
Enfoncez la touche “ MODE” pendant 3 secondes. Le temps d’alarme clignote.
Lorsque l’heure du temps d’alarme clignote, utilisez les touches + et – pour ajuster
l’heure.
Appuyez sur la touche “ MODE” pour confirmer.
Lorsque les minutes du temps d’alarme clignotent, utilisez les touches + et – pour
ajuster les minutes.
Appuyez sur la touche “ MODE” pour confirmer.
MARCHE / ARRÊT DE L’ALARME JOURNALIÈRE
Lorsque AL est affiché, utilisez la touche – pour activer l’alarme 1 (le symbole d’alarme
s’allume).
Afin d’arrêter la sonnerie d’alarme, vous appuyez encore sur la touche AL
INFORMATION
Si vous ne touchez aucun bouton pendant 30 secondes, le display passe
automatiquement du mode de réglage au mode d’affichage de l’heure.
Si vous ne l’arrêtez pas en appuyant sur une touche quelconque, la sonnerie
d’alarme continue pendant 2 minutes.
RÉPÉTITION D’ALARME
Pour activer cette fonction de somnolence, suivez les étapes suivantes :
Lorsque vous entendez la sonnerie, appuyez sur la touche “SNOOZE/LIGHT“ pour
activer le mode somnolence.
L’icône d’alarme clignote pour signaler que la répétition de l’alarme est activée.
La sonnerie s’arrête, mais reprend 5 minutes plus tard.
Vous pouvez arrêter la fonction de somnolence en appuyant sur une touche
quelconque.
AFFICHAGE 12/24 HEURES
L’heure s’affiche soit au format de 12 heures AM/PM, soit au format 24 heures.
Appuyez sur le + pour changer d’un format à l’autre.
AFFICHAGE DE LA TEMPÉRATURE EN °C OU °F
La température peut être affichée en °C ou °F. Appuyez sur la touche “–“ pour
sélectionner °C ou °F.
MAX./ MIN. POUR LA TEMPÉRATURE INTÉRIEURE/EXTÉRIEURE ET
L’HUMIDITÉ DE L’AIR
Appuyez plusieurs fois sur la touche “MAX/MIN” pour afficher la température et l’humidité
de l’air MAX/MIN à l’intérieur et à l’extérieur.
Other manuals for DTX250
1
Table of contents
Languages:
Other Cresta Weather Station manuals
Popular Weather Station manuals by other brands

Hyundai
Hyundai WS 1806 BOY instruction manual

La Crosse Technology
La Crosse Technology LTV-D1 manual

Honeywell
Honeywell TE923W - Deluxe Weather Station user manual

Oregon Scientific
Oregon Scientific BAR339DP user manual

PCE Instruments
PCE Instruments PCE-FWS 20N user manual

Explore Scientific
Explore Scientific WSH4102 instruction manual