manuals.online logo
Brands
  1. Home
  2. •
  3. Brands
  4. •
  5. Crestron
  6. •
  7. Cable Box
  8. •
  9. Crestron FlipTop FT2A-UTK-CLOAK Series User manual

Crestron FlipTop FT2A-UTK-CLOAK Series User manual

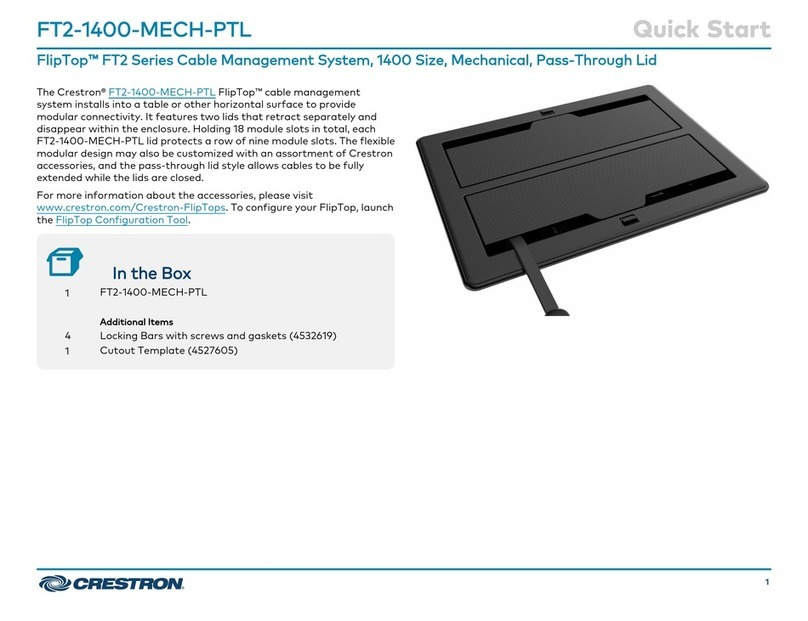
The Crestron® FT2A‑UTK‑CLOAK, FT2A‑UTK‑CLOAK‑1T, FT2A‑UTK‑CLOAK‑WIDE, and FT2A‑UTK‑CLOAK‑WIDE‑1T are used to conceal
exposed cables and retractors in under‑table FT2 Series FlipTop™ applications.
The FT2A‑UTK‑CLOAK, FT2A‑UTK‑CLOAK‑WIDE, FT2A‑UTK‑CLOAK‑1T, and FT2A‑UTK‑CLOAK‑WIDE‑1T are functionally similar. For simplicity
within this guide, the term “cloak” is used except where noted.
The following information provides compatible FlipTop models and cable retractor types for each cloak.
Cloak Model Compatible FT2 Series Model
FT2A‑UTK‑CLOAK
Conceals up to four gravity retractors.
FT2‑202‑MECH, FT2‑202‑MECH‑AC, FT2‑202‑MECH‑ACUSB, FT2‑500‑MECH,
FT2‑500‑MECH‑AC, FT2‑500‑MECH‑ACUSB, FT2‑700‑MECH, FT2‑700‑MECH‑AC, FT2‑700‑
MECH‑ACUSB, FT2‑1200‑MECH, FT2‑1200‑MECH‑AC, FT2‑1200‑MECH‑ACUSB
FT2A‑UTK‑CLOAK‑1T
Conceals up to four one‑touch retractors.
FT2‑202‑ELEC, FT2‑500‑ELEC, FT2‑700‑ELEC, FT2‑1200‑ELEC
FT2A‑UTK‑CLOAK‑WIDE
Conceals up to four gravity retractors.
FT2‑1400‑MECH, FT2‑1400‑MECH‑AC, FT2‑1400‑MECH‑ACUSB
FT2A‑UTK‑CLOAK‑WIDE‑1T
Conceals up to four one‑touch retractors.
FT2‑1400‑ELEC
FT2A-UTK-CLOAK FT2A-UTK-CLOAK-WIDE-1T
>
>
*Inside
Hook-and-loop
fastener strips (4)
*Inside
Hook-and-loop
fastener strips (4)
Check the Box
Item Qty
FT2A-UTK-CLOAK, FT2A-UTK-CLOAK-1T, FT2A-UTK-CLOAK-WIDE, or FT2A-UTK-CLOAK-WIDE-1T 1
Attach the Cloak
Attach the cloak to the FlipTop assembly after the assembly has been installed in the table and the cable retractors and modules are installed
in the assembly.
NOTE: Do not fold the cloak. Once creases are made in the fabric, they cannot be removed.
1. Locate the four small strips of hook‑and‑loop fasteners and remove them from the cloak. These four strips shall be applied to the portion
of the FlipTop enclosure that sits beneath the table.
2. Determine the placement of each fastener strip on the FlipTop enclosure. The top of the power supply bracket may be used as a guideline
around the enclosure for fastener placement.
NOTE: A minimum of two strips of hook‑and‑loop fasteners must be used. If only two strips are needed for the installation, place a strip
on the front power supply bracket and on the rear of the of the enclosure. These strips are outlined in blue in the illustration.
Recommended hook-and-loop fastener placement
Hook-and-loop
fastener strips (4)
Power supply
bracket
Power supply
bracket
Hook-and-loop
fastener strip
3. Remove the protective backing from the fastener strips, and press them firmly onto the FlipTop enclosure.
4. Align the inside of the cloak with the hook‑and‑loop fasteners to the fastener strips applied to the FlipTop enclosure.
5. Carefully wrap and press the cloak onto the fastener strips attached to the FlipTop enclosure.
Hook-and-loop fastener strips
Cloak
FlipTop enclosure
Power supply bracket
6. To prevent tangling or cable movement obstruction, ensure that the cables are routed properly within the cloak.
FT2A-UTK-CLOAK Series
Under-Table Cloak for FT2 Series FlipTop™ Cable Management Solutions
Additional Information
Scan or click the QR code for detailed product information.
FT2A‑UTK‑CLOAK FT2A‑UTK‑CLOAK‑1T FT2A‑UTK‑CLOAK‑WIDE FT2A‑UTK‑CLOAK‑WIDE‑1T
Compliance and Legal
Original Instructions: The U.S. English version of this document is the original instructions. All other languages are a translation of the original instructions.
The product warranty can be found at www.crestron.com/warranty.
The specific patents that cover Crestron products are listed at www.crestron.com/legal/patents.
Certain Crestron products contain open source software. For specific information, please visit www.crestron.com/opensource.
Crestron, the Crestron logo, FlipTop, and FlipTops are either trademarks or registered trademarks of Crestron Electronics, Inc. in the United States and/or other countries. Other
trademarks, registered trademarks, and trade names may be used in this document to refer to either the entities claiming the marks and names or their products. Crestron disclaims any
proprietary interest in the marks and names of others. Crestron is not responsible for errors in typography or photography.
©2019 Crestron Electronics, Inc.
Crestron Electronics, Inc.
15 Volvo Drive, Rockleigh, NJ 07647
Tel: 888.CRESTRON
Fax: 201.767.7576
www.crestron.com
Quick Start - Doc. 8532A
(2054497)
10/10/19
Specifications subject to
change without notice.

This manual suits for next models

4

Other Crestron Cable Box manuals

Crestron FlipTop FT2 Series User manual

Crestron

Crestron FlipTop FT2 Series User manual

Crestron FlipTop FT2 Series User manual

Crestron

Crestron FlipTop FT2 Series User manual

Crestron FlipTop FT2 Series User manual

Crestron

Crestron FlipTop FT2 Series User manual

Crestron FlipTop FT2 Series User manual

Crestron

Crestron FlipTop FT2 Series User manual

Popular Cable Box manuals by other brands

Palmer PLI01 manual

Palmer

Palmer PLI01 manual

Grundfos LC-Ex4 Installation and operating instructions

Grundfos

Grundfos LC-Ex4 Installation and operating instructions

OBO Bettermann GE 2V 15 B Mounting instructions

OBO Bettermann

OBO Bettermann GE 2V 15 B Mounting instructions

IKEA 365+ manual

IKEA

IKEA 365+ manual

Steelcase DSTRAYLG quick start guide

Steelcase

Steelcase DSTRAYLG quick start guide

Tripp Lite SRWB6210STR installation guide

Tripp Lite

Tripp Lite SRWB6210STR installation guide

Tripp Lite SR13 Management guide

Tripp Lite

Tripp Lite SR13 Management guide

Tykoflex MULTIFLEX T712 SOT manual

Tykoflex

Tykoflex MULTIFLEX T712 SOT manual

GAPOSA QCTX3SD manual

GAPOSA

GAPOSA QCTX3SD manual

Commercial Electric 5028 installation guide

Commercial Electric

Commercial Electric 5028 installation guide

manuals.online logo
manuals.online logoBrands
  • About & Mission
  • Contact us
  • Privacy Policy
  • Terms and Conditions

Copyright 2025 Manuals.Online. All Rights Reserved.