10
Congratulations!
With your purchase you have decided on a
high-quality product. Get to know the product
before you start to use it. Carefully read the
following instructions for use. Use the product
only as described and only for the given areas
of application. Keep these instructions safe.
When passing the product on to a third party,
always make sure that the documentation is
included.
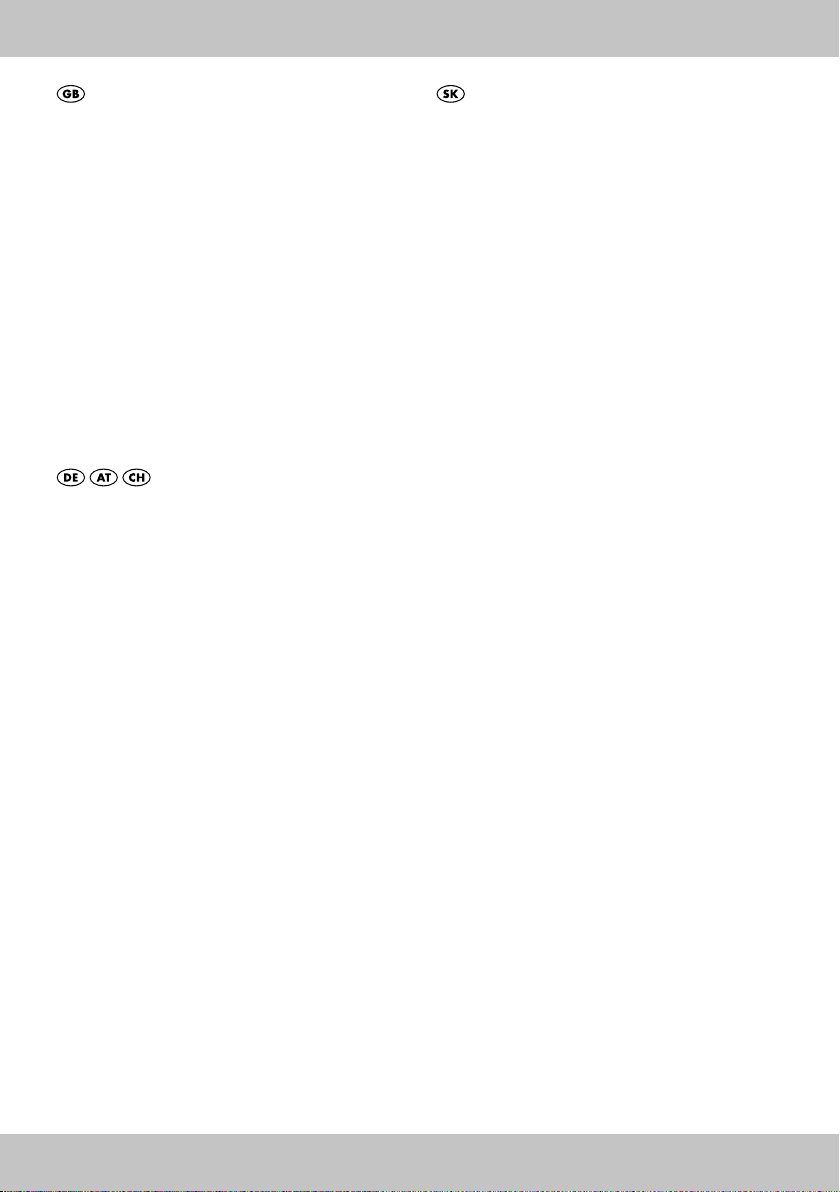
Scope of delivery/
Part names (figure A1)
1 x Instructions for use
1 x Suspension trainer (suspension training)
(1) Handles
(2) Foot loops
(3) Adjustment clasps
(4) Adjustment loops
(5) Belt strap
(6) Anchor loop
(7) Door notice
(8) Door anchor
(9) Extension belt
(10) Snap hook
(11) Storage bag
1 x A3 Exercise poster
1 x Training DVD
Technical data
Maximum weight of user: 120kg
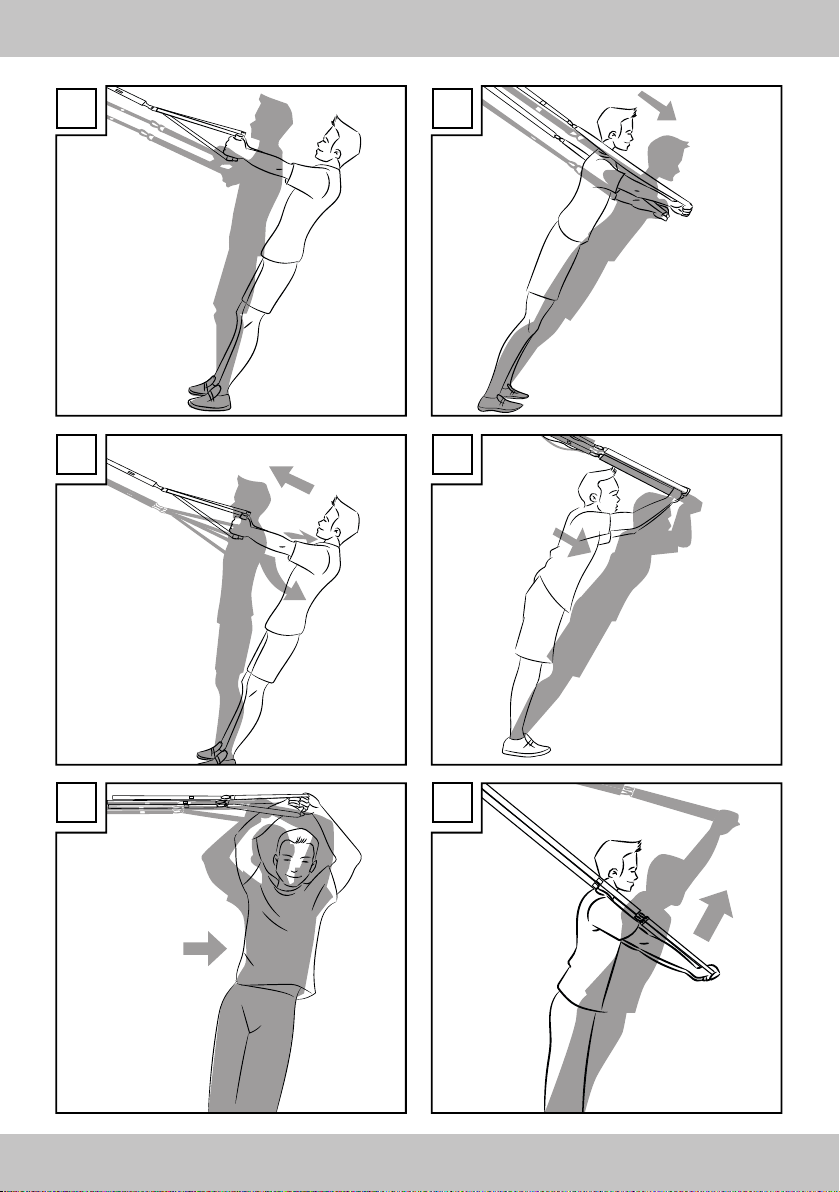
Correct use
This article was developed as a piece of training
equipment that can be used to train your whole
body. The sling trainer was designed for private
use, and it is not suitable for medical and com-
mercial use.
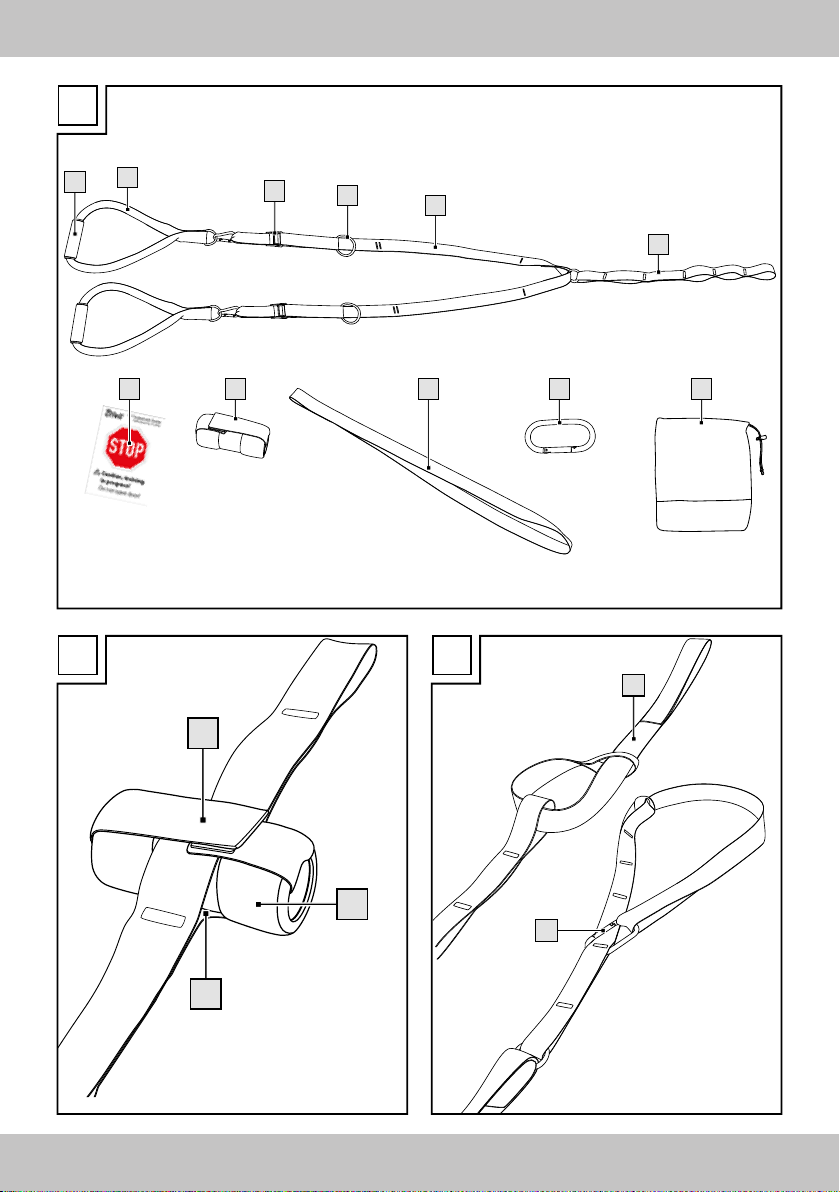
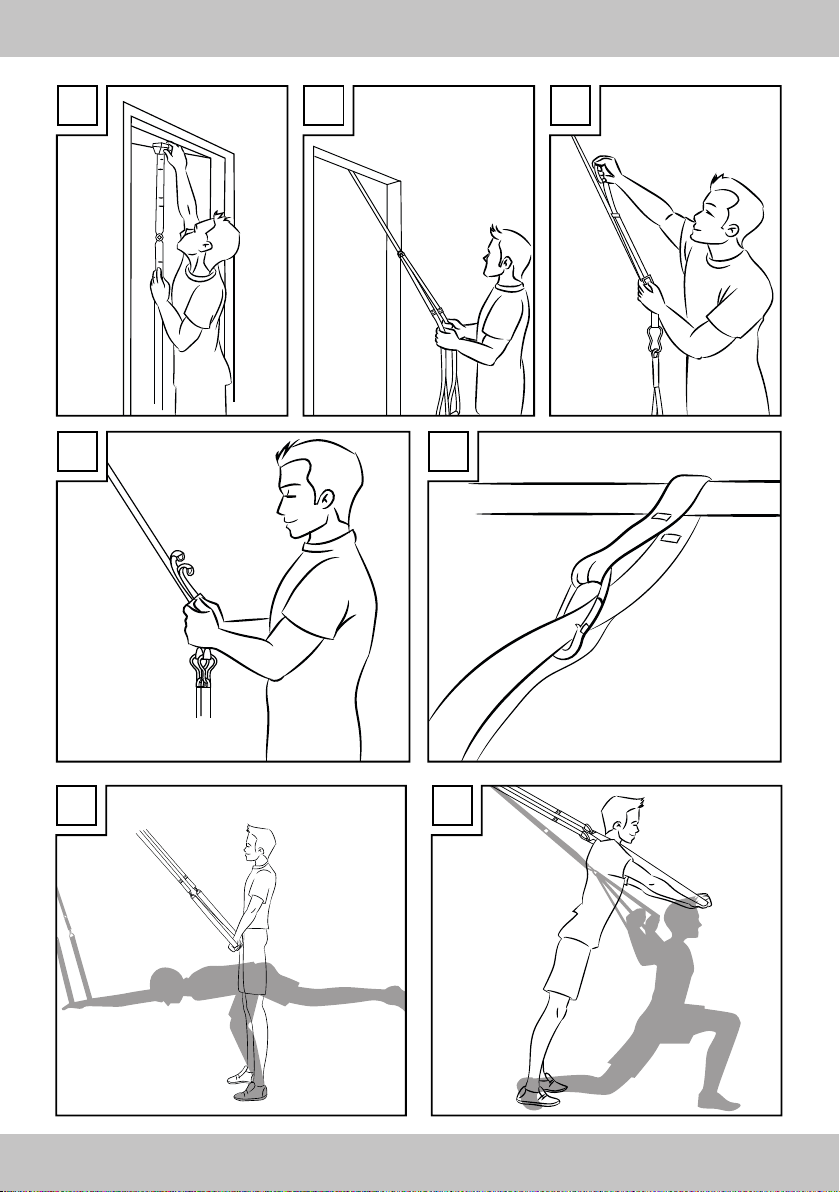
This article has been designed for both indoor
and outdoor use and may only be attached to
doors with the included door anchor or on rods,
branches, hooks, or similar using the additional
snap hook.
Safety notes
Warning! Risk of injury!
• Consult a doctor before beginning training.
Please ensure that you are in a good state of
health for this training.
• Always remember to warm up before training
and train in accordance with your current
abilities. There is a risk of incurring serious
injury, if you use too much effort and overtrain.
If you experience any complaints, feel weak
or tired, you must stop training immediately
and contact your doctor.
• This article may only be used under adult
supervision and must not be used as a toy.
• Keep the instructions for use and the
exercise instructions to hand at all times.
• In order to train safely you need sufficient
space. Carry out the exercises with enough
space between you and objects or other
people so that no one can be injured.
• Only train on a flat, non-slip surface.
• Do not use this article close to stairs or steps.
• Do not exceed the prescribed user weight
of 120kg.
• Caution! Only attach the sling trainer
to doors!
• Warning! Risk of injury!
Only attach the sling trainer to doors
that open outwards (away from you)!
Never mount the sling trainer on
doors that open inwards (towards
you). The door could open and this
could lead to serious injury!
• Warning! Always test the load-bea-
ring capacity of the attachment
points in order to ensure that there is
a sufficient safety margin in place.
There is a risk of serious injury if this
is not adhered to.
• Warning! Risk of injury!
Always lock the door to which you
have attached the sling trainer!
• Caution! Always use the door sign
(included with the product) while
training. Ensure that it is easily legible
and on the other side of the door.
GB