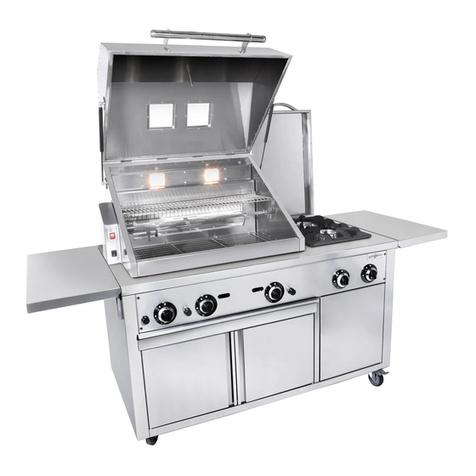
CROWN VERITY Infinite Series User manual

Page 1 of 66
Infinite Series
OWNERS MANUAL
2021

Page 2 of 66
MH64834
DANGER: IF YOU SMELL GAS
1. Shut off gas to the appliance.
2. Extinguish any open flame.
3. Open lid and doors and remove any storage cover(s).
4. If the odor continues, keep away from the appliance and immediately call your gas
supplier or fire department.
Failure to follow these instructions could result in fire or explosion which could cause property
damage, personal injury or death.
WARNING: FOR YOUR SAFETY
DO NOT store or use gasoline or other flammable vapors and liquids in the vicinity of this or any
other appliance.
DO NOT check for leaks with a match or open flame.
DO NOT store an LP cylinder that is not connected for use in the vicinity of this or any other
appliance.
DO NOT use your unit if there is evidence of damage (cuts, cracks, burns) or excessive wear to the
gas supply hose.
DO NOT obstruct the flow of combustion and ventilation air to the unit.
DO NOT place combustibles on the undershelf. Do not stand on the undershelf as it could result in
injury or irreparable damage.
DO NOT leave your unit unattended while in operation.
DO NOT use under the influence of alcohol or drugs.
DO NOT use this unit until you have read and understood all of the information in this manual.
WARNING: Instructions to be followed in the event that a user smells gas must be
posted in a prominent location. This information shall be obtained by consulting
the local gas supplier.

Page 3 of 66
Congratulations and thank you for choosing
Crown Verity.
The Infinite Series Product line was developed for
high performance and flexibility of design making it
distinctly different than any other grill line.
This manual contains important information
necessary for the proper and safe use of the
product. Please read this manual carefully and
follow all warnings and instructions to ensure safe
operation and to maximize your cooking
enjoyment.
Crown Verity is here to help. Should you ever have
any questions about cooking with or caring for your
Crown Verity product, please contact our customer
service desk at:
Please have your model number and serial number
ready when you call or include it in your email.
Model Number
Serial Number
Note: The serial number and model number can be found on the rating plate (See Appendix A
for rating plate references).
THIS MANUAL MUST REMAIN WITH THE PRODUCT
OWNER FOR FUTURE REFERENCE.
PROUDLY MADE IN
NORTH AMERICA

Page 4 of 66
For your Safety
WARNING: This appliance shall be used only in a well-ventilated space and shall not be used in
a building, garage, or any other enclosed area. Ensure that the clearances to combustibles are
adhered to as listed in this manual.
WARNING: Improper installation, adjustment, alteration, service or maintenance can cause
property damage, injury or death. Please read the operating and maintenance instructions
provided in this manual thoroughly before installing or servicing this equipment. It is your
responsibility to see that your units are properly assembled, installed, and cared for.
WARNING: Keep any electrical supply cords and fuel supply hose(s) away from any hot
surfaces.
WARNING: This appliance has been tested according to ANSI Z21.58/CSA 1.6 for residential use.
This is an outdoor cooking appliance and is not intended to be installed in or on a boat or
recreational vehicle.
California Proposition 65 Warning
The burning of gas cooking fuel generates some by-products that are on the list of substances
which are known by the State of California to cause cancer or reproductive harm. California law
requires businesses to warn customers of potential exposure to such substances. To minimize
exposure to these substances, always operate the unit according to this Owner’s Manual, and
ensure you provide proper ventilation when cooking with gas.
IMPORTANT: Damage caused by a failure to heed the warnings or follow the safety
instructions and practices described in this manual is not covered by the warranty.

Page 5 of 66
Inspecting Your Shipped Appliances
IF SHIPMENT ARRIVES DAMAGED
This product was carefully inspected and tested before leaving the factory. Upon acceptance of
the shipment, all freight damage responsibility is relinquished by the freight carrier.
VISIBLE LOSS OR DAMAGE
• Be sure any visible damage to the carton is noted on the freight bill or express receipt and
signed by the person making the delivery.
• FILE CLAIM OR DAMAGES IMMEDIATELY, regardless of extent of damage
CONCEALED LOSS OR DAMAGE
• If damaged is unnoticed until the appliance is unpacked, notify the transportation company
or carrier immediately and file a “concealed damage” claim with them. This should be done
within 5 days of the date delivery is made to you. Be sure to hold on to the packaging for
inspection. We cannot assume responsibility for damage or loss incurred in transit.
Unpacking and Assembly
The appliance arrives fully assembled and ready to use. Please follow the uncrating and
unpacking steps to avoid damage to the product.
The shipping weight on smaller units is approximately 300 lbs. and larger units may weight over
500 lbs.
WARNING:
Use two or more people to move or install this unit. Failure to follow
instructions can result in personal injuries.
REMOVING THE CARTON
• Remove the staples at the bottom of the carton.
• Lift off the carton
• Cut straps holding the appliance to the pallet. The straps are installed under load, wear
protective eyewear when cutting the straps as they may spring back.
• With assistance, remove the appliance from the pallet and place into desired location.
For appliances with wheels, the appliance will not directly roll off of the pallet. An option to
safely remove the appliance off the pallet is by lifting one end of the appliance high enough to
place a ramp under the wheels and then lift the other end while rolling the appliance off the
pallet.

Page 6 of 66
When moving a Crown Verity appliance across uneven surfaces be cautious and move slowly. It
is highly recommended that a carpet dolly is used to ensure no damage is caused to the
structure of the cart. Failure to do so, will not be covered under the warranty.
INTERIOR PACKING
Crown Verity takes all necessary measures in securing and protecting the appliance to ensure it
arrives in the same condition that it left our factory.
BE SURE YOU HAVE REMOVED ALL TIE DOWNS BEFORE USING THE APPLIANCE.
BE SURE YOU HAVE REMOVED ALL OF THE PROTECTIVE PAPER ON THE STAINLESS STEEL
SURFACES BEFORE USING THE APPLIANCE.
• Remove any loose items located under the hood, such as the extension rack or any other
accessory you may have purchased with your grill/side burner.
• Carefully cut the tie downs securing the cooking grates in place.
• Remove the grates and remove and tie downs around the burners and radiants.
• Remove any stainless-steel protective paper on the exterior of the appliance. It is important
to clean any area that you have removed the protective paper, to ensure no glue residue is
left over. Using the grill/side burner prior to removing the protective paper will
permanently adhere the paper to the appliance and will not be covered under warranty.

Page 7 of 66
Table of Contents
For your Safety ________________________________________________________________ 4
California Proposition 65 Warning ________________________________________________ 4
Inspecting Your Shipped Appliances _______________________________________________ 5
Unpacking and Assembly ________________________________________________________ 5
Table of Contents ______________________________________________________________ 7
Safe Operation ________________________________________________________________ 9
Before You Cook- Positioning Your Grill/Side Burner ________________________________ 11
Specifications and Installations __________________________________________________ 12
BUILT-IN INSTALLATIONS _____________________________________________________ 13
CLEARANCE TO COMBUSTIBLES _______________________________________________ 13
REAR HOOD CLEARANCE _____________________________________________________ 13
OVERHEAD PROTECTION AND EXHAUST REMOVAL _______________________________ 14
Built-In Cut-out Dimensions ____________________________________________________ 16
FIGURE 3. REFERENCE DRAWING FOR CUT-OUT DIMENSIONS _______________________ 17
Gas Connections ______________________________________________________________ 18
IMPORTANT LP TANK SAFETY INFORMATION ____________________________________ 18
NOTE TO GAS TECHNICIAN ___________________________________________________ 20
LIQUID PROPANE GAS REQUIREMENTS (20 and 30 POUND CYLINDERS) _______________ 21
NATURAL GAS REQUIREMENTS ________________________________________________ 28
BULK SUPPLY LIQUID PROPANE GAS REQUIREMENTS ______________________________ 32
Gas Conversion Kits ___________________________________________________________ 34
Leak Test Procedure ___________________________________________________________ 34
Electrical Connections – For Appliances Equipped with a Lighting Package _______________ 35
Warning! Natural Hazard - Spiders _______________________________________________ 36
General Operating Procedures __________________________________________________ 37
WHILE YOU ARE COOKING ____________________________________________________ 37
Pre-Grill Checklist _____________________________________________________________ 38
BEFORE FIRST USE __________________________________________________________ 38
BEFORE EACH USE __________________________________________________________ 38
AT EACH NEW SEASON ______________________________________________________ 39

Page 8 of 66
Lighting Your Grill _____________________________________________________________ 39
STANDARD LIGHTING PROCEDURE _____________________________________________ 39
MANUAL LIGHTING PROCEDURE: ______________________________________________ 42
Grilling in Windy Conditions ____________________________________________________ 44
Basic Grilling _________________________________________________________________ 45
PRE-HEATING ______________________________________________________________ 45
TYPES OF COOKING _________________________________________________________ 45
Burner Adjustments ___________________________________________________________ 46
Caring for Your Grill ___________________________________________________________ 51
Troubleshooting ______________________________________________________________ 53
Contacting Crown Verity Customer Care __________________________________________ 55
Installation Checklist __________________________________________________________ 56
RESIDENTIAL LIMITED WARRANTY TERMS & CONDITIONS
_________________________________ 57
Appendix “A”
_______________________________________________________________ 60
Appendix “B” ________________________________________________________________ 63
Exploded Parts View __________________________________________________________ 64
Grill Parts List ________________________________________________________________ 65

Page 9 of 66
Safe Operation
This manual covers Crown Verity grill and side burner models listed below. Some features and
options will vary based upon which model that you purchased. Read this manual thoroughly to
ensure proper operations of the specific appliance model(s) purchased.
CROWN VERITY MODELS COVERED BY THIS MANUAL
BUILT-IN
MODULAR
NON-MODULAR
IBI30
IGM24
IE30
IBI36
IGM36
IE36
IBI42
IGM42
IE42
IBI48
ICM-SB
IE36I
IBI482RD
IBISC-SB
IBISB
WARNING:
Certain surfaces of your grill/side burner can get hot enough to cause severe burns.
Never leave the appliance unattended when in use to prevent unintentional contact.
WARNING:
Children should never be left alone or unattended in an area where a grill/side
burner is located. Place your grill/side burner well away from areas where children play. Do not
store items that may interest children in or around the appliance, in the cart, or in the masonry
enclosure.
IMPORTANT:
Improper use or installation of the appliance is dangerous. The grill/side
burners produce intense heat and therefore the risk of accidents or potential injuries is
increased. Carefully follow all instructions, including the following:
• To reduce the risk of fire, burns or other injury, read this manual thoroughly. Begin by
ensuring proper installation and servicing. Do not repair or replace any part of the grill/side
burner yourself unless it is specifically recommended in the manual. All other service must
be carried out by a licensed gas technician.
• Always have an ABC Fire Extinguisher accessible — never attempt to extinguish a grease fire
with water or other liquids.
•
Do not use the grill/side burner unless a leak check has been
performed on all gas
connections.
(See INDEX: “Leak
Test Procedure” for further details.)
• If you smell gas, there is likely a problem with the installation. If the connections are not
perfectly sealed, you can have a small leak resulting in the faint smell of gas, even if the
appliance appears to be working properly. Shut the gas supply off to the appliance and call a
licensed gas technician to locate and resolve the leak.
• Do not operate the grill/side burner under an unprotected combustible construction. Use
only in a well- ventilated area. The unit is for outdoor use only.

Page 10 of 66
• Do not obstruct any of the openings on the grill/side burner or otherwise obstruct the flow
of combustion and ventilation air. Do not build the grill/side burner into any combustible
structure that is closer than 12 inches (30.5 cm) from the sides and 18 inches (45.7 cm) from
the back and top.
• Keep all gas hoses away from the hot surfaces of the grill/side burner, including all external
surfaces of the unit.
• Keep all electrical cords away from the hot surfaces of the appliance.
• Ensure proper installation and servicing by following all instructions in this manual and any
other instructions or markings provided with this product. Have your unit installed by a
licensed gas technician.
•
The grill/side burner hood must be fully opened while lighting the appliance.
Releasing fuel into a closed grill/side burner before lighting will not make it light
sooner or more efficiently. It will only risk explosion and personal injury or death.
Never lean over a hot grill/side burner surface or look directly into the appliance
when attempting to light.
• Do not heat unopened food containers on the appliance. The buildup of pressure resulting
from the heat may cause the container to burst.
• Never lean on any part of the grill/side burner.
• The grill models are equipped with a pilot tube burner. When lighting the pilot, always pay
close attention to what you are doing. Make sure the pilot tube burner is lit before
attempting to light the main burners.
• When the burners are on, the grill/side burner will become very hot quickly. Use caution
when making contact with any part of the unit. The cooking surface will become extremely
hot and may cause severe burns. It is recommended that care be taken when touching any
part of the unit while operating.
• Never move the appliance when hot. When in use, portions of the grill/side burner are hot
enough to cause severe burns.
• Always use dry potholders or gloves on hot surfaces or cooking tools: moist or damp
potholders or gloves may cause steam burns. Never use a towel or bulky cloth in place of
potholders. Do not let potholders touch hot portions of the grill/side burner surfaces or
allow them to get near the open flame.
• Never grill without the grease tray in place. Always ensure the grease tray is pushed all the
way to the back of the grill. The grease tray is designed to hold water. Hot grease dripping
from food can produce a fire so always put water in the grease tray prior to use.
•
Grease is extremely flammable. Let hot grease cool down before attempting to
handle or dispose of it. The drip tray should be cleaned of grease on a regular
basis.
• The grill/side burner will retain heat after the burners have been turned off, especially the
cooking grates. Use caution when coming in contact with the unit immediately after use.

Page 11 of 66
• Be sure all control knobs are in the OFF position and the unit is cool before using any
aerosol cleaner on it or near it. The chemical used for aerosol propellant could ignite in the
presence of heat. Never use aerosol cleaner on the cooking surfaces.
•
For
Portable L.P. cylinders: Always shut off the main valve
on the L.P. cylinder after
each
use.
Before You Cook- Positioning Your Grill/Side Burner
CHOOSING A LOCATION
Important considerations for all grill/side burner placements include exposure to wind,
proximity to foot traffic or areas where people congregate.
• Freestanding Grills/Side Burners: position the appliance so that the prevailing winds blow
into the front panel, supporting the proper front to back airflow.
• Built-In Grills/Side Burners: located in areas with a prevailing wind, the appliance should be
protected by a wind barrier.
• Winds hitting the back of the grill/side burner, may cause issues, as proper ventilation may
be impeded.
• Be sure wind does not blow into the back of the grill hood.
• DO NOT place the grill/side burner where it is likely to be bumped into or inadvertently
touched by passersby.
• DO NOT place the grill/side burner on a surface that is unable to safely support the weight of
the unit as it may topple or tip over.
• DO NOT place the grill/side burner on any surface that would allow it to change position
easily or inadvertently.
• When in use, if applicable, always have the casters in the locked position.
• For natural gas and bulk propane models, NEVER place the grill/side burner where the gas
hose creates a safety hazard. Tripping over an exposed gas hose may create a gas leak,
cause the appliance to tip or topple over or create other serious safety hazards.
• NEVER locate the grill/side burner in a building, breezeway, shed or other such enclosed
areas.
• The built-in versions are identical to the freestanding versions, with the exception of the
IMPORTANT: NEVER place the grill underneath an overhead combustible surface.
The grill must be placed on top of a non-combustible surface.

Page 12 of 66
base. They are available with LP gas cylinders connections up to 100 lbs. They can also be
specified for natural gas or bulk propane supply.
• DO NOT place the built-in grill/side burner on a combustible surface.
• The grill/side burner is not intended to be installed in or on a boat or recreational vehicle.
• For ease of use and safe operation, it is recommended the surface on which the grill/side
burner sits be at least 36 inches (91.4 cm) high (counter-height) and not more than 42
inches (106.7 cm) high (bar-height).
LEVEL GROUND
It is critical that this appliance is level upon installation. A grill/side burner that is not level will
cause erratic burner combustion and inefficient, uneven heating. A carpenter’s spirit level
should be used to level the grill both front to back and side to side. If the floor is uneven or has
a slope, re-leveling may be required each time you move a freestanding unit.
Specifications and Installations
INSTALLATIONS
The installation of this appliance must be in accordance with:
All applicable local codes, or in the absence of local codes; Canada: must conform to current
National Standard CAN/CGA B149.1&.2 - natural gas/ propane installation code. U.S.A.: must
conform to national Fuel Gas Code, ANSI Z223.1/NFPA 54 edition.
• Use only hoses, regulators and quick disconnects supplied by Crown Verity.
• Maintain minimal clearances to combustible materials (See “Figure 1”).
ü 12 inches (30.5 cm) from side(s)
ü 18 Inches (45.7 cm) from back
ü 72 inches (182.9 cm) from Non-combustible overhangs
• Always keep the area surrounding your grill clear of all combustible materials, gasoline, or
other flammable liquids.
• Use your grill OUTDOORS ONLY and in a well-ventilated space, preferably 10 ft. (3 m) from
dwellings or outbuildings.
• Casters, if applicable, must be locked when the appliance is in operation.
• Keep all gas supply lines as short as possible because gas lines lose pressure over distance
and with each elbow and tee that is added. This drop in pressure affects grill performance.
(See Appendix “B” for further details.)

Page 13 of 66
BUILT-IN INSTALLATIONS
The Crown Verity Built-In Grills and Side Burners are designed for easy installation into masonry
enclosures.
NOTE: Crown Verity built-in grill/side burners are intended either for installation in a built-in
enclosure constructed of non-combustible materials or for an installation in a built-in enclosure
constructed of combustible material when installed with an insulated jacket.
The built-in enclosures should have ventilation holes to prevent gas build-up in the event of a
leak. The deck ledges and counter should be flat and level. (refer to ANSI Z21.58 Standard for
Outdoor Cooking Gas Appliances, Section 1.7 Enclosures For Self Contained LP-Gas Supply
Systems).
For non-combustible applications, the grills and side burners drop into the opening specified in
the cutout detail drawings (See “Figure 3”) and hangs from its countertop trim.
Pay special attention to the provisions shown for gas line hook-up (See “Appendix “B” for
further details).
The Built-In and Modular grills and side burners, when equipped with one of the optional light
packages, requires that the appliance be connected to a 120-volt, 60 hertz, 15-amp GFI certified
outlet by a qualified electrician.
CLEARANCE TO COMBUSTIBLES
Minimum clearance from the sides and back of the grill/side burner to adjacent construction
below and above the countertop surface is 12” from the sides and 18” from the back of the
hood.
A minimum of 12 inches (30.5 cm) clearance is required on the left and right side of the grill
above the countertop for the rotisserie motor and spit rod.
If the grill/side burner is to be placed into a combustible enclosure, an approved insulated
jacket is necessary and is available only through your Crown Verity dealer. Crown Verity
insulated jackets have been designed and tested specifically for your grill.
REAR HOOD CLEARANCE
A 3.5 inch (8.9 cm) clearance is required behind the rear flange of the grill to allow the hood to
open unobstructed. The grill exhausts combustion products and cooking greases to the back.
Do not locate the grill where this exhaust will be difficult to clean.

Page 14 of 66
OVERHEAD PROTECTION AND EXHAUST REMOVAL
If installed under any combustible construction the cooking area over the grill/side burner
MUST be covered with an exhaust hood. The hood must provide 6 inches (15.2 cm) of overhang
on all exposed sides. The exhaust hood shall provide no less than 1,200 CFM for proper exhaust
ventilation. The hood must be approved for outdoor installation and provided with a dedicated
GFCI protected branch circuit (See “Figure 2” for further details).
FIGURE 1. CLEARANCES TO COMBUSTIBLES
IBI36 with IBI36FDLT Light Package Shown
All appliance covered by this manual are subject to the clearances shown in Figure 1.

Page 15 of 66
FIGURE 2. EXHAUST HOOD REQUIREMENTS
IBI36 with IBI36FDLT Light Package Shown
All appliance covered by this manual are subject to the clearances shown in Figure 2.

Page 16 of 66
Built-In Cut-out Dimensions
This measurements and dimensions detailed below are designed to assist with planning your
outdoor kitchen. Due to continuing product innovation, specifications are subject to change
without notice. Please reference the Manual for details on gas plumbing requirements,
electrical specifications and the proper installation of your Crown Verity outdoor kitchen
equipment.
BUILT-IN SIDE BURNERS
H6
W6
D6
IBISB
13.000
15.750
23.000
(cm)
33.0
40.0
58.4
H8
W8
D8
IBISC-SB
33.000
19.125
24.750
(cm)
83.8
48.6
62.9
BUILT-IN STORAGE DRAWERS
H2
W2
D2
IBI30-DD
12.125
32.625
22.750
(cm)
30.8
82.9
57.8
IBI36-DD
12.125
38.625
22.750
(cm)
30.8
98.1
57.8
IBI42-DD
12.125
44.625
22.750
(cm)
30.8
113.3
57.8
IBI48-DD
12.125
53.125
22.750
(cm)
30.8
134.9
57.8
BUILT-IN STORAGE CABINETS
H4
W4
D4
IBILC
26.360
18.938
23.000
(cm)
67.0
48.1
58.4
IBISC
18.860
18.938
23.000
(cm)
47.9
48.1
58.4
BUILT-IN ICE CHEST
H5
W5
D5
CV-IC1
11.125
23.625
23.500
(cm)
28.3
60.0
59.7
BUILT-IN REFRIDGERATION
H7
W7
D7
CV-RF-1
33.750
24.000
22.000
(cm)
85.7
60.1
55.9
BUILT-IN GRILLS
H1
W1
D1
IBI30
13.000
33.000
23.000
(cm)
33.0
83.8
58.4
IBI36
13.000
39.000
23.000
(cm)
33.0
99.0
58.4
IBI42
13.000
45.000
23.000
(cm)
33.0
114.3
58.4
IBI48
13.000
53.375
23.000
(cm)
33.0
135.6
58.4
IBI482RD
13.000
53.375
23.000
(cm)
33.0
135.6
58.4
BUILT-IN SINK
H8
W8
D8
IBISC-SK
33.000
19.125
24.750
(cm)
83.8
48.6
62.9
BUILT-IN ACCESS DOORS
H3
W3
D3
IBI-VD
19.125
18.938
3.813
(cm)
48.6
48.1
9.68
H2
W2
D2
IBI30-HD
12.125
32.625
3.813
(cm)
30.8
82.9
9.68
IBI36-HD
12.125
38.625
3.813
(cm)
30.8
98.1
9.68
IBI42-HD
12.125
44.625
3.813
(cm)
30.8
113.3
9.68
IBI48-HD
12.125
53.125
3.813
(cm)
30.8
134.9
9.68

Page 17 of 66
FIGURE 3. REFERENCE DRAWING FOR CUT-OUT DIMENSIONS

Page 18 of 66
Gas Connections
WARNING: NEVER CONNECT A GAS LINE DIRECTLY TO THE GRILL/SIDE BURNER. A
PRESSURE RGULATOR MUST BE INSTALLED ON ALL GAS EQUIPMENT. ALL LOCAL CODES
REQUIRE IT AND CROWN VERITY SUPPLIES THE CORRECT REGULATOR WITH YOUR GRILL.
REMOVING OR FAILING TO INSTALL THE PRESSURE REGULATOR CAN RESULT IN FIRE AND
SERIOUS PERSONAL INJURY AND WILL VOID THE WARRANTY
.
IMPORTANT LP TANK SAFETY INFORMATION
Although safe to use when properly handled, careless handling of a propane gas
cylinder could result in fire, explosion and/or serious injury.
To avoid risk of fire, explosion or injury, take the following safety precautions:
WARNING:
For safety reasons, the LP gas cylinder, if supplied with your grill or side burner,
has been shipped empty. The cylinder must be purged of air and filled prior to use.
•
The LP-gas supply cylinder to be used must be constructed and marked in
accordance with the specifications for LP-gas cylinders, U.S. Department of
Transportation (DOT) or the National Standard of Canada for Cylinders, Spheres
and Tubes for the Transportation of Dangerous Goods, CAN/CSA-B339.
ü
The LP gas cylinder used for this appliance must not have a capacity
exceeding 20 lb. (9 kg). Approximately 18” (46cm) high and 12”
(31cm) diameter
ü
All LP gas cylinders used with this appliance must be provided with a
shutoff valve terminating in a cylinder valve outlet No. 510, specified
in the Standard for Compressed Gas Cylinder Valve Outlet and Inlet
Connection (USA) ANSI/CGA-V-1-1977 (Canada) CSA B96.
ü
The cylinder supply system must be arranged for vapor withdrawal.
ü
The cylinder must include a collar to protect the cylinder valve.
ü
The cylinder must be installed as per assembly instructions.
ü
Never fill the cylinder beyond 80% full. A fire causing death or
serious injury may occur.
ü
The cylinder valve must include a safety relief device having direct
communication with the vapor space of the cylinder.
•
Never use dented, rusted, or damaged propane cylinders.
•
Allow only a qualified LP gas dealer to fill or repair cylinders.

Page 19 of 66
•
A liquid propane cylinder should never be “overfilled” beyond the cylinder filling
capacity. “Overfilling may create a dangerous condition. “Overfilled” tanks can
build up excess pressure. The standard safety device on tanks is the safety relief
valve. This valve vents propane gas vapors to relieve excess pressure. These vapors
are combustible and can be ignited.
•
Make sure the gas dealer checks the cylinder for leaks after filling.
•
Do not store spare LP gas cylinders under the grill.
•
For built-in cooking gas appliances with a connection to a self-contained 20 or 30
lbs. LP tank, the design lay-out can only accommodate storage for the LP tank
currently in use. The design cannot accommodate the storage of a spare tank
vertically or horizontally within any enclosure, or under the firebox of the
appliance.
•
Always use the protective cap provided with your cylinder whenever it is
not connected to your grill.
•
Never connect the grill to anything other than the fuel source indicated on
the rating plate. Conversions are available for switching fuel sources.
Contact Crown Verity or an authorized dealer for details. Conversion
installation must be done by a licensed gas technician.
•
The LP-gas cylinder must include a collar to protect the cylinder valve from
damage.
•
Ensure proper ventilation of the cylinder. The cylinder supply system must
be arranged for vapor withdrawal.
•
When the grill/side burner is not in use, the gas must be turned off at the
supply cylinder.
•
Handling, storage and transportation of propane cylinders must be in
accordance with Storage and handling of Liquid Petroleum Gases,
ANSI/NFPA 58 or Natural Gas and Propane Installation Code, CSA B149.1
•
The grill/side burner may be stored indoors, but only if the cylinder is
disconnected and removed from the oven. An LP cylinder MUST NEVER BE
STORED INDOORS.
•
Cylinders must be stored outdoors and must not be stored in a building,
garage, or any other enclosed area. Store in a well-ventilated area.
•
Do not store in the vicinity of any gas burning apparatus or in any high heat area
such as a closed car or trunk.
•
Do not smoke while transporting a LP cylinder in your vehicle.
•
Always close the main valve on the tank before disconnecting or transporting the
tank.
•
Transport and store cylinders in an upright position. Do not tip it on its side
•
The pressure regulator and hose assembly supplied with the grill must be used.

Page 20 of 66
Replacement pressure regulators and hose assemblies must be the type specified
by Crown Verity and installed by a licensed gas technician. For replacement parts,
contact Crown Verity Customer Service at 1-888-505-7240.
NOTE TO GAS TECHNICIAN
WARNING: DO NOT perform any pressure tests on this appliance or the regulator supplied in
excess of 1/2 PSIG.
For fixed fuel supply systems. RE: Pressure tests
1.
The appliance and its individual shut-off valve must be disconnected from the gas supply
piping system during any pressure testing of that system at test pressures in excess of 1/2
psi. (3.45 kPa).
2.
The appliance must be isolated from the gas supply piping system by closing its individual
manual shut-off valve during any pressure testing of the gas supply piping system at test
pressures equal to or less than 1/2 psi. (3.45kPa).
WARNING: DO NOT install any gas handling components/materials affected by elevated
temperatures within 18 inches (45.7 cm) of any side of this appliance.
Make sure that the supply line is of adequate capacity to accommodate the higher inputs of the
grill before you begin. They are significantly higher inputs than average appliances of this type.
The use of a typical corrugated metallic appliance connector is recommended for connecting
the appliance, with a minimum inside diameter of 3/4”.
BTU Grills: Table 1
BTU’s
LP Pilot
Orifice - 70
BTU’s
LP Burner
Orifice - 58
BTU’s
NG Pilot
Orifice - 57
BTU’s
NG Burner
Orifice - 51
Total BTU’s
NG/LP
IBI30
5,500
14,750
5,500
14,750
64,500
IBI36
5,500
14,750
5,500
14,750
79,250
IBI42
5,500
14,750
5,500
14,750
94,000
IBI48
5,500
14,750
5,500
14,750
108,750
IBI482RD
5,500
14,750
5,500
14,750
94,000
IGM24
5,500
14,750
5,500
14,750
49,750
IGM36
5,500
14,750
5,500
14,750
79.250
IGM42
5,500
14,750
5,500
14,750
94,000
IE30
5,500
14,750
5,500
14,750
64,500
IE36
5,500
14,750
5,500
14,750
79,250
IE42
5,500
14,750
5,500
14,750
94,000
IE36I (GRILL)
5,500
14,750
5,500
14,750
79,250
This manual suits for next models
21
Table of contents
Other CROWN VERITY Grill manuals

CROWN VERITY
CROWN VERITY PS-001 User manual
CROWN VERITY
CROWN VERITY BI-30 User manual

CROWN VERITY
CROWN VERITY IBISB User manual
CROWN VERITY
CROWN VERITY MCB User manual

CROWN VERITY
CROWN VERITY MCB30 User manual

CROWN VERITY
CROWN VERITY BI-36 User manual

CROWN VERITY
CROWN VERITY MCB30 User manual

CROWN VERITY
CROWN VERITY Infinite IBI30 User manual

CROWN VERITY
CROWN VERITY BI-30 User manual


