manuals.online logo
Brands
  1. Home
  2. •
  3. Brands
  4. •
  5. Dyna-Glo
  6. •
  7. Grill
  8. •
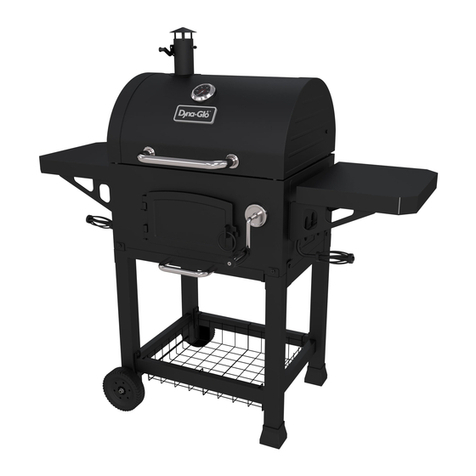
  9. Dyna-Glo DGN405SNC User manual

Dyna-Glo DGN405SNC User manual

Serial Number Purchase Date
ATTACH YOUR RECEIPT HERE
70-10-032
Español p. 37
Français p. 19
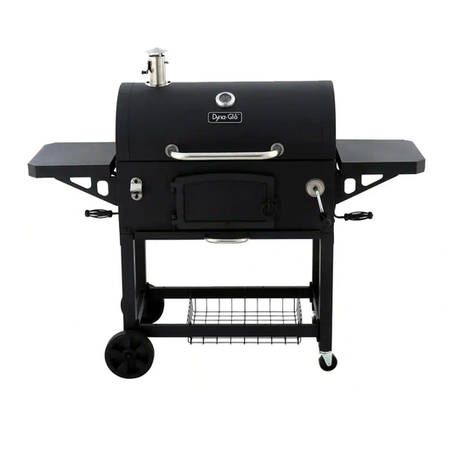
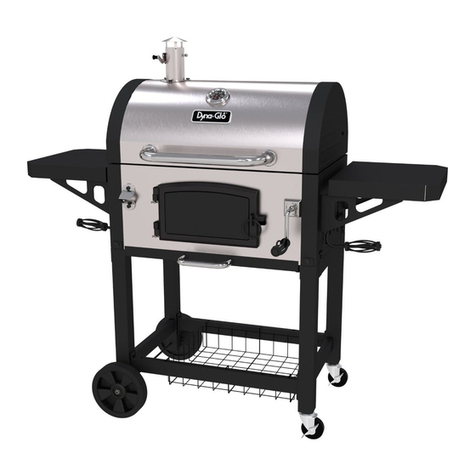
HEAVY-DUTY
CHARCOAL GRILL
MODEL #DGN405SNC/
#DGN405SNC-D
Questions, problems, missing parts? Before returning to your retailer, call our customer
service department at 1-877-447-4768, 8:00 a.m. – 4:30 p.m. CST, Monday – Friday, or
email [email protected]
1
Rev. 7/11/19
2
TABLE OF CONTENTS
Package Contents ............................................................................................................... 3
Hardware Contents.............................................................................................................. 4
Preparation.......................................................................................................................... 4
Safety Information ............................................................................................................... 5
Assembly Instructions.......................................................................................................... 6
Operating Instructions ....................................................................................................... 14
Care and Maintenance ...................................................................................................... 16
Warranty ............................................................................................................................ 16
Replacement Parts List ..................................................................................................... 17
Please read and understand this entire manual before attempting to assemble, operate or install the
product. If you have any questions regarding the product, please call customer service at:
1-877-447-4768, 8:00 a.m. – 4:30 p.m. CST, Monday – Friday.
CAUTION
• THIS UNIT IS HEAVY. TWO PEOPLE REQUIRED FOR SAFE ASSEMBLY. Some parts may
contain sharp edges. Wear protective gloves if necessary. Read and follow all safety statements,
warnings, assembly instructions, and use and care instructions before attempting to assemble and
use.
WARNING
• Keep a re extinguisher near this product at all times.
• This grill is for outdoor use only in well-ventilated areas.
• The use of alcohol, prescription or non-prescription drugs may impair the user’s ability to properly
assemble and safely operate this appliance.
SAFETY INFORMATION
3
• Use caution when lifting and moving the unit to avoid back strain or back injury. Do not move the
unit while it is in use.
• DO NOT operate the unit near or under ammable or combustible materials such as decks, porches
or carports. A minimum clearance of 36 in. (91.4 cm) is recommended. DO NOT operate the unit
under overhead construction.
• A minimum clearance to combustible construction is 36 in. (91.4 cm) from sides and back.
• DO NOT use this appliance as a heater.
• Operate the unit on a stable, level, non-ammable surface such as asphalt, concrete or solid
ground. DO NOT operate the unit on ammable material such as carpet or wood deck.
• Use caution when assembling and operating this unit to avoid cuts and scrapes from edges.
• DO NOT use this product in a manner other than its intended purpose. It is NOT intended for
commercial use. It is not intended to be installed or used in or on a recreational vehicle and/or boats.
• DO NOT store this unit near gasoline or other combustible liquids or where other combustible
vapors may be present.
• DO NOT store or operate this product in an area accessible to children or pets. Store this unit in a
dry protected location.
• DO NOT leave the unit unattended while in use.
• DO NOT leave hot ashes unattended until the grill cools completely.
• DO NOT move the unit while in use or while ashes are still hot. Allow the unit to cool completely
before moving or storing.
• NEVER use gasoline or other highly volatile uids as a starter.
• Always cook your food on the grate after the ame is burned out.
• Dispose of cold ashes by wrapping them in heavy-duty aluminum foil and placing in a
noncombustible container. Make sure that there are no other combustible materials in or near the
container.
• If you must dispose of ashes in less time than it takes for the ashes to completely cool down, then
remove the ashes from the unit, using heat-resistant gloves along with long metal tongs or replace
shovel. Place the coals in aluminum foil and soak them completely with water before disposing of
them in a noncombustible container.
• Allow the unit to cool completely before conducting any routine cleaning or maintenance.
SAFETY INFORMATION
WARNING
This product and the fuels used to operate this product (charcoal or wood), and the
products of combustion of such fuels, can expose you to chemicals including carbon black,
which is known to the State of California to cause cancer, and carbon monoxide, which is
known to the State of California to cause birth defects or other reproductive harm.
For more information go to www.p65Warnings.ca.gov
CALIFORNIA PROPOSITION 65
44
PART DESCRIPTION QUANTITY
A Side Shelf 2
BLid and Firebox Assembly 1
CLid Handle Assembly 1
DSmoke Stack Assembly 1
ECharcoal Access Door 1
F Crank Handle 1
G Damper Handle – Right 1
H Damper 2
ISide Shelf Support – Right
Rear/Left Front
2
JAsh Tray 1
KAsh Tray Handle 1
L Cart Brace 2
PART DESCRIPTION QUANTITY
MRight Leg Assembly 1
N Caster 2
O Storage Basket 1
PAxle 1
Q Wheel 2
RLeft Leg Assembly 1
SCharcoal Tray 1
T Grate 2
U Warming Rack 1
V Damper Handle – Left 1
W
X
Y
Side Shelf Support – Left
Rear/Right Front
Temperature Gauge
Temperature Gauge Nut Bezel
2
1
1
PACKAGE CONTENTS
A
D
C
E
F
G
B
JI
H
K
L
R
S
Q
O
P
N
M
T
U
V
W
X
Y
5
PREPARATION
HARDWARE CONTENTS (shown actual size)
Before beginning assembly of product, make sure all parts are present. Compare parts with package
contents list and hardware contents list. If any part is missing or damaged, do not attempt to
assemble the product.
Estimated Assembly Time: 50 minutes with two people
Tools Required for Assembly (not included): Phillips screwdriver, Adjustable wrench
DD EE
AA
FF
BB CC
HH
II
GG
M6x12 Bolt
Qty. 27
M6x20 Bolt
Qty. 14
M5 Shoulder Bolt
Qty. 8 M8 Washer
Qty. 2
M8 Nut
Qty. 2
Cotter Pin
Qty. 7
M6x30 Bolt
Qty. 2
M5 Lock Nut
Qty. 8
Hinge Bolt
Qty. 2
JJ
Wrench
Qty. 1
6
ASSEMBLY INSTRUCTIONS
3. Attach two cart braces (L) to left leg assembly (R)
using two M6x12 bolts (AA) on each side.
2. Attach two casters (N) to right leg assembly (M)
and secure with wrench (JJ).
Hardware Used
Hardware Used
M8 Washer
M8 Nut
x 2
x 2
DD
EE
1. Insert axle (P) into left leg assembly (R). Attach
one wheel (Q) to each side of axle (P) using one
M8 washer (DD), and one M8 nut (EE).
M6x12 Bolt
Qty. 27
M6x20 Bolt
Qty. 14
M5 Shoulder
Bolt
Qty. 8
M8 Washer
Qty. 2
M8 Nut
Qty. 2
Wheel Axle
Sleeve
Qty. 2
Hinge Bolt
Qty. 2
M6 Lock Nut
Qty. 3
M5 Lock Nut
Qty. 8
M6x30 Bolt
Qty. 2
AA BB CC DD EE
GG HH II
JJ
LL
Wrench
Qty. 1
Cotter Pin
Qty. 7
FF
KK
Hardware Used
M6x12 Bolt x 4
AA
1
2
3
P
EE
DD
JJ
Q
R
M
N
L
AA
R
Wrench x 1
JJ
7
ASSEMBLY INSTRUCTIONS
6. With the help of a second person, set lid and
rebox assembly (B) on top of left leg
assembly (R) and right leg assembly (M).
5. Attach storage basket (O) to cart braces (L).
NOTE: Make sure four hooks on storage
basket (O) are fully inserted into holes on cart
braces (L).
4. Attach two cart braces (L) to right leg assembly (M)
using two M6x12 bolts (AA) on each side.
Hardware Used
M6x12 Bolt x 4
AA
6
5
4M
R
M
O
AA
L
L
B
8
ASSEMBLY INSTRUCTIONS
7. Secure lid and rebox assembly (B) on top of
left leg assembly (R) and right leg assembly (M)
using six M6x20bolts (BB).
8. Attach damper (H) to inside of lid and rebox
assembly (B) using four M5 shoulder bolts (CC)
and four M5 lock nuts (II). Repeat for remaining
damper (H).
NOTE: For clarity, illustration is shown with front
of lid and rebox assembly (B) removed.
Hardware Used
Hardware Used
M6x20 Bolt
M5 Shoulder Bolt
M5 Lock Nut
x 6
x 8
x 8
BB
CC
II
9. Insert damper handle – right (G) into the two holes
on right side damper (H). Secure with two cotter
pins (FF). Repeat for damper handle – left (V).
Hardware Used
Cotter Pin x 4
FF
7
9
8
G
FF
H
G
B
M
R
BB
II
CC
H
B
9
ASSEMBLY INSTRUCTIONS
11. Attach charcoal access door (E) to lid and
rebox assembly (B). Insert two hinge bolts
(HH) into hinges on charcoal access door (E)
and secure with two cotter pins (FF).
Hardware Used
Cotter Pin
Hinge Bolt
x 2
x 2
FF
HH
10.With shelf upside down, attach side shelf
support – left rear/right front (W) and side shelf
support – left front/right rear (I) to side shelf
(A) using four M6x12 bolts (AA) on each side.
Repeat for remaining shelf (A).
Hardware Used
M6x12 Bolt x 8
AA
12. Attach right side shelf (A) to lid and rebox
assembly (B) using four M6x20 bolts (BB).
Repeat on left side with remaining side shelf (A).
NOTE: First secure two upper M6x20 bolts (BB),
then lower M6x20 bolts (BB).
Hardware Used
M6x20 Bolt x 8
BB
10
11
HH
FF
B
E
A
W
AA
I
12
BB
AB
10
ASSEMBLY INSTRUCTIONS
14. Insert ash tray (J) into lid and rebox
assembly (B).
15. Attach smoke stack assembly (D) to lid and
rebox assembly (B) using three M6x12 bolts
(AA).
NOTE: Make sure the smoke stack damper
adjustment handle faces the front of the grill.
Hardware Used
M6x12 Bolt x 3
AA
13. Attach ash tray handle (K) to ash tray (J) using
two M6x12 bolts (AA).
Hardware Used
M6x12 Bolt x 2
AA
13
14
J
15
B
AA
J
B
K
D
AA
Hardware Used
11
ASSEMBLY INSTRUCTIONS
16. Attach temperature gauge (X) and temperature
gauge nut bezel (Y) to lid and rebox assembly
(B) using pre-assembled nut.
18. Thread crank handle (F) into lid and rebox
assembly (B). Secure with one cotter pin (FF).
Hardware Used
Cotter Pin x 1
FF
17. Attach lid handle assembly (C) to lid and rebox
assembly (B) using two M6x12 bolts (AA).
M6x12 Bolt x 2
AA
16
B
X
18
17
B
AA
C
B
FF
F
Y
12
ASSEMBLY INSTRUCTIONS
19.Attach charcoal tray (S) to inside of lid and
rebox assembly (B) using four M6x12 bolts (AA).
20. Place two grates (T) on lid and rebox
assembly (B).
21. Attach one M6x30 bolt (GG) on each side of lid
and rebox assembly (B). DO NOT fully tighten.
Hardware Used
M6x12 Bolt x 4
AA
19
S
AA
B
B
T
20
B
GG
21
Hardware Used
M6x30 Bolt x 2
GG
13
ASSEMBLY INSTRUCTIONS
23. Fully tighten M6x30 bolts (GG) on each side of lid
and rebox assembly (B).
22. Insert one end of warming rack (U) onto M6x30
bolt (GG) and into the hole on lid and rebox
assembly (B). Repeat for other side.
22 B
23
U
B
GG
GG
17
REPLACEMENT PARTS LIST
For replacement parts, call our customer service department at 1-877-447-4768, 8:00 a.m. –4:30 p.m.
CST, Monday – Friday.
PART DESCRIPTION PART #
Hardware pack
Owner’s/instruction manual
Smoke stack - stainless steel
Lid assembly-WITHOUT handle, temperature gauge/bezel, smoke stack, badge
DynaGlo badge
Temperature gauge – with nut
Lid bumper
Lid pin with cotter pin
Lid handle with hardware
Warming rack with supports
Cooking grate – 1 piece
Charcoal tray
Charcoal tray adjustment arm assembly
Firebox bottom assembly ONLY, WITHOUT – side damper, charcoal pan/tray, arm
assembly to charcoal pan/tray, crank arm assembly, front access door, and bottle opener
Threaded mount for charcoal tray adjustment crank
Charcoal tray adjustment crank handle bezel-with screws
Charcoal tray adjustment crank only
Charcoal tray adjustment crank handle or side damper adjustment crank handle (same)
Side shelf
Side damper adjustment plate - left or right
Side shelf support-left front or right rear (same)
Side shelf support-left rear or right front (same)
Caster (includes wrench)
Storage basket
Charcoal access door
Bottom brace - front or rear (same)
Charcoal access door hinge pin with cotter pin
Side damper adjustment bar – left (without wire grip)
Side damper adjustment bar-right (without wire grip)
Ash pan without handle
Ash pan handle with hardware
Left leg assembly
Right leg assembly
Upper lid hinge
Lower lid hinge
Axle rod for wheels
Wheel
Charcoal access door insert with hardware
Charcoal access door latch
Charcoal access door hinge for rebox with hardware
Temperature gauge nut bezel
406-03026-00
70-10-032
404-01002-05
406-03003-04
213-02002
213-02005
403-01002-07
404-03002-03
413-03002-02
413-11002-00
403-07005-01
405-01006-00
405-01003-02
416-13003-01
404-02003-10
403-03003-05
403-02003-02
403-02003-05
414-03004-01
403-02003-08
403-01004-01
403-01004-02
403-01014-02
403-01015-00
406-03014-03
404-03014-04
401-01013-03
404-02003-06
404-02003-07
404-03005-01
403-01005-02
403-03001-01
404-03001-05
404-03002-04
404-03002-02
403-01018-00
405-01019-00
405-03017-01
403-03017-00
404-03016-00
213-02006
n/a
n/a
1
2
3
4
5
6
7
8
9
10
11
12
13
14
15
16
17
18
19
20
21
22
23
24
25
26
27
28
29
30
31
32
33
34
35
36
37
38
39
18
REPLACEMENT PARTS LIST
Printed in China
1
3
6
47
16
9
2
32
22
21
14
12
5
17
15
10
30
34
23
20
18
11
13
19
8
25
28
31
26
27
24
35
29
33
39
38
36 37

This manual suits for next models

1

Other Dyna-Glo Grill manuals

Dyna-Glo DGA480SSN User manual

Dyna-Glo

Dyna-Glo DGA480SSN User manual

Dyna-Glo SEARPLUS DGF481CRN User manual

Dyna-Glo

Dyna-Glo SEARPLUS DGF481CRN User manual

Dyna-Glo DGC313CNCP User manual

Dyna-Glo

Dyna-Glo DGC313CNCP User manual

Dyna-Glo DGE486SSP User manual

Dyna-Glo

Dyna-Glo DGE486SSP User manual

Dyna-Glo DGH353CRP User manual

Dyna-Glo

Dyna-Glo DGH353CRP User manual

Dyna-Glo SIGNATURE Series User manual

Dyna-Glo

Dyna-Glo SIGNATURE Series User manual

Dyna-Glo DGC310CNP-D User manual

Dyna-Glo

Dyna-Glo DGC310CNP-D User manual

Dyna-Glo DGH474CRP User manual

Dyna-Glo

Dyna-Glo DGH474CRP User manual

Dyna-Glo DGN576DNC User manual

Dyna-Glo

Dyna-Glo DGN576DNC User manual

Dyna-Glo DGN405DNC-D User manual

Dyna-Glo

Dyna-Glo DGN405DNC-D User manual

Dyna-Glo DGJ810CSB-D-1 User manual

Dyna-Glo

Dyna-Glo DGJ810CSB-D-1 User manual

Dyna-Glo DGN576SNC-D User manual

Dyna-Glo

Dyna-Glo DGN576SNC-D User manual

Dyna-Glo DGP321SNP User manual

Dyna-Glo

Dyna-Glo DGP321SNP User manual

Dyna-Glo DGP552SSN User manual

Dyna-Glo

Dyna-Glo DGP552SSN User manual

Dyna-Glo DGH563CRN User manual

Dyna-Glo

Dyna-Glo DGH563CRN User manual

Dyna-Glo DGE530GSP User manual

Dyna-Glo

Dyna-Glo DGE530GSP User manual

Dyna-Glo DGP552SSP User manual

Dyna-Glo

Dyna-Glo DGP552SSP User manual

Dyna-Glo DGH485CRP User manual

Dyna-Glo

Dyna-Glo DGH485CRP User manual

Dyna-Glo DGP397SNN User manual

Dyna-Glo

Dyna-Glo DGP397SNN User manual

Dyna-Glo DGA550SSP User manual

Dyna-Glo

Dyna-Glo DGA550SSP User manual

Dyna-Glo DGP480CSP Manual

Dyna-Glo

Dyna-Glo DGP480CSP Manual

Dyna-Glo DGA550SSN User manual

Dyna-Glo

Dyna-Glo DGA550SSN User manual

Dyna-Glo DGN405SNC-D User manual

Dyna-Glo

Dyna-Glo DGN405SNC-D User manual

Dyna-Glo DGH485CRN User manual

Dyna-Glo

Dyna-Glo DGH485CRN User manual

Popular Grill manuals by other brands

Titan R50CC1614 Assembly instructions

Titan

Titan R50CC1614 Assembly instructions

Weber Summit E 470 Assembly instructions

Weber

Weber Summit E 470 Assembly instructions

Weber Q Series owner's guide

Weber

Weber Q Series owner's guide

George Foreman GR0036W Champ use and care manual

George Foreman

George Foreman GR0036W Champ use and care manual

Kenmore 141.16221 owner's manual

Kenmore

Kenmore 141.16221 owner's manual

Sunbeam NBC1712E owner's manual

Sunbeam

Sunbeam NBC1712E owner's manual

croydon SASQ-10412-700 instruction manual

croydon

croydon SASQ-10412-700 instruction manual

Char-Broil 46322354632236 / 0-P47F2A (01-15-02) 4632236 use and care manual

Char-Broil

Char-Broil 46322354632236 / 0-P47F2A (01-15-02) 4632236 use and care manual

Uniflame CBT711W owner's manual

Uniflame

Uniflame CBT711W owner's manual

Weber 40871 owner's manual

Weber

Weber 40871 owner's manual

FKI GL 9640 User and service manual

FKI

FKI GL 9640 User and service manual

Jumbuck HS-UM006D Assembly & operation instructions

Jumbuck

Jumbuck HS-UM006D Assembly & operation instructions

SEVERIN RG 2682 - RACLETTE GRIL Instructions for use

SEVERIN

SEVERIN RG 2682 - RACLETTE GRIL Instructions for use

Hamilton Beach 25328C user guide

Hamilton Beach

Hamilton Beach 25328C user guide

BHG 720-0882 manual

BHG

BHG 720-0882 manual

tepro Keansburg 4 instruction manual

tepro

tepro Keansburg 4 instruction manual

Qlima FPG 102 user manual

Qlima

Qlima FPG 102 user manual

Weber Spirit II E310 manual

Weber

Weber Spirit II E310 manual

manuals.online logo
manuals.online logoBrands
  • About & Mission
  • Contact us
  • Privacy Policy
  • Terms and Conditions

Copyright 2025 Manuals.Online. All Rights Reserved.