GrandCafe CGE06ALP User manual

OPERATOR'SMANUAL
Liquid Propane Gas (LPG)Grill
ModelCGE06ALP
NOTETOASSEMBLER/INSTALLER:
Leavethismanualwiththeconsumer.
NOTETOCONSUMER:
Keepthismanualforfuturereference.
RECORDYOURSERIAL# __________________
(seesilverCSAlabelonmainbodyofgrill)
Manual#P80170001A-Date:2006/01/17
Grill Information Center:
Callusfirst ifyou haveanyproblemwiththis
product.Wecanhelpyouwithquestionsabout
assemblyandgrilloperationorifthereare
damagedormissingpartswhenyouunpackthis
unit fromtheshipping box.Pleasecallbefore
returningtothestore.
1-800-761-5456
8am-4:30pmCST,Mondaythrough Friday
Ÿ
Ÿ
IMPORTANT:
Ÿ
FORYOURSAFETY
Donot storeoruse gasolineorother
flammable vaporsorliquidsinthe
vicinityof this oranyappliance.
!!
Beforeusingthis gas appliance read
allinstructionsandperformallgas
leak-check proceduresevenifthe
product waspre-assembledbythe
retailerormanufacturer.
Improperinstallation,adjustment,
alteration,service ormaintenance can
causepropertydamage,injuryordeath.
Readtheinstallation,operating and
maintenanceinstructionsthoroughly
beforeinstallingorservicingthisequip-
ment.
WARNING

2
Tableof Contents
PrimarySafetyWarnings...........................1-3
WarrantyTermsandConditions..................2
Pre-AssemblyInstructions..............................3
PartDiagramsandLists..........................4-7
AssemblyInstructions...............................8-11
Use&CareInstructions:
•GasSafetyand LeakTests..........12-14
•Lighting Instructions................................15
•Troubleshooting.........................................16
•Cleaning andMaintenance...............17-18
•FrequentlyAsked Questions...........A1-A2
•
•
WARNING
!!
Ÿ
Ÿ
Ÿ
•
•
Use yourgrill atleast3feetaway from
anywall orsurface. Useyourgrill atleast
3feetaway fromcombustibleobjectsthat
can meltorcatchfire(suchasvinylorwood
siding,fencesand overhangs)orsources
ofignition including pilotlightson waterheaters
and liveelectricalappliances.
THISGASAPPLIANCEISDESIGNEDFOR
OUTDOORUSEONLY.
Combustion byproductsproduced when using
thisproductcontainchemicalsknownto
theStateofCalifornia tocausecancer,birth
defects,orotherreproductiveharm.
LPGgrill modelsmustbe used withLiquid
PropaneGas andtheregulatorassembly
supplied.NaturalGasmodelsmustbeused
withNaturalGasonly.Anyattempttoconvert
thegrillfromonefueltypetoanotherisextremely
hazardous andwill voidthewarranty.
Never use yourgas grill inagarage,porch,shed,
breezewayoranyotherenclosedarea.
Never obstructtheflow ofventilation airaround
yourgas grill housing.
Never disconnectthegas regulatororanygas
fitting whileyourgrillislit.Alit grillcan ignite
leakinggasandcauseafireorexplosionwhich
couldresultinpropertydamage,personalinjury
ordeath.
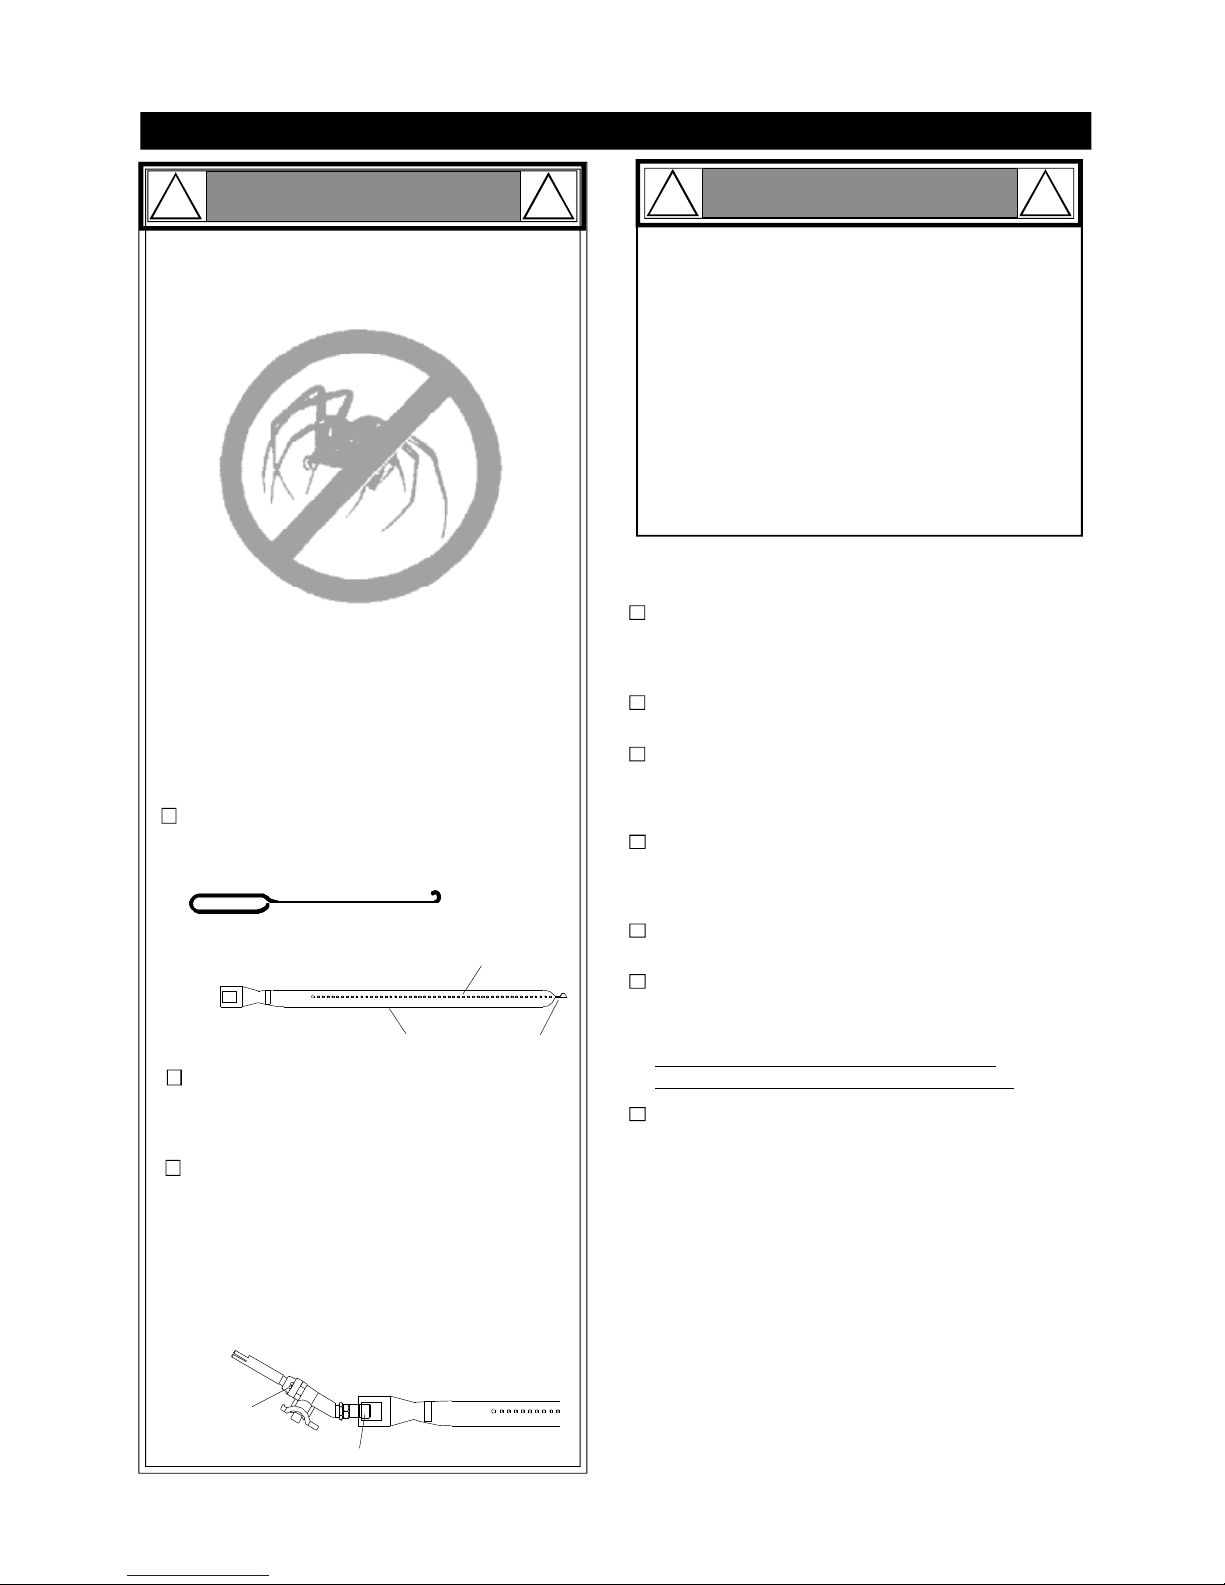
Keepgas regulatorhose awayfromhotgrill
surfaces and dripping grease.Avoidunnecessary
twistingofhose.Visuallyinspecthose prior
toeachuseforcuts,cracks,excessive wear
orotherdamage.Ifthehose appears damaged
do notuse thegas grill.Call:1-800-761-5456
foraauthorizedreplacementhose.
•
Manufacturer:
Grand Hall EnterpriseCo., Ltd.
9thFl.,No.298,Rueiguang Rd.,Neihu,
Taipei,Taiwan(114)
Grand Hall will warranttotheORIGINALPURCHASER
ofthisgasgrillthatitwillbefree ofdefectsinmaterial
and workmanshipforsetperiodsbelow fromthedateof
purchase when usedundernormaloutdooruse and
correctassembly:
Full Warrantyon Grill –1year
(exceptfor paintloss, rusting and ignitorbattery)
Stainless SteelPartsand Tube Burners–5yearsno
rustthrough
Cooking Grids –3yearsno rustthrough
SavorPlates®–2yearsno rustthrough
Grand Hall will requirereasonableproofofyourdateof
purchase.Therefore,youshouldsend intheowner
registrationcardorregisteryourgrillonline at
www.grandhall.com.Saveyourreceiptincase ifrequired
as proofofpurchase.
ThisLimitedwarrantyislimitedtorepairorreplacement
ofparts,atGrandHall’soptionthatprovedtobe
defective undernormaluse and service.
Grand Hall mayrequirethe returnofdefective parts
forexaminationbeforeissuingreplacementparts or
repairs. Ifyou arerequiredtoreturndefectiveparts,
transportationchargesmustbeprepaid.
Upon examination andtoGrand Hall’ssatisfaction,if
theoriginalpartisproven defective GrandHall may
approveyourclaimandelecttoreplace suchparts
withoutcharge.You areresponsibleforshipping
chargesofsuch replacementparts.
ThisWarrantydoes notcoveranyfailuresoroperating
difficulties duetoaccident, abuse,misuse,alteration,
misapplication,vandalism,improperinstallation,
maintenanceorservice,damagescaused byflashback
fires orgrease fires, as setoutinthisOperator’sManual.
Deteriorationordamageduetosevereweather
conditionssuch as hail,hurricane,earthquakes,tsunami,
tornadoes, ActsofGod orterrorism,discoloration dueto
exposuretochemicalseitherdirectlyorintheatmo-
sphere,isnotcoveredbythisLimitedWarranty.
Noreturnswill be acceptedwithoutpriorauthorization
fromGrand Hall.Authorizationforreturnmaybe
obtained bycalling1-800-761-5456.8am–4:30 pm
CST,Mondaythrough Friday.
WarrantyRestrictions
Grand Hall Limited Warranty
•
•Thisgrill issafetycertifiedforuse onlyinthe
countrywherepurchased.Modification foruse in
anyotherlocation isasafetyhazardand will
voidthewarranty.
Thiswarrantygives you specificlegalrights,and
you mayalsohaveotherrightswhich varyfrom
statetostate.

3
GasValve
Orifice
Pre-AssemblyInstructions ForYourSafety
Spiders and small insectscanspinwebsand
nestinthegrill BurnerTubes during transitand
warehousing which canleadtoagas flow
obstruction resulting inafireinand around the
BurnerTubes.Thistypeof"FLASHBACK FIRE"
cancause seriousgrill damageand createan
unsafeoperating condition fortheuser.
Toreduce thechance ofFLASHBACK
FIREyou mustcleantheBurner Tubes
as followsbefore intialuse. Alsodo thisat
leastonceamonthinsummerand fall or
wheneverspiders areactiveinyourarea,and if
yourgrill has notbeenusedforanextended
period oftime.
WARNING
! !
Failuretocomplywiththese instructionscould
resultinafireorexplosion thatcouldcause
seriousbodilyinjury,deathorpropertydamage.
METHOD 1:Bend astiff wireorwirecoat
hangerintoasmall hook as shown and run
thehook through theBurnerTubeand inside
theBurnerseveraltimes toremovedebris.
METHOD 2:Use abottlebrushwithaflexible
handleand run thebrushthrough theBurner
Tubeand insidetheBurnerseveraltimes to
removeanydebris.
METHOD 3:Use anairhose toforceair
through each BurnerTube.Theforcedair
shouldpass debrisorobstructionsthrough
theBurnerand outthePorts.
1.Removethescrewfromtherearofeach Burner
using aPhillipsHeadScrewdriver.
2.Carefullylift each Burnerup and awayfromthe
Gas ValveOrifice.
3.Check and cleanBurner/VenturiTubes forinsects
and insectnests.Acloggedtubecanleadtoafire
beneaththegrill.
4.Refertothefigurebelow and performoneof
these 3cleaning methods:
9
TOCLEANBURNERTUBE,
INSERTHOOKHERE
GrillInformationCenter 1-800-761-5456
8am-4:30pmCST,MondaythroughFriday
ToolsRequiredforAssembly include:
protectiveworkgloves
protectiveeyewear
You will needassistancefromanother person tohandle
thegrill headand otherlarge,heavy parts.
OpenLidofshipping carton and removetop sheetof
cardboardand /orpacking materials.Laycardboard
sheeton floorand use as aworksurfacetoprotect
floorand grillpartsfromscratches.
You mayslicethecarton frontcorners withautility
knifetolayopenthecarton frontpanel.Thisallows
you toraise thegrill headLidand removethe
componentspackedinside,making iteasiertolift.
Use theHardwareand Part Diagramstoensureall
itemsareincludedand free ofdamage.
Do notassembleoroperatethegrill ifitappears
damaged.Iftherearedamagedormissingparts
whenyou unpack theshipping boxoryou have
questionsduring theassemblyprocess,callthe:
Toexpeditethe assemblyprocess follow these
general guidelines:
NOTE: Thisgas grill isdesignedtobeusedwithtwo
20lbLPGas tanks(notincluded)for8burneropera-
tion. Atank placedon therightwill operatethefour
right-sideburners. Atank placedon theleftwill operate
thefourleft-side burners.
•
•
•PhillipsHeadScrewdriver
GrillInstallation Codes
Theinstallationmustconformwithlocalcodesor,inthe
absenceoflocalcodes,withthe NationalFuelGas Code,
ANSIZ223.1/NFPA54,orthe NaturalGasand Propane
InstallationCode,CSAB149.1,asapplicable,including:
1.Theapplianceand itsindividualshutoffvalvemustbe
disconnectedfromthegas supplypiping system
during anypressuretesting ofthatsystemattest
pressures inexcess of1/2psi(3.5kPa).
2.Theappliancemustbeisolatedfromthegas supply
piping systembyclosing itsindividualmanualshutoff
valveduring anypressuretesting ofthegas supply
piping systemattestpressureequaltoorless than
1/2psi(3.5kPa).
Forsafeoperation ensuretheGas ValveAssembly
OrificeisinsidetheBurnerTubebeforeusing your
grill.See figure.IftheOrificeisnotinsidetheBurner
Tube,lightingtheBurnermaycause explosion
and/orfireresulting inseriousbodilyinjuryand/or
propertydamage.
DANGER
!!
Leakinggasmay causeafireor
explosionwhichcouldresultinproperty
damage,personal injuryordeath.
1.
2
3.
4.
IFYOU SMELL GAS:
Shutoff gas to theappliance.
Extinguishanyopenflame.
Openlid.
Ifodorcontinues, keepawayfrom
theappliance andimmediatelycall
your gas supplieroryour fire
department.
Foot
Burner
BurnerPort

4
Thefollowing tableillustrates abreakdown ofthehardwarepack.Ithighlightswhatparts areusedin
thevariousstages ofassembly.
HardwarePack PartsList forModelCGE06ALP
*Two Batteries/AA includedintheHardwarePack.
PhillipsHeadScrew1/4"x1/2"
QTY.28
Part #S112G04081
LockNut3/8"
QTY.2
Part #S372G06111
HardwarePack DiagramforModelCGE06ALP
Spring Washer3/8"
QTY.2
Part #S411G06081
PART#PARTDESCRIPTIONQTYPURPOSEOFPART
P06024001AHardwarePack1Foruseinassembly
S112G04061
PhillipsHeadScrew 1/4"x3/8"4InstallsTankHolderson theCartFrame
S112G04081PhillipsHeadScrew 1/4"x1/2"8InstallsCastersonthe Cart Frame
S112G04081
PhillipsHeadScrew 1/4"x1/2"8SecuresCart Bracket ontothe Cart Frame
S372G06111
S411G06081
S211G06531
Lock nut 3/8"
Spring Washer 3/8"
WheelBolt3/8"x5-5/16"
2
2
2Secures8"Wheelsontothe Cart Frame
S112G03061PhillipsHeadScrew 3/16"x3/8"4InstallsLidHandlestoLids
S112G04081PhillipsHeadScrew 1/4"x1/2"12 InstallCart Handleson theLeft and RightBowlSupport
Bracket
PhillipsHeadScrew1/4"x3/8"
QTY.4
Part #S112G04061
PhillipsHeadScrew3/16"x3/8"
QTY.4
Part #S112G03061
WheelBolt3/8"x5-5/16"
QTY.2
Part #S211G06531
Scale1:2

5
PartsDiagramforModelCGE06ALP
24
39
39a
b
44
33
28B
28A
27
26
36
37
40
38
20
18
20
41
35
34
32
29
25
12
31
30
20
2321 19
10
16
13
43
4
22
42
11
14
7
9
8
6
5
15
17
3
1
2
45

6
Parts List forModelCGE06ALP
KEYPARTDESCRIPTIONPART#QTY
1Lid,LeftP00127046A1
2Lid,RightP00128046A1
3LidHandleP00203016B2
4CookingGridP01612002B4
5SavorPlate®P01708018B8
6BurnerP02008023A8
7GasCollectorBoxwithElectrodeP02609002B8
8BurnerBracketP02216015A1
9GreaseTrayHeatShieldP06904044C2
10Wind ShieldAssemblyY0480003 1
11BowlPanel, RearP0072561EC 1
12BowlPanel, FrontP0073861EC 1
13BowlPanel, LeftP0072061EC 1
14BowlPanel, RightP0072161EC 1
15BowlSupportBracketP01303015B 2
16ElectricWireSetP02615022A 1
17Lighting StickP05507031E 1
18CartHandleP00205078B 2
19ProtectivePadP05518010I4
20LatchAssemblyP05517002L 8
21HoseBracketP05341002E 2
22GasValve/ManifoldAssemblyBracketP03324002H 1
23RegulatorwithHose/Two Stage (LPG)P03624003A 2
24GasValve/ ManifoldAssembly,LeftY0060314 1
25GasValve/ ManifoldAssembly,RightY0060315 1
26ControlPanel,UpperP02911553S 1
27ControlPanel,LowerP02911561S 1
28aControlKnobP03429012J 8
28bControlKnob SeatP03415054A 8
29ElectricIgnitor,4-portP02502164C 2
30GreaseTrayP02717163C 1
31GreaseReceptacleP02701267C 1
32Tank HookP04005007A 2
33CartLeg,LeftP00904004B 1
34CartLeg,RightP00905004B 1
35CartFrameBracketP03339001C 2
36CartFrameP03335003C 1
37CartSeatP04518001A 4
38Tank HolderP04008007A 2
39aWheel, 8in.P05103014A 2
39bWheelHub CapP05113011E 2
40Caster, 4in.,withBrakeP05120002D 2
41CartBottomShelfP03340001C 1
42SavorPlate® BracketP03328015A 16
43End CapP04522001A 4
44CartBracketP05327025A 2

7
KEYPART DESCRIPTIONPART#QTY
45NamePlateP00407010D 1
CoverP07002046B 1
Operator'sManualP80170001A 1
HardwarePackP06024001A 1
Parts List forModelCGE06ALP
To obtainthecorrectreplacementparts foryourgas grill,please refertothepart numbers inthisparts
list. Thefollowing information isrequiredtoensureyou receivethecorrectparts:
1.Modeland SerialNumber(see CSA labelon grill)
2.Part Number
3.Part Description
4.Quantityofparts needed
Important: Use onlyfactoryauthorizedparts. Theuse ofanypart thatisnotfactoryauthorizedcanbe
dangerousand will alsovoidyourproductwarranty.KeepthisOperator'sManualforconvenientreferral
and forpart replacement.
Fortherepairorreplacementparts you needcall ourGrill Information Centerat 1-800-761-5456

8
AssembleCart
1AssemblyInstructions
2Install Tank Holders toeach sideofCart Frame.
(Tightensecurelyusing4PhillipsHeadScrews
1/4"x3/8").
Withanassistant, liftCart outofshipping carton
and placeiton thecardboardworksurface.
UnfoldtheCart Legsand straightentheCart
FrameBracketuntil aclick sound isheard.
CAUTION: Donotstand,lean or applypressure
tothe CartFrameBracketonceassembled.
InstallTankHolders,Casters andWheels
Install Casters toeachsideRightCart Leg.
(Tightensecurelyusing8Phillips Head Screws)
Install Cart Bracketstoeach sideLeftCart Leg
using 4Phillips HeadScrews1/4"x1/2"and attach 8"
Wheelsusing2WheelBolts3/8"x5-1/8",2Spring
Washers and 2Flangenutsand tightensecurely.
PhillipsHeadScrew1/4"x3/8"
QTY.4
Part #S112G04061
LockNut3/8"
QTY.2
Part #S372G06111
WheelBolt3/8"x5-5/16"
QTY.2
Part #S211G06531
Scale1:2
CastersInstallation Code
Theinstallation shall bemadewithaconnectorthatcomplies
withtheStandardfor ConnectorsforMovableGas Appliances,
ANSIZ21.69-CSA6.16.
PhillipsHeadScrew1/4"x1/2"
QTY.16
Part #S112G04081
Spring Washer3/8"
QTY.2
Part #S411G06081
L
R
L
R

9
4Install Grill Bowl
Withanassistant, liftand position Grill BowlontotheCart.
Lock 4Latches on Grill Bowland Cart.
3Install LidHandles toLeft andRightLid.
(Tightensecurelyusing 4PhillipsHeadScrews3/16"x3/8")
Install Cart Handles toeach BowlSupport Bracket.
(Tighten securelyusing12PhillipsHead Screws1/4"x1/2")
InstallHandles
PhillipsHeadScrew1/4"x1/2"
QTY.12
Part #S112G04081
PhillipsHeadScrew3/16"x3/8"
QTY.4
Part #S112G03061
Latch

10
5Lift and slidetheGrease ReceptacleoutfromtheGrease Tray
Bracket, fromtherearoftheCart.
Unscrewthe WingBoltsoneachsideoftheGreaseTray and
removetheGrease TrayfromBottomBowlpanel.
Reinstall Grease Tray and Grease Receptacle
Attach theGrease TraytotheBottomBowlpanelusing theWing
boltsand tightensecurely.
TheGrease Trayisrequiredtobepresentand centeredforyour
safety.
SlidetheGrease ReceptacleoverGrease TrayBracket.
Note:PreassembledGrease Tray and Grease Receptacle
CARTREARVIEW
Wing Bolt
GreaseReceptacle

11
6Install IgnitorBatteries
UnscrewIgnitorCapfromControlPanel.
PlacesuppliedAA batteryintotheIgnitor
Slotwithpositivepolefacing you.
Position theCapand Spring overtheAA
batteryand tightenontoControlPanel.
Repeattoinstall theotherAA battery
intotheIgnitorSlot.
WARNING !
Failureto readandfollow theUseand Care
Instructionscouldresultinafireorexplosion
thatcouldcauseseriousbodilyinjury,deathor
propertydamage.
!
Install Cooking Components
PlacetheSavorPlates on lowerledge
aboveBurners.
PlaceCooking Gridson bowlledge.
Withtheassistance ofanother person,
perform thisElectrodeCheckbefore
proceeding.
ThistestwillensurethattheSpark Electrode
Tipsareproperlypositionedso yourgrilllights
easilyandproperly.
Besureall ControlKnobsaresetto
"OFF"and opentheGrill Lids.
Haveyourassistantstand behind tothe
rightofthegrill and look towardthefront
ofthegrill bowl. Never putyourface
insidetheGrill Head.
Press theIgnitorCap.You shouldhear
a"clicking"sound.Yourassistantshould
see abluesparkwithineach Gas
CollectorBox.Ifasparkispresentthe
ElectrodeTipsareproperlypositioned.
Ifno sparkisseen,theSparkGap
needstobeadjustedas follows:
•
•
•
Using anadjustablewrench,loosenthe
Inside NutuntiltheGas CollectorBox
can be turned upward.
If thegap between theSpark Electrode
TipandReceiverismorethan 3/16"
uselongnoseplierstogentlysqueeze
the GasCollectorBoxtonarrowgap.
ReturntheGas CollectorBoxtoits
originalposition,securetheInsideNut
andtrytheElectrodeCheck again.Ifno
"clicking"sound isheard:
AA Batteryisinstalledbackwards.
Electricwiresmay be loose.Remove
theAABatteryand inspecttheIgnitor
Junction Boxfound behind theControl
Paneland reconnectanyloose wires.
8
7
FinalGrill AssemblyStep
Whenyou have finishedassembling your
grill besure thatall screwsare tightened
forsafeoperation ofyourgrill.
®
-
-
CalltheGrillInformation Center ifyou haveanyproblemwiththisproduct.Wecan helpyou with
questionsaboutassemblyandgrill operation oriftherearedamaged ormissingpartswhenyouunpack
thisunitfromtheshippingbox.Pleasecallbeforereturningthisproduct.
GRILLINFORMATION CENTER
Call 8amto4:30pmCST 1-800-761-5456 Mondaythrough Friday
SparkElectrodeTip
SparkGap
SparkReceiver
GasCollectorBox
InsideNut
Spring
+-
AA Battery
IgnitorCap
IgnitorSlot
Cooking Grids
SavorPlate®

12
USE AND CAREINSTRUCTIONS
Keepfireextinguisherreadilyaccessible.Inthe
eventofaoil/grease fire,do notattempttoextin-
guishwithwater. Use typeBextinguisheror
smotherwithdirt, sand orbaking soda.
Keepyourgrill coveredduring freezing rainor
snow.Sleetand snow canblock theregulatorvent
holeresulting inimproperand potentiallydangero-
usregulatorpressure.
Use yourgrill on alevel,stablesurfaceinan
area clearofcombustiblematerials.
Do notleavegrill unattendedwheninuse.
Do notmovetheappliancewheninuse.
Coveryourgrill whennotinuse.
Allow thegrill tocoolbeforemoving orstoring.
Do notuse yourgrill as aheater.
Thisgrill isnotintendedtobeinstalledinoron
recreationalvehicles and/orboats.
WARNING !!
DonotstoreaspareLP-Gastank underornear
thisappliance.
Neverfillthetankbeyond80percentfull; and
Ifthe information in"(a)"and"(b)"isnotfollowed
exactly,afirecausingdeathorseriousinjurymay
occur.
A.
B.
C.
LPGasgrillmodelsaredesignedforusewithtwo
standard20lb.LiquidPropaneGas(LPGas)tanks,
notincluded withgrill. Never connectyourgasgrillto
an LPGastankthatexceeds thiscapacity.Atankof
approximately12inchesindiameterby18-1/2inches
highisthe maximumsizeLPGastanktouse. You
mustusean "OPD"gastankwhichoffersalisted
Overfill PreventionDevice. Thissafetyfeature
preventstankfrombeingoverfilled whichcan cause
malfunctionofLPGastank,regulatorand/orgrill.
The LPGastankmustbe constructedandmarked
inaccordance withtheSpecifications forLP-Gas
CylindersoftheU.S.DepartmentofTransportation
(D.O.T.)orthe NationalStandardofCanada,CAN/
CSA-B339,Cylinders,SpheresandTubesfor
TransportationofDangerous Goods;andCommis-
sion,asapplicable.
TheLP Gas tank musthaveashutoff valve,
terminating inanLP Gas supplytank valveoutlet,
thatiscompatiblewithaType1tank connection
device.TheLP Gas tank mustalsohaveasafety
reliefdevicethathas adirectconnection withthe
vaporspaceofthetank.
Thetank supplysystemmustbearrangedfor
vaporwithdrawal.
TheLP Gas tank usedmusthaveacollar
toprotectthetank valve.
Never connectanunregulatedLP gas tank toyour
gas grill.Thegas regulatorassemblysuppliedwith
yourgas grill isadjustedtohaveanoutletpres-
sureof11"watercolumn(W.C.) forconnection to
anLP gas tank.Onlyuse theregulatorand hose
assemblysuppliedwithyourgas grill.Replacement
regulators and hose assemblies mustbethose
specifiedbytheManufacturer.
Have yourLPGasdealercheckthereleasevalve
afterevery fillingtoensureitremains freeofdefects.
Always keepLPGastankinuprightposition.
DonotsubjecttheLPGastanktoexcessive heat.
Neverstorean LPGastankindoors.If youstore
yourgasgrillinthe garage always disconnectthe
LPGastankfirstandstoreit safelyoutside.
LP Gas tanksmustbestoredoutdoors inawell-
ventilatedarea and outofthereach ofchildren.
DisconnectedLP Gas tanksmustnotbestoredin
abuilding,garageoranyotherenclosedarea.
Theregulatorand hose assemblycanbeseen
afteropening thedoors (ifapplicable)and mustbe
inspectedbeforeeach use ofthegrill.Ifthereis
excessiveabrasion orwearorifthehose iscut, it
mustbereplacedpriortousing thegrill again.
Never lightyourgas grill withthelidclosedor
beforechecking toensuretheburnertubes arefully
seatedoverthegas valveorifices.
Never allow childrentooperateyourgrill.Do not
allow childrenorpetstoplaynearyourgrill.
Use ofalcoholordrugsmayimpairtheabilityto
assembleand operatetheappliance.
CORRECTLPGASTANK USE
WARNING
! !
•Use yourgrill outdoors,atleast3feetaway
fromanywall orsurface. Use yourgrill at
least 3feetaway fromcombustibleobjects
thatcanmeltorcatch fire(such as vinylor
wood siding,fences and overhangs) or
sources ofignition including pilotlightson
waterheaters and liveelectricalappliances.
Never use yourgas grill inagarage,porch,
shed,breezewayoranyotherenclosedarea.
Never obstructtheflow ofventilation airaround
yourgas grill housing.
•
•

13
USE AND CAREINSTRUCTIONS
NOTEaboutLPGasTankExchangePrograms
Ÿ
How toLeak TestyourLPGas Tank
Foryoursafety:
LPGas Modelonly:
Secure two 20lb LPGas Tanks toGas Grill
CAUTION: Whentheapplianceisnotinuse thegas
mustbeturnedoff atthetanks.
CylindersInstallationCode
Thehandling,storage,and transporation ofall sizes ofgas
cylinders mustbeinaccordancewith ANSI/NFPA58,
Storage and Handling ofliquidPetroleumGases, orthe CSA
B149.1,NaturalGas and Propane Installation Code.
TurnyourLP Gas Tank Valves clockwise to
theclosedorOFF positon.
Hang yourgas tankson thetop Tank Hooks.
Thering footofthegas tankswill reston the
Tank Holder.
Manyretailers thatsell grillsofferyou theoption of
replacing youremptyLPGas tank through anexchange
service.Useonlythosereputableexchangecompanies
thatinspect, precision fill,testand certifytheirtanks.
Exchangeyourtank onlyforanOPD safetyfeature-
equippedtank as describedintheLPGas tank section
ofthismanual.
Alwayskeepnewand exchangedLPGas tanksinan
uprightpositionduring use,transitorstorage.
Leaktestnewand exchangeLPGas tanksBEFORE
connecting onetoyourgrill.
Ÿ
Ÿ
Allleaktestsmustberepeated each timeyourLPGas
tank isexchangedofrefilled.
Whencheckingforgas leaksdonotsmoke.
Donotusean openflametocheckforgas leaks.
Yourgrill mustbeleak testedoutdoorsinawell-
ventilatedarea,awayfromignitionsourcessuchas
gasfiredorelectricalappliances.Duringtheleaktest,
keepyourgrillawayfromopen flamesorsparks.
Donotusehouseholdcleaning agents.Damageto
gasassemblycomponentscanresult.
Ÿ
Ÿ
Ÿ
Ÿ
Ÿ
Ifgrowing bubbles appeardo notuse ormove
theLP Gas tank.ContactanLP Gas Supplier
oryourfiredepartment!
WARNING
! !
Beforeusingthisgasappliance read all
instructionsand performall gasleak-check
proceduresevenif theproductwas
pre-assembledbytheretailerormanufacturer.
WARNING
! !
Use acleanpaintbrushand a50/50 mildsoapand
watersolution.
Brushsoapysolution ontoLPGas tank intheareas
indicatedbythearrows.See diagram.
Ifgrowing bubbles appeardo notuse ormovethe
LPGas tank.Call anLPGas SupplieroryourFire
Department. Turnall BurnerValves totheOFF position.
Inspectthevalveconnection port and regulator
assemblyfordamage ordebris.Removeany
debris.Neverusedamagedorpluggedequip-
ment.
Connecttheregulatorassemblytothetank
valveand HAND TIGHTEN nutclockwise toa
full stop.DO NOT use awrench totighten
because itcoulddamagetheQuick Coupling
Nutand resultinahazardouscondition.
Openthetank valvefully(counterclockwise) and
use asoapywatersolution tocheck all
connectionsforleaksbeforeattempting tolight
"Checking forLP Gas Leaks".
Ifaleakisfound,turnthetank valveoff and
do notuse yourgrill until theleakisrepaired.
LPGas Modelonly:
ConnectRegulatorwithHosetoyourLPGTanks
yourgrill.See
Type1connectionper
ANSI Z21.58b-2002
Quick
Coupling Nut

14
USE AND CAREINSTRUCTIONS
Checkall connectionsforLPGasLeaks
Never testforleakswithaflame.Priortofirstuse,
atthebeginningofeachseason,orevery time
yourLPGastankischanged,youmustcheckfor
gasleaks.Followthesethreesteps:
Makeasoapsolution bymixing onepart liquid
detergentand onepart water.
Turnthegrill ControlKnobstothefull OFF
position,thenturnthegas ON atsource.
Applythesoapsolution toall gas connections
indicatedbythearrows.See diagram.If
bubbles appearinthesoapsolution the
connectionsarenotproperlysealed.Check
each fitting and tightenorrepairas necessary.
CAUTION:Always openbothleftand rightLids
asshownbefore lightingyourgrill.
Ifyou haveagas leakthatcannotberepairedby
tightening,turnoff thegas atthesource,disconnect
fuellinefromyourgrill and call 1-800-761-5456 or
yourgas supplierforrepairassistance.
Neverdisconnectthegas regulatororanygas fitting
whileyourgrill islit. Alitgrill canigniteleaking gas
and cause afireorexplosion which couldresultin
propertydamage,personalinjuryordeath.
WARNING
! !
Disconnecting ALiquid PropaneGas (LPG)
TankFromYourGrill
MakesuretheBurnerValves and LP Gas tank valve
areoff. (Turnclockwise toclose.)
Detach thehose and regulatorassemblyfromthe
LP Gas tank valvebyturning theQuick Coupling
Nutcounterclockwise.
Gas Valve/ManifoldAssembly
LP Gas Tank
Two StageRegulator
withHose (LPG)
Lock Casters while
yourgrillisinuse

15
USE AND CAREINSTRUCTIONS
GrillLightingInstructions
Lighting Stick and follow steps1through 6oftheGrill
Lighting Instructions.Then,lightthematch and place
Lighting Stick through theLighting Holeon therightside
ofthegrill asshownbelow.TurntheControlKnob
nearesttheopentank totheHIGH setting torelease gas.
TheBurnershouldlightimmediately.
Never leanoverthegrill cooking area whilelighting
yourgas grill.Keepyourfaceand bodyasafe
distance(atleast18 inches)fromtheLighting Hole
orBurners whenlighting yourgrill bymatch.
WARNING
!!
ManuallyLighting YourGrill By Paper Match
NOTE: Thisgas grill isdesignedtobeusedwithtwo
20lbLPGas tanks(notincluded)for8burneroperation.
Atank placedon therightwill operatethefourright-side
burners. Atank placedon theleftwill operatethefour
left-sideburners.
Immediatelypress theright-sideElectricIgnitorfor
3-4secondstolighttheBurner.
Ifignition does notoccurin5seconds,turnthe
burnerControlKnob(s) and gas sourceOFF and
conductaleaktestofALL gas connectionsand
gas sources as explainedintheUse and Care
section ofthismanual.Ifno leaksaredetected,
wait5minutes foranygas toclearand repeat
thelighting procedure.
AfteroneBurnerislit, turnthetank valveSLOWLYone
more1/4ofaturnfor1/2ofonecompleteturn.
OnceoneBurnerislit, theadjacentBurnercanbelit
byturning itsControlKnob toHIGH.
Tolightthefourleft-sideburners repeatstep7and 8
thenpress theleft-sideElectricIgnitor.
10.
11.
12.
13.
9.
6.
Beforeeach use,check all hoses forcracks,nicks,
cuts,burnsorabrasions.Ifahose isdamagedin
anyway,do notuse yourgrill beforereplacing the
hose withanauthorizedpart fromtheParts List. Also
makesureall gas supplyconnectionsaresecurely
tightened.
Foroptimumperformancethisgrill shouldbeused
onlywhenoutdoortemperatures are60 degrees or
above.
Familiarize yourselfwiththesafetyand Use and Care
instructionsinthismanual.Do notsmokewhile
lighting grill orchecking gas supplyconnections.
Besureeach LP Gas tank isfilledand lock Casters
topreventmovementduring grill operation.
Opentheleft and rightLidsbeforelighting thegrill.
Check thattheend ofeach BurnerTubeisproperly
locatedovereach ValveOrifice.
1.
5.
4.
3.
2.
Failuretoreplaceafaultyhose,securegas supply
connectionsortoopentheLidbeforeproceeding
totheLighting Procedures couldresultinafireor
explosion thatcouldcause seriousbodilyinjury,
death,orpropertydamage.
!
WARNING
!
Setall ControlKnobstoOFF and opentheright-side
tank valve SLOWLY 1/4ofaturn.
To lightthe fourthright-sideburners, pushand turn
thefourthControlKnob fromtheright toHIGH.Thisis
consideredthemiddlerightControlKnob.
8.
7.
To lightyourgas grill bymatch,insertamatch intothe
BurnerControlKnobson ControlPanel
Left4Burnersarecontrolled
byleft LP Gas tank Right4Burnersarecontrolled
byrightLP Gas tank
PRESS
OFF
HIGH
The fourthmiddleControlKnobs
LightingHole
Match
Lighting Stick
OpenLP Gas tank

16
USE AND CAREINSTRUCTIONS
Troubleshooting
WARNING
Turngas offatsource andturnControlKnobsto
OFF.Waitatleastfiveminutesforgas toclear,
thenretry.
Ifyourgrillstill failstolight, check gas supply
andconnections.
Repeatlighting procedure.Ifyourgrillstill fails
tooperate,turnthegas off atsource,turnthe
ControlKnobstoOFF,thencheck thefollowing:
Ifthegrill failstolight:
1.
2.
3.
MisalignmentofBurnerTubesoverOrifices
Correction: RepositionBurnerTubesoverOrifices.
Obstruction ingas line
Correction: Removefuelline fromgrill.Donot
smoke!Opengassupplyforonesecondtoclear
anyobstructionfromfuelline.Closeoffgassupply
atsourceandreconnectfuellinetogrill.
PluggedOrifice
Correction: Removethescrewfromtherearof
each Burnerusing aPhillipsHeadScrewdriver.
RemovetheOrificefromgas valveand gently
clearanyobstruction withafinewire.Then
reinstall all Orifices,Burners, Screwand cooking
components.
Ifanobstruction issuspectedinGas Valves or
Manifold,call theGrill Information Center.
Obstruction inBurnerTubes
Correction: Follow theBurnerTubecleaning
procedureon page 18 ofthisOperator'sManual.
MisalignmentofIgnitoron Burner
Correction: Checkforproperposition ofthe
Electrode Tipasshownin step 7page 11.The
gap betweentheSpark ElectrodeTipand Spark
Receiver shouldbe approximately3/16".Adjust
ifnecessary. Withthe gassupplyclosed and all
ControlKnobs settoOFFpressthe Electric
Ignitorcapand check forthepresenceofaspark
attheElectrode.
DisconnectedElectricWires
Correction: InspecttheIgnitorJunctionBoxfound
behindtheControlPanel.ConnectlooseElectric
wirestoJunctionBoxandtrytolightthe grill.
WeakAAbattery
Correction: UnscrewtheIgnitorCapand replace
thebattery.
Ifthegrill still does notlightyou mayneedto
purgeairfromthegas lineorresetthe
regulatorexcess gas flow device. Note: This
procedureshouldbedoneeverytimeanew
LP Gas tank isconnectedtoyourgrill.
Topurgeairfromyourgas lineand/orreset
theregulatorexcess gas flow device:
TurnControlKnobstotheOFF position.
Turnoff thegas atthetank valve.
DisconnectregulatorfromLP Gas tank.
Letunitstand 5minutes toallow airtopurge.
ReconnectregulatortotheLP Gas tank.
OpentheGrill Lids.
Turntank valveon SLOWLY1/4ofaturn.
Pushandturnthe middleControlKnobfarthest
fromopen tank toHIGH.
Press ElectricIgnitorfor3-4secondstolight
theburners.
Keepgrill area clearand free fromcombustible
materials,gasolineand otherflammablevapors
andliquids.
Do notobstructtheflow ofairforcombustion
andventilation.
Keeptheventilation openingsofthetank enclosure
cabinetfree and clearofdebris.
Visuallycheck burnerflames occasionallyto
ensureproperflamepatternas shown below.
Failuretocomplywiththeseinstructionsmay
resultinahazardoussituationwhich,ifnot
avoided,mayresultininjury.
•
•
•
•
CAUTION
!!
WARNING !
ShouldaFLASHBACKfireoccurin oraround
theBurnerTubes,follow theinstructionsbelow.
Failuretocomplywiththeseinstructionscould
resultinafireorexplosionthatcouldcause
seriousbodilyinjury,death,orpropertydamage.
!
Shutoff gassupplytothe gasgrill.
Turnthe ControlKnobstoOFF position.
Open the Grill Lid.
PutoutanyflamewithaClass Bfire
extinguisher.
Oncethe grill hascooled down,clean
the BurnerTubesand Burnersaccording
tothe cleaning instructionsinthis
Operator's Manual.
GRILL INFORMATION CENTER
Call8amto4:30pmCST
1-800-761-5456
MondaythroughFriday
•
•
•
•
•
MAGNIFIEDVIEW OF
BURNERFLAME
THROUGHLIGHTING
HOLE

17
Fig.1
Propercareand maintenancewill keep yourgrill intop
operatingconditionandprolong itslife.Follow these
cleaning proceduresonatimelybasisand yourgrillwill
stayclean andoperatewithminimumeffort.
CAUTION: BesureyourgrillisOFFandcoolbeforecleaning.
CleaningTheCooking Grids
Beforeinitialuse,and periodically,washyourCooking
Gridsinamildsoapand warmwatersolution.You
canuse awashclothorvegetablebrushtocleanyour
Cooking Grids.
Cleaning TheSavorPlates®
Periodicallyyou shouldwashtheSavorPlates®ina
soapand warmwatersolution.Use avegetablebrush
toremovestubbornburnt-on cooking residue.Drythe
SavorPlates®thoroughlybeforeyou reinstall them
intothecooking bowl.
Cleaning TheGrease Tray and Receptacle
To reducethechanceoffire,theGrease Draining Tray
and Grease Receptacle(somemodels) shouldbe
visuallyinspectedbeforeeach grill use.Removeany
grease and washGrease Trayand Receptaclewitha
mildsoapand warmwatersolution.
Cleaning theInsideoftheGrill Lid
Grease canhaveatendencytobuildup on theinside
oftheGrill Lidand coulddripontodeck orpatiowhen
thelidisopened.Visuallyinspecttheinsideofthe
Grill Lidbeforeeach grill use.Removeanygrease
and washwithamildsoapand warmwatersolution.
AnnualCleaning ofTheGrill Interior
Burning-off excess food aftereverycookoutwill keepit
readyforinstantuse.However,atleastevery3months
you mustgivetheentiregrill athorough cleaning to
minimize yourriskofgrease fireand keepthegrill in
top shape.Follow these steps:
Turnall BurnerValves tothefull OFF position.
TurntheLP gas tank valvetothefull OFF position.
Disconnect theregulator fromthegas tank. Inspectthe
hose withregulatorassemblyforcracking,cutsorany
otherdamage,and replaceas neccessary.Refertothe
Parts ListinthisOperator'sManual.
Removeand cleantheSavorPlates®,Cooking Grids
and Grill Burners.
Covereach Gas ValveOrificewithaluminumfoil.
Brushtheinsideand bottomofthegrill withafiber
padornylon brushand washwithamildsoapand
warmwatersolution.Rinse thoroughlyand letdry.
Removealuminumfoil fromOrifices and check each
Orificeforobstruction.
Check each SparkElectrode,adjusting as needed.
ThespacebetweentheSparkElectrodeTipand
SparkReceivershouldbeapproximately3/16".
ReplacetheBurnersandadjusttheGas
CollectorBox.Theedgeofthecollectorboxshould
be overlapping theBurnerPort.
ReplaceSavorPlates®andCooking Grids.
Reconnectthegas sourceand observetheBurner
flameforcorrectoperation.
Cleaning ExteriorSurfaces:
Beforeinitialuse,and periodicallythereafter, we
suggestyou washyourgrill using amildsoapand
warmwatersolution.You canuse awashclothor
spongeforthisprocess.Do notuse astiff wireor
brass brush.These will scratch stainless steeland
chippaintedsurfaces (varies bymodel)during the
cleaning process.
CLEANING AND MAINTENANCE
1.
2.
3.
4.
5.
6.
7.
8.
9.
Cleaning ExteriorStainless SteelSurfaces:
Weathering and extremeheatcancause exterior
stainless steelsurfaces toturntanincolor.
Machineoilsusedinthemanufacturing process
ofstainless steelcanalsocause thistanning
color. Afterremoving anyprotectivePVC filmfrom
theControlPanel,use aStainless SteelCleanerto
polishthestainless steelsurfaces ofyourgrill.
Neveruse abrasivecleaners orscrubbers because
theywill scratch and damageyourgrill.Follow
these stepsforthebestresults.
TurntheLP Gastank valve (clockwise)tothe full
OFF position.Disconnectthe regulatorandhose
assemblyfromLP Gas tank.Coverexposedgas
fitting withaluminumfoil.
Remove dirt orgrease using asoft clothand
polish stainlesssurfaces.Wipe withasoft cloth.
Removealuminumfoilfromexposedgasfitting
and allow grilltoair drybeforeattaching the
regulatorand hosetoyourLP Gas tank.
11.
10.
1.
2.
3.
1.
2.
3.
4.
5.
6.
TransportingorStoringyourgrill:
Fig.2
Lock grill Casters.
RemoveLP Gas tank and Grease Trayfromyour
grill.PlaceGrease Trayon LowerGrease Tray
Bracket. See Fig.1.
Loosen4Latches on Grill Bowland Cart. Withan
assistant, lift and position Grill Bowlon acardboard
surface.
FoldtheCart LegsontoCart Frame.See Fig.1.
Withanassistant, lift and position Grill Bowlonto
thefoldedCart. See Fig.1.
Lock 4Latches on Grill Bowland Cart. See Fig.2.
Besuregrill issecuredtightlyand coveredwhen
beingtransported.

18
Figure 1
CLEANING THEBURNERTUBES AND BURNERPORTS
Turnall BurnerValves tothefull OFF position.
TurntheLP Gas tank valvetothefull OFF position.
Detach theLP Gas regulatorassemblyfromyour
gasgrill.
Removethescrewfromtherearofeach Burner
using aPhillipsHeadScrewdriver.
Carefullylift each Burnerup and awayfromthe
Gas ValveOrifice.
Check and cleanburner/venturitubes forinsects
and insectnests.Acloggedtubecanleadtoafire
beneaththegrill.
Referto Figure1 and performoneofthese
three cleaning methods:
Regardless ofwhich Burnercleaning procedureyou
use,werecommend you alsocompletethefollowing
stepstohelpprolong Burnerlife.
1.Use afiberpadornylon brushtocleantheentire
outersurfaceofeach Burneruntil free offood
residueand dirt.
2.Cleananycloggedports withastiff wire,such as
anopenpaperclip.
3.Inspecteach Burnerfordamage(cracksorholes)
and ifsuch damageisfound,orderand install anew
Burner. Afterinstallation,checktoensurethatthe
Gas ValveOrifices arecorrectlyplacedinsidethe
endsoftheBurnerTubes.Alsocheck theposition of
yourSparkElectrode.
WARNING
!!
Forsafeoperation ensuretheGasValve
AssemblyOrificeisinsidetheBurnerTubebefore
using yourgrill.See figure.IftheOrificeisnot
insidetheBurnerTube,lighting theBurnermay
cause explosion and/orfireresulting inserious
bodliyinjuryand/orpropertydamage.
METHOD 1:Bend astiff wireorwirecoat
hangerintoasmall hook as shown and
run thehook through theBurnerTubeand
insidetheBurnerseveraltimes toremove
debris.
METHOD 2:Use abottlebrushwitha
flexiblehandleand run thebrushthrough
theBurnerTubeand insidetheBurner
severaltimes toremoveanydebris.
METHOD 3:Use anairhose toforceair
through each BurnerTube.Theforcedair
shouldpass debrisorobstructionsthrough
theBurnerand outthePorts.
TOCLEANBURNERTUBE,
INSERTHOOKHERE
9
1.
2.
3.
4.
5.
6.
7.
8.
To reducethechanceofFLASHBACK FIRE you must
cleantheBurnerTubes as followsatleastoncea
monthinsummerand fall orwheneverspiders are
activeinyourarea,and ifyourgrill has notbeenused
foranextendedperiod oftime.
RemovetheCooking Grids,SavorPlates®and
Grease Traysfromyourgrill.
BurnerPort
BurnerFoot
GasValve
Orifice

19
A-1
Question:
No,yourgas grill ismanufacturedtoexactspecifications
and iscertifiedforLPG(LiquidPropaneGas)orNG
(NaturalGas)only.Foryoursafety,aconversion kitisnot
availableforthismodel,norwill wesellorotherwise
provideparts orinformation tobeusedtoconvert this
grill.Anyattempttoconvert thisgrill isdangerousand
will voidyourwarranty.
Question:
Aretheserialandmodelnumbers ofmygrilllisted
somewhereforreference?
Answer:
Theserialand modelnumbers arelistedon asilverCSA
labelplacedon thegrill.Depending onthegrillmodel
thesilverCSA labelwill belocatedon theleft orright
sidebowlpanelunderneaththeside shelf, underneath
therightsideofthecontrolpanel,outsideleftorrightof
controlpaneloron theback ofthegrill cabinet.
Question:
Mygrill willnotlightproperly.Why?
Answer:
AlwayslightthemainBurnerfarthestfromthefuel
sourcefirst. Thiswill drawgasacross the manifold
helping preventairpocketswhich obstructgas flow and
preventpropergrill lighting.Alsotrythisprocedure:
1. Turngas offatsourceand turnControlKnobsOFF.
Waitatleast5minutes forgas toclear,thenretry.
2.Ifyourgrill still failstolight, check gas supplyand
connections.
3.Repeatlighting procedure.
Ifyourgrill still failstooperate,turnthegas offat
source,turntheControlKnobstoOFF and refertothe
Troubleshooting Section formoretips,orcall theGrill
Information Center.
FREQUENTLY ASKED QUESTIONS (FAQ'S)
Can I convert mygrill fromone fueltype toanotherin
otherwords fromLPG toNG orvice versa?
Answer:
Question:
Sometimes I hear ahumming sound coming frommy
regulator. Whatcauses this? And - Mygrill has alow
flameand sometimes will notlight. Why?
Answer:
Thehumming sound isgas flowing through theregulator.
Alowvolumeofsoundisnormalandwillnotinterfere
withtheoperation ofyourgrill.Loud orexcessiveregulator
humming and/orlow flow andintermittentlighting may
becausedbytheregulator'sexcess gas flow device.
Opening thetank valveall thewayortoo quicklyiswhat
triggers theregulator'ssafetydevicetorestrictgas flow,
preventing excess gas flow toyourgrill.Lighting themain
Burnerfarthestfromthefuelsourceeverytimewill help
eliminateair pocketsinthe manifold.Note:This
procedureshouldbedoneeverytimeanewLPGas tank
isconnectedtoyourgrill.
Turnall ControlKnobstotheOFF position.
Turnoff theLPGas tank atthetank valve.
DisconnectregulatorfromLPGas tank.
Letunitstand for5minutes.
ReconnectregulatortotheLPGas tank.
Opengrill Lid(oron selectmodels,theSideBurner
Lidifyou arelighting theSideBurner).
Turnthetank valveslowly¼of oneturn.
LightmiddlemainBurnerfarthestfromfuelsource.
Turnthetank valveslowlyonemore¼ofoneturn
for ½ofonecompleteturn.
ContinuetolightBurners moving towardsthetank.
Do not turntank valvemorethan½of oneturn.
Question:
Wheredo Iuse mygrill for saferoperation and better
performance?
Answer:
Strong windsand low temperatures canaffectthe
heating and performanceofyourgas grill so
factorintheseelementswhen positioningyour
grill outdoors forcooking.
Use yourgrill atleast3feetawayfromanywall or
surface.
Use yourgrill atleast 3feetaway from
combustibleobjectsthatcanmeltorcatch fire
(such as vinylorwood siding,fences and
overhangs) orsources ofignition including pilot
lightson waterheaters and liveelectrical
appliances.
Never use yourgas grill inagarage,porch,shed,
breezewayoranyotherenclosedarea.
Never obstructtheflow ofventilation airaround
yourgas grill housing.
Question:
Ifmyignitor orbattery isnotworking how can I light
mygrill manually? And -WhywouldI need the silver
lighting stick that hangs fromthe side ofmygrill?
Answer:
Ifyourignition failstoworkoryourbatteryneeds
replacing,you canlightyourgrill through theLighting
Holeon thesideofthegrill bowlusing theManual
Lighting Stick thathangsfromthesideofyourgrill.The
Lighting Stick isdesignedtoholdapapermatch and
allowsyou tosafelyinsertamatch through theLighting
Holewithoutgetting close totheBurner.Neverremove
theCooking GridsorSavorPlates®and attempttolight
thegrill fromabove.Tolightyourgas grill manually,
insertapapermatch intotheManualLighting Stick and
follow steps 1through 6oftheBasicLighting
Procedures.Then,lightthematch and placeitthrough
theLighting Holeon therightsideofthegrill (location
ofholevaries bygrill model). Turnthenearestmain
BurnerControlKnob totheHigh setting torelease gas.
TheBurnershouldlightimmediately.

20A-2
Question:
TheRegulatorandHose suppliedwithmygasgrill
does notfittheolderLPGastank I’veused for
years.Whynot?
Answer:
TheU.S.Governmentregulatesgas appliancesand
LP Gastanks.Whenregulations arechangedtheLP
Gastank fittingsarealteredtoinsurecompliance.If
yourLPGas tankdoes notfitthe RegulatorandHose
suppliedwithyournewgrill,thetank isoutdated and
mustbereplaced.Note:Effective April1,2002 all LP
Gastanks soldmustincludean“OPD”Overfill
PreventionDevice.The OPDtanks areidentifiedby
theirtriangular-shaped valvewheel.Thisinternal
devicepreventsthe LP Gastank frombeingoverfilled.
Tanks withoutan OPDvalve cannotberefilled.
Question:
What causes grill partstorustand what affect does
ithave on mygrill?
Answer:
Rustingisanaturaloxidationprocessand may
appearon cast-iron andsteelparts.Rustwillnot
affecttheshort termperformanceofyourgrill.
Toslow therusting process on steelCooking Grids
(selectmodels)we recommendgreasingthe
Cooking Gridsbeforeand aftereach cookout. Use a
brushtoapplyathinlayerofcooking oil orvegetable
shortening ontoeach Cooking Grid.Wedo not
suggestspray typeoilsunlesstheyarespecifiedfor
high-temperaturecooking.Besuretocoattheentire
cookingsurfaceincluding edgesandanyareaswith
chipped porcelain.
Question:
Which isabettercooking surfacetogrill on;
porcelaincoatedsteel/cast-iron cookinggrids or
stainlesssteelgrids?
Answer:
They allhave their advantages.Fortraditionalgrilling
andsearing meats,cast-ironorsteelgrids offer
betterheatconductivity.Toprotectagainstthenatural
rustingprocess,steelorcast-ironcookinggridsoffer
aporcelainfinish whichrequiresroutine
maintenancetokeep the gridswell seasoned.
Stainlesssteelispopularwiththose who preferless
maintenance.
Anewinnovative solutionisavailableonselect
modelscalledStainless CladTherma-Core®.This
CookingGridcombinesaheatconductingsteelcore
withaneasy-to-cleanstainlessoutershell.
Question:
Somestainless steel grillsspecify304 grade
construction whileothersdo notmention agrade at
all?Whatisthe difference?
Answer:
All stainless grades arenotcreatedequal.The304
grade,alsocalled18-8stainless steel,isprizedforits
excellentresistancetorustand corrosion and good
performanceathigh temperatures,which makes itideal
forgrill construction.
304 gradestainless steelisbyfarthemostpopular
stainless steelandcontains18-20%chromiumand
8-10%nickel,making itnon-magnetic.
Somestainless steelgrillsareconstructedofType430
stainlesssteelwhich contains16-18%chromiumbut
generallyless than1%nickel.Itismagneticwithless
corrosion and rustresistanceanddesignedforlimited
temperatureuse.Bewareofstainlesssteelgrillsthat
offerno claimofgradebecause whatlooksshinyon the
sales floorcouldbecomeaproblemon yourpatio.
How canyou tell ifaproductismadeof304 grade
stainless?Takethesimplemagnettest. Ifamagnet
stickstothestainless steelitis430 grade.Ifamagnet
does notstick you cantrustits304 gradequality.
FREQUENTLYASKEDQUESTIONS(FAQ'S)
Youmayalsoreview FAQ’s,Troubleshootingand
Care&MaintenanceTips onlineat
www.grandhall.com.
Table of contents
Other GrandCafe Grill manuals