INSTALLATION AND OPERATION MANUAL, STEAM COIL CABINET BASE CONVECTION
STEAMER, MODEL SCX-16
PART NUMBER 10061R1 62006-07-14
1.0 INSTALLATION INSTRUCTIONS
GENERAL
The steam boiler is designed to ASME Code and approved as a steam heating boiler restricted
to operation at pressure not to exceed 15 psi.
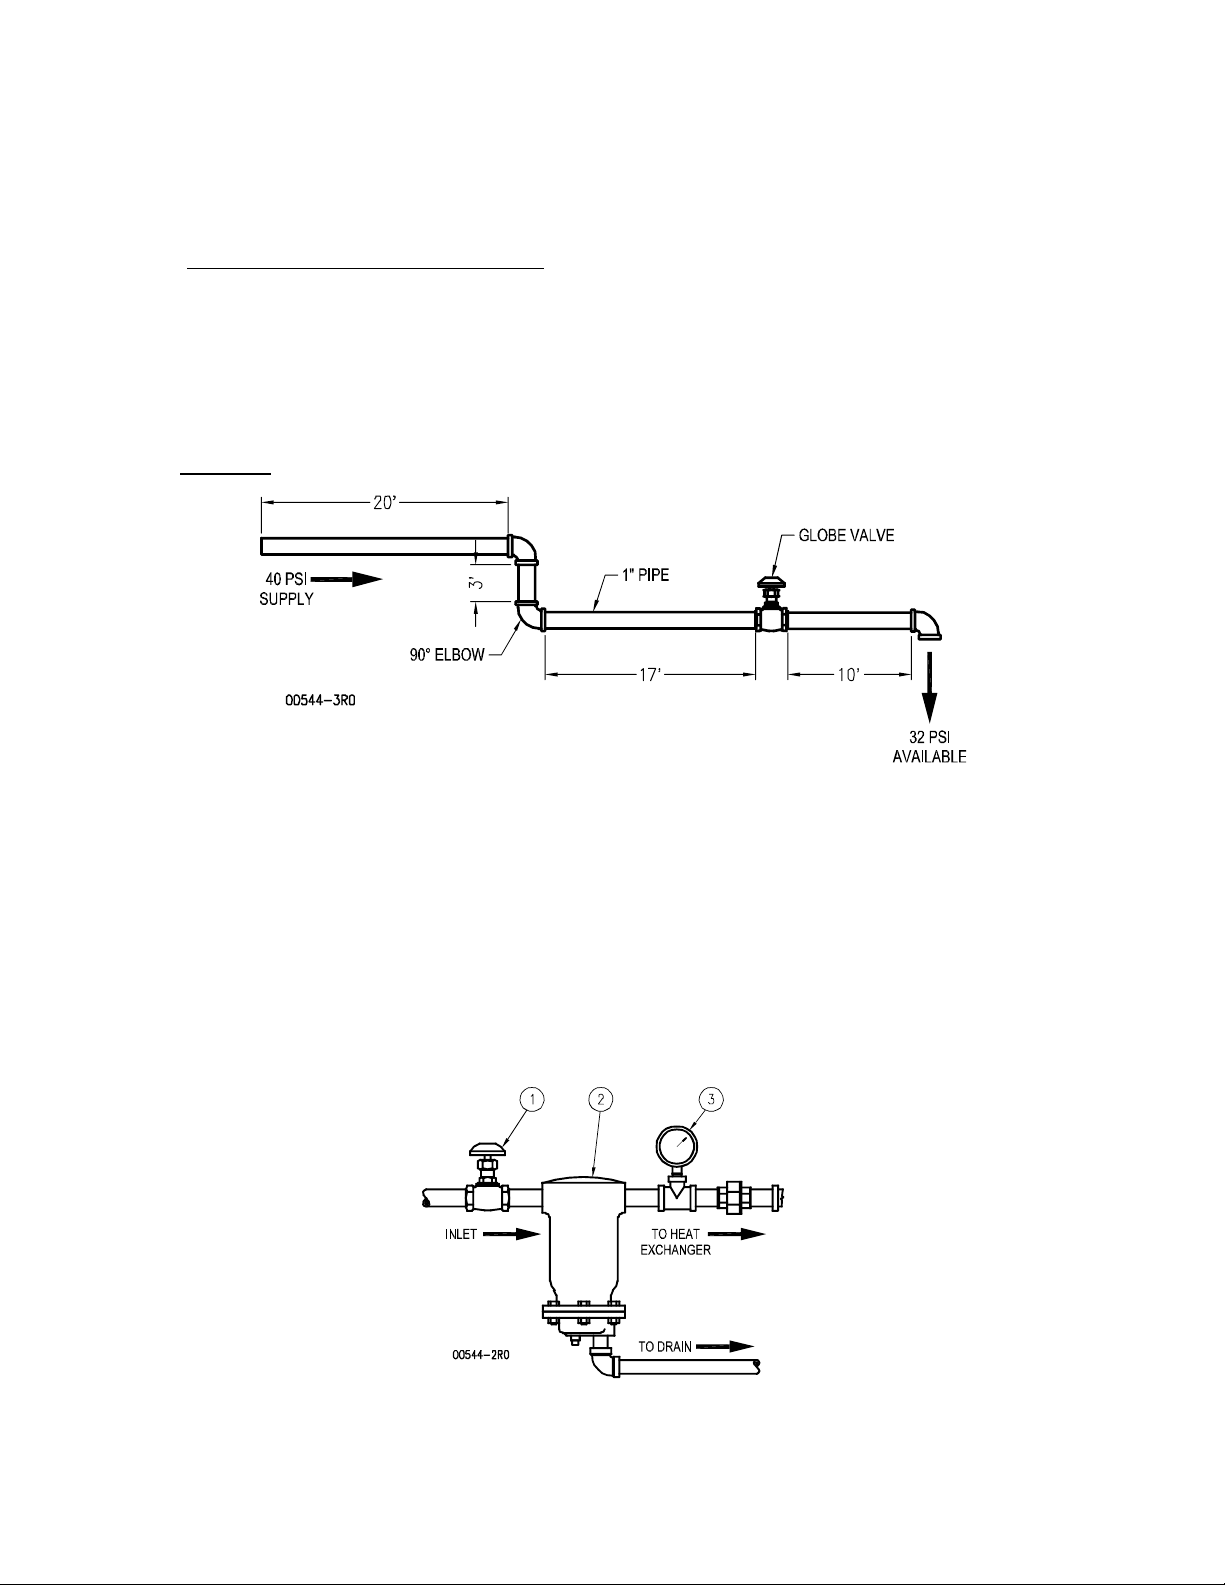
INSTALLATION
UNPACKING
Immediately after unpacking, check for possible shipping damage. If the appliance is found to
be damaged, save the packaging material and contact the carrier within 15 days of delivery.
Before installing, verify the electrical rating agrees with the specification on the rating plate.
LOCATION
Position the appliance in its installation location. Check that there are sufficient clearances to
service the controls, door swing, etc. Also adequate clearance must be left for making the
required supply and drain connections.
Allow enough space between any other piece of equipment or wall for service access. Service
to the controls may be required on the left and/or right side panels of the cabinet.
INSTALLATION CODES AND STANDARDS
The appliance must be installed in accordance with:
In Canada:
Provincial and local codes, or in the absence of local codes, with the Canadian Electric Code,
CSA C22.1 (latest edition). Copies may be obtained from the Canadian Standard Association,
178 Rexdale Blvd., Etobicoke, Ontario, Canada, M9W 1R3.
In the U.S.A.:
State and local codes, or in the absence of local codes, with the National Electrical Code,
ANSI/NFPA-70 (latest edition). Copies may be obtained from The National Fire Protection
Association, Batterymarch Park, Quincy, MA, 02269.