CROWNFUL AFT08003J-UL User manual
8 QUART 2-BASKET AIR FRYER
Model No.:AFT08003J-UL


1.
2.
3.
4.
5.
6.
7.
8.
9.
10.
11.
12.
13.
14.
15.
To avoid damaging the appliance and prevent danger or potential injury - do not
immerse the power cord, plug, the appliance, or its heating elements in water
or under the tap during cleaning.
To avoid electrical shock and avoid short-circuiting your device, do not put any
liquid into the appliance.
DO NOT COVER the air inlet vent or air outlet vent while the unit is operating.
Doing so will prevent even cooking and may damage the unit or cause it to
overheat.
The appliance's outer surface may become hot during operation. Please make
sure to wear your OVEN GLOVES.
The unit's internal temperature gets very high while it's in operation. To avoid
physical injury, do not place your hands inside the appliance unless it has
completely cooled down. Do not put plastic dishes, bowls or protection film into
the unit. Use oven-proof or heat-resistant cookware only.
Make sure that your output voltage corresponds to the voltage stated on the
rating label of the appliance.
If the electrical circuit is overloaded with other appliances, your unit may not
operate properly. It should be operated on a dedicated electrical circuit.
Check the power cord and plug regularly for any damage. If the cord or the plug
is damaged, the manufacturer must replace it to avoid an electrical hazard.
DO NOT USE this unit if the plug, the power cord or the appliance itself is
damaged in any way.
NOTE: DO NOT ATTEMPT TO REPAIR THE UNIT YOURSELF. THIS WILL VOID THE
WARRANTY.
This appliance is NOT INTENDED FOR USE by persons with reduced physical,
sensory, or mental capabilities, or lack of experience & knowledge unless they
are UNDER THE SUPERVISION of a responsible person or have been given proper
instruction in using the appliance. This appliance is NOT INTENDED FOR USE by
children.
Children should be supervised to ensure that they do not play with the
appliance.
Keep the appliance and its power cord OUT OF THE REACH of children when it is
in operation or in the "cooling dowl" process.
To disconnect, press pull any active fryer basket out of the Air fryer body &
remove the plug from the wall outlet.
Do not let the cord hang over the edge of a table or counter. Ensure that the
cord is not in a position where it can be pulled on inadvertently.
KEEP THE POWER CORD AWAY from hot surfaces. DO NOT PLUG in the power
cord or operate the appliance’s controls with wet hands.
When using the crisping tray, make sure they are properly inserted into each air
fryer basket.

16.
17.
18.
19.
20.
21.
22.
23.
24.
25.
26.
27.
28.
29.
30.
31.
32.
33.
DO NOT OPERATE the appliance on or near combustible materials such as
tablecloths and curtains, Do not allow this appliance to touch curtains, wall
coverings, clothing, dish towels, or other flammable materials during use.
Caution is required on surfaces where heat may cause damage - an insulated
heat pad is recommended. Never place the appliance on a plastic, fabric, or
carpeted surface while cooking.
When cooking, DO NOT PLACE the appliance against a wall or other appliances.
Leave at least 10cm of free space on the back and sides and above the
appliance. Do not place anything on top of the appliance.
Always make sure any active fryer basket is fully inserted and locked into the
unit body before use.
Use of an extension cord with the appliance is not recommended. However, if it
is necessary to use an extension lead, ensure that the lead is suited to the
power consumption of the appliance to avoid over heating of the extension cord,
appliance or plug point. Do not place the extension cord in a position where it
can be pulled on by children or animals, or tripped over.
NEVER CONNECT this appliance to an external timer switch or separate
remote-control system.
Always operate the appliance on a horizontal surface that is level, stable, and
non-combustible.
DO NOT USE the unit for any purpose other than described in this manual.
NEVER OPERATE the appliance unattended.
Let the unit cool down completely before you clean or store it.
Extreme caution must be used when moving the unit. It is recommended that
you do not move it when it is switched on or before it has cooled down.
WARNING: Air Fryer will not operate unless the active fryer baskets are fully
closed.
When in operation, the air is released through the air outlet vent. KEEP YOUR
HANDS AND FACE at a safe distance from the air outlet vent.
Should the appliance emit black smoke, UNPLUG IT IMMEDIATELY and wait for
the smoke to stop before removing unit contents.
Should the cooking cycle time be too long, burning the food and smoke starts to
release from the air outlet - UNPLUG IT IMMEDIATELY and wait for the smoke to
stop before removing unit contents. Once it is safe and sufficiently cooled,
please clean the unit accessories to avoid stubborn grease and grime.
Remove the plug from the socket by gripping the plug. Do not pull on the cord to
disconnect the appliance from the mains. Always unplug the unit when not in
use, before cleaning or when adding, or removing parts.
Let the appliance cool down for approximately 30 minutes before handling,
cleaning, or storing.
Do not use accessories or attachments other than those we supply.
This appliance is intended for normal household use only. It is not intended for
use in commercial or retail environments. Do not use outdoors.
Foods that are smaller in size usually require a slightly shorter cooking time than
larger ones.
Large quantities of food only require a slightly longer cooking time than smaller
quantities.
“Flipping” or turning smaller-sized foods halfway through the cooking process,
assures that all the pieces are evenly fried.
Misting a bit of vegetable or olive oil on to fresh potatoes is suggested for a crispier
result. When adding oil, do so just before cooking. (DO NOT use spray&cook)
Use the pre-made dough to prepare filled snacks quickly and easily. The Pre-made
dough also requires a shorter cooking time than homemade dough.
Place a heat-resistant baking tin or unit dish in the Air Fryer Unit when baking a
cake or quiche-A heat-resistant tin or dish is also suggested when cooking fragile or
filled foods.
You can use the Unit to reheat foods. Simply set the temperature to 300°F for up
to 10 minutes.
Meat, fish and vegetables can be coated with a light spray of olive oil before being
grilled; this will help to prevent the food from sticking to the accessory surface.
Never use a cooking vessel filled with cooking oil or any other liquid with this unit! Fire
hazard or physical injury could result. The cooking time for whole roasted chicken will
vary depending on its weight.Use a meat thermometer to the internal temperature as
per the chart below:
34.
35.
36.
37.
38.
39.
If the unit is used improperly or for professional or semi-professional purposes or
if it is not used according to the instructions in the user manual, the warranty will
become invalid.
Should the inner temperature control system fail, the overheating protection
system will be activated and the Unit will not function. Should this happen, unplug
the power cord. Allow time for the Unit to cool completely before restarting or
storing.
The appliance has a built-in “shut-off” device, that will automatically shut down
the unit when the Timer LED reaches zero. You can manually switch off the
appliance by selecting the Power Button.
Do not use any aerosol sprays, instead use a spray bottle with oil.
Do not use harsh abrasives, caustic cleaners, or oven cleaners when cleaning this
appliance.
Do not use anything metal or sharp, you will damage the non-stick surfaces.
E1: Malfunction or short circuit for the internal wire, Please take a picture and contact us.
E2: Malfunction or short circuit for the internal wire, Please take a picture and contact us.

To prevent heat loss and for even cooking, do not open the baskets too frequently.
For best results, do not overload the unit.
Use boneless meat, fish, and poultry for more even cooking and browning.
For even more flavour, add dry seasoning or marinade foods before grilling.
•When the Air fryer is plugged in, you will hear beep and the panel will illuminate,
then will turn black. Push the button to turn the unit on.
•Once you have pressed the button, it will lit up a green light, the /
buttons will also lit up.
•While in operation, press the button to turn both and baskets off.
PRODUCT FUNCTIONS
FUNCTIONS
ON
/OFF
•
8 preset menus: French
fries, steak, fish, shrimp, pizza,
chicken leg, cake, dehydration,
multiple preset functions make
it easier for you to choose your
own cooking method.
•SYNC FINISH button: Automatically syncs the cooking time to ensure both zones
finish at the same time.
•DUAL COOK button: Automatically matches basket R settings to those of basket L
to cook a larger amount of the same food, or cook different foods using the same
function, temperature, and time.
•SHAKE button: when the cooking time is 1/3 left, the unit will beep to remind you to
flip the food in the basket.
•Start/Pause button: After selecting the desired cooking function, press this button
to start or pause cooking.
•POWER BUTTON: The button turns the unit on and off and stops all cooking
functions.
OPERATING BUTTONS
•TEMP ( ) : Use to adjust the temperature before or during cooking
• Controls the output for the basket on the left.
• Controls the output for the basket on the right.
/
•TIME ( ) : Use to adjust the cooking time before or during cooking
/
/
/
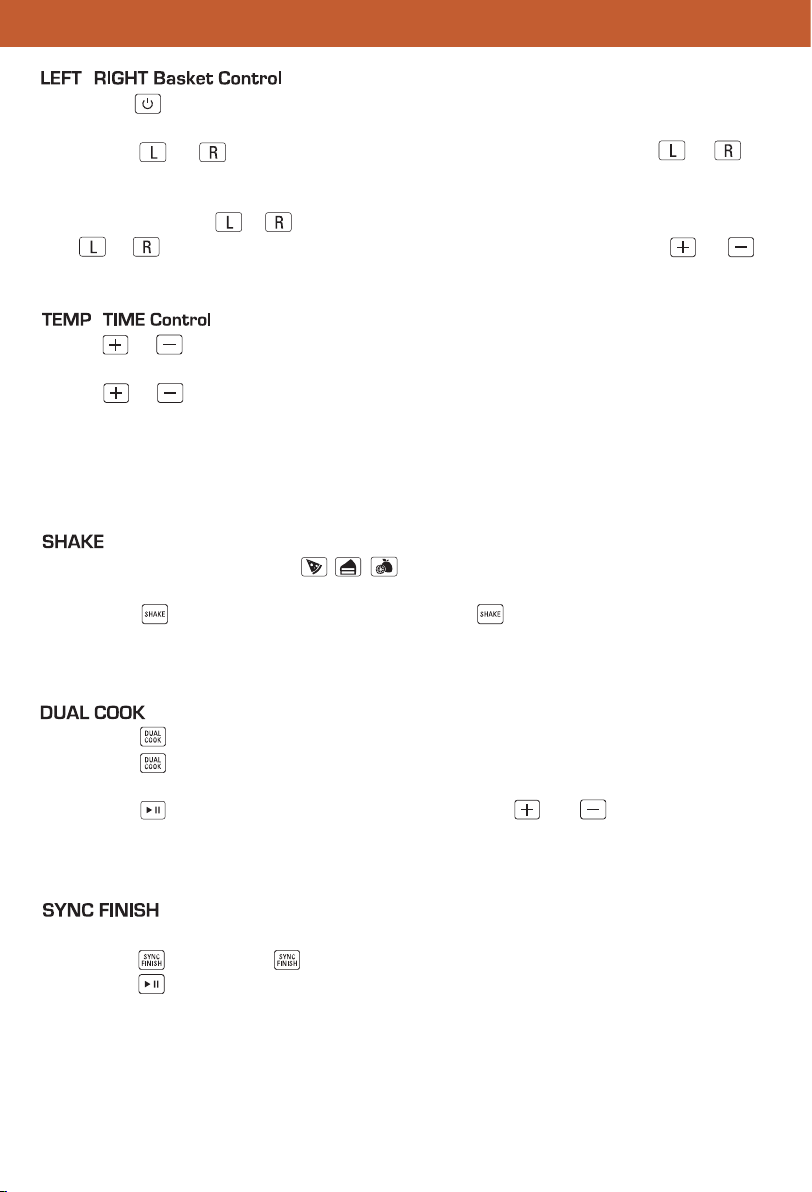
•First set the temperature and time for the two baskets.
•Press the button, the button will start flashing.
•Press the button to start working. The basket with a long set time will work first,
and then the other basket will display “HOLD”. When the frying time on both sides is
the same, the two baskets will start to cook together.
Note: After the cooking starts, SYNC Finish Function will not be available.
•Press the button to easily copy the settings of the basket.
•Press the button, select cooking preset, the same time and temperature will
be displayed on both sides.
•Press the button, in the working state, press the and buttons on either
side of the temp and time,both sides will increase and decrease at the same time.
PRODUCT FUNCTIONS
•Press or on the left to increase or decrease the TEMP by 5 degrees each
press.
•Press or on the right to increase or decrease the TIME by 1 min each press.
•Note: When using the DEHYDRATE, Time will increase or decrease by 1 hour each
press.
•Note: LEFT and RIGHT basket’s TIME and TEMP may be independently programmed at
any time before or during operation.
•For all pre-programs except ,the unit will beep 5 times at 2/3 of the
cooking time, to remind you to flip the food in the basket.
•Press the button to turn this feature off. The will stop blinking.
•Note: If the cooking time is less than 3min, the shake function will not work.
/
/
•When the button is pulsating, the unit will beep, you can now select to use either
left or right baskets independently, or dual cooking.
•Press the or button to program the desired basket. While the or
button is flashing,select any cooking preset from the menu to continue.
[Note: Left or Right baskets can be independently operated)
•Once activated,the & button will stay illuminated. To adjust or add time, select
the or and When the button starts to flash,use the TEMP/TIME or to
adjust.

1.
2.
3.
Remove and discard any packaging material, promotional labels, and tape from the unit.
Remove all accessories from the package and read this manual carefully. Please pay
particular attention to operational instructions, warnings, and important safeguards
to avoid any injury or property damage.
Wash the baskets and crisper plates in hot, soapy water, then rinse and dry thoroughly.
The crisper plates and baskets are the ONLY dishwasher-safe parts. NEVER clean the
main unit in the dishwasher.

1.Cooking the same food in each basket?
Set basket L and use DUAL COOK to automatically match settings to basket R.
Step 2. Press the button.
Step 1.Press the button and place the food
in the baskets.
USAGE-DUAL COOK
USAGE-SYNC FINISH
Step 3.Press the button, the baskets on both
sides will start to work with the same time and
temp.
Step 2.Choose the cooking preset you preferred
and use the TEMP/TIME to adjust the
cooking time and temperature.
/
2.Cooking 2 foods using 2 different functions, temps, or cooking times?
Program each basket and use SYNC FINISH to have both baskets finish at the same time.
Step 1.place the food in the baskets.Set up the
cooking temperature and time for the two baskets.
Press the button.
Step 3. The basket with a long set time will work
first, and then the other basket will display “HOLD”.
When the frying time on both sides is the same, the
two baskets will work together.

3.Want to cook in two baskets with different temperature and cooking time?
When SYNC Finish or DUAL Cook are not selected, manually select two
baskets with different cooking duration.
Step 1.Place food in baskets.
Choose the corresponding food basket (L/R)
Adjust the required time or temp (optional).
Step 2.Repeat step 1 for the other baskets
Step 2. Press the button to start cooking.
Step 1.Place food in the basket.
Choose the basket you want to work in.
Adjust temp or time (optional)
USAGE-Using Two Zones
USAGE-Using a Single Zone
Step 3.Press the button to start cooking.
• Check food frequently to avoid overcooking.
4.Want to cook in one basket only?
Fill a single Basket and use it like a traditional air fryer.
1
2
1
2
1
2

Step 2. Press the button to pause cooking.
NOTE: In SYNC FINISH mode, we recommend pressing the button to pause both baskets.
Pausing only one basket will affect the synchronized finish time.
Step 1.Select the basket you want to pause
USAGE-Pausing Time in a Single Zone (While Both Zones Are Running)
USAGE-Ending the Cook Time in One basket (While Using Both baskets)
Step 3.To resume cooking, press the button
Step 2. Press TIME to decrease time to the
lowest value and wait until the duration to finish.
Step 1. Select the basket you want to stop cooking in.
Step 3.After waiting for the remaining time to end,
the screen on the corresponding side will display
'COOL',indicating the cooking has ended and the
basket on the other side will continue to cook.
to start cooking.

Thanks for trusting CROWNFUL
for your household and kitchen needs!
(May you have a FANTASTIC culinary experience with your new CROWNFUL Air Fryer!)
START COOKING delectable yet healthier meals
using your free CROWNFUL air fryer recipe book
SUBSCRIBE to our newsletter to get yourself
updated with latest great deals, gifts and valuable
information about CROWNFUL products.
https://www.facebook.com/crownful.official
GOT QUESTIONS or CONCERNS?
please contact support@crownful.com
12
Months
WARRANTY ISSUE
Email: [email protected]om
And we'll do our best to make you one of our HAPPY customers!
We remain at your service! Of CROWNFUL
https://www.crownful.com/
Scan to Follow Us
@crownful.official
Website: www.crownful.offical
Table of contents
Other CROWNFUL Fryer manuals


Popular Fryer manuals by other brands


Curtis
Curtis DF7003-UL instruction manual

Anetsberger Brothers
Anetsberger Brothers FM-14 Installation, user operation & maintenance manual

Ward's
Ward's CDF-2060TSA instruction manual

Redfox
Redfox FE 30 T Instructions for installation and use

DELLA
DELLA 048-GM-48268 instruction manual

Beper
Beper BC.353 use instructions