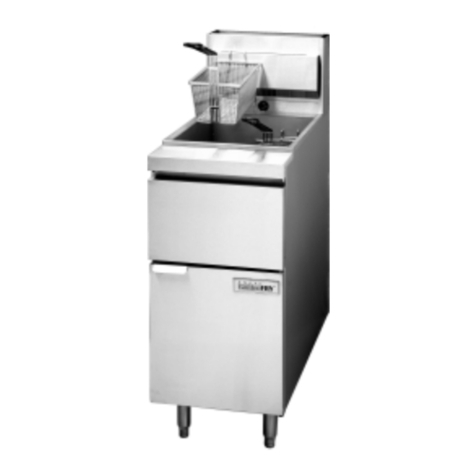
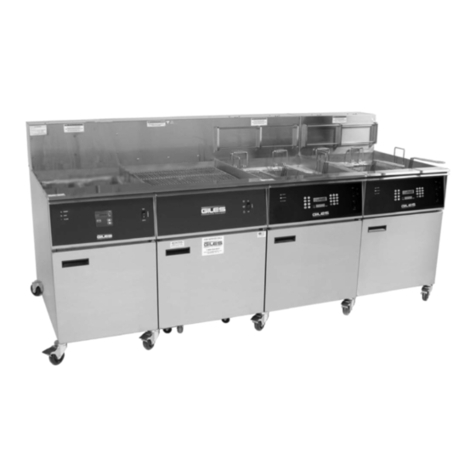
Anetsberger Brothers FM-14 Installation guide

1
Anetsberger Brothers, Inc.
180 North Anets Drive • Northbrook, Illinois 60062 • 847-272-0770 • Fax 847-272-1943
For ANETS Factory Warranty Service • 800-837-2638
Installation,
User Operation,
&
Maintenance
Manual
Keep this Manual in a Convenient Location for Reference
The Anets GoldenLine
Quality Equipment For The Restaurant, Supermarket, and Bakery Industries
WARNING
After installation of this equipment, immediately contact your local gas
supplier to obtain information about what action to take whenever any
person smells gas. Post this information in a prominent location.
!
DANGER
Improperinstallation,adjustment,alteration,service,ormaintenancecan
cause property damage, injury or death. Read the installation, operating
andmaintenanceinstructionsthoroughlybeforeinstallingorservicing this
equipment.
!
Form I-225
Rev. 6/03
Price $20.00 US
FOR YOUR SAFETY
DONOTstoreorusegasoline or other flammable vapors
or liquids inthe vicinity of this or any other appliance.
!
GoldenFRGoldenFR
GoldenFRGoldenFR
GoldenFRYY
YY
Y
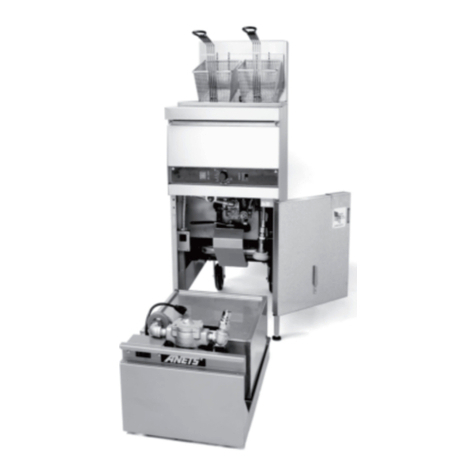
ModelFM-14FilterMate
shownunder the base system
of(2) 14” fryers
Model Filt II-14W shown banked
to(2) 14” fryers
Models
FM-14 Filter Mate
FM-18 Filter Mate
Filt II-14/14W Filtronic
Filt II-18/18W Filtronic
FM-14
FM-18
FiltII-14/14W
FiltII-18/18W

2
1. Carefullyexaminetheshippingcontainerforexternaldamage. When damage isnoted,notifythe
deliverycarrier immediately. Saveallpackingmaterialsfor damageclaim examination.
2. Ifnoexternaldamageisnoted,remove theshippingcontainerfromthefilterand examinetheunit
carefullyfordamage. Place thefilterin asafelocation,if damageisnoted,sothat thefreightdamage
claimsadjustercanexamineit.
SHIPPING CONTSHIPPING CONT
SHIPPING CONTAINER INSPECTIONAINER INSPECTION
AINER INSPECTIONAINER INSPECTION
AINER INSPECTION
NOTE: A Parts List for each Anets Filter System is among the items shipped with each unit. If an
additional copy of this list is needed, please contact the factory as directed on the back cover.
Models CoModels Co
Models CoModels Co
Models Covv
vv
verer
erer
ered Byed By
ed Byed By
ed By TT
TT
This Manhis Man
his Manhis Man
his Manualual
ualual
ual
FM-14 Filter Mate, Under Fryer Filter System - 14”
FM-18 Filter Mate, Under Fryer Filter System - 18”
Filt II-14 14” Filtronic Filter System in Cabinet
Filt II-14W 14” Filtronic Filter System with Heat Lamp
Filt II-18 18” Filtronic Filter System in Cabinet
Filt II-18W 18” Filtronic Filter System with Heat Lamp
StandardAccessories furnishedinthe shippingcarton withthis filterinclude:
(1) FilterScreenAssembly
Box of Filter Paper (100 pcs.)
OtheravailableOptionalequipment may includeaseparatehose assemblyforshorteningremoval anda
cleaningbrush. These would be packed withthe fryers,if ordered.
TABLE OF CONTENTS
ShippingContainerInspection ....................................................... 2
CodeRequirements ...................................................................... 2
FilterUnitPreparationInstructions ................................................ 3
FilterSystemDiagrams .................................................................. 4
FilteringInstructions ...................................................................... 5
OilDisposalInstructions ............................................................... 6
ReplacingTheFilterPaper ............................................................ 7
FilterTroubleshootingGuide .......................................................... 8
FilterWarranty .............................................................................. 9
DD
DD
DANGERANGER
ANGERANGER
ANGER
Read these specifications, Code Requirements, Installation Requirements, Installa-
tion Instructions, and Operating Instructions very carefully. Failure to follow the Instruc-
tions could cause the filter system to malfunction. A filter system malfunction can result
in property damage, serious bodily injury, or death.
!
3
This Manual will detail the Installation and Operation of the Filter-
Mate system, with notes where the Filtronic II System differs.
BoththeFilterMate andFiltronicIISystems enabletheuserto safely andefficientlyfilter the cookingoilor
shorteningfroma fryerina bankedrowwhile theotherfryers inthatrow arestillbeing used. Eventhough
thesetwoFiltrationSystemsareslightlydifferentinphysicaldimensionsanddesign,theInstallationand
Operationisbasicallythesame.
INSTINST
INSTINST
INSTALLAALLA
ALLAALLA
ALLATIONTION
TIONTION
TION
Pleasemakesure thatyourdesired filter locationhas electrical supplyfactorsthat aresuitablefor this
product. Requirements are 120Volts,60 Hz, 8Amps,1-phase,three-wire connection,includingan
electricalground.
FILFIL
FILFIL
FILTER ELECTRICAL SPECIFICATER ELECTRICAL SPECIFICA
TER ELECTRICAL SPECIFICATER ELECTRICAL SPECIFICA
TER ELECTRICAL SPECIFICATIONSTIONS
TIONSTIONS
TIONS
WARNING
ElectricalGroundingInstructions
This appliance is equipped with a three-prong (grounding) plug for
your protection against shock hazard, and should be plugged
directly into a properly grounded, three-prong receptacle. DO NOT
cut or remove the grounding prong from this plug.
!
!
FILFIL
FILFIL
FILTER UNIT PREPTER UNIT PREP
TER UNIT PREPTER UNIT PREP
TER UNIT PREPARAARA
ARAARA
ARATIONTION
TIONTION
TION (Refer to Photos On Page 4)
1. Assemble filterenvelopetofilterscreenbysliding the envelopeoverthefilterscreen,folding
backthe openend overthe filterscreen. Make surethe hole inthe filterenvelope fitsover
thefittingonthefilterscreen.
2. Assemble filterenvelopeclipover foldedbackendof envelope andoverfittingon filter
screen.
3. Attachknurledretainingnutontofittingonscreen,securingtheassembly.
4. Attach quick-connectcouplingon draintube toknurledretainingnut.
5. Placefilterunitintothefiltertankusingthelift-outhandle.
6. Connect thefilterassemblyto thepumpusingthe quick-connect assembly.
7. Put thefilter tankcover onthe tank.
8. Slidethefiltertankunitinto itslocationunderthefryersor inthefiltercabinet.
9. Make theconnectionfrom the fryerreturnline to thefilterpump withthequick-connect
fitting.
10. Plugthe cord on the side of thefilter unit into the receptacle onthe fryer frame. Make sure
that the power switch located on the side or top of filter unit is ON.

4
FILFIL
FILFIL
FILTER MATER MA
TER MATER MA
TER MATETE
TETE
TE TT
TT
TANKANK
ANKANK
ANK
Filter envelope
Knurledretainingnut
Quickconnectcoupling
Filterenvelopeclip
Liftouthandle
Pumpquick-connectcoupling
FILFIL
FILFIL
FILTRTR
TRTR
TRONIC IIONIC II
ONIC IIONIC II
ONIC II TT
TT
TANKANK
ANKANK
ANK
Liftouthandle
Filterenvelopeclip
Quickconnectcoupling
Filter envelope
Pumpquick-connectcoupling Knurledretainingnut
Returnlineandoptionalhose
connection

5
FILFIL
FILFIL
FILTERINGTERING
TERINGTERING
TERING
FILFIL
FILFIL
FILTERING INSTRTERING INSTR
TERING INSTRTERING INSTR
TERING INSTRUCTIONSUCTIONS
UCTIONSUCTIONS
UCTIONS
CAUTION
Never operate the filter unit unless the cooking oil or shortening in the
fryers has been brought up to cooking temperature.
WARNING
Alwayswear protective heat-resistant gloves when performing thefiltering operation.
1.Before filtering theshortening ina fryer,turn thethermostat knobto “OFF”or theGas Valveto“PI-
LOT”topreventthefryerfromre-lightingduringfiltering. Onsomemodelsthesystemautomatically
preventstheburnersfrom lightingwhenthe doorofthefryer isopen.
2.Openthe drain valve(blackhandle) onthefryer tobefiltered, lettingallthe shorteningdraininto the
filtertank. Leavethisvalve open.
3.Openthe returnlinevalve (yellowhandle)for thefryerbeing filtered. Thisactivatesthe powerto the
pump. Ifthe pumpdoes notstart immediately checkthat theswitch on theside ortop ofthe pump
frameis“ON”. Whilethefilter systemiscycling,use along-handledcleaningbrushto wipethebottom
ofthefryerand pushexcesscrumbsthrough thedrainandinto thefiltermachine.
4.Whentheshortening returningintothe fryer isclear,close the drainvalve(black handle)andallowthe
fryertorefill.
5.Allowthepump to rununtilno more oilisreturninginto thevat. Thenclosethe returnlinevalve
(yellowhandle),which de-activatesthepower tothe pump.
WARNING
When cleaning the inside of the frypot, do not damage the temperature and
hi-limit probes that protrude into the frypot.
If solid shortening is being used it is very important that all oil is allowed to flow back into
the vat and none is left in the hoses. Failure to do so could cause the pump to fail if the
oil solidifies in the line.
WARNING
DANGER
Never drain more than one fryer at a time – the filter pan may overflow.
!
!
Note On Using Filter Powder
If filter powder is being used, add 1 cup of powder (for 14” fryers) or 2 cups (for 18” fryers) to
eitherthe fry tank orthefiltertank. If added to frytank,makesure powder is completelyflushed
during fry tank cleaning (Step 3) before closing drain valve (Step 4). If added to filter tank, the
powder will be removed when the filter envelope is changed and the filter tank is cleaned.

6
OIL DISPOSALOIL DISPOSAL
OIL DISPOSAL
Ifthecooking oilor shorteningfrom afryer is tobe disposed,follow steps1 and2from FilteringInstruc-
tionsinprevioussection. Disconnect thelinefrom thepumpto thefryerreturn line, andconnectthe
optionalhose assemblyto thepump. Turn onthe pumpusing themanual switchon theside ortop ofthe
filteranddirect theoil intoan appropriatedevice such asan oilshuttle tomove theusedoil toits disposal
tank.
IMPORTANT NOTE:
Thepumponthis filter unitisequipped with asafetythatwill turnoffthemotor ifitoverheatsor an
electricalfaultoccurs. If thisoccurs,let thepump motorcoolfor 15minutes, then pressthe manual
resetbutton on thebottom of themotor and restartthe motor.
DANGER
Never run water through the filter system. This will cause rust and corrosion in the
motor and pump and will void the Warrranty.
WARNING
Always wear protective heat-resistant gloves when performing the oil disposal operation.
6.On gas-operated thermostat models(14G, 14GS, MXEG, 18EG, 20EG)the thermostat knob cannow
beturned back to the desiredtemperature. CAUTION: On these models the thermostat must be set to
“OFF”or the Gas Valve to “PILOT”before filtering orthe burners MAYcomeback on ifthe doors are
closedduringfiltering.
7.On electric-operated thermostat models (MX-14E, MX-14AA, 18E,18AA, 20E, and 14EL-17) the
powerswitch onthe control panelmust bereset for thefryer tooperate again.
8.The otherfryers inthe bankcan befiltered usingthe sameprocedure.

7
1. Disconnecttheoilreturn linefromthepump.
2. Unplugthe cord from the receptacleon the sideof the cabinet.
3. Pullthefilterunitfromthe cabinet.
4. Disconnecttheline fromthepump tothe filterscreen.
5. Onthe FiltronicII models,pivot the motor assembly upout ofthe way.
6. Removethe filtercover.Use liftout handle toremove screenassembly. Placeona clean surface for
disassembly.
7. Detachquick-connectcouplingon drain tubefromknurledretaining nut.
8. Detachknurledretainingnutfromfittinginscreen.
9. Removefilter envelope clip from endof filterscreen andfolded backend ofenvelope .
10. Removefilterenvelopefromfilter screen.
11.Cleanthefilter pan, filterscreenand allcomponentsthoroughlyusing asolutionofhot waterand
detergent. Make surethat allfood andbreading particlesare removedfrom thepan and from the filter
screen.
12. Drythe pan,the screenand allcomponents completelybefore startingto reassemble.
13. FollowinstructionsunderFILTERUNITPREPARATIONtoinstallnewfilter envelope.
REPLAREPLA
REPLAREPLA
REPLACINGCING
CINGCING
CING THE FILTHE FIL
THE FILTHE FIL
THE FILTER PTER P
TER PTER P
TER PAPERAPER
APERAPER
APER
Ifthefilter paperbecomestorn, orif thetimeto filtertheoil fromone unit becomesexcessive, itistime to
replacetheFilterEnvelope.
The oil soaked filter envelope may still be very hot and could cause burns.
WARNING
DANGER
Make sure the filter pan has cooled completely to room temperature before
attempting to change the paper.
!
!

8
FILFIL
FILFIL
FILTER SYTER SY
TER SYTER SY
TER SYSTEMSTEM
STEMSTEM
STEM TRTR
TRTR
TROUBLESHOOOUBLESHOO
OUBLESHOOOUBLESHOO
OUBLESHOOTING GUIDETING GUIDE
TING GUIDETING GUIDE
TING GUIDE
PROBLEM
Pump does not
start when the
return line valve
(yellow handle) on
the fryer is opened.
1. Make sure the power cord is plugged into the receptacle in the cabinet and the
main power cord from the system is plugged into the appropriate power supply.
2. Turn the switch on the side of the filter to “ON”.
3. Close the return line valve (yellow handle) and try opening the return line valve
on another fryer. If the pump starts, the problem is with the microswitch that
contacts the return line valve on the first fryer.
4. If pump still hasn’t started, depress the thermal overload button on the bottom
of the motor. If the motor is hot to the touch, wait at least 45 minutes before trying
this.
5. If the pump starts and stops again in a short time, or if it hums but does not
pump, there is a restriction somewhere in the filter screen or in the pump itself. Go
to Step 6. If there is no reaction from the pump, go to step 7.
6. Allow the oil/shortening in the filter pan to cool, then empty the pan and verify
that the filter paper and screen assembly is assembled correctly. Disassemble the
filter screen and look for blockages of sediment or solid shortening within.
7. Problem is with the motor/pump or the wiring. Remove the motor from the
filter and bench test by connecting a 120V line to the motor leads. If it runs, the
problem is with the wiring between the motor and the power supply. If it does not
run, the motor needs to be replaced.
Filteringprocedureis
veryslow. Shorten-
ing/oilreturningtothe
fryerveryslow.
1. Afterallthe shortening/oilhas been pumpedback intothefryer,inspectthe
filterpaper envelope. Make surethat anyexcess sedimentis removedfrom the
topof the filterpaper envelope.
2. Ifthefilter paperenvelope isdirty ortorn, disassemblethe filter screen
assembly. Inspect forblockages inthe lines. Replacewitha cleanfilter paper
envelope.
Fryersdo not re-fire
afterfiltering. 1. Make sure thedoor on the fryeris completely closed.
2. Resetthe ON/OFF switchon the fryerby flipping toOFF position and
then back to ON. (Note: Each time the fryer door is opened the ON/OFF
switchneeds to be reset.
SOLSOL
SOLSOL
SOLUTIONUTION
UTIONUTION
UTION
3. Iftheoil stillreturnsto thefryer slowly,theproblemmaybe ablockage within
thepumpitself. The pumpsection ofthe motorcanbe easilydisassembled to
lookforblockagesofsedimentorsolid shorteningwithin.
WARNING
Onlyusefilter paperenvelopesfrom AnetsbergerBrothersthat havebeen
specificallydesignedforthisfiltersystem. Usingthewrongtypeof filterpaper
cancausedamage tothe pumpsystem, and willvoid thewarranty.

9
LIMITEDWARRANTY
ANETSBERGERBROTHERS, INC., Northbrook,Illinois, USA,certifies
thatallequipmentofitsmanufactureis,tothebestofitsknowledge,freefrom
defectivematerialandworkmanship.
ANETSBERGERBROTHERS,INC., agreestoreplace anyintegralpart of
itsequipmentthatprovesdefectivewithin15 monthsofdateoforiginalship-
mentfromthefactory,or12monthsfromthedateofinstallation,whicheveris
sooner. Buyer must return thedefective part tothe factory,freightprepaid,
for inspection. AnetsbergerBrothers,Inc.,further agreestoassume thecost
ofinstallingsaidreplacementpartwithinthesameperiod.
Allfrypotsare coveredby thewarranty abovefor thefirst year ofoperation.
Variousmodelshavean extendedwarrantythat cover thereplacementof the
frypotonly. Seethe individualspecificationsheetsfordetails.
Overtimecharges,calibration,adjustmentsandabnormalinstallationcharges
shallnot beat the expense ofAnetsbergerBrothers, Inc.
Theconditionsandwarrantyexpressedabovearevalidonlyifequipmenthas
beenproperly installed and operated. No other warranty,expressed orim-
plied,shall govern equipmentmanufactured by AnetsbergerBrothers, Inc.
UndernocircumstancesshallAnetsbergerBrothers,Inc., beliableforlossof
profitsorany direct orindirect cost, expenses,lossor damagesarisingout of
defectsinor failureofthe equipmentorany partthereof.
Keep this Manual in a Convenient Location for Reference
Anetsberger Brothers, Inc.
180 North Anets Drive • Northbrook, Illinois 60062 • 847-272-0770 • Fax 847-272-1943
Toll-free Customer & Warranty Service: 800/837-2638
WebSite: www.anetsberger.com
email: sales@anetsberger.com
This manual suits for next models
9
Table of contents
Other Anetsberger Brothers Fryer manuals

Anetsberger Brothers
Anetsberger Brothers SilverLine SLE40 User manual

Anetsberger Brothers
Anetsberger Brothers GoldenFry MX14E-SFF User manual

Anetsberger Brothers
Anetsberger Brothers SLG40 Installation guide

Anetsberger Brothers
Anetsberger Brothers CF14 Installation guide

Anetsberger Brothers
Anetsberger Brothers 14G Installation guide

Anetsberger Brothers
Anetsberger Brothers 14VF Installation guide

Anetsberger Brothers
Anetsberger Brothers MX-14-2AA Installation guide