Quik n’ Crispy Rapid Air Fryer RAF R900007 User manual

©2020 QNC, Inc. 1020 208V/240V RAF OM 1
Model RAF
Operator’s Manual
For Models with Integral Systems for Limiting the Emissions of
Grease Laden Vapors to Comply with EPA 202 / UL710B
Covering RAF Part Numbers:
R900007
R900009

©2020 QNC, Inc. 1020 208V/240V RAF OM 2

©2020 QNC, Inc. 1020 208V/240V RAF OM 3
Table of Contents
INTRODUCTION/PACKING LIST ...............................................................4
INSTALLATION PREPARATION .................................................................5
INSTALLATION PROCEDURES ..................................................................6
INITIAL OPERATION.................................................................................7
INITIAL PROGRAMMING .........................................................................8
MENU SETUP ..........................................................................................9
COOK MODE .........................................................................................10
SYSTEM SETUP ......................................................................................13
MANAGER PROGRAMMING..................................................................13
SERVICE PROGRAMMING......................................................................15
COOKING PROCEDURES ........................................................................17
PROCEDURES TO CLEAN AND MAINTAIN THE FILTERS .........................21
CLEANING PROCEDURES.......................................................................23
PRODUCT REGISTRATION / SERVICE .....................................................28
WARRANTY ...........................................................................................28
SERVICE.................................................................................................28
EXTENDED WARRANTY .........................................................................28
RAF WIRING DIAGRAM .........................................................................29

©2020 QNC, Inc. 1020 208V/240V RAF OM 4
INTRODUCTION/PACKING LIST
INTRODUCTION
Marketed since 2020, the Rapid Air Fryer® Rapid Air Fryer (RAF) is the result of
years of research, development, and refinement. By using the principles of forced
hot air and radiant heat, combined with an externally discharged catalytic
converter and an air filtration system, the Rapid Air Fryer can quickly cook and
brown several "oven ready" convenience foods. All without the need of a vented
hood system! This easy-to-use countertop greaseless fryer safely and efficiently
eliminates the health concerns, expense, and operating difficulties inherent with
hot oil cooking processes.
PACKING LIST
Included in the Rapid Air Fryer packing carton are the following items:
▪1 Rapid Air Fryer Rapid Air Fryer which includes:
•1 Cooking Basket Assembly
o2 Cooking Basket Handles & Mounting Hardware
o5 3/8” screws (1 extra)
o6 nuts (2 extra)
o1 ¼” screw (extra)
•1 Drip Tray
•1 Three-Piece Air Plenum
•1 Removable Front Panel
•4 Adjustable Legs
•1 Operator's Manual
•1 Product Registration Form

©2020 QNC, Inc. 1020 208V/240V RAF OM 5
INSTALLATION PREPARATION
Select a suitable position in the retail location to install the Rapid Air Fryer. Points
to consider when selecting a location are:
1. Accessibility by store employees
2. Proximity to customers
3. Proximity to refrigerator and freezer equipment
4. Proximity to other retail points of sale to take advantage of cross
merchandising opportunities
5. Sight line of customer (to enhance customer perception of "fresh"
preparation).
The Rapid Air Fryer should be mounted on a sturdy, foodservice-appropriate
surface. Stainless steel is the preferred material. Allow an adequate amount of
workspace near the Rapid Air Fryer so that operators will not have to work in a
confined location. A minimum of 1" of space between the rear, sides and top of
the Rapid Air Fryer, and the walls, ceiling or other structural surfaces of your
facility is recommended.
In addition to a suitable location, accommodation must be made for the
necessary electrical connection. Please note the following electrical
specifications.
Electrical Specifications
US / Canada / International: Single Phase, 50/60 Hz.
208 VAC USA (5760 Watts, 29 amps) 3-hour input averaging test, less than 24
amps, can be installed on 30 amp circuit
208 VAC –Canada - (4326 Watts, 21 amps)
230 VAC (5290 Watts, 23 amps)
240 VAC (5750 Watts, 24 amps)
RAF Receptacle (USA / Canada) NEMA #6-30R

©2020 QNC, Inc. 1020 208V/240V RAF OM 6
INSTALLATION PROCEDURES
1. Open the shipping carton and lift off the top portion.
2. Lift off the 4 sides of the carton, leaving the Rapid Air Fryer and the
corrugated cardboard packing set in place on the floor.
3. Remove the corrugated cardboard packing set from around the base of the
Rapid Air Fryer.
4. Lift the fryer into position on the designated counter. The Rapid Air Fryer
weighs approximately 165 lb. The use of at least two people is advised for
this step of the installation.
5. A piece of tape is attached to each appliance leg to prevent them from
shifting during shipment. Remove the tape from the appliance legs. Adjust
the legs to level the fryer on the counter surface.
6. Pull out the Cooking Basket Assembly and remove the plastic bag
containing the Cooking Basket handles, screws, nuts, wrench, Operator’s
Manual, and 34-page Menu.
7. Mount the Cooking Basket handles to the Cooking Basket by attaching two
3/8” screws with acorn nuts to the base of each handle using the wrench to
tighten. We recommend tightening the acorn nuts a good half turn past
the point of resistance to lock them tightly into place.
8. Take the four adhesive backed rubber leg stops and mount them to the
bottom of the four adjustable legs. This is to prevent the Rapid Air Fryer
from sliding on a stainless-steel appliance stand or table.

©2020 QNC, Inc. 1020 208V/240V RAF OM 7
INITIAL OPERATION
Plug the RAF into the NEMA# 6-30R electrical receptacle. Plugging in the RAF to
the receptacle is only done on the initial operation of the unit, and the RAF does
not need to be unplugged when it is powered off at the end of the day.
The initial image that will appear on the screen will display the time of day at the
top of the screen and “Power” button in the center of the screen. (if the time of
day is incorrect, we will show you how to update the time later in this manual).

©2020 QNC, Inc. 1020 208V/240V RAF OM 8
INITIAL PROGRAMMING
Touch the “Power Button” and this will take you to main operation screen display.
From this screen, you can touch the “Menu Setup” to create and modify up to 108
cooking recipes. You can touch the “Cook” icon to engage any of these recipes.
You can touch the “System Setup” to access either the “Manager” or the
“Service” programming features of the RAF. You can touch the “Help” icon to
access the contact information for QNC, Inc. as well as to view the most recent
firmware that has been uploaded into the RAF Controller.

©2020 QNC, Inc. 1020 208V/240V RAF OM 9
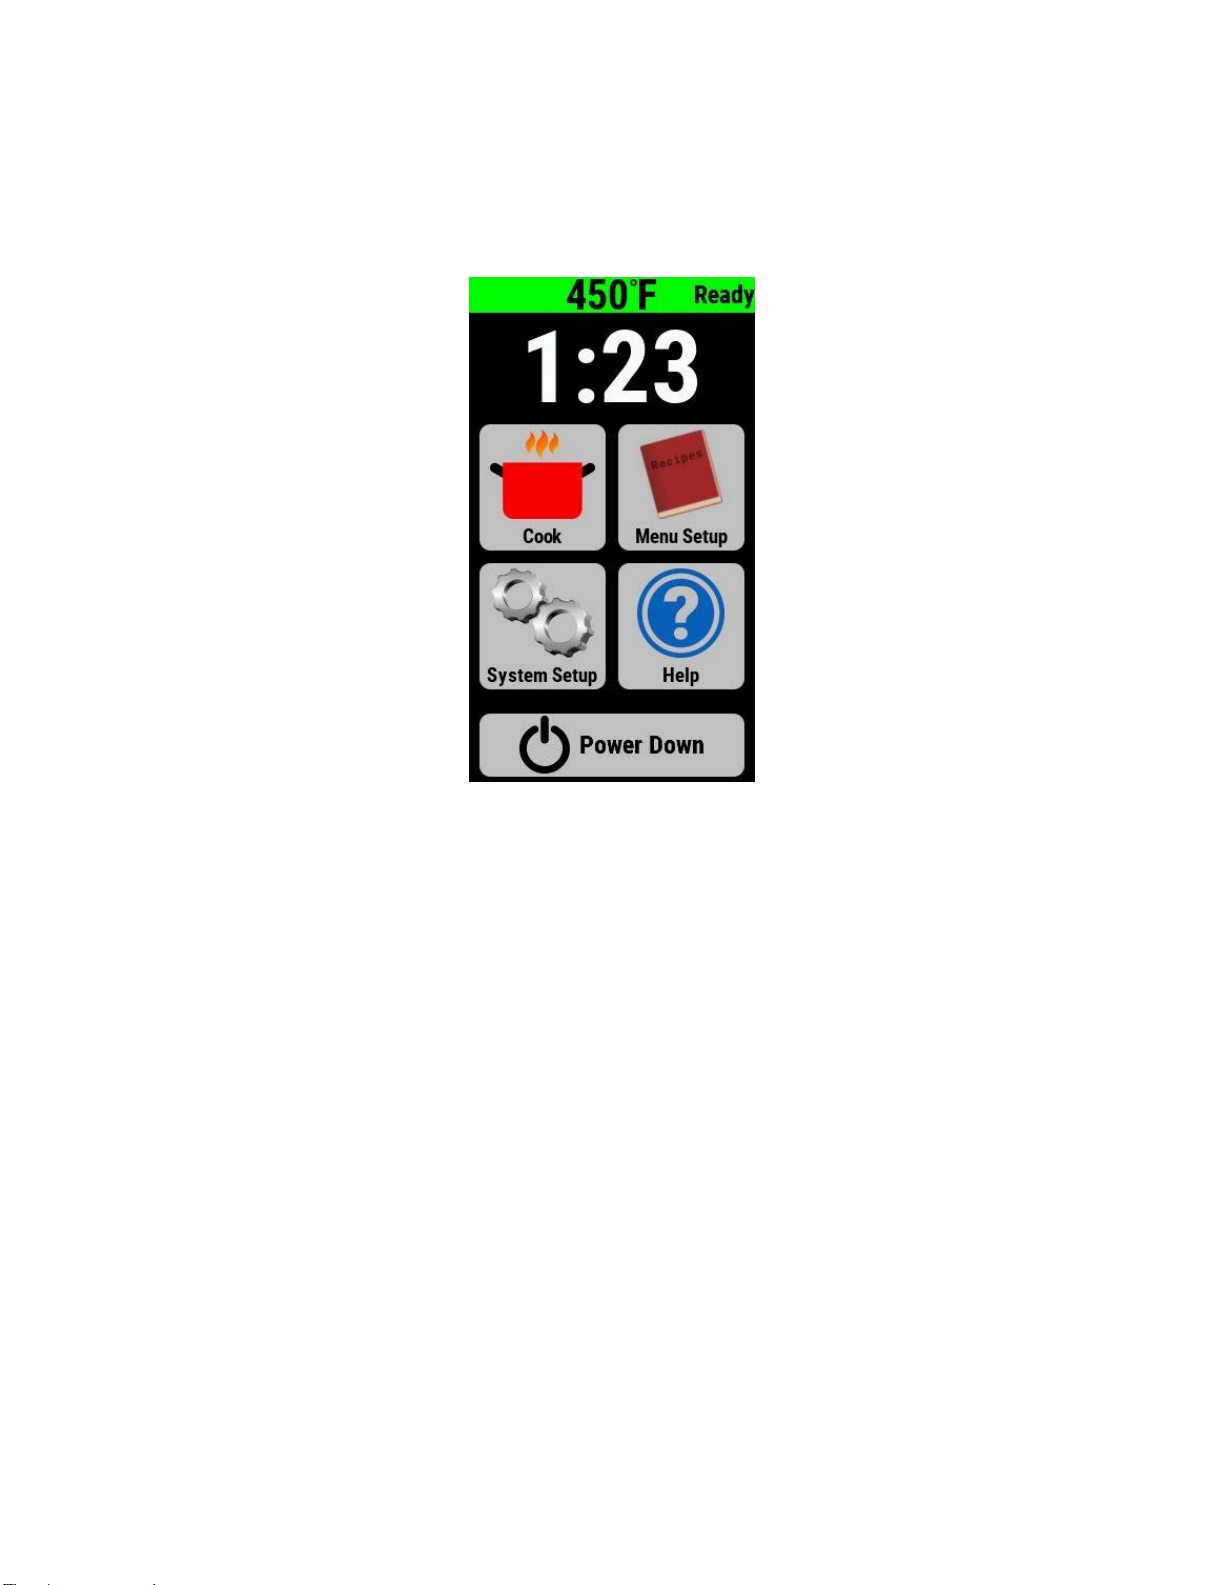
MENU SETUP
The RAF Menu Setup utilizes six “Groups” and this screen will display the factory
pre-set Groups of Grill, Bake, Fry, Breakfast, Lunch, and Dinner. The names of
these Groups can be edited to names of your choosing by touching the Group
icon and then selecting the “Edit” key.If the Group has an image uploaded to it
and you wish to change the image, you will need to delete the Group and then
add a new Group.
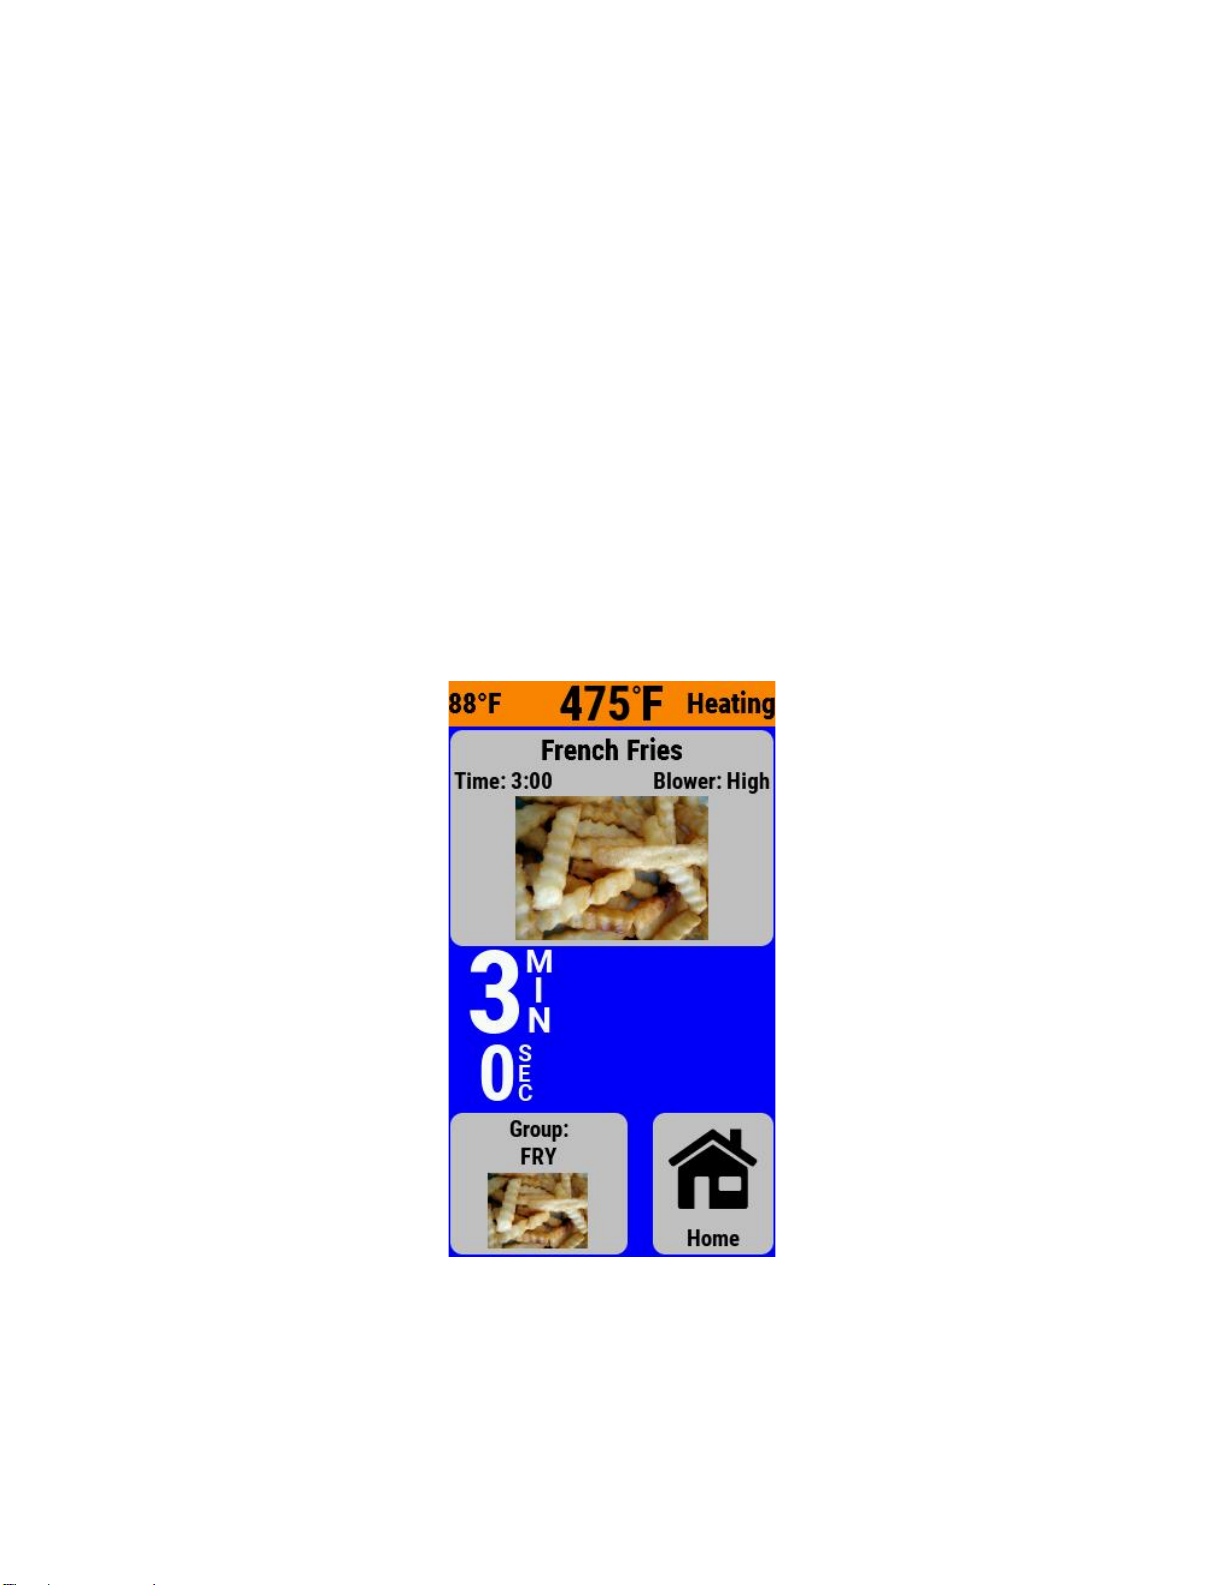
Each of the six Groups can accommodate 18 individual recipes. Push one of the
“Groups” on the screen and then touch edit. It will display the recipes that have
been created for this Group. For our example push “FRY” and then click “Edit”at
the bottom right hand side of the screen. This will display up to 18 recipes that
have recipe name, time, temperature, and blower speed.
To edit any of the recipes that have been preloaded into the controller, click on
the recipe. To modify any of the fields within a recipe, just click on the field and it
will take you to a keyboard for you to update the text or numbers within the field.
Hit OK to save your changes. Some recipes with cooking times and temperatures
have been entered at the factory for guidelines. Again, click on the fields to
change the time and temperature. For the “Blower” field, we recommend that
you utilize the “High” setting for most recipes. There is also a larger field in each
recipe, located below the name of the recipe. In this field, you can upload a
bitmap image of the product that you wish to use for this recipe.
For the field with the images, you can click on the field and enter any of the
images in the factory library. You can also add your own images that are in a
Bitmap (BMP) format. The maximum image pixel width is 180 and maximum
height is 120 and they can be a 24 or 32 Bitmap. We found a free converter
program at https://onlineconvertfree.com/convert-format/jpg-to-bmp/. This
program will convert your images from JPEG to BMP and will then allow you to
resize the BMP file. There are other programs that you can use to convert images
into a BMP file such as Photoshop and others.

©2020 QNC, Inc. 1020 208V/240V RAF OM 10
COOK MODE
When you touch the “Cook” icon, it will engage the last recipe that had been run
in the RAF. If you wish to utilize a different recipe within the same “Group”, touch
the recipe that is displayed, it will now display the recipes that are programmed
within that Group. If you wish change Groups, touch the Group icon at the lower
left part of the screen, and then click on the Group you wish to use. This will take
you to the programmed recipes within that group. From there, you can select the
recipe that you wish to run next.
The top left of the screen will display current oven temperature, the top center
will display the programmed cooking temperature, and the top right will display
“Heating”. The section below will display the field with the name of the recipe,
the programmed cooking time, and the programmed Blower speed.

©2020 QNC, Inc. 1020 208V/240V RAF OM 11
When the RAF oven temperature has risen to within 5° F of the programmed
temperature, the top right image of the screen will display “Ready” and the
center right portion of the screen will display “Start” with a right pointing arrow.
When the “Start Arrow” button is illuminated, you can now pull the basket out of
the cooking chamber, place your menu items into the basket (display will show
“Paused Door Open”. Push the basket back into the RAF and hit the Start button.
The two-speed cooking blower will change from low speed to high speed. When
the countdown timer reaches 0:00, the buzzer will engage, and the operator will
need to hit the “Stop” button to stop the buzzer. The RAF will stay at this recipe
and maintain the cooking temperature for this recipe until the operator changes
either the recipe or the Group or goes to the “Home” screen.
If you wish to engage a different recipe after the previous one has finished, and
it’s in the same Group, touch the recipe name and it will take you to all of the
recipes within that Group. Touch the recipe that you wish to use next and if the
RAF needs to continue to preheat, it will continue to heat up until the

©2020 QNC, Inc. 1020 208V/240V RAF OM 12
temperature is within 5 degrees of the preprogrammed temperature. You can
now touch “Start” to engage this recipe.
If you wish to engage a recipe that is located in a different Group, you need to
touch the “Group” button at the bottom left of the screen, and then select the
Group that you wish to use next, and then the recipe within that Group.
If the Home screen is engaged, the Main Screen is then displayed, and it will
continue to maintain the temperature setting from the most recent recipe that
was utilized. If the Operator is done for the day, hit the “Power Down” button.
This will turn off the RAF heaters. The cooling blowers will continue to operate in
the low speed blower mode for up to 15 minutes to assist in the cooldown of the
RAF.

©2020 QNC, Inc. 1020 208V/240V RAF OM 13
SYSTEM SETUP
The System Setup icon will take you to the screen below with two options. You
can sign in as the Manager or as the Service Technician.
MANAGER PROGRAMMING
Click on the Manager icon and enter the code, 0001 and click “OK”. The following
screen will appear:

©2020 QNC, Inc. 1020 208V/240V RAF OM 14
The first field is Oven Stats. If you click on this screen, it will show you
information on the operation of the RAF including the number of Bakes
Completed, Bakes Started, Fan Powered on, as well as additional historical
information.
The second field is Controller Settings. If you click on this field, you can adjust the
following:
The Time & Date field is used to edit the time and date that appears on the main
screen.
The Temperature Unit field allows you to change the temperature display from
Fahrenheit to Celsius. Just touch the screen and it will move you from one setting
to the other.
The Volume screen allows you increase the level from one to ten. Each time you
touch the display, it increases the volume up the next level. To get back to a
lower level, you need to move up to level 10 and then the next touch will take you
back to level zero.
The Color Scheme provides you with five preset display colors. The factor preset
is #4 which is a blue background.

©2020 QNC, Inc. 1020 208V/240V RAF OM 15
The Heat Control is a screen that we recommend that YOU DON’T ADJUST. The
factory preset for this section is PID enable. This feature adjusts the temperature
rise and drop within a recipe to maintain a consistent cooking temperature. If
you change this screen to “No” the RAF will most likely overshoot the preset
cooking temperatures for each recipe.
The third field is Menu Upload/download. This feature allows up to download a
file with the programmed Groups and Recipes on the RAF to a USB Thumb Drive.
This file can then be used to upload these recipes to other RAF units.
Menu Export:
Insert Thumb drive into USB port at the control box on the right side of the unit by
the power cord. Once the USB Thumb drive is inserted press the Export button on
the screen.
Menu Import:
Repeat same procedure as used for import function
SERVICE PROGRAMMING
Enter Passcode 0002 which will provide access to a subset of features found
under “Service”. The first three options were already addressed in the “Manager”
screen.

©2020 QNC, Inc. 1020 208V/240V RAF OM 16
Controller Settings:
There are additional settings in this screen that are not shown from the
“Manager” access. We recommend that you do not change any of these
additional settings.
Firmware update:
QNC will periodically update the software on the RAF and this screen provides you
with the option of updating your Firmware. QNC will email updated firmware
from time to time, and this file needs to be entered onto a USB Thumb Drive
which can then be uploaded into the controller. Alternatively, if only one UI
firmware file is on a flash drive and that flash drive is in place when power is
applied to the control, the control will automatically update.
Diagnostics:
View, Erase, and Export the fault log.
Manual Control:
Allows the user to bake with a set bake time/temperature and blower speed without
creating a recipe. A start button is visible if the cavity temperature is within 5° F
of setpoint.
Factory Test:
This screen shows the input status and allows the user to exercise all outputs.
The control reverts to a “Safe State” (Heaters Off) when exiting this screen.
Demo Mode:
This screen is reserved for future applications

©2020 QNC, Inc. 1020 208V/240V RAF OM 17
COOKING PROCEDURES
The Rapid Air Fryer RAF can fry, grill, and bake a wide array of frozen, oven-ready
products available through normal food service distribution and
wholesale clubs.
To prepare "fried" menu items in the RAF, the foods selected must have oven
preparation directions listed on the package. As an example, egg rolls, corn
dogs, beer battered or tempura battered vegetables and battered cheese sticks
are typically fryable or bakeable. Seasoned or coated French fries or potato
wedges are fryable or bakeable. These types of products will come out of the RAF
crisp on the outside and moist on the inside as if they were fried. To prepare a
non-battered, non-coated, or non-seasoned menu item, it must be a bakeable
version. To prepare shoestring or crinkle cut French fries, or skin-on potato
wedges, you must use a bakeable version.
Menu items prepared in the RAF that do not have baking directions listed on the
package will typically be soggy and limp, and will not change in color from a
pale white to a golden brown. Contact your food distributor to order the correct
version of the menu item to prepare. If the food distributor salesperson is not
sure of the menu items that can be prepared in the Rapid Air Fryer, have them
review the 32 page menu found in this Operators Manual, or have them contact
the Rapid Air Fryer distributor, or QNC, Inc. directly.
To prepare breaded items such as chicken nuggets and chicken strips either a
pre-cooked or a fully cooked product must be used. Pre-cooked means that the
product has been partially cooked, is pre-browned on the outside, and the
interior of the product is raw. Fully cooked means that the product is cooked on
both the outside and the interior. You cannot prepare ready-to-cook items that
have a white breading on the outside. They will cook, but they will not turn
golden brown in the Rapid Air Fryer.
To grill foods in the Rapid Air Fryer, you should use pre-cooked or fully cooked
meat, poultry, or fish products. As an example, hot dogs and some sausages are
fully cooked products and could be consumed cold right from the package. These
items will grill in the Rapid Air Fryer with a charbroiled appearance. To prepare
grilled chicken breasts or hamburgers, use fully cooked products. These products

©2020 QNC, Inc. 1020 208V/240V RAF OM 18
will come out of the Rapid Air Fryer sizzling on the outside and tender and juicy
on the inside.
The Rapid Air Fryer can bake frozen pizzas or prepare freshly made pizzas using
a par-baked crust. Please note that an optional pizza basket is available. Please
contact QNC for pricing information Prepare hot, open-faced sandwiches in just
60 to 90 seconds. To bake cookies, pastries, or muffins, lower the temperature
setting to 350°F and use a muffin tin, a small sheet pan, or parchment paper.
Optional Pizza Basket Cheese Pizza
Please note the following general cooking procedures:
1. Always spray the Cooking Basket and Drip Tray with an aerosol vegetable
shortening (for example, Pam® for Grilling) prior to the first cooking cycle of
the day, or the first cooking cycle since cleaning. Do not spray non-stick
aerosol directly into the fryer, or while the fryer is operating. Wipe any
excess oil from the Drip Tray with an absorbent paper towel or bar towel.
To help reduce any drag between the Drip Tray and Tray Guides, pull the
Drip Tray out as far as possible, and rub the towel with the excess oil on
the underside of each side of the Drip Tray.

©2020 QNC, Inc. 1020 208V/240V RAF OM 19
2. For best results, prior to the first cooking cycle of the day, warm the Rapid
Air Fryer at the preprogrammed cooking temperature for 10-15 minutes.
3. Most menu items will cook in the Rapid Air Fryer RAF between 410°F and
475°F. Cooking at a temperature higher than 500°F can cause the Rapid
Air Fryer to smoke. If smoke is emitted from the Rapid Air Fryer, either
clean the Cooking Basket and Drip Tray and/or lower the temperature
setting.
4. Similar products will vary in cooking time depending on internal
temperature at the time of cooking. For example, frozen fried chicken will
take longer to cook than the same fried chicken that has been thawed in
the refrigerator.
5. Arrange the product to be cooked in a single layer in the Cooking Basket.
Avoid stacking the product to be cooked. A single layer of product will cook
more evenly than products placed into the Cooking Basket in a stacked or
clumped arrangement.
French Fries Layered on Cooking Basket
6. Select a Menu time approximately 65% of the food manufacturer's
suggested convection oven cooking times. As an example, if the suggested
convection oven cooking time is 10 minutes, this item should take
approximately 6.5 minutes in the Rapid Air Fryer.

©2020 QNC, Inc. 1020 208V/240V RAF OM 20
7. Please be aware that the cooking times can vary depending on variances in
voltage at the facility, and the quantity of food being cooked at one time.
Experimenting with cooking times and temperatures and recording the
results for future reference is recommended. This testing will prevent
under-cooking or burning of food products.
8. Remove cooked product from the open Cooking Basket with a spatula or
tongs. For small food products, such as French fries, remove the Cooking
Basket entirely with both hands on the handles, and dump the food
product into a foil pan or holding container. CAUTION: DO NOT INSERT
TONGS OR SPATULA INTO THE COOKING CAVITY. This is extremely
dangerous and could result in injury to the operator.
This manual suits for next models
1
Table of contents
Other Quik n’ Crispy Fryer manuals