CRRC MS-2624PT User manual
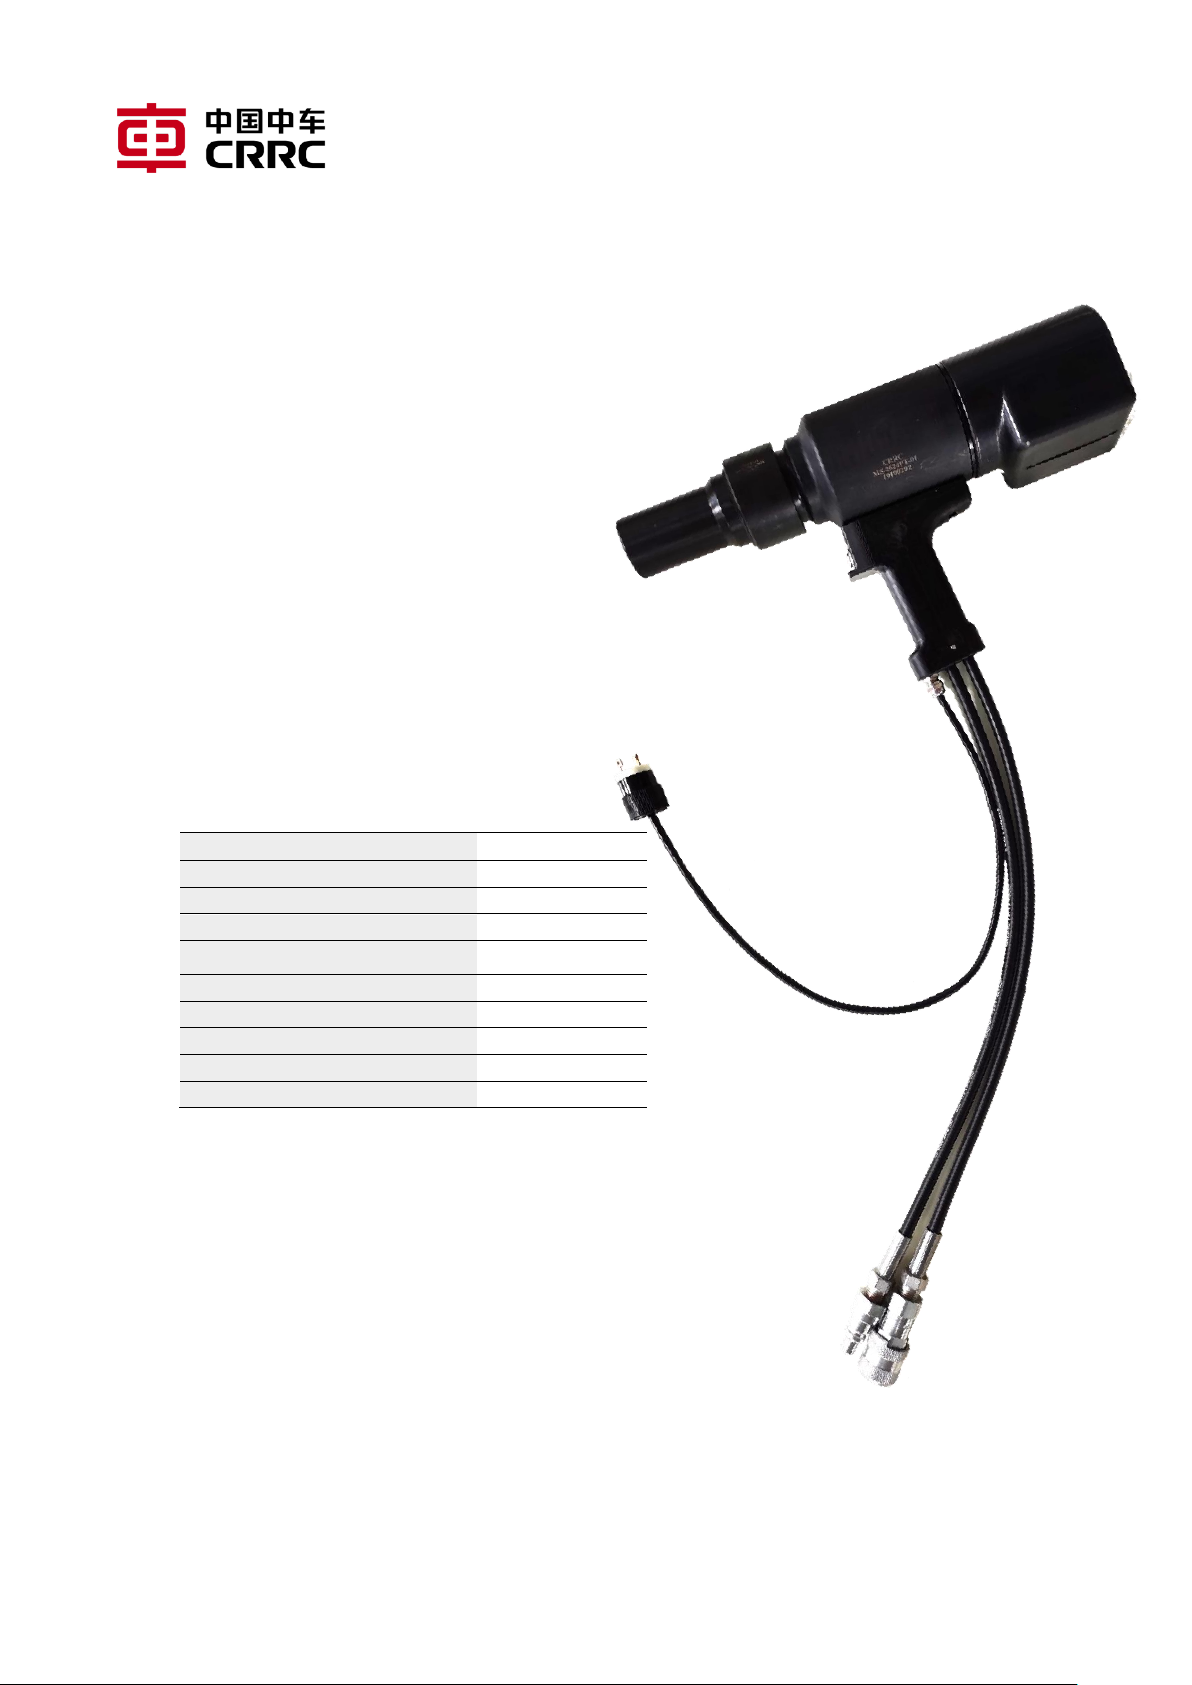
Hydraulic Installation Tool
MS-2624PT
for 1/2” BOM
P.N. of Tool
MS-2624PT
P.N. of Nose
MS-5106
Operating temp. range
°C
0-60
Noise
dBA
45±3
Max. Vibration
m/s²
2
Weight of Tool
kg
10
Effective Displacement
mm
42.8
PULL Pressure
MPa
40-45
PUSH Pressure
MPa
15-20
Standards
EN 2006/42/EG
Meishan CRRC Fastening System Co., Ltd.

Work with You to Connect the World
Contents
1. Safe................................................................................................................................................1
1.1 Work Site.................................................................................................................................1
1.2 Personal Safety........................................................................................................................1
1.3 Maintenance Safety ................................................................................................................2
1.4 Specific Safety Rules................................................................................................................2
2. Product data..................................................................................................................................4
2.1 Specification............................................................................................................................4
2.2 Overall Dimensions .................................................................................................................4
2.3 Product Structure and Nomenclature.....................................................................................5
3. Operation ......................................................................................................................................7
3.1 Before Startup.........................................................................................................................7
3.2 Assemble Nose to Tool............................................................................................................7
3.3 Standard of Installation...........................................................................................................8
3.4 Sequence of Installation..........................................................................................................8
4. Maintenance.................................................................................................................................9
4.1 Caution....................................................................................................................................9
4.2 Product Service Kit and Performance Parameters ..................................................................9
4.3 Configuration List....................................................................................................................9
4.4 Replacement of Nose Assembly............................................................................................10
4.5 Replacement of Other Components .....................................................................................10
5. Troubleshooting Guidance..........................................................................................................11
APPENDIX 1 - List of Warranty and Life Cycle..................................................................................13
Appendix 2 – Authorized Service center and Agent in Australia.....................................................14

1
1. Safe
Please read this entire manual carefully. Meishan CRRC Fastening System Co.,
Ltd. (hereinafter referred as Meishan) assumes no liability for any fire or severe injury
caused by failing to follow the instructions provided hereinafter or any damage or
personal injury resulted from lack of maintenance or improper operation.
Do not rip off the warning signs, labels or decals. In case of any problem or
concern, please contact Meishan for further instructions.
1.1 Work Site
a. Keep the tool away from flammable liquid, gas and dust.
b. Do not operate the tool around children or unauthorized personnel.
c. Keep the tool away from fire and heat sources.
1.2 Personal Safety
a. Maintain focus and attention on the operation while using this tool. Do not
operate the tool when you are affected by fatigue, drugs, alcohol or medical
treatment.
b. Always wear safety goggles, dust mask, anti-skid shoes, safety helmet and ear
protections while using the tool.
c. Dress properly when operating the tool. Do not wear loose clothes or jewelry.
Keep your hair and clothes away from the tool’s moving parts.
d. Do not drop or abuse the tool. Reasonable care of the tools by operators is an
important factor in maintaining tool efficiency, eliminating downtime, and
preventing an accident which may cause severe personal injury.
e. Keep tools away from children. People who do not understand how to operate
the tool are not permitted to use the tool.

2
f. Tool maintenance. Inspect the moving parts for damage and other conditions
that may affect the moving of the tool. Repair any part failure before continued
use.
g. Use the proper tool, nose assembly and accessories from Meishan as needed.
1.3 Maintenance Safety
a. If the tool experiences significant damage or failure, then send the tool to a
professional repairman for repair.
b. Follow this manual for replacement of components and basic troubleshooting.
c. Keep the tool dry, clean and free of grease.
d. Replace worn or damaged parts by genuine products from Meishan.
1.4 Specific Safety Rules
Repairmen and Operators must read this manual prior to using equipment and
understand all Warning and Caution stickers/labels supplied with equipment before
connecting equipment to any primary power supply. As applicable, each section in
this manual contains specific safety and information on best practices.
a. Ear protection is required.
b. Inspect the collect assembly for wear, cracks, or any other visible damage before
use.
c. Please hold the tool firmly, and be ready to counteract any normal or sudden
movements with both hands available
d. Maintain a balanced body position and secure footing. When operating at height,

3
always check to make sure no one is beneath you.
e. Use the correct nose assembly for the different type of rivets.
f. Do not keep the tool continuously running for 10minutes, otherwise, have a
break for 3 min after using for 10 minutes continuously.

4
2. Product data
Independently developed by Meishan, The hydraulic tool MS-2624PT with nose
assembly MS-5106 equipped installs 1/2” blind oversized rivet. The tool is
characterized by long service life, light weight, easy operation and low noise.
2.1 Specification
P.N. of Tool
MS-2624PT
P.N. of Nose
MS-5106
Operating temp. range
°C
0-60
Noise
dBA
45±3
Max. Vibration
m/s²
2
Weight of Tool
kg
10
Effective Displacement
mm
42.8
PULL Pressure
MPa
40-45
PUSH Pressure
MPa
15-20
Standards
EN 2006/42/EG
2.2 Overall Dimensions
Overall dimensions of MS-2624PT:
MS-2624PT
Dimension in mm
5
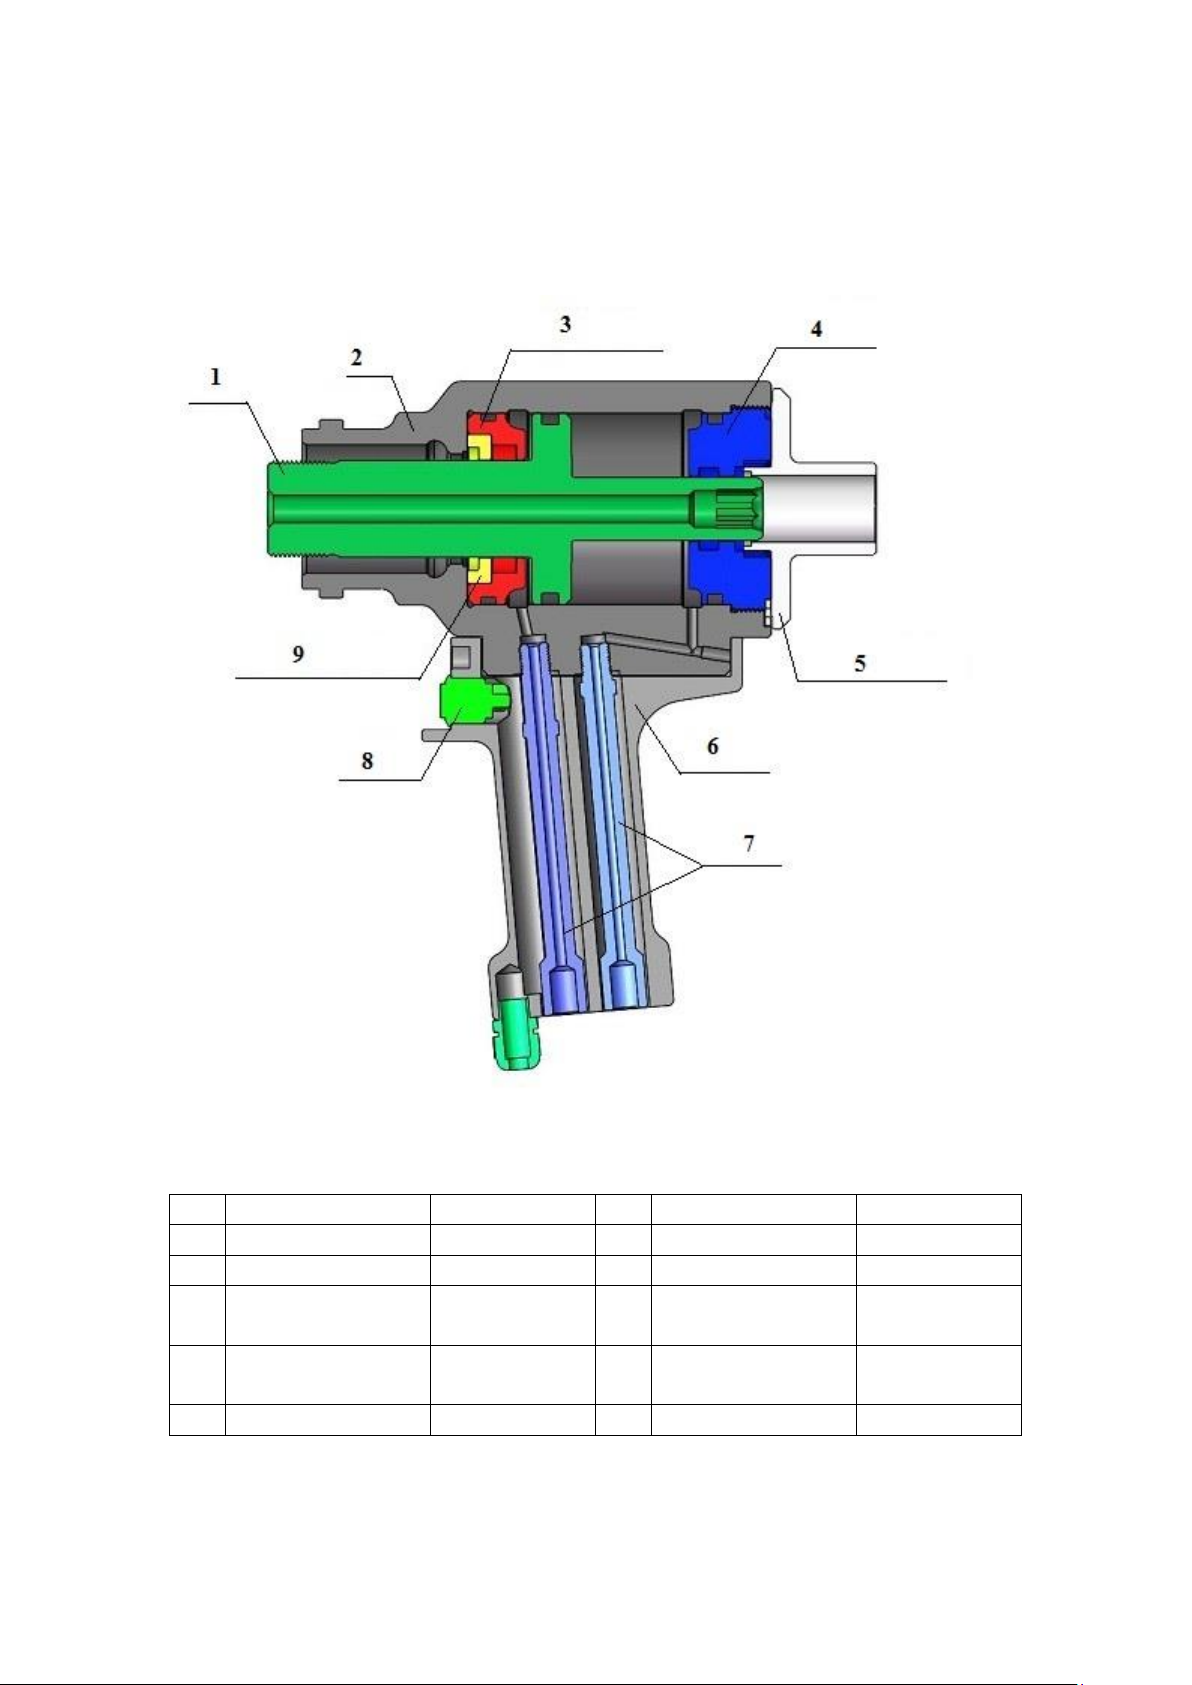
2.3 Product Structure and Nomenclature
Tool body structure
No.
Description
P.N.
No.
Description
P.N.
1
Piston
MS-2624PT-02
6
Handle
MS-2624PT-04
2
Cylinder Assembly
MS-2624PT-01
7
Oil Hose
MS-2624PT-14
3
Front Gland
MS-2624PT-07
8
Trigger Switch
Assembly
MS-2624PT-15
4
End Cap
MS-2624PT-03
9
Wiper Seal
Assembly
MS-2624PT-09
5
Retainer
MS-2624PT-13
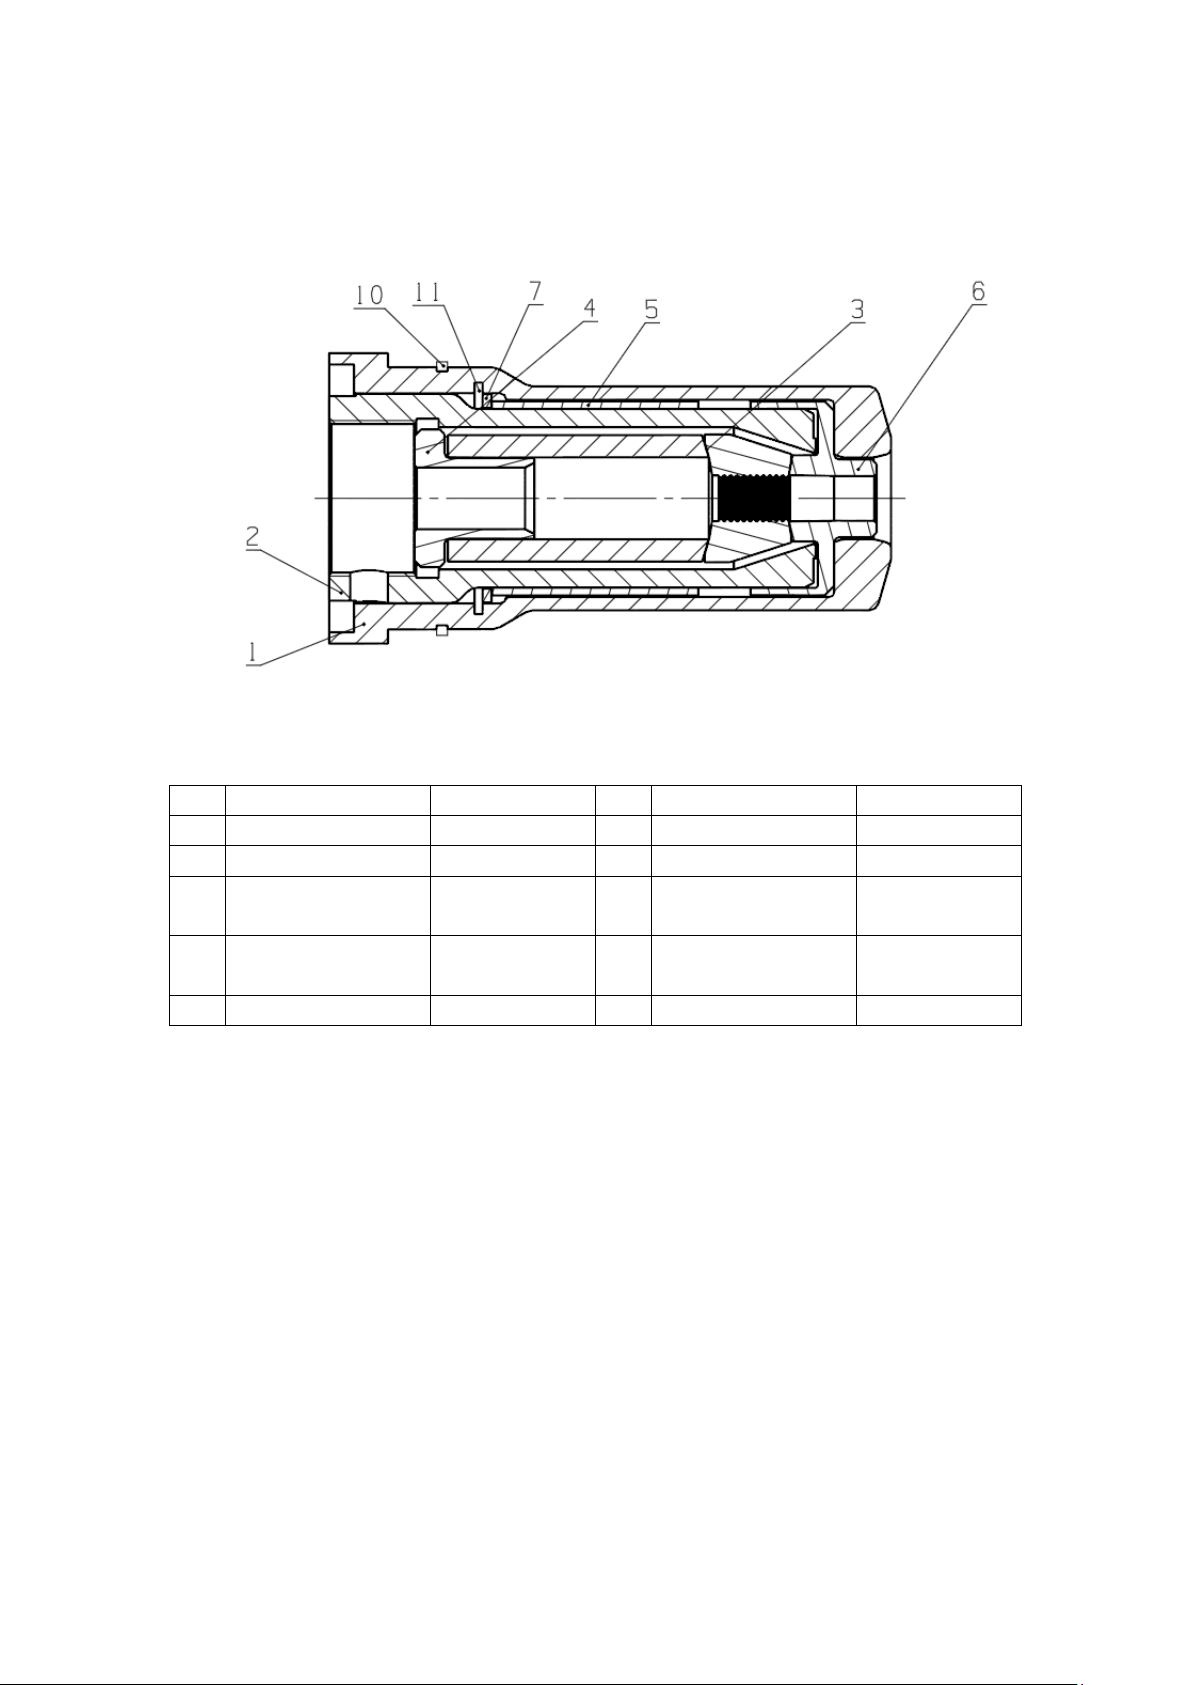
6
Nose assembly
No.
Description
P.N.
No.
Description
P.N.
1
Anvil
MS-5106-01
6
Ejector
MS-5106-06
2
Collect Assembly
MS-5106-02
7
Spacer
MS-5106-07
3
Rubber jaw
assembly
MS-5106-03
10
Retaining ring 56
for shaft
GB/T 894
4
Guiding sleeve
MS-5106-04
11
Retaining ring 45
for hole
GB/T 893
5
Spacer Tube
MS-5106-05

7
3. Operation
3.1 Before Startup
a. Select the correct nose assembly for the specific fastener to be installed.
(See section 3.2 for the steps of nose installation)
b. Turn the hydraulic system to OFF and disconnect the power supply from unit,
then connect the tool hoses to the tool;
c. Connect the tool’s control switch electrical cord to the hydraulic unit.
d. Connect the hydraulic unit to the power supply. Turn on the unit. Press the
tool’s trigger a few times to circulate the hydraulic fluid. Observe the action
of the tool and check for any leaks.
e. Check the PULL and PUSH pressure, if necessary, adjust to the proper
pressure.
3.2 Assemble Nose to Tool
STEP1: Install the ejector into the hole that is inside of the anvil;
STEP2: Install the guiding sleeve into the hole of the rubber jaw.
STEP3: Install the rubber jaw into the collect assembly.
STEP4: Use circlip pliers to install the retaining ring-45 to the rear end of the guiding
sleeve, then fix the guiding sleeve in the collect assembly.
STEP5: Thread the collect assembly to the piston.
STEP6: Tighten the 3 set screws from the piston.
STEP7: Install the anvil into the collect assembly as shown in the Nose assembly
diagram above;
STEP8: Lock in the anvil and the cylinder assembly with retaining ring-56.

8
3.3 Standard of Installation
Standard of installed rivet: measure the dimensions or observe the shape of
installed collar.
Qualified
NOT qualified
NOT qualified
NOT qualified d
NOT qualified
L1
L2
L3
D1
Standard
(in mm)
MAX
MAX
MIN
MAX
4.4
1.6
7.5
17.42
3.4 Sequence of Installation
a. Insert the rivet into the hole.
b. Insert the nose into the pintail of the rivet and hold it against the collar of the
rivet.
c. Press and hold the trigger to swage the collar.
d. Release the trigger when the rivet breaks.
This manual suits for next models
4
Table of contents
Other CRRC Tools manuals


