Cruiser Consoles BUSHMAN 15L ROADIE fridge Base console User manual
70 Series Landcruiser Console Specialists
2535 Toowoomba – Cecil Plains Road
Biddeston QLD 4401
Phone: 0419 784 590
Email: [email protected]
http://www.cruiserconsole.com.au
SPlastic Dash 76 Wagon / 79 Dual Cab & DPF Single Cab –
BUSHMAN 15L ROADIE fridge Base console Installation
Instructions
The Bushman 15L ROADIE fridge base console is suited to the Dual Cab & Wagon New Dash model and
Late 2016 onwards DPF Single Cab models. Please read these instructions carefully and consider if you
have the required skill and patience to fit this kit.
These consoles have been designed with minimal modifications to be done to the vehicle, but some are
necessary at your own discretion for the fridge to fit. These instructions suit 76 Wagon, 79 Dual Cab and the
Side Curtain Airbag 79 Single Cab though all consoles are model specific.
No seat rail modifications are required for the Side Curtain Airbag Single Cabs.
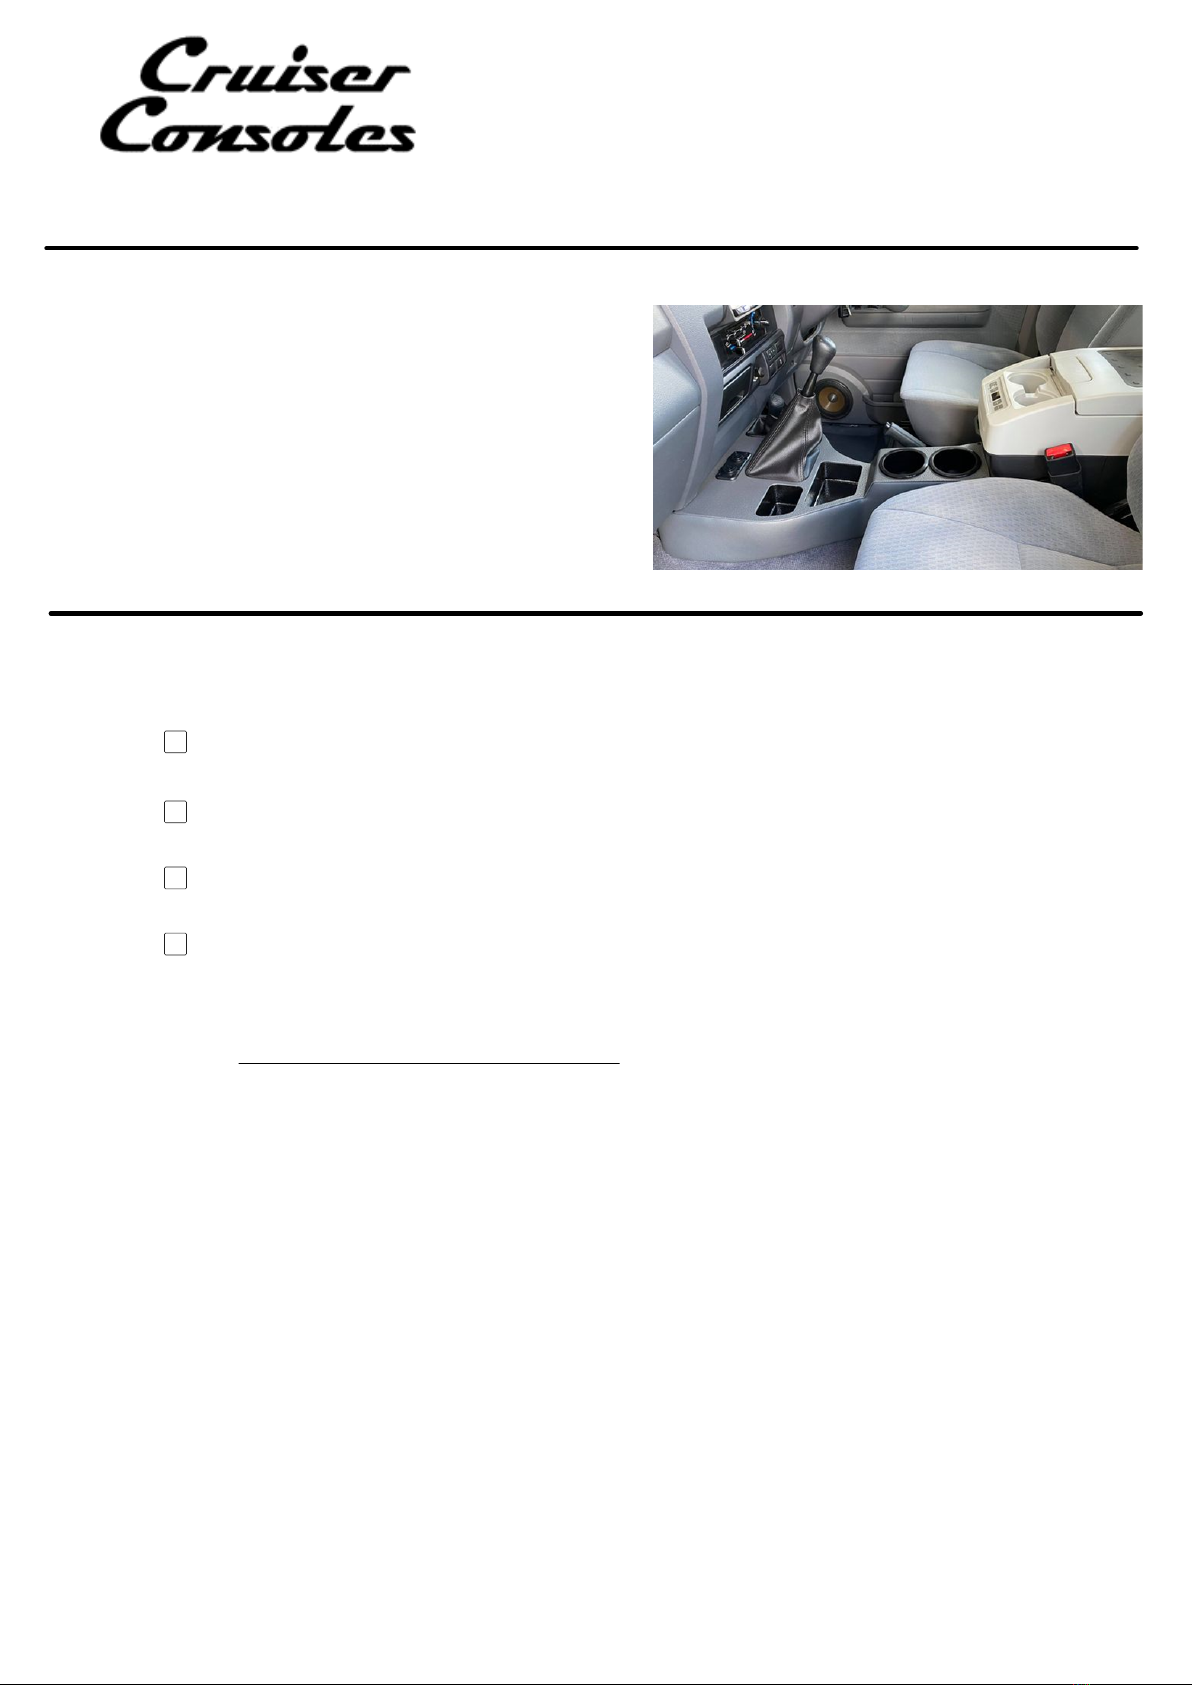
1. INTRODUCTION
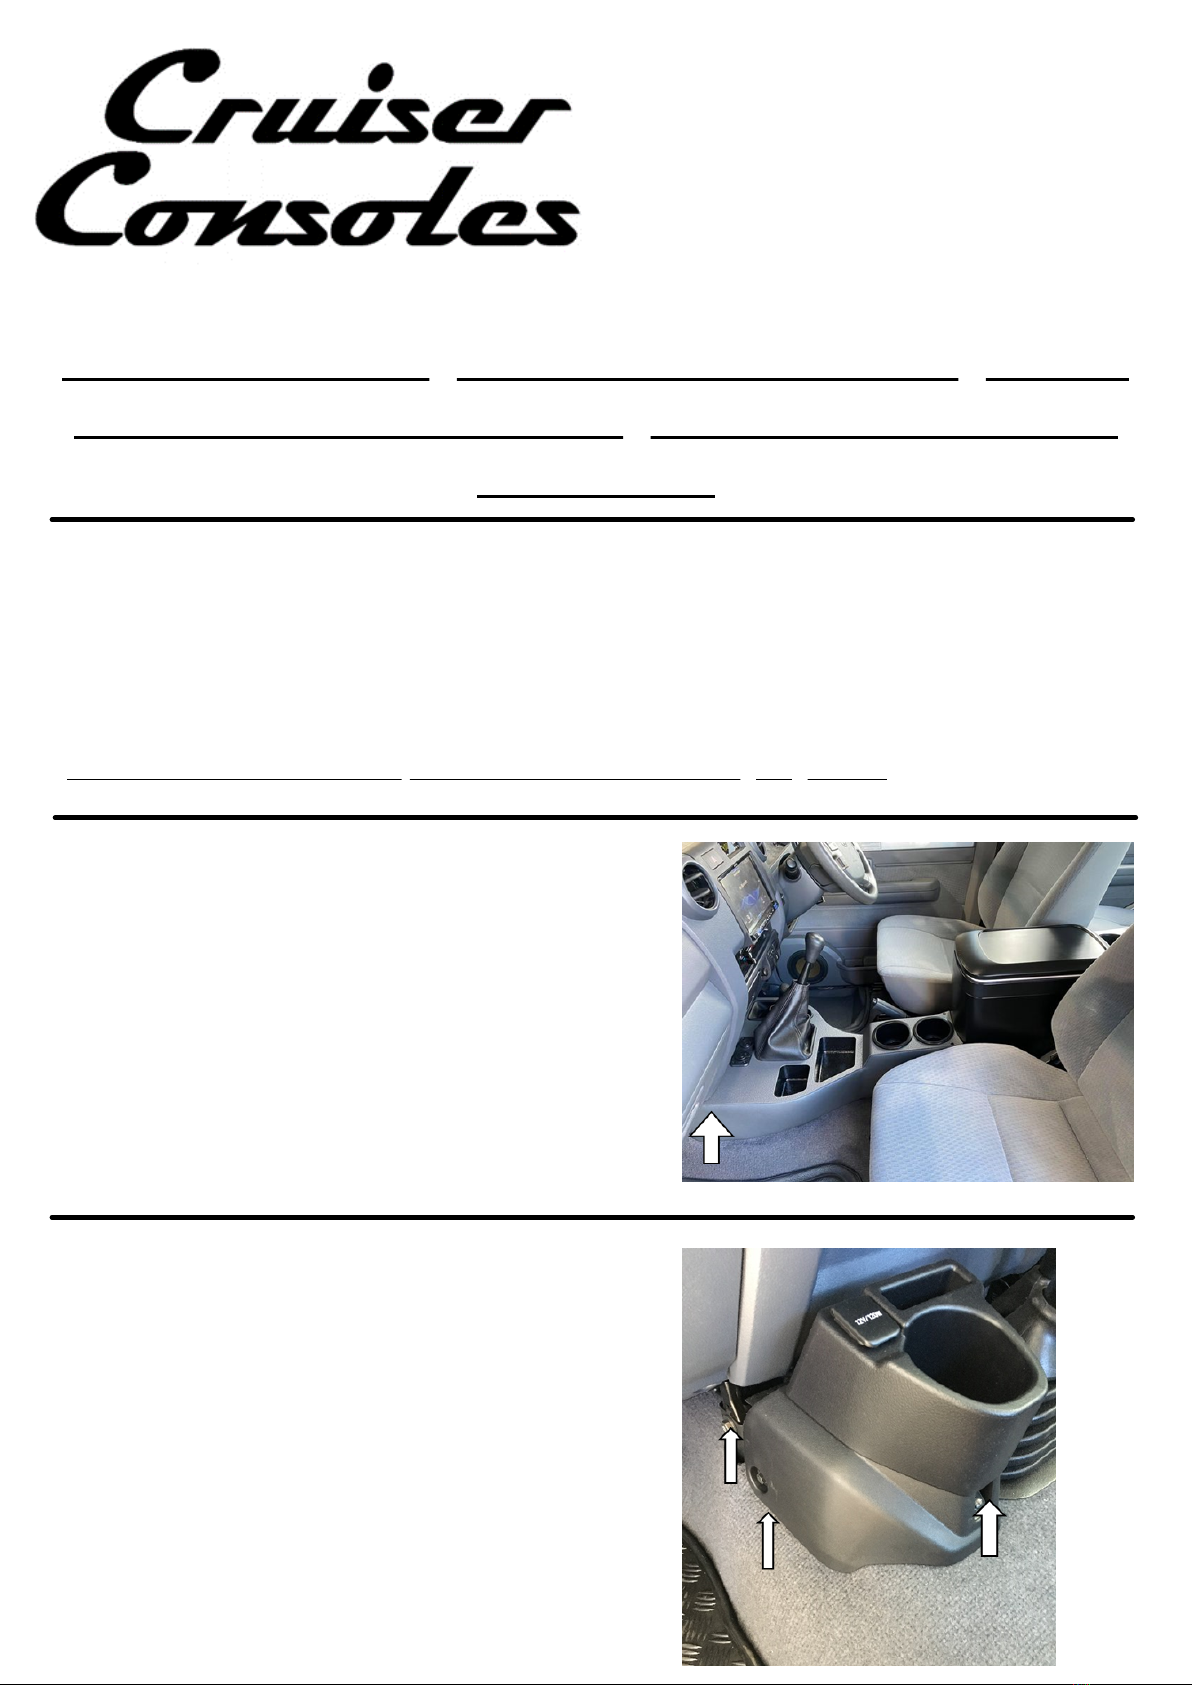
Take note of the hole in the console under the vinyl in this
location (plastic dash only)
2. OEM CUPHOLDER REMOVAL
When fitting the new gearstick surround, remove the 3
bolts (as indicated in image) and the plastic trim clip from
the factory cup holder base. 2 of them have 10mm heads
and one has a 12mm head.
Page 1
70 Series Landcruiser Console Specialists
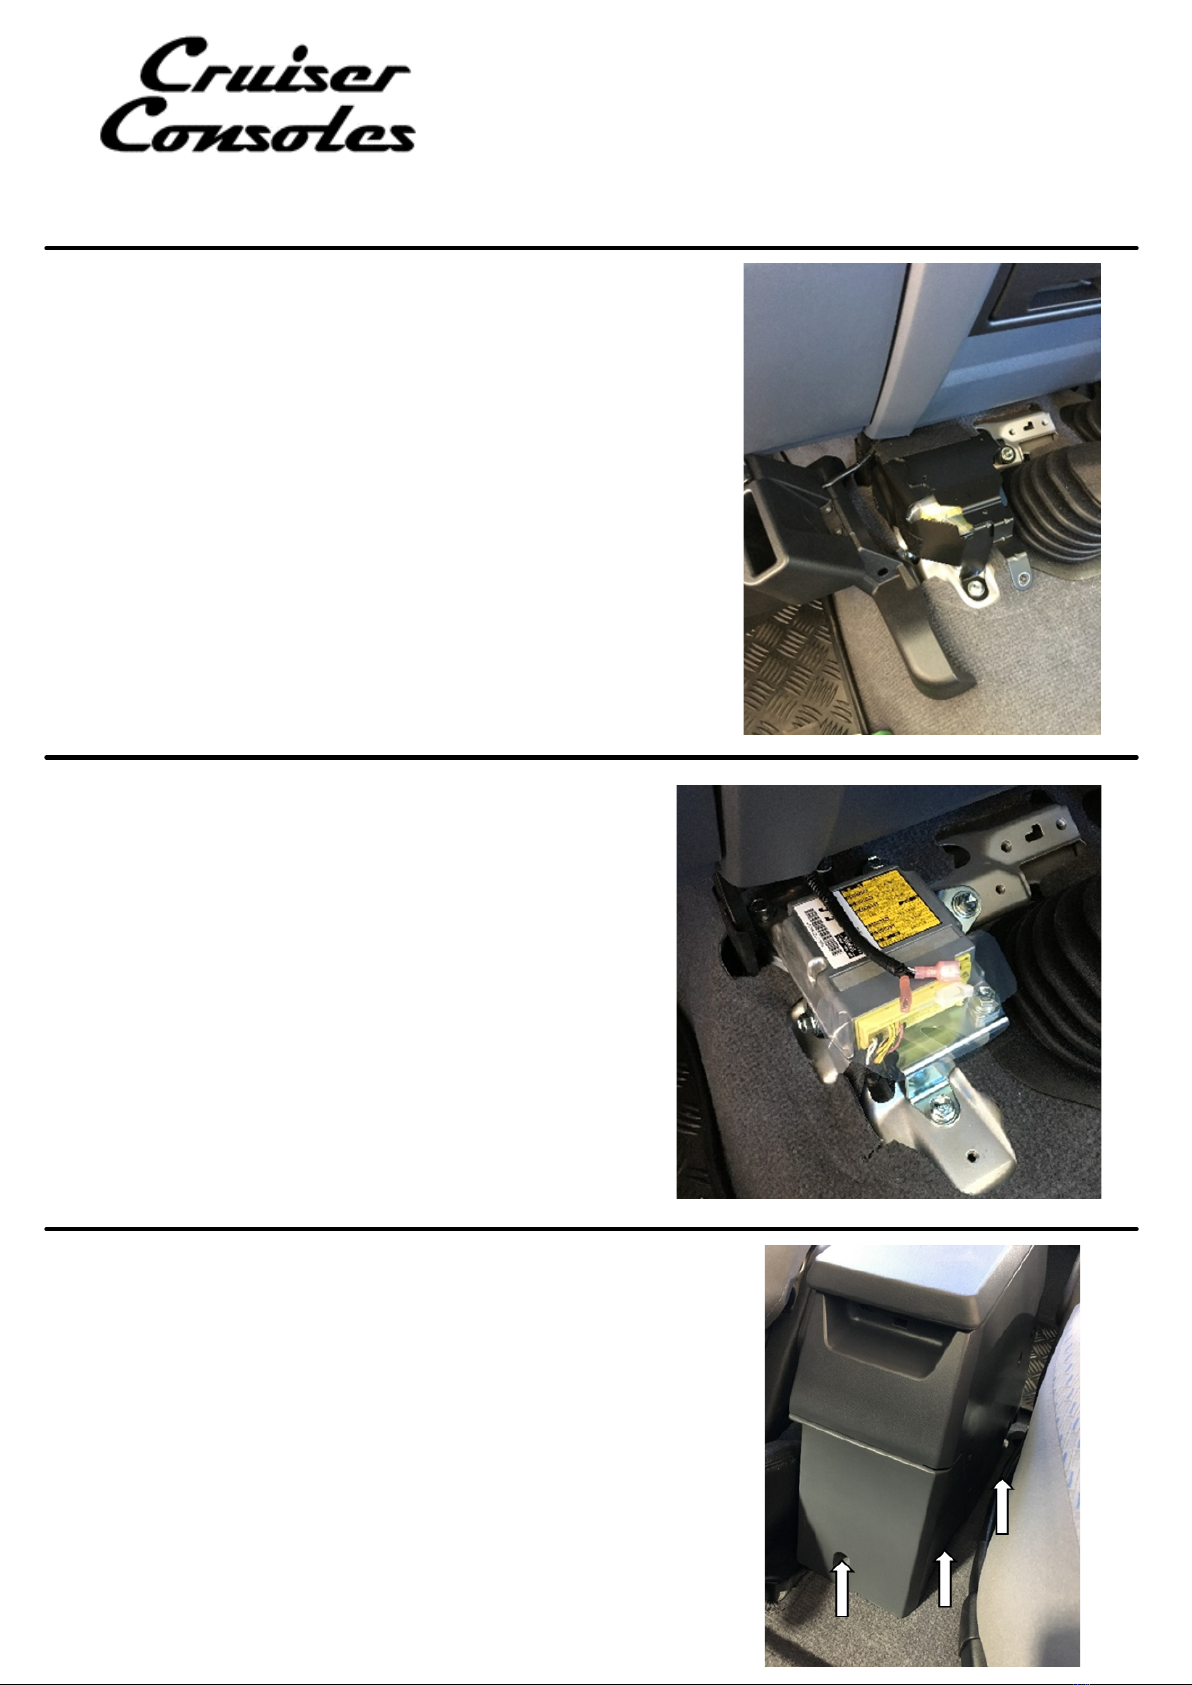
3. OEM CUPHOLDER REMOVAL
Remove the 3 bolts from the SRS airbag black metal
module cover and discard the cover and KEEP the
bolts. (Do not remove the silver module). Remove the 3
screws from the cup holder and unplug the harness from
the factory cigarette socket.
Put the silver bolts back in their threads but without the
black meatal cover.
4. SOCKET WIRING
Ensure ignition is off. Cut the plug from the harness and
crimp the female terminal to the red wire and the male
terminal to the white wire.
5. REMOVE PLASTIC CENTRE CONSOLE
Remove the 5 screws holding the small plastic factory
console in position.
Page 2

70 Series Landcruiser Console Specialists
6. REMOVE FRONT SEATS
There are 4 bolts in each seat with a 14mm Hex Head. The
rear bolts have plastic covers which are easily removed by
hand, then the bolts can be accessed. It is not necessary to
modify the seat rails of the DPF side curtain airbag
single cabs
7. FRIDGE HARNESS
Have the power lead plug ready before the fridge goes into
place on the console.
We recommend connecting it to a dual battery with an
inline fuse to prevent running the starter battery flat. It is
best to run the harness under the carpet and bring it out at
the join in the carpet that is just under the front of the rear
seats.
8. MOUNT FRIDGE TO BASE
Sit the fridge upside down on the foam pad that came with
the packaging. Inside the fridge compartment there will be
a packet with 4 black machine screws. Use the 4 screws to
bolt the fridge base to the bottom of the fridge. Slide the
base forward on the fridge so that the fridge will sit back
further in the vehicle, then tighten the screws.
Page 3

70 Series Landcruiser Console Specialists
9. GEARSTICK SURROUND INSTALL
Put the transfer stick in neutral and remove the gear knobs.
You may want to tape the dash to prevent accidental
damage to the plastic. Plug in the new USB and cigarette
harness and slide the new console under the dash. You
might have to wriggle it slightly to get it over the factory
rubber boots.
10. FITTING THE FRIDGE AND BASE TO THE
VEHICLE
It may take two people to get the fridge in behind the
gearstick surround. The back of the gearstick console will
need to be raised. The front of the fridge will need to be
raised and the fridge pushed back into the foam of the rear
seats. This will allow enough room for the two consoles to
come down together.
This rear section of the console slides under the gearstick
section. Start with the 6mm bolt in the base first (Taped in
beneath the rear of the two cup holders). Two of the screws
that held in the old plastic centre console are used to hold
the fridge base secure (one either side). Once the side
screws are in, the front bolt can be tightened.
Page 4

70 Series Landcruiser Console Specialists
11. SEAT REINSTALL
The 4 holes in each seat rail will need slotting into an oval
shape. About 6 mm for each hole is enough to allow for the
extra room needed for the fridge to fit between the seats.
This can be done with a good round file or a die grinder.
Remember to file the seat rail holes towards the centre of
the vehicle to allow the seats to move out. We also
recommend spraying silicon spray on the sides of the fridge
to help the seats slide back and forth.
Not required for SINGLE CABS side curtain airbag
DPF
Page 5
12. GEARSTICK FITTING
Find the slotted hole under the vinyl with your thumb and
then poke a screwdriver through the centre of it.
13. GEARSTICK FITTING
The factory bolt can then be replaced into the side of the
console. Before tightening, pull the gear stick surround
console back towards the centre console to close any gap
between the fridge and the surround.
70 Series Landcruiser Console Specialists
CHECKLIST – OFFICE USE ONLY
Console Matches the Invoice
Correct Gearstick Surround
Instructions Match the Console
6mm Bolt Taped in
Signed .
14. CONNECTIONS / BATTERY
If connected to dual battery Read the fridge manual and set
the cut out setting to low, this will prevent the fridge from
turning off as often. the battery will need full charge before
the fridge will reset.
Page 6
Table of contents
Popular Automobile Accessories manuals by other brands


ULTIMATE SPEED
ULTIMATE SPEED 279746 Assembly and Safety Advice

SSV Works
SSV Works DF-F65 manual

ULTIMATE SPEED
ULTIMATE SPEED CARBON Assembly and Safety Advice

Witter
Witter F174 Fitting instructions

WeatherTech
WeatherTech No-Drill installation instructions

TAUBENREUTHER
TAUBENREUTHER 1-336050 Installation instruction