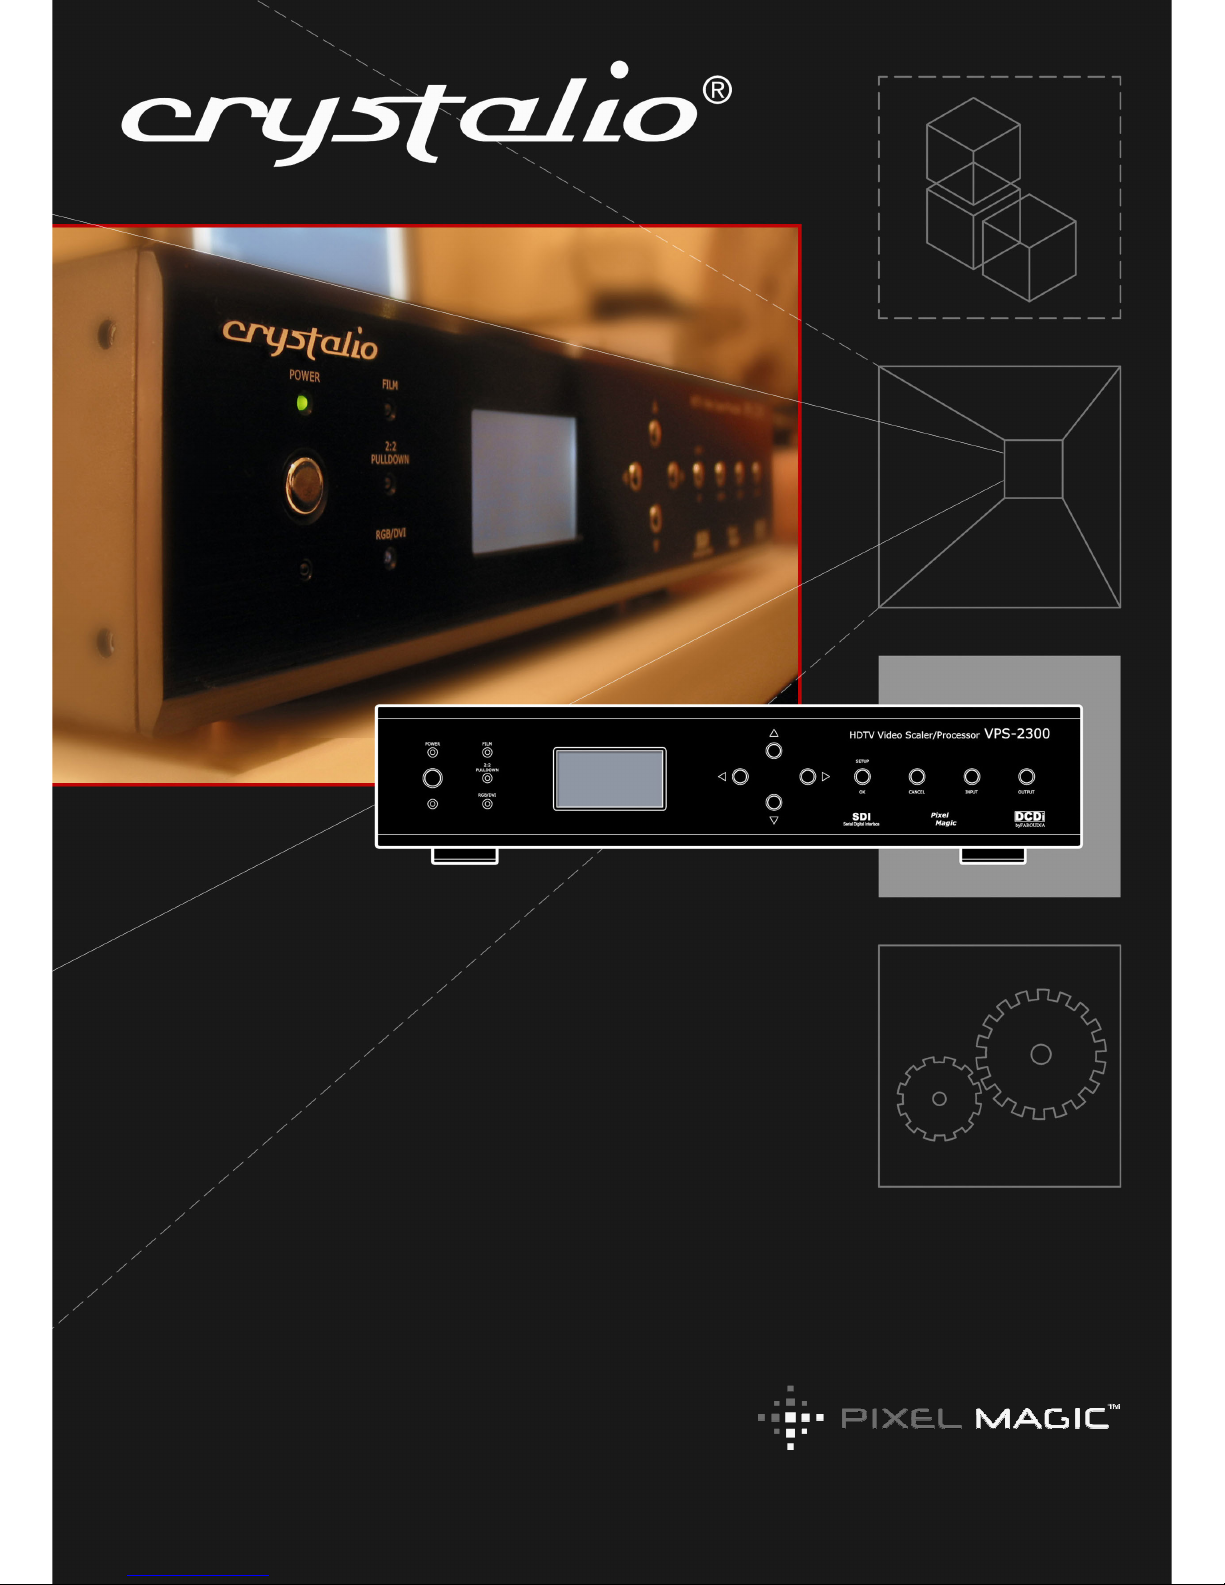
Crystalio VPS-2300 User manual

VPS-2300 User Guide
HDTV Video Scaler / Processor VPS-2300
Over the years, Pixel Magic Systems Ltd. has devoted itself to the
creation of a modular, expandable and network ready video
processing solution using the best of breed components, with a
view to delivering a cinema-class visual experience at an
affordable price level.
We are glad to have achieved this with Crystalio, the video
processor of excellence.
USER GUIDE

2

VPS-2300 User Guide
Welcome
Thank you for purchasing Crystalio, the next generation
of video processors! This unit will bring you a
breathtaking visual experience by exploiting the utmost
capability of your display devices.
Before we start, let us first check that you have all of the
following contents with you:
1. Crystalio VPS-2300 Video Processor
2. Remote Control
3. Mains power lead
4. Pixel Magic DVD
5. Crystalio User Guide
6. Crystalio Installation & Setup Quick Guide
7. USB Firmware upgrade thumb disk
8. Rack mounting brackets
If any items are missing, please contact your Crystalio
retailer immediately.
If everything is ready, you may now:
1 Connect your Crystalio to your AV devices with
reference to the section 3, Hardware Installation.
2 Configure your Crystalio with reference to
section 4, System Setup, and section 5, Expert
Configuration.
3 Register your Crystalio to enjoy official warranty,
technical support, and software update from
Pixel Magic Systems Ltd.
4 Upgrade your Crystalio with the USB Firmware
upgrade thumb disk as provided. Also check
Crystalio’s website (http://www.crystalio.com)
regularly to download the latest firmware.
Enjoy!
!!Caution: Make sure you read and follow the
instructions of the Crystalio User Guide or Installation &
Setup Quick Guide to connect the Crystalio to your AV
system.

4
Contents
Welcome..................................................................3
Contents..................................................................4
1. About Crystalio ...................................................5
1.1 Why do I need Crystalio? ....................................5
1.2 Video Processing History ....................................5
1.3 Video Processing Technology Primer ..................6
2 Familiarizing with Crystalio .................................8
2.1 Crystalio Front Panel...........................................8
2.2 Crystalio Rear Panel ...........................................9
2.3 Remote Control.................................................11
3 Hardware Installation.........................................12
3.1 Compatible Equipment......................................12
3.2 Mains................................................................12
3.3 Video Inputs......................................................12
3.4 Video Outputs ...................................................13
3.5 Product Registration..........................................13
4 Basic Software Setup ........................................14
4.1 Configure Your Video Source............................14
4.2 Switch on Crystalio............................................14
4.3 Select Input Terminal ........................................14
4.4 Select Output Terminal......................................15
4.5 Set Output Format / Resolution .........................15
5 Expert Configuration .........................................16
5.1 Overview...........................................................16
5.2 Input Select.......................................................17
5.3 Aspect Ratio .....................................................17
5.4 Video Settings...................................................18
5.5 Advanced..........................................................19
5.6 System Config...................................................24
5.7 AR Profile .........................................................30
5.8 Video Profile .....................................................31
5.9 Pixel Magic System...........................................32
6 Troubleshooting.................................................33
7 Specifications ....................................................34
8 Safety Information..............................................35
9 Support and Warranty Information ...................36

VPS-2300 User Guide
1About Crystalio
Crystalio is the realization of a dream long held by many engineers and product designers but accomplished by few.
Over the years, Pixel Magic Systems Ltd. has devoted itself to the creation of a modular, expandable and network
ready video processing solution by adopting the best of breed components, with a passion to delivering a cinema-
class video image performance at an affordable price level.
“We envisaged a product that would be powerful enough and configurable for the Videophile, while at the same time
accessible to film enthusiasts who care about the picture, not the technology. More importantly, it should be so
designed that integration with the new breed of 21st Century ‘connected homes’ could readily be accomplished. We
take pleasure and pride to have achieved these goals with Crystalio.”
1.1 – Why do I need Crystalio?
Crystalio is designed to deliver the best viewing
experience from your video sources and video display
device. This is made possible by the use of the award
winning technology introduced by Faroudja®, inventor
of the DCDi®technology which is widely used in a
diverse range of domestic and professional AV
components.
You may wonder why you need a separate video
processor, if you can simply purchase a projector or a
DVD player with DCDi®technology built in. The reason
is performance and flexibility. Crystalio allows you to
have the sophisticated control over every aspect of
video processing, so that you can control the
performance of the entire video system to a far greater
extent. Crystalio also gives you the flexibility to enjoy
this feature from many different types of source
devices, from basic composite video sources right
through to pure digital SDI and DVI video. SDI (Serial
Digital Interface) is a specialist video distribution
standard for video transmission in the broadcast
industry at maximum quality over long distance by
using inexpensive co-axial cable. While this is not
available for domestic equipment, it is possible to
purchase modified domestic equipment that is SDI
enabled. DVI (Digital Video Interface) on the other
hand is a technology used by the computer industry to
connect digital displays (e.g. plasma panels, LCD
monitors etc.) to PC video cards, and this is only
suitable for relatively short distances of a few feet.
In a nutshell, Crystalio is able to maximize the
performance of any video sources, from traditional
SVHS recordings, video games consoles to high
definition TV broadcast and DVD players.
The following will give you an in-depth evolution of the
video processing history that has led to the innovation
of Crystalio. You may skip these paragraphs and go
directly to Section 1.3 for an overview of the most
cutting-edge technologies that Crystalio has embodied.
1.2 – Video Processing History
Faroudja®’s technology began in the early 1970s
when Yves Faroudja and a group of videophiles
invented state-of-the-art video processing
technologies and began licensing them to other
companies. In the 1990s, Faroudja became involved
in the specification of High-Definition TV (HDTV).
This is a new television standard which is being
introduced at different rates worldwide, and vastly
improves the quality of the image that is displayed.
How is this achieved? Well, simply by increasing the
amount of picture detail used to make the image.
To put this into perspective, a standard definition
(SDTV) image is made up of around ¼ million pixels
or points of light. This sounds like an awful lot of
information, more than it would ever be required to
display a good quality TV image. However, when
this standard was defined, the maximum screen
sizes that could be used in a domestic environment
were much smaller than those available today.
Consider that a 50” screen has four times the area
of a 25” display, with the increased use of projection
systems meaning that 100” or even 200” screen
sizes are commonplace (16 times of the visible
area). Suddenly, ¼ million is not a lot of detail at all,
and the result is any problems in the image are now
magnified to such an extent that the viewing
pleasure is reduced. The solution is to use more
pixels to make up the image, and HD increases this
by a factor of eight to 2 million. This makes a huge
difference to the quality of the image, which has
been likened to ‘looking through a window’ – it really
is that good.
However, while the hardware industry has now
started to produce affordable HD capable displays,
the availability of source devices and programming
to use with HD devices has been limited. The
amount of HD programming material is miniscule
compared to the availability of SD material, which
means that if you simply connect your SD video
source to your high quality display, you will often be
very disappointed with the results.
reference information

6
1About Crystalio
From SD to HD
Engineers at Faroudja realized that to find an entry
point for the new HD programming into a
broadcasting industry where HD programmes were
yet to be available, they had to develop a device
capable of ‘up-conversion’, i.e. increasing the detail
of the then existing SD material into HD format. This
of course was a highly complex task to achieve. To
convert a ¼ million pixel SD image into a 2 million
pixel HD image, the device should have a
sophisticated programming to ‘guess’ the missing
pixels in-between, which is essentially creating
nearly 90% of the image information from the
originally available 10%. Faroudja was successful in
such ground breaking attempt. And in June 1998,
Yves Faroudja won the Charles F. Jenkins Lifetime
Achievement Award by the Academy of Television
Arts and Sciences.
DCDi®
The equipment developed to achieve the SD to HD
up-conversion for the broadcasters was of course
way beyond the budget of the domestic film
enthusiasts, but with the ever increasing power and
sophistication of microprocessors, it was clear to
Faroudja that this technology could eventually be
made available to the domestic market. DCDi®
(Directional Correlational Deinterlacing) to give it its
complete title, pioneered affordable, high quality
video processing for the first time in the domestic
market.
DCDi®eliminates the jaggedness that conventional
up-converters causes to diagonal edges in video.
DCDi®’’s unique algorithm identifies all the moving
edges in a scene and adjusts the angle of
interpolation at each pixel so that the interpolation
always follows the edge instead of crossing it,
eliminating stair-casing or jagged edge artifacts. This
technology was first used in the Digital Format
Converter introduced in 1997. With its combination of
decoding, de-interlacing and enhancement
technologies, they won an Emmy Award from the
National Academy of Television Arts and Sciences in
2001. In addition to being used in all Faroudja Home
Theatre and High Definition Broadcast products, the
DCDi algorithm has been incorporated into a wide
range of video sources and displays by different
manufacturers, identifiable by its distinctive DCDi®
logo on their front panels.
1.3 – Video Processing Technology Primer
Crystalio is the only video processor on the market that
uses the latest Faroudja FL2300 DCDi®central
processor, so quite simply if you want to enjoy the
benefit of over 30 years of pioneering video
excellence – Crystalio is your video processor of choice.
Listed below are some state-of-the-art video processing
technologies that Crystalio offers to you:
Aspect Ratio Conversion
The aspect ratio of a video source describes the
proportion of the image’s width versus its height.
Traditionally, programmes made for television have
been made at a 4:3 aspect ratio (for every 3 units
high the picture is 4 units wide), whereas films have
used widescreen aspect ratios (16:9 or wider).
4:3 image 16:9 image (distorted)
For the image to look correct (i.e. to prevent the
image being distorted or stretched either vertically or
horizontally), every part of the playback ‘chain’, i.e.
the video source material, the video source and the
display, must be correctly configured.
Aspect Ratio Conversion is used to fit images on
displays with different aspect ratios while best
preserving the correct aspect ratio of the image.
NTSC and PAL contents including TV, VCR,
Camcorder and video games, typically have an
aspect ratio of 4:3.
NTSC and PAL contents can be shown on a 16:9
display using various forms of conversion, including
Pillar Boxing, Zoom and Non-Linear, referred to as
Anamorphic or Panoramic. Faroudja’s technology
varies aspect ratio and picture position to handle
traditional 4:3 aspect ratio sources and the wider
16:9 HDTV aspect ratio on a variety of display types
and video formats.
reference
i
nformation

VPS-2300 User Guide
1About Crystalio
TrueLife® Enhancement
Conventional video enhancement simply boosts up
the high-frequency components of the video signal
with a ‘peaking filter’. This often leads to undesirable
artifacts (or visible ‘glitches’), which are distracting
and ruining the viewing experience.
Faroudja, on the other hand, uses its TrueLife®
Enhancement technology to identify patterns of
transition that are the desired details in an image
such as skin texture, freckles or hair. These areas of
transition are deliberately enhanced to render the
details more visible and more lifelike. At the same
time, the technology enhances large edges to create
greater depth of perception without introducing
visible artifacts or distortion.
Film Mode Detection Technology
In 1989, Faroudja invented and patented film mode
detection, also known as 3:2 pulldown detection.
Film-originated content (where conventional film
cameras were used as opposed to digital video
cameras) that has gone through 3:2 pulldown for
conversion to NTSC (the United States television
broadcast standard) is detected and the original film
frames are recreated by blending the fields back
together.
‘Pulldown’ is the process of translating film signals to
tally with the broadcast standard. Again, such a
process often results in artifacts commonly known as
combs. Faroudja was the first to introduce “bad edit”
detection capability to detect the original film frames
within the video stream and reconstruct an accurate
image. This produces an image free from motion
artifacts with full vertical resolution. This film mode
processing is widely accepted in the industry.
Cross Colour Suppression
Cross colour is an artifact produced by imperfect
decoding of composite video. High frequency luma
(brightness) components are incorrectly decoded as
chroma (colour) signals, causing colour effects to
appear where there should be none. This problem
can be detected in many types of “busy” scenes
including tiled rooftops, herringbone patterned
clothing and leafy scenery etc. The most common
and visible cross colour artifacts are flickering,
flashing colours or rainbow patterns. The artifact can
be eliminated in still images, but is much more
complex to detect and correct in moving images.
Faroudja’s Cross Colour Suppression uses motion
detection to selectively perform the filtering in an
intelligent manner, identifying where there is no
motion in the image and using the already existing
frame memory for the chroma storage required.
Motion Adaptive Noise Reduction
Noise in an image is typically eliminated or reduced
by filtering. Filtering can be done spatially (1-D) or
temporally (3-D). Spatial filtering results in a softer
image with the details lost. Temporal filtering, without
the problem of detail loss, would however induce
smearing or ghosting of moving objects in the image
if not accurately performed. Faroudja employs
Motion Adaptive processing to reduce noise without
causing smearing.

2Familiarizing with Crystalio
2.1 – Crystalio Front Panel
POWER
2:2
PULLDOWN
RGB/DV I
FILM
INPUT
HDTV Video Scaler/Processor VPS-2300
SDI
Serial Digital Interface
SETUP
OK CANCEL
Pixel
Magic DCDi
byFAROUDJA
OUTPUT
1 POWER button
Press once to switch on, press once again to switch
to standby.
The status is shown by the Power Indicator LED.
!!Caution: Before connecting Crystalio to the power
supply, check the voltage switch at the rear panel to
make sure the correct voltage is selected.
!!Caution: When Crystalio is switched off, please
wait for at least 10 seconds before switching it on
again.
2 POWER indicator LED
Green - Crystalio is running
Red - Crystalio is in standby mode
3 INPUT button
Press to cycle through the Crystalio video input
sources.
Input sources support HDTV Component, HDTV
DVI, SDI, S-Video and RGBs etc. Please refer to
Section 5.2,Input Select, for details.
4 OUTPUT button
Press to cycle through the Crystalio output modes:
<RGBHV>, <RGBs>, <DVI>, <YpbPr>, & <YcbCr>
5 Navigation buttons
6 SETUP / OK button
7 CANCEL button
8 RGB indicator LED
ON - analogue video output in RGB mode
OFF - analogue video output in Component Y-Pb-Pr mode
9 FILM & 2:2 PULLDOWN indicator LEDs
Film 2:2 Pulldown Mode
OFF OFF Video (DCDi)
ON OFF Film (3:2 Pulldown)
ON ON Film (2:2 Pulldown)
OFF ON Not applicable
10 LCD Display
The LCD display has 2 distinct modes.
Status Display
By default, the LCD displays the current status of Crystalio
which includes the following information:
Video input source
Video source format
Screen aspect ratio
Output resolution / format
Image aspect ratio
Image size
Output selection
Current de-interlacing mode
Setup Display
When setting up Crystalio, the LCD displays setup menu.
Typical operation includes:
To enter menu set up mode, press <SETUP>
To highlight the previous or next item, press <UP>
or <DOWN>
To increase or decrease value, press <LEFT> or
<RIGHT>
To select an item or confirm setting, press <OK>
To exit and go up one level of the menu, press
<CANCEL>
1 2 3 46 7
10 5
8 9
8

VPS-2300 User Guide
2Familiarizing with Crystalio
2.2 – Crystalio Rear Panel
Video2/sync
Component/RGB2
Compo nent /RGB 1
Cr/R Y/G Cb/B
Video1/sync
LAN
USB
RS232
Cr/R Y/G Cb/B
HDTV Digital in HDTV Analog in
Hsync Vsync SDI 1 SDI 2 S DI 3DVI Out
Exp ansion
S-Video1
230
S-Video2
POWER
1 Power Supply Cable Entry
Use the cable supplied with your Crystalio.
2 Power Supply Voltage Selector
This must be set to the same as your mains
voltage, either 110v or 220v AC. It should have
been set correctly by your supplying dealer.
!!Caution: Make sure this is correctly set BEFORE
connecting Crystalio to your power supply.
VIDEO INPUT TERMINALS
These allow you to connect your video sources to
Crystalio. Please refer to Section 3.3 for details.
Digital
3 HDTV Digital In
4 SDI 1, SDI 2, and SDI 3
Analogue
5 Component/RGB 1
Can be used either as:
RGBs (RGB with composite sync) or RGsB (RGB
with Sync on Green)
Component Video Y-Pb-Pr
1 x Composite (CVBS) video and 1 x S-Video
6 Component/RGB 2
Can be used either as:
RGBs (RGB with composite sync) or RGsB (RGB
with Sync on Green)
Component Video Y-Pb-Pr
1 x Composite (CVBS) Video and 1 x S-Video
7 HDTV analogue in
Can be used either as:
High Definition Component Video Y-Pb-Pr
RGBHV
RGsB (RGB with Sync on Green)
1 2 34
5 6 7

10
2Familiarizing with Crystalio
2.2 – Crystalio Rear Panel (cont’d)
Video2/sync
Component/RGB2
Compo nent /RGB 1
Cr/R Y/G Cb/B
Video1/sync
LAN
USB
RS232
Cr/R Y/G Cb/B
HDTV Digital in HDTV Analog in
Hsync Vsync SDI 1 SDI 2 S DI 3DVI Out
Exp ansion
S-Video1
230
S-Video2
VIDEO OUTPUT TERMINALS
Your display device(s) should be connected to these
terminals. Crystalio offers the following connection
configurations.
Digital
8 DVI
The DVI (Digital Video Interface) provides the best
quality video output from Crystalio. If you are
connecting to a display device that has a DVI terminal,
this is the recommended option to use. This allows
direct transmission of the video information from
Crystalio to the display without any conversion from
digital to analogue signals.
Analogue
9 5 x BNC Connectors
Can be used either as:
RGBHV
RGB(Cs)
Component Video Y-Pb-Pr or Y-Cb-Cr
Computer / Network Connectivity
These are optional / advanced connections
10 USB (Universal Serial Bus)
Allows Crystalio to be upgraded using USB thumb
disk.
11 RJ45 Ethernet connection
Allows Crystalio to be connected to a computer
network for firmware upgrades.
RS232 DB9 Male Serial connection
Allows Crystalio to be integrated into and controlled
by home theatre control systems.
11 12 9
10 8

VPS-2300 User Guide
2Familiarizing with Crystalio
2.3 – Remote Control
A remote control is supplied with your Crystalio for
your direct access to the commonly used functions.
Note: Insert batteries to remote control before using.
1 Power ON & OFF buttons
Press ON to switch your Crystalio
on and press OFF to switch to
standby mode.
!!Caution: When Crystalio is
switched off, please wait for at
least 10 seconds before switching
it on again.
2 Video Settings buttons
Use these buttons to configure
the appearance of the video being
displayed. Parameters available
for customization including
BRIGHTness, CONTRAST,
COLOR saturation, RGB
OFFSET, RGB GAIN, and HUE.
Refer to Section 5.4 for details.
3 Aspect Ratio buttons
To switch to the common aspect
ratio settings directly including
4:3, 16:9, 2.35:1, and SCREEN.
Refer to Section 5.3 for details.
4 Input Select buttons
To select the active video source
directly including SDI 1, Video,
Component, and DVI etc. Refer to
Section 5.2 for details.
5 Navigation buttons
6 ENTER button
ENTER button acts the same as
the SETUP / OK button on the
front panel. It is used to enter the
menu setup mode and to select
item or confirm setting.
7 ESC button
ESCape button acts the same as the CANCEL
button on the front panel. It is used to exit and go
back one level of the menu setup
8 LCD ON / LCD ACTIVE / LCD OFF buttons
To control the backlight of LCD display on the
front panel. Refer to Section 5.5 for details.
9 AR STORE PROFILE button
Use this to memorize Aspect Ratio profiles.
10 AR PROFILE buttons
To recall stored Aspect Ratio profiles. Refer to
Section 5.7 for details.
11 USER STORE PROFILE button
To store user-defined video
profiles.
12 VIDEO USER PROFILE buttons
To recall stored user profiles. Refer
to Section 5.8 for details.
13 POSITION CUSTOM CENTRE
Use this together with the
Navigation buttons to control the
position of displayed image. Refer
to Section 5.5 for details.
14 LED ACTIVE / LED OFF buttons
To switch on and off the LED
indicators on the front panel.
15 PIXEL MAGIC 1:1 button
To activate Pixel Magic System.
Refer to Section 5.9 for details.
16 ZOOM buttons
To scale displayed image so that it
makes the image perfectly fit the
display device. These include
ZOOM, BEST FIT, ZOOM IN,
ZOOM OUT, FULL WIDTH, &
FULL HEIGHT. Refer to Section
5.5 for details.
17 Deinterlace buttons
Use these to select deinterlace
method including AUTO, VIDEO,
NTSC@30 ON, 2:2 EVEN, and 2:2
ODD. Refer to Section 5.5 for
details.
18 NLS button
Use this to switch on and off Non-Linear
Stretching. Refer to Section 5.5 for details.
16:9 GAINOFFSET HUE
2.35:1 SDI 2SDI 1 SDI 3
SCREEN COMPONENT1
VIDEO COMPONENT2
HDTV SVID EO 1DVI SVIDE O 2
ENTER
LCD ACTIVE
LCD ON
ESC
LCD OFF
STORE PROFILE
AR USER CUSTOM CENTER
POSITION
LED ACTIVE PIXEL MAGIC 1:1 LED OFF
FULL WIDTH FULLHE IGHT
ZOOM
Z OOM I N Z OOM OUT
BEST FIT
AR PR OFI LE
12
43
56
VIDEO USER PROFILE
2:2 EVEN NTSC30 ON VIDEO AUTO
2:2 ODD NLS
1 2 43
OFF ON
4:3 BRIGHT CONTRAST COLOR
1
2
3
4
8
6
5
7
9
11
13
14 15
18
16
10
12
17

12
3Hardware Installation
3.1 – Compatible Equipment
In simple terms, Crystalio serves as a video processor
which enhances video signal from source devices and
then deliver the enhanced video signal to the display
devices.
Crystalio is compatible with:
Any source device capable of outputting:
Composite Video
S-Video
RGsB (Sync on Green)
RGBs (Separate Sync)
Component (Y-Pb-Pr)
VGA (HD15)
Digital DVI
SDI (Serial Digital Interface)
Any analogue or digital display device is
capable to accept input in the form of:
Analogue RGBHV
Analogue RGB with composite sync
Analogue Component (Y-Pb-Pr)
Analogue Component (Y-Cb-Cr)
Digital DVI
3.2 – Mains
!!Caution: Ensure that the voltage selector is set
correctly for your mains voltage. If you have any
doubts, DO NOT connect your Crystalio and contact
your dealer for advice. Incorrect setting of the voltage
selector will result in serious damage to your unit and
may lead to fire hazard / electric shock.
!!Caution: Connect Crystalio to a power point using
the mains cable provided.
3.3 – Video Inputs
Crystalio includes a comprehensive set of input
terminals to allow you to connect a wide range of video
sources.
For the best results you should:
use the highest quality output that your video
source provides
use high quality cables for all connections
When deciding on which output to use from your
device, use the following list as a guideline (with best
quality being first):
1 SDI or DVI (a direct digital connection from a
compatible set top box or DVD player).
2 RGB (RGsB/RGBS) – often available from set
top boxes, DVD players etc., This could be used
an optional connection on games consoles.
3 Component (YpbPr) – typically available on
mid-range to high-end DVD players and some
games consoles.
4 S-Video – a general purpose connection found
on many devices. Sometimes (but incorrectly)
this referred as SVHS.
5 Composite – the most common, and the lowest
performing video connection.
TIPS: It is recommended that you choose the
interlaced output from your source device instead
of the progressive (e.g. 480i instead of 480p).
This leaves the conversion from interlaced video
to progressive video to be performed by Crystalio,
which has sophisticated processing dedicated to
this task.

VPS-2300 User Guide
CRT Projector Plasma TV / LCD TV /
Digital Projector
HDTV Source
Game Console / DVD Player DVD Player with SDI
Output
3Hardware Installation
Hardware Installation Diagram
3.4 – Video Outputs
For maximum performance you should use the
digital connection where possible.
The reason for this is that the display of a digital device
(for example a plasma panel, TFT monitor or
LCD/LCOS/DLP projector) is built up of a grid of fixed
number of elements or pixels, which are all directly and
individually controlled by the internal digital electronics
of the display. Using the DVI interface of the display
allows these individual pixels to be directly controlled
by Crystalio, bypassing the internal picture processing
electronics of the display device, and thereby
producing more detailed and accurate images.
When deciding on which output to use from your
device, use the following list as a guideline (best
quality first):
1 DVI (a direct digital connection from Crystalio to
the display device).
2 RGBHV / RGB(Cs)
3 Component video
3.5 – Product Registration
To enjoy the 12-month warranty for your Crystalio, you
must register online at:
http://www.crystalio.com/support.html
This would only take a couple of minutes. You will need
your serial number so please make a note of it prior to
registering your Crystalio.
Once registered, you will be entitled to view technical
information, online product help, and of course
software updates for your Crystalio.
V
ideo Out
p
uts
V
ideo In
p
uts

14
4Basic Software Setup
4.1– Configure Your Video Source
Even your video source has the option to output
progressive video (denoted by a number and then the
letter ‘p’, for example 480p), for maximum results, it is
recommended to disable such option and select
interlaced video mode instead (denoted by a number
and then the letter ‘i’, for example 480i).
The reason for this is that Crystalio features the state-
of-the-art technology specifically designed for
converting interlaced video into progressive video, and
that will usually deliver higher performance than the
converter built in your source device.
4.3 – Switch On Crystalio
Press the POWER button on the front panel, the Power
LED should show green and the LCD display
illuminates. Note that you will need to wait for
approximately 40 seconds for Crystalio to initialize and
for video to display.
If you do not see video as expected, refer to the
[Troubleshooting] section.
4.2 – Select Input Terminal
Using remote control
Press the button of the type of input terminal via which
your input device has been connected.
Note: For HDTV analogue input, repeat pressing the HDTV
button to cycle through the HDTV Component, RGB, and
RGBHV option.
OR
Using front panel control
1 Press SETUP button to start VP SETUP
2 Choose Input Select, press OK button to continue
3 Choose input terminal via which your input device
is connected
4 Press OK button to confirm
OR
Using front panel control
Press the INPUT button to cycle through the various
input terminals and stop at the one by which your input
device is connected.
VP SET UP
> Input Select
Aspect Ratio
Video Settings
Advanced
System Config
AR Profile
……
INPUT SELECT
HDTV Compnt
HDTV RGBHV
HDTV RGB
> HDTV DVI
SDI 1
SDI 2
SDI 3
Component 1
……
SETUP
OK

VPS-2300 User Guide
4Basic Software Setup
4.4 – Select Output Terminal
Using front panel control
1 Press SETUP button to start VP SETUP
2 Choose System Config, press OK to continue
3 Choose Output Select, press OK to continue
4 Choose DVI for digital device or RGBHV / YPbPr /
YCbCr / RGB(Cs) for analogue device
5 Press OK button to confirm
4.5 – Set Output Format / Resolution
Setting Output Format for Analogue devices
1 Press SETUP button to start VP SETUP
2 Choose System Config, press OK to continue
3 Choose Output Format, press OK to continue
4 Choose output format of the display device being
connected in the OUTPUT FORMAT menu
5 Press OK button to confirm
Setting Resolution for Digital devices
1 Press SETUP button to start VP SETUP
2 Choose System Config, press OK to continue
3 Choose Resolution, press OK to continue
4 Choose the resolution of your display device from
the list and press OK button to confirm
OR
5 Choose Preset Models, press OK to continue
6 Select the display device being connected
7 Press OK button to confirm
Congratulations! You have now completed the basic
configuration. In the following sections, there is much
more fine-tuning that you can do to fully optimize the
performance.
SETUP
OK
VP SET UP
Input Select
Aspect Ratio
Video Settings
Advanced
> System Config
AR Profile
Video Profile
Pixel Magic
SYSTEM CONFIG
Input Format
HD Active Wnd
> Output Select
Resolution
Output Format
H sync /V sync
Pre Y/C Delay
……
SETUP
OK
VP SET UP
Input Select
Aspect Ratio
Video Settings
Advanced
> System Config
AR Profile
Video Profile
Pixel Magic
SYSTEM CONFIG
Input Format
HD Active Wnd
Output Select
Resolution
> Output Format
H sync /V sync
Pre Y/C Delay
……
OUTPUT FORMAT
480p @59.94Hz
> 480p @60Hz
540p @60Hz
576p @60Hz
……
SETUP
OK
VP SET UP
Input Select
Aspect Ratio
Video Settings
Advanced
> System Config
AR Profile
Video Profile
Pixel Magic
SYSTEM CONFIG
Input Format
HD Active Wnd
Output Select
> Resolution
Output Format
H sync /V sync
Pre Y/C Delay
……
RESOLUTION
> Preset Models
800 x 600
848 x 480
856 x 480
……
PRESET MODELS
> Epson TW100
Fuj 1024x1024
Hitachi 40 Alis
InFocus 7205
……
OUTPUT SELECT
RGBHV
> DVI
YPbPr
YCbCr
RGB(Cs)
OUTPUT SELECT
> RGBHV
DVI
YPbPr
YCbCr
RGB(Cs)
TIPS: For optimum display, you should set
Crystalio to output a video signal that matches
your display perfectly in terms of resolution and
aspect ratio. See Section 5 Expert Configuration
for details on how to achieve this.

16
5Expert Configuration
5.1 – Overview
Digital display devices create the picture from a large
number of pixels or points of light. The best picture with
these devices is achieved by:-
Delivering the picture signal digitally by using digital
video interface (DVI)
Sending a picture that ‘fits’ exactly the number of
pixels that the display device physically has. This is
known as 1:1 pixel mapping or driving the display at
its ‘native resolution’
Analogue display devices are not built up from
individual pixels, as such they do not have a ‘native
resolution’. However, they have a range of resolutions
where they can deliver the best performance, therefore
it is recommended to utilize in that mode.
Although optimum resolution varies from one display
device to another, this would not be causing setback to
Crystalio, since it has been designed to match the
resolution of almost any display device available in the
market.
What makes Crystalio distinguished from the ordinary
video processors among various state-of-the-art
technologies incorporated is, that the sophisticated
control allows users to have the flexibility to configure
every single aspect of video processing.
Crystalio provides expert users with a diverse range of
options and settings for customizing the system to suit
their specific needs and preferences. These include
color fine-tuning and enhancement, aspect ration
control, re-defining remote control buttons, customizing
menu display, saving display profiles, etc. These
options allow users to be able to control the display
settings precisely and to have quality video viewing
experience. With such control, users could maximize
the performance of any video sources and exploit the
capability of almost any display devices.

VPS-2300 User Guide
5Expert Configuration
5.2 – Input Select
This option allows you to select the active video
source. Note that if you have configured Crystalio to
hide 1 or more sources, these sources will not be
shown.
Setup
►Input
Select ►Port Arrange
>
Available Modes
Input Select Input Format
HDTV
Compnt
HD Analogue Component
(YpbPr)
HDTV
RGBHV
HD Analogue RGBHV
HDTV RGB HD Analogue RGB sync on
Green
HDTV DVI HD Digital DVI DVI
SDI 1 SDI 1 SDI
SDI 2 SDI 2 SDI
SDI 3 SDI 3 SDI
Component 1* Component 1 Component
(YpbPr)
Component 2* Component 2 Component
(YpbPr)
S-Video 1 S-Video 1 Svideo
S-Video 2 S-Video 2 Svideo
Video 1 Composite video
1
Composite (CVBS)
Video 2 Composite video
2
Composite (CVBS)
RGB 1* RGB sync on
Green 1
RGB sync on
Green (RGsB)
RGB 2* RGB sync on
Green 2
RGB sync on
Green (RGsB)
RGBs 1* RGB separate
sync 1
RGB Separate
Sync (RGBS)
RGBs 2 * RGB separate
sync 2
RGB Separate
Sync (RGBS)
5.3 – Aspect Ratio
Crystalio features sophisticated Aspect Control
management by using UltraAR™, allowing almost any
aspect ratio (including custom ratios) to be used with
almost any device.
Setup
►Aspect
Ratio ►select appropriate
mode from list
Available Modes
Aspect Ratio Source Material Aspect Ratio
4:3 4:3
16:9 16:9
16:9 Letterbox 16:9 Letterbox
2.35:1 Anamorphic 2.35:1
Same as Screen Use this mode if the source image
aspect ratio is same as screen aspect
ratio
Customize Allows custom control over the aspect
ratio for non standard material
TIPS: For Customized option, use the Navigation
Buttons on the front panel to set up customized
aspect ratio.
Note: Increment / decrement of aspect ratio is 0.05, except
that it will also stop at 4:3 (1.33:1) and 16:9 (1.78:1)
SETUP
OK
SETUP
OK
HDTV Video Scaler/Proc
e
SDI
Seria l Digital In terface
SETUP
OK CANCEL
Pixel
Magic
Decrease
aspect ratio
Increase
aspect ratio
Confirm
selection
Cancel
selection
VP SET UP
> Input Select
Aspect Ratio
Video Settings
Advanced
System Config
……
VP SET UP
Input Select
> Aspect Ratio
Video Settings
Advanced
System Config
……

18
5Expert Configuration
5.4 – Video Settings
Crystalio allows you to configure the appearance of the
video being displayed with a range of parameters.
Setup
►Video
Settings ►select appropriate
setting from list
Note: Use Navigation Buttons on the front panel to
set up:
Available Modes
Video
Setting
Function Available
range
Brightness Adjusts display brightness -999 to 999
Contrast Adjusts display contrast -18 to 14
Colour Adjusts display colour saturation -99 to 99
Hue Adjusts display hue -180 to 180
Sharpness Adjusts display sharpness
Note: This setting is same as
adjust TrueLife Luma Edge Eff.
0 to 100
R Offset Adjusts Red element of display
saturation
-999 to 999
G Offset Adjusts Green element of display
saturation
-999 to 999
B Offset Adjusts Blue element of display
saturation
-999 to 999
R Gain Adjusts Red gain -99 to 99
G Gain Adjusts Green gain -99 to 99
B Gain Adjusts Blue gain -99 to 99
Black
Enhancer
Black Enhancer improves black
level details
Natural
Black /
Enhanced
Black
Voltage
Pump
Voltage Pump drives analogue
output voltage up
Note: This setting is available
when analogue output is
selected.
On / Off
SETUP
OK
HDTV Video Scaler/Proc
e
SDI
Seria l Digital In terface
SETUP
OK CANCEL
Pixel
Magic
decrease
value
increase
value
confirm
selection
cancel
selection
increase value in
increments of 10
decrease value in
increments of 10
VP SET UP
Input Select
Aspect Ratio
> Video Settings
Advanced
System Config
AR Profile
Video Profile
Pixel Magic

VPS-2300 User Guide
5Expert Configuration
5.5 – Advanced
The settings introduced in this section allows Crystalio
to be configured to suit complex environments,
enabling you to configure many of the Faroudja video
processing options to maximize the picture quality.
Note: The DCDi®, De-interlace and Noise Reducer will be
hidden in this menu if HDTV input has been selected.
Setup
►Advanced ►select appropriate
advanced setting
Note: Use Navigation Buttons on the front panel to set up:
Available Modes
Advanced Available modes
DCDi® Faroudja developed DCDi® (Directional
Correlational De-interlacing) technology to
eliminate the jaggedness that conventional up-
converters introduced to diagonal edges in
video. DCDi®’s unique algorithm identifies all
the moving edges in a scene and adjusts the
angle of interpolation at each pixel so that the
interpolation always follows the edge instead of
crossing it, eliminating stair-casing or jagged
edge artifact, to produce a smooth and natural
looking image.
On
Activate DCDi® de-interlacing
Off
Deactivate DCDi® de-interlacing
Deinterlace Auto
Crystalio will automatically select the most
appropriate de-interlace method. The method
selected can either be
• DCDi®
• Film 3:2 Pulldown
• Film 2:2 Pulldown Even (PAL only)
• Film 2:2 Pulldown Odd (PAL only)
Video
DCDi® de-interlacing only
NTSC@30 On
Crystalio will automatically select the most
appropriate de-interlace method. The method
selected can either be
• Film 3:2 Pulldown
• Film 2:2 Pulldown Even (NTSC/PAL)
• Film 2:2 Pulldown Odd (NTSC/PAL)
• DCDi®
2:2 Even
Film 2:2 Pulldown Even
2:2 Odd
Film 2:2 Pulldown Odd
Note: If DCDi® is switched off in the
Advanced menu setting, simple video
de-interlace will be used instead of
DCDi
SETUP
OK
HDTV Video Scaler/Proc
e
SDI
Seria l Digital In terface
SETUP
OK CANCEL
Pixel
Magic
decrease
value
increase
value
confirm
selection
cancel
selection
VP SET UP
Input Select
Aspect Ratio
Video Settings
> Advanced
System Config
AR Profile
Video Profile
Pixel Magic

20
Advanced Available modes
Noise
Reducer
This is useful for improving the quality of off-air
material.
Options:
• Hi
• Medium
• Lo
• Off
True Life ™ Conventional video enhancement is done by a
“peaking filter” that enhances the high-
frequency components of the video signal.
However, this creates unwanted artifacts.
Faroudja does not use a peaking filter to
enhance an image, instead it uses its
TrueLife™ Enhancement technology to identify
transitions considered to be the details in an
image such as skin texture, freckles or hair.
These detail transitions are deliberately
enhanced making them more visible and more
lifelike. The technology also enhances large
edges to create greater depth of perception
without introducing visualartifacts or distortion.
Detail Eff
Sets the level of Horizontal Detail enhancement
Detail Thd
Sets the threshold point for the introduction of
Horizontal Detail enhancement
Luma Edge Eff
Sets the level of Horizontal Edge Luma
enhancement
Luma Edge Thd
Sets the threshold point for the introduction of
Horizontal Edge Luma enhancement
Chroma Edge Eff
Sets the level of Horizontal Edge Chroma
enhancement
Chroma Edge Thd
Sets the threshold point the introduction of
Horizontal Edge Chroma enhancement
V Luma Edge Eff
Sets the level of Vertical Details enhancement
V Luma Edge Thd
Sets the threshold point for the introduction of
Vertical Detail enhancement
Advanced Available modes
Zoom This setting allows the displayed image to be
scaled to perfectly fit the display device.
Full Width
Crystalio will set the width of the image to
match the dimensions of the display device
Full Height
Crystalio will set the height of the image to
match the dimensions of the display device
Best Fit
This automatically selects Full Width and Full
Height options together, so that the image
displayed fills the dimensions of the display
device.
Source Width
Crystalio will set the width of the image to
match the dimensions of the video source. No
horizontal scaling is taking place in this mode
Source Height
Crystalio will set the height of the image to
match the dimensions of the video source. No
vertical scaling is taking place in this mode
Customize
This allows fine manual control over the exact
image size
Note: Zoom takes place in increments of
0.02. The displayed image can not be
enlarged beyond 10 times the original
source image dimensions, nor can it be
reduced to less than half of the source
image dimensions.
Zoom In
Crystalio will enlarge the image by increments
of x0.1
Zoom Out
Crystalio will shrink the image by decrements
of x0.1
Zoom to Line
Crystalio will enlarge/shrink the image to exact
line
A
dvanced
A
vailable modes
A
dvanced
A
vailable modes
Other manuals for VPS-2300
3
Table of contents
Other Crystalio Media Converter manuals