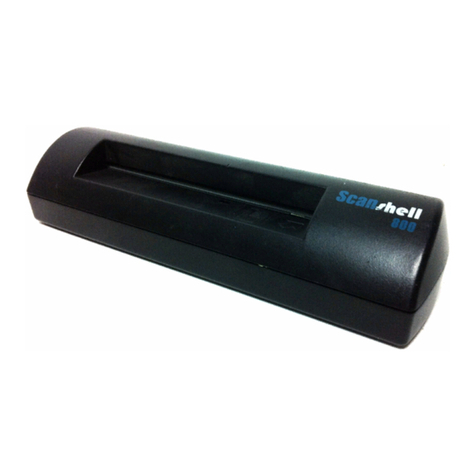
CSSN ScanShell 1000 User manual

IdScan User Manual version 9.0
©
Card Scanning Solutions, all rights reserved 1
User Manual
Version 9.0
This publication contains proprietary information of the Card Scanning Solution Company, provided
for customer use only. No other use is authorized without the express written permission of Card
Scanning Solution.

Disclaimer 2
IdScan User Manual version 9.0
©
Card Scanning Solutions, all rights reserved 2
DISCLAIMER
WARRANTY
Card Scanning Solutions provides this publication “as is” without warranty of any
kind, either express or implied, including, but not limited to, the implied warranties of
merchantability or suitability for any particular purpose.
Card Scanning Solutions reserves the right to revise this publication, and to make
changes in the content hereof from time to time without notification. Some countries
or states in the USA do not allow a disclaimer of express or implied warranties in
certain transactions; if you are a resident of such country or state, this statement may
not apply to you.
This publication may include technical inaccuracies or typographical errors. Changes
are made periodically to the information herein; these changes will be incorporated in
new editions of the publication. Card Scanning Solutions may make improvements
and/or changes in the products and/or the software described in this publication at any
time.
NOTICE TO USER
This manual should not be construed as a representation or warranty with respect to
the software named herein. Occasionally, changes or variations exist in the software
that are not reflected in the manual. Generally, if such changes or variations are
known to exist and to affect the product significantly, a release note or “read me” file
accompanies the manual and/or the distributed software. In that event, be sure to read
the release note or “read me” file before using the product.
PUBLICATION
The descriptions, specifications, design and procedures contained in this manual were
effective at the time of publication of this manual. Card Scanning Solutions reserves
the right to modify any of the above at any time without notice and without incurring
obligations.

Table of Content 3
IdScan User Manual version 9.0
©
Card Scanning Solutions, all rights reserved 3
TABLE OF CONTENT
DISCLAIMER .........................................................................................................................................2
Warranty.........................................................................................................................................2
Notice to User.................................................................................................................................2
Publication......................................................................................................................................2
TABLE OF CONTENT .............................................................................................................................3
TABLE OF FIGURES...............................................................................................................................5
1. GETTING STARTED..................................................................................................................7
BEFORE USING THE SCANNER ...............................................................................................................7
MINIMUM SYSTEM REQUIREMENTS.......................................................................................................7
CONNECTING THE SCANNER .................................................................................................................7
INSTALLATION......................................................................................................................................8
STARTING THE PROGRAM .....................................................................................................................8
UNINSTALL...........................................................................................................................................8
2. INTRODUCTION.........................................................................................................................9
3. SCANSHELL 800 .......................................................................................................................10
OVERVIEW..........................................................................................................................................10
GETTING STARTED..............................................................................................................................10
THE PROGRAM INTERFACE.................................................................................................................11
THE MAIN SCREEN CONTROLS.............................................................................................................11
PROGRAM OPERATION........................................................................................................................14
Card Insertion Auto-Detect...........................................................................................................14
Category........................................................................................................................................14
Categories ................................................................................................................................................14
Selecting country and state ..................................................................................................15
Auto detect...............................................................................................................................................15
Scan Image....................................................................................................................................15
Output options...............................................................................................................................15
SCANNING A NEW DOCUMENT ............................................................................................................16
ID DATA.............................................................................................................................................17
Custom fields - User defined fields ...............................................................................................18
Editing and deleting custom fields...........................................................................................................19
ID data saving...............................................................................................................................19
ID CARD VERIFICATION................................................................................................................19
To verify a card:............................................................................................................................19
Understanding the VERIFICATION status light...........................................................................20
What to do when verification fails? ..............................................................................................20
4. SCANSHELL 1000 .....................................................................................................................21
OVERVIEW..........................................................................................................................................21
GETTING STARTED .............................................................................................................................21
Installation....................................................................................................................................21
THE PROGRAM INTERFACE.................................................................................................................22
THE MAIN SCREEN CONTROLS.............................................................................................................22
SCANNER BUTTON ASSIGNMENT.........................................................................................................24
SCANNING DOCUMENTS .....................................................................................................................25
Auto-Detect...................................................................................................................................25
Category........................................................................................................................................26
Categories ................................................................................................................................................26
Selecting country and state...........................................................................................................27
Auto detect...............................................................................................................................................27
Scan Image....................................................................................................................................27
Output options...............................................................................................................................27
SCANNING A NEW DOCUMENT ............................................................................................................28
ID DATA.............................................................................................................................................30
Custom fields - User defined fields ...............................................................................................31
Editing and deleting custom fields...........................................................................................................32

Table of Content 4
IdScan User Manual version 9.0
©
Card Scanning Solutions, all rights reserved 4
ID data saving...............................................................................................................................32
ID CARD VERIFICATION................................................................................................................33
To verify a card:............................................................................................................................33
Understanding the VERIFICATION status light...........................................................................34
What to do when verification fails? ..............................................................................................34
5. SCANSHELL 800 N ...................................................................................................................35
OVERVIEW..........................................................................................................................................35
GETTING STARTED .............................................................................................................................35
THE PROGRAM INTERFACE.................................................................................................................36
THE MAIN SCREEN CONTROLS.............................................................................................................36
PROGRAM OPERATION........................................................................................................................39
Card Insertion Auto-Detect...........................................................................................................39
Category........................................................................................................................................39
Scan Image....................................................................................................................................39
Output options...............................................................................................................................39
SCANNING A NEW DOCUMENT ............................................................................................................40
CARD DATA........................................................................................................................................41
1D AND 2D MODES.............................................................................................................................42
GENERAL DOCUMENT MODE .............................................................................................................42
data saving....................................................................................................................................43
6. MAGSHELL ...............................................................................................................................44
OVERVIEW ..........................................................................................................................................44
GETTING STARTED..............................................................................................................................44
THE PROGRAM INTERFACE.................................................................................................................45
THE MAIN SCREEN CONTROLS.............................................................................................................45
SWIPING CARDS ..................................................................................................................................48
Category........................................................................................................................................48
Scan Image....................................................................................................................................48
Output options...............................................................................................................................48
SWIPING A NEW DOCUMENT................................................................................................................48
ID DATA.............................................................................................................................................48
Custom fields - User defined fields ...............................................................................................50
Editing and deleting custom fields...........................................................................................................51
ID data saving...............................................................................................................................51
ID CARD VERIFICATION................................................................................................................52
To verify a card:............................................................................................................................52
Understanding the VERIFICATION status light...........................................................................53
What to do when verification fails? ..............................................................................................53
7. CONFIGURING THE PROGRAM..........................................................................................55
AUTOMATION TAB..............................................................................................................................56
Data Source ..................................................................................................................................56
Scanner button assignment ...........................................................................................................57
Saving options...............................................................................................................................58
Image manual save .......................................................................................................................58
Image auto save ............................................................................................................................58
File Naming ..................................................................................................................................59
Driver License images tab ............................................................................................................59
General documents images...........................................................................................................60
LICENSE TEXT EXPORT TAB ...............................................................................................................61
Extract full image..........................................................................................................................62
Extract face image to file ..............................................................................................................62
Extract signature image to file......................................................................................................62
Export id data to web....................................................................................................................62
Extract ID data to a file ................................................................................................................62
Document type export strings ..................................................................................................................63
Append records:............................................................................................................................64
OCR TEXT EXPORT TAB......................................................................................................................65

Table of Content 5
IdScan User Manual version 9.0
©
Card Scanning Solutions, all rights reserved 5
IMAGE TAB .........................................................................................................................................66
Text Stamp.....................................................................................................................................68
Scanner Calibration......................................................................................................................68
Cleaning the Scanner....................................................................................................................68
PRINTING –PRINT TAB .......................................................................................................................69
Image Print Size............................................................................................................................69
LIVE UPDATE TAB..............................................................................................................................71
MAGNETIC READING TAB ...................................................................................................................73
Manual Save .................................................................................................................................73
Auto Save ......................................................................................................................................73
Save immediately after swipe........................................................................................................74
MAGNETIC CARD DATA EXPORT TAB ..................................................................................................74
Field separators............................................................................................................................74
8. APPENDIX A – SUPPORTED STATES FOR DETECTION................................................75
9. APPENDIX B – SUPPORTED SCANNERS............................................................................78
10. APPENDIX C - MAINTAINING THE SCANNER............................................................79
CALIBRATING THE SCANNER ..............................................................................................................79
CLEANING THE SCANNER....................................................................................................................79
11. APPENDIX D - MINIMIZED INTERFACE MODE & COMMAND-LINE SWITCHES
80
USING THE COMMAND LINE SWITCHES ...............................................................................................80
RUNNING IN MINIMIZED INTERFACE MODE ........................................................................................80
12. APPENDIX E – FULL EXPORT FIELDS LIST................................................................82
TABLE OF FIGURES
Figure 1: Main Screen..................................................................................................11
Figure 2: status bar document type indication.............................................................14
Figure 3: Scanned driver license..................................................................................16
Figure 4: ID Data - basic mode....................................................................................17
Figure 5: Figure 6: ID Data - Details mode.................................................................18
Figure 7: Cusotm fields creation window....................................................................18
Figure 8: Main Screen..................................................................................................22
Figure 9: Scanshell 1000 button assignment ...............................................................24
Figure 10: Scanshell 1000 button configuration..........................................................25
Figure 11: status bar document type indication...........................................................26
Figure 12: ScanShell 1000, ID card placing................................................................28
Figure 14: Scanned driver license................................................................................29
Figure 15: ID Data - basic mode..................................................................................30
Figure 16: Figure 17: ID Data - Details mode.............................................................31
Figure 18: Cusotm fields creation window..................................................................31
Figure 19: Main Screen................................................................................................36
Figure 20: Scanned Business card ...............................................................................40
Figure 21: ID Business card data.................................................................................41
Figure 22: Check data window....................................................................................42
Figure 24: Main Screen................................................................................................45
Figure 25: ID Data - basic mode..................................................................................49
Figure 26: Figure 27: ID Data - Details mode.............................................................50
Figure 28: Cusotm fields creation window..................................................................50
Figure 29: Scanner configuration panel.......................................................................55

Table of Content 6
IdScan User Manual version 9.0
©
Card Scanning Solutions, all rights reserved 6
Figure 30: Scanshell 1000 button configuration..........................................................57
Figure 31: File naming configuration – Driver license................................................59
Figure 32: File naming configuration – General documents.......................................60
Figure 33: Scanner configuration panel - License data processing tab .......................61
Figure 34: Scanner configuration panel – OCR TEXT EXPORT tab.........................65
Figure 35: Scanner configuration panel – Image tab...................................................66
Figure 36: Document Measurements...........................................................................66
Figure 37: Text stamp configuration window..............................................................68
Figure 38: Scanner configuration panel – Print tab.....................................................69
Figure 39: Print custom fields dialog...........................................................................70
Figure 40: Live Update tab..........................................................................................71
Figure 41: Live Update user details.............................................................................72
Figure 42: Automation Tab..........................................................................................73
Figure 43: Main screen in minimized mode................................................................81

Installation 7
IdScan User Manual version 9.0
©
Card Scanning Solutions, all rights reserved 7
1. GETTING STARTED
BEFORE USING THE SCANNER
The application has been carefully packaged to avoid damage during transportation.
Before operating the scanner, please remove the packaging materials. After removing
the packaging materials, you will find the following:
ScanShell scanner
CD of the application
USB interface cable
User license card
Calibration card (only with ScanShell 800/800N)
MINIMUM SYSTEM REQUIREMENTS
The minimum system requirements are:
•Pentium III with 128MB
•Win 98 Second Edition or higher
•USB port
•15 MB free storage space
CONNECTING THE SCANNER
The scanner is connected to the computer via the USB port. To connect the reader, do
the following:
Place the scanner on a flat, firm, solid surface with easy access.
Plug the USB interface cable into the USB port of the computer
After the Add new hardware wizard dialog box appears, click Next until you are
asked to set the driver for the reader. You’ll find the driver on the Installation CD
at:
<CD ROM drive>:\Scanner Driver\ScanShell800 (for scanner model
ScanShel800)
<CD ROM drive>:\Scanner Driver\ScanShell800N (for scanner model
ScanShel800N)
<CD ROM drive>:\Scanner Driver\ScanShell1000 (for scanner model
ScanShel1000)
<CD ROM drive>:\Scanner Driver\MagShell900 (for magnetic reader
model MagShel900)
After you specify the driver, click Next until the installation is complete.

Installation 8
IdScan User Manual version 9.0
©
Card Scanning Solutions, all rights reserved 8
INSTALLATION
To install the software on the computer, do the following:
1. Close all programs.
2. Insert the CD into the CD ROM drive.
3. Wait until the install program begins and follow the instructions on the screen.
4. If the install program does not automatically start, click the My Computer icon
on the desktop and then select the CD ROM drive.
5. Double click on the Setup program.
Once the Setup program starts, select the application name from the left list and click
on the Setup icon. Enter your license key number when prompt, and follow the
instructions.
STARTING THE PROGRAM
The very first time you start the program after installation, you will be prompted to
enter your registration key. You'll find your registration key sticker on the box of your
ScanShell scanner.
On the first time you start the program, you will also be prompted to check for new
updates. Click Yes to let the program check for updates (make sure you are connected
to the Internet at that time), or No to skip the update check and proceed to the
program's main screen.
If you click yes, the program will check for updates. If updates are found, you will be
prompted to confirm download and installation. If you confirm, the program will
download the most recent updates and install them automatically.
UNINSTALL
To uninstall the software, open the Add-Remove Program control panel. Select the
Application icon and click on Add/Remove. Follow the uninstall instructions until the
operation is completed.

Introduction 9
IdScan User Manual version 9.0
©
Card Scanning Solutions, all rights reserved 9
2. INTRODUCTION
IdScan is a modular scanning application for various cards and ID documents. It
extracts both the information data and image of documents into an external file,
clipboard or third party software. In addition, idScan is capable of exporting the
extracted data and image to other applications, email. FTP and the web.
With an outstanding cards scanning and processing speed combined with a powerful
OCR engine, idScan is ideal for customer service offices, government agencies,
various businesses, and third party kiosk applications.
The available modules are:
idScan for Driving Licenses - scans and extract the data and image of various
ID documents such as driver licenses and passports.
idScan for Passports - scans and extract the data and image of passports.
idScan for Business Cards - scans and extract the data and image of business
cards.
idScan for Magnetic Cards – reads data of magnetic strips
Barcode Reader
Check Reader
Signature Reader
The modules available to you depend on the package you purchased. The modules
configuration usually depends on your type of scanner as follow:
Scanner Modules Page
Scanshell
800 N idScan for Business Cards, Check Reader, Signature Reader 35
Scanshell
800/2000 idScan for Driving Licenses, idScan for Business Cards,
Barcode reader, Check Reader , Signature Reader 10
Scanshell
1000 idScan for for Passports, idScan for Driving Licenses,
idScan for Business Cards, Barcode Reader, Check Reader ,
Signature Reader
21
Magshell idScan for Magnetic Cards 44
For each package you will find a dedicated chapter, explaining how to use the various
modules included in your package.

Scanshell 800 Overview
IdScan User Manual version 9.0
©
Card Scanning Solutions, all rights reserved 10
3. SCANSHELL 800
The Scanshell 800 package includes the following modules:
idScan for Driving Licenses, idScan for business cards, Barcode reader, Check
reader , Signature reader
OVERVIEW
IdScan with a Scanshell 800 scanner is a scanning application for various ID
documents such as driver licenses, as well as business cards, barcodes, checks, and
signatures. It extracts both the information data and image of scanned documents into
an external file, clipboard or third party software. In addition, idScan is capable of
exporting the extracted data and image to other applications, email. FTP and the web.
With an outstanding cards scanning and processing speed, combined with a powerful
OCR engine, idScan is ideal for customer service offices, government agencies,
various businesses, and third party kiosk applications.
When using the automatic page-feed detection, idScan launches the scan job
immediately upon the insertion of a document into the ScanShell 800 scanner. The
image is scanned and saved to the hard disk in a predefined color scheme, resolution,
and scanning area, in a user-defined format (BMP, JPG, PCX, PNG, TIFF, TGA,
PSD). The scanned image can also be rotated automatically, using predefined angles
to obtain the proper orientation. idScan offers three naming conventions to the saved
images: fixed name, ascending numerator name, and naming according to the
customer name as extracted from the ID card.
Full automation of the scan process allows chain-feeding of media to the Scanshell
800 scanner while image processing takes place in the background.
The ScanShell 800 scanner is capable of scanning any photo media due to its
powerful scanning engine – including paper photos, ID cards, and even rigid plastic
credit cards.
GETTING STARTED
Please read chapter 1. Getting Started on page 7, for information concerning the
installation of the application and connecting the scanner.

Scanshell 800 The Program Interface
IdScan User Manual version 9.0
©
Card Scanning Solutions, all rights reserved 11
THE PROGRAM INTERFACE
The following figure shows the application main screen:
Figure 1: Main Screen
THE MAIN SCREEN CONTROLS
•Always on Top: Toggles the application window between normal mode
and always-on-top mode.
•Help: Displays this document.
•Print Preview: Shows the scanned image and the data before printing.
•Print: Prints the scanned image and the data.
•Toggle Toolbar: Minimizes the application screen to display only a
toolbar with the application controls, and restores the full application screen
again.
•Card Insertion Auto-Detect: Set the automatic detection of card
insertion on and off.
•Live Update: Updates your software with the most recent version, using
the Internet.

Scanshell 800The main screen controls
IdScan User Manual version 9.0
©
Card Scanning Solutions, all rights reserved 12
•Category: Toggles between the available
document types, according to the used scanner and application, and sets the
source for data detection accordingly.
•Driver’s license country: Sets the country and
state to be used for the OCR recognition template. You can also set state
detection to ‘Auto Detect’ (top of the list),
•Rotate Image: Rotates the image 90 degrees clockwise. This allows you
to control the image orientation prior to saving.
•Zoom Image: Click to enlarge the image for better reading.
•Scan Image: Starts the image scan if using manual scan.
Otherwise, activates the File Open dialog.
Note: Opening a file is possible only if a scanner is physically connected to the PC, or if the
license key used is a temporary key.
•Toggle Image Source: Sets the input image source to
Scanner (ScanShell 800/800N/2000 or ScanShell 1000), Magnetic reader, or
an image file on the hard disk.
•Scanner Connection: A green light indicates that the scanner is
connected to the PC. A red light indicates that no scanner was found.
•Delete Image: Deletes the scanned image. This gives you a
way to control the image prior to saving.
•Save to File: Active only in manual save mode: Opens the
SAVE AS dialog if file saving is enabled, or saves the file to the clipboard.
•Toggle Image Output: Active only in manual save mode: Sets the
output destination to file or clipboard.
•Card Verification: Activates the verification function.
•Toggle reference: Sets the reference source for card
verification purposes.
•Open OCR View: Open extracted text view.

Scanshell 800The main screen controls
IdScan User Manual version 9.0
©
Card Scanning Solutions, all rights reserved 13
•Open Configuration Dialog: Opes the configuration screen in which
all the application preferences can be set.
•Exit / End of Scan: Used to close the application or to save the current
image (used in automatic save mode only).
•Background save progress (Status bar): Shows the
background saving progress (used in automatic save mode only).
•FTP Progress (Status bar): Shows the progress of FTP
Export
•Detected State (Status bar): Displays the detected state
when State Auto Detect is selected.
Device connection indicator
Red – device is not connected
Green – device is connected

Scanshell 800Program Operation
IdScan User Manual version 9.0
©
Card Scanning Solutions, all rights reserved 14
PROGRAM OPERATION
Before scanning, you have to set up the scanning configuration. This can be done in
two ways:
6. In the configuration panel, in which you can control all the program settings,
see chapter 7, Configuring the Program, page 55.
7. Most settings can also be set up from within the application main window.
CARD INSERTION AUTO-DETECT
Click on this button to for automatic detection of card insertion. If this button is
pressed, scanning will start as soon as you insert a card into the scanner. If auto-detect
is not turned on, scanning starts when you click the Scan Image button.
CATEGORY
Select the scanned document types, according to the used
ScanShell 800support all document reading as follows:
•Driver Licenses
•Passports
•Business cards
•Barcodes
•Checks
Categories
•Combined category: Driver license/ID/Business card: In this mode,
ScanShell scans a document assuming that the document is a either a driver
license or an ID card. If it is indeed a driver license or an ID card, the process
shows the license details (and exports the data). If the document is not a driver
license or an ID card, ScanShell switches automatically to business card mode
and attempts to process the scanned card as a business card. The progress of
this process can be followed in the status bar at the bottom of the screen,
which also indicates whether the card is being processed as a driver license or
a business card.
Clicking the OCR button will open an appropriate window according to the
document type detected; driver license details for scanned driver licenses and
business card details if the scanned document was a business card.
Note: This option is only available if the United State (auto detection) option is selected in
the 'State' field!
Figure 2: status bar document type indication

Scanshell 800Program Operation
IdScan User Manual version 9.0
©
Card Scanning Solutions, all rights reserved 15
•Combined category: Driver license/ID/ card – Same as the above. idScan
attempts to recognize the document type automatically.
•Other categories: Select the category of the scanned document. If you scan
the same document type regularly, selecting the exact category could speed up
the process compared to using the combined category.
SELECTING COUNTRY AND STATE
If you scan a driver license or an ID card,
you have to specify the Driver’s license or
ID card issuing country or state, to enable
the OCR recognition process.
Click on the field arrow, and navigate
through the popup lists to the desired
country/state.
Auto detect
In most cases, you can select Auto Detect
(top of the list), which will cause the
application to detect the issuing
country/state automatically. However, if
the data extractions results are not
accurate, you will need to specify the
issuing country or state manually.
SCAN IMAGE
8. Click on the arrow and select the image source: Scanner
or an image file on the hard disk. (The third option Mag.
Strip is only available if a Magshell magnetic reader is
connected to the computer)
9. Start the scan if Auto-detect is not selected, by pressing the Scan Image
button.
Note: Image file can be selected if a scanner is physically connected to the PC, or if the
license key used is a temporary key.
10. Scanner Connection: A green light indicates that the scanner is
connected to the PC. A red light indicates that no scanner was found. If no
scanner is detected, input of new data is not possible.
OUTPUT OPTIONS
Select the data output option: Save to file or copy to the clipboard,
which allows immediate pasting into another application. Active only if manual save
is selected in the configuration panel, see Saving options, page 58. Selecting Save to
file opens the Save As dialog after the scan is complete.

Scanshell 800Scanning a new document
IdScan User Manual version 9.0
©
Card Scanning Solutions, all rights reserved 16
SCANNING A NEW DOCUMENT
To scan a new document, just feed the document into the scanner. If the scanner is set
to automatic scan mode, the scanner will start scanning the card automatically. In
manual scan mode, the scanner starts scanning when you click on the Scan button in
the main screen. See Automation tab, page 56. Once the scan is complete, the
program will process the image and data. The scanned image and data will be saved
according to the settings you specified in the configuration panel, see chapter 7,
Configuring the Program, page 55.
Figure 3: Scanned driver license

Scanshell 800ID Data
IdScan User Manual version 9.0
©
Card Scanning Solutions, all rights reserved 17
ID DATA
After scanning and processing the ID card, you can review the acquired text by
opening the ID Data window. To open the ID Data window, press the OCR button on
the main screen.
The ID Data window shows the data retrieved either from the scanned image by OCR
(Optical Character Recognition), or from the scanned image Barcode, depending on
the option selected. Irrelevant fields are disabled (depending the state). The data
displayed in the ID Data window can be reviewed and edited. Once a new ID card is
scanned, this data is transferred to a text file (if this option is enabled).
To open the ID Data window, press the OCR button on the main screen.
To edit details: select the desired details and type.
Figure 4: ID Data - basic mode
The ID Data window can be viewed in two modes:
•Basic mode: Only the most important data is shown.
•Detailed mode: Shows all the data on the card.
You can toggle between the two modes using the Basic / Detailed button at the bottom
of the ID Data window.
State: You can select the state manually from the dropdown list, or let the program
detect the state automatically, by selecting 'auto detect' at the top of the list (if
available).

Scanshell 800ID Data
IdScan User Manual version 9.0
©
Card Scanning Solutions, all rights reserved 18
Figure 5: Figure 6: ID Data - Details mode
CUSTOM FIELDS - USER DEFINED FIELDS
Custom fields can be useful for creating badges and other purposes.
•Click on the 'OCR' button at the bottom left of the main screen.
•Click on the 'Details' button at the bottom left of the window that opens.
•Click on the 'Custom' button at the bottom left of the window that opens.
•Click on the 'Labels' button at the bottom of the window that opens to create a
label for the field.
Figure 7: Cusotm fields creation window

Scanshell 800
IdScan User Manual version 9.0
©
Card Scanning Solutions, all rights reserved 19
•Click 'Add' and type in a name for the field.
•Repeat the process to create additional fields.
•Click OK. You will find new fields in the Custom fields' window. You can
now type values or data into the field.
Editing and deleting custom fields
Repeat the process above. After the 'Add' window opens, select a label and click 'Edit'
to change the field's name, or 'Remove' to remove it. When you are done, click OK.
ID DATA SAVING
Text data saving options are controlled from the configuration panel's Automation tab.
See Automation tab, page 56.
ID CARD VERIFICATION
Use this option to check if the card you are scanning is genuine. IdScan will scan the
data on the card using OCR, and then compare it to data from a second source on the
card, either the barcode or the magnetic strip (if available). If the data from the two
sources match, the card is genuine. Else, the card is either faked, or one of the data
sources on the card is corrupted.
TO VERIFY A CARD:
1. Select Record -> New Record from the menu bar or click on the New Record
button from tool bar.
2. The New Record Screen will appear.
3. Select a state from the State dropdown list or use the State Detect option (for
OCR). You are advised to select the state manually, because if the state is not
recognized for some reason, you’ll have to repeat the process. You can also
select a state from the quick state selection buttons, if you have predefined
them. (To set a button for the desired state, right-click on the button. Select the
desired state from the list. After you release the mouse button, you’ll notice
that the button name has been changed to the state you selected).
4. Use the popup menu of the card verification button to
select a second card data source, which will be used for
comparison with the OCR results. (Barcode by default.
The magnetic Reader will only be available if a
Magnetic reader is connected to the computer).

Scanshell 800 ID Card VERIFICATION
IdScan User Manual version 9.0
©
Card Scanning Solutions, all rights reserved 20
5. Click on the Card verification button to start the verification (When the
verification process is active, the icon on the button will flash, if it’s not active
it will be black)
6. Place the ID card in scanner.
7. If you are not using the Auto detect card insertion option: Click on the Scan
button to scan the data source (This scan will be saved to the database if you
will save the record).
8. If you are using the AutoDetect card insertion mode, just insert the card into
the scanner
9. IdScan will scan the card, and than prompt you to scan the card a second time.
Insert the card again in the scanner/reader and repeat the steps above.
10. If the data from the two sources on the card matched, the icon on the
verification button will be green. If it did not match, the icon will be red,
which means the card is not in order, (either faked, or one of the data sources
on the card is corrupted.
11. Press OK to save the record to database.
UNDERSTANDING THE VERIFICATION STATUS LIGHT
The status light provides indications for the verification process, as follows:
•Solid black color, the verification function is not activated.
•Solid brown color, the verification function is activated and waits for the
reference scan or swipe.
•Flashing brown light, the reference scan or swipe has been successful, waits
for the scan of the source.
•Solid green color - the source was scanned successfully and the verification is
successful (the data of the two sources match).
•Solid red color - the source was scanned badly or the verification is failed (the
data of the two sources don’t match).
WHAT TO DO WHEN VERIFICATION FAILS?
If the status light remains solid red after the reference scan or swipe, it means that the
data from the two sources don’t match. He reason can be one of the following:
1. The card could be faked
2. Bad reading of either one of the source
3. Corruption of one of the data sources.
If verification fails, you can try the following:
•Make sure the current (US) State box is set to the correct state of the driver
license.
•Try authenticating the card again.
Other manuals for ScanShell 1000
1
This manual suits for next models
4
Table of contents
Other CSSN Software manuals
Popular Software manuals by other brands

Extreme Networks
Extreme Networks Ridgeline Guide installation guide

Dell
Dell Powerconnect W-ClearPass Hardware Appliances Deployment guide

Braunschweiger Flammenfilter
Braunschweiger Flammenfilter PROTEGO QuEST quick guide

Lucent Technologies
Lucent Technologies INTUITY Messaging Solutions manual

Native Instruments
Native Instruments Skanner user manual

Canon
Canon DV-PC Software instruction manual