manuals.online logo
Brands
  1. Home
  2. •
  3. Brands
  4. •
  5. CTA
  6. •
  7. Rack & Stand
  8. •
  9. CTA PAD-PARAFP User manual

CTA PAD-PARAFP User manual

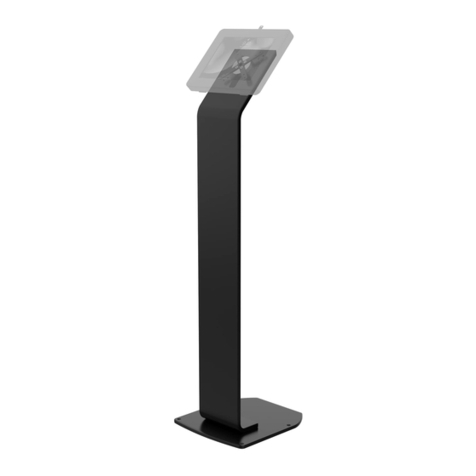
Premium Locking Floor Stand Kiosk
with Enclosed Printer Storage & Cable Management
PAD-PARAFP
INSTRUCTION - MANUAL
CONTENTS:
INSTALLATION:
888-733-4448
1. Assembling base
x2
1A. Combine both halves of the base (B) as shown above. Take (1) unit of
the body (A) and align the mounting holes. Rotate in (4) screws (E) with
provided allen key until securely tightened.
2. Attaching Base Pads
2A. Flip over the now combined base section. Find the base pads (H) and
peel off the sticker to expose the adhesive. Place the foam pads (adhesive
face down on base) at the corners and give it a firm press for a few
seconds until it’s securely attached.
3. Assembling Body Segments
3A. Find the other body unit (A) and the printer shelf unit (C). First unlock the
compartments using the keys (I).Then align holes between two body units at
a time. Take (4) screws (E) and using the provided allen key tool (G), rotate
in the screws as shown until securely tightened. Each body segment has it’s
own unique key set. Identify which keys go with each segments. Each key
set is specific to a segment.
A
x2
B
x6
I
x4
D
M5 x 6
x12
E
M5 x 12
x4
J
M6 anchor
x2
F
M5 Allen Key
x1
G
x4
H
x1
C
A
B
G
E
H
B
A
E
I
C
A
(4)
G
I
I
888-733-4448
4. (Optional) Anchoring Base to Floor
4A. Drill (4) holes into the surface using a power drill or like (not
provided). Take the metal anchor (F) and place the casing into the
holes. Then take the screw end and rotate in with screwdriver (not
included) until securely tightened.
4B. If not anchoring into floor, use the (2) hole fillers (D) to plug in for a
more seamless look.
**Tablet and enclosure
shown for illustration,
NOT INCLUDED.
**Monitor shown for
illustration only,
NOT INCLUDED.
**Monitor shown for
illustration only,
NOT INCLUDED.
F (4) D (4)
Assembling Enclosure to
Printer Shelf Component
Assembling Monitor to
Printer Shelf Component
Align the VESA holes of the enclosure to that of
the printer shelf component (C). Rotate in screws
(J) from above using provided allen key tool (G) as
shown until securely tightened.
Align the VESA holes of the monitor to that of the
printer shelf component (C). Rotate in screws (J)
from behind using provided allen key tool (G) as
shown until securely tightened.
(4) M5 x 12
Cable Routing
Cable Management
Unlock all (3) body unit storage compartments
using the correct key for each section. Fish the
cables through as shown and out the opening
at the very bottom as needed.
G
G
J
J
C
J
(4) M5 x 12
J

Other CTA Rack & Stand manuals

CTA PAD-VPOS1W User manual

CTA

CTA PAD-VPOS1W User manual

CTA ADD-PARAFS User manual

CTA

CTA ADD-PARAFS User manual

CTA PAD-UGT User manual

CTA

CTA PAD-UGT User manual

CTA ADD-PARAFSV User manual

CTA

CTA ADD-PARAFSV User manual

CTA PAD-ASKM6 User manual

CTA

CTA PAD-ASKM6 User manual

CTA PAD-SSMANS User manual

CTA

CTA PAD-SSMANS User manual

CTA PAD-PF1ICC User manual

CTA

CTA PAD-PF1ICC User manual

CTA PAD-DSGK User manual

CTA

CTA PAD-DSGK User manual

CTA PAD-VPOS2BC User manual

CTA

CTA PAD-VPOS2BC User manual

CTA PAD-CHKBM10 User manual

CTA

CTA PAD-CHKBM10 User manual

CTA LT-LFSDM User manual

CTA

CTA LT-LFSDM User manual

CTA PAD-SCGS User manual

CTA

CTA PAD-SCGS User manual

CTA PAD-HSKSB User manual

CTA

CTA PAD-HSKSB User manual

CTA PAD-SCGS User manual

CTA

CTA PAD-SCGS User manual

CTA PAD-TAM User manual

CTA

CTA PAD-TAM User manual

CTA PAD-ASKB10 User manual

CTA

CTA PAD-ASKB10 User manual

CTA PAD-TAM User manual

CTA

CTA PAD-TAM User manual

CTA PAD-HSKSBAE User manual

CTA

CTA PAD-HSKSBAE User manual

CTA PAD-CHKB User manual

CTA

CTA PAD-CHKB User manual

CTA PAD-PARAFPE User manual

CTA

CTA PAD-PARAFPE User manual

CTA ADD-2VDMB User manual

CTA

CTA ADD-2VDMB User manual

CTA PAD-SSMA User manual

CTA

CTA PAD-SSMA User manual

CTA PAD-UATPB2 User manual

CTA

CTA PAD-UATPB2 User manual

CTA ADD-CPOLEGN User manual

CTA

CTA ADD-CPOLEGN User manual

Popular Rack & Stand manuals by other brands

homechoice Willow Shoe Rack Assembly instruction

homechoice

homechoice Willow Shoe Rack Assembly instruction

Innovation First 111-5383 installation instructions

Innovation First

Innovation First 111-5383 installation instructions

Jotto Desk 425-5652 quick start guide

Jotto Desk

Jotto Desk 425-5652 quick start guide

Grizzly T33692 instructions

Grizzly

Grizzly T33692 instructions

ACT AC8325 Quick install

ACT

ACT AC8325 Quick install

Square Getting Started Guide

Square

Square Getting Started Guide

KSL WM225T installation instructions

KSL

KSL WM225T installation instructions

Wali MF001-P installation manual

Wali

Wali MF001-P installation manual

Costway TL35274 user manual

Costway

Costway TL35274 user manual

Middle Atlantic Products TOR Series instruction sheet

Middle Atlantic Products

Middle Atlantic Products TOR Series instruction sheet

Avalon Instruments EVO-ZERO instruction manual

Avalon Instruments

Avalon Instruments EVO-ZERO instruction manual

Hakko Electronics 999-224B Assembly instructions

Hakko Electronics

Hakko Electronics 999-224B Assembly instructions

Crimson CV100S-24A instruction manual

Crimson

Crimson CV100S-24A instruction manual

Pulsar RS4268GD installation guide

Pulsar

Pulsar RS4268GD installation guide

Ubiquiti Quick-Mount quick start guide

Ubiquiti

Ubiquiti Quick-Mount quick start guide

KSL WMO-6241N Quick installation guide

KSL

KSL WMO-6241N Quick installation guide

Titan Fitness HEAVY DUTY POWER RACK owner's manual

Titan Fitness

Titan Fitness HEAVY DUTY POWER RACK owner's manual

Crimson F55A instruction manual

Crimson

Crimson F55A instruction manual

manuals.online logo
manuals.online logoBrands
  • About & Mission
  • Contact us
  • Privacy Policy
  • Terms and Conditions

Copyright 2025 Manuals.Online. All Rights Reserved.