CUAV P8 User manual

www.cuav.net
- 1 -
P8 Radio User Manual
Latest Update:2021-08-26

www.cuav.net
- 2 -
Preface
Thank you for purchasing and using CUAV products.
If you have any suggestions and feedback on our products or services, please let us
know. Press Ctrl and click blue text or mobile phone scan the QR code below to visit
CUAV feedback form.
Product Definition
Indicator Light Definition
Configuration
mode
Normal communication
Unmatched
ST Light: Red
always on
Ground Unit
ST Light: pink flashing
RSSI lamp: always on
Sky Unit
ST Light: Green always on
RSSI Light: always on
Ground Unit
ST Light: Red always on
RSSI lamp: The lamp is off
Sky Unit
ST Light: Green light always
on
RSSI Light: jogging lamp
flickers

www.cuav.net
- 3 -
Button Definition
RESET Button
Restart the P8 Radio module
CONFIG Button
Pressing it alone is not defined. Press and hold the
CONFIG and RESET Key at the same time. Release the
RESET key first, and then release the CONFIG key to
enter the configuration state.
Power Requirement
We recommend that you use a 3S-12S battery to power the P8. Both the sky end and
the ground end need independent power supply, please ensure that the maximum
output current of the power supply is> 2.5A (battery is recommended).
* Note: Do not use computers or power bank with output current lower than 2A to
supply power to the equipment; Otherwise, it may lead to irreversible damage to the
equipment.
Default Configuration
The default configuration of P8 is: airspeed 115K, interface speed 57600, broadcast

www.cuav.net
- 4 -
mode. In general, you do not need to perform any configuration, plug and play. If you
need to modify the configuration, for example, modify the ID, set one-to-many, relay
mode, Click Configuration Guide, go to the web page for more information. Configure
the required [serial assistant] Users can download any serial assistant online.
Connect Flight Controller
Pixhack series: Access the [Radio] interface of flight controller.
V5 +/V5 nano/X7 series: The Green connector is connected to the interface of flight
controller [TELEM1]/[TELEM2], and the white connector is connected to the interface
of Data transmission [Data].
Ground Station Connection
Mission Planner
After connecting to the P8, select the correct port in the upper-right corner of the
ground station, select 57600 baud rate, and click [CONNECT] to CONNECT to the
ground station.
Port not recognized? After the P8 is connected, the mouse moves randomly and
cannot communicate? Does the digital transmission indicator turn off and not work?
For more information, please see FAQ]

www.cuav.net
- 5 -
QGroundControl
After data transmission is connected, open the QGroundControl and the ground
station will automatically identify and connect. If it is not identified, you can manually
add it as follows.
Click the icon in [QGroundControl]-[communication connection]-[add]]

www.cuav.net
- 6 -
In the following interface, enter [name] [type] [serial port] and [baud rate], and click OK.
Select the connection you just added and Click Connect.
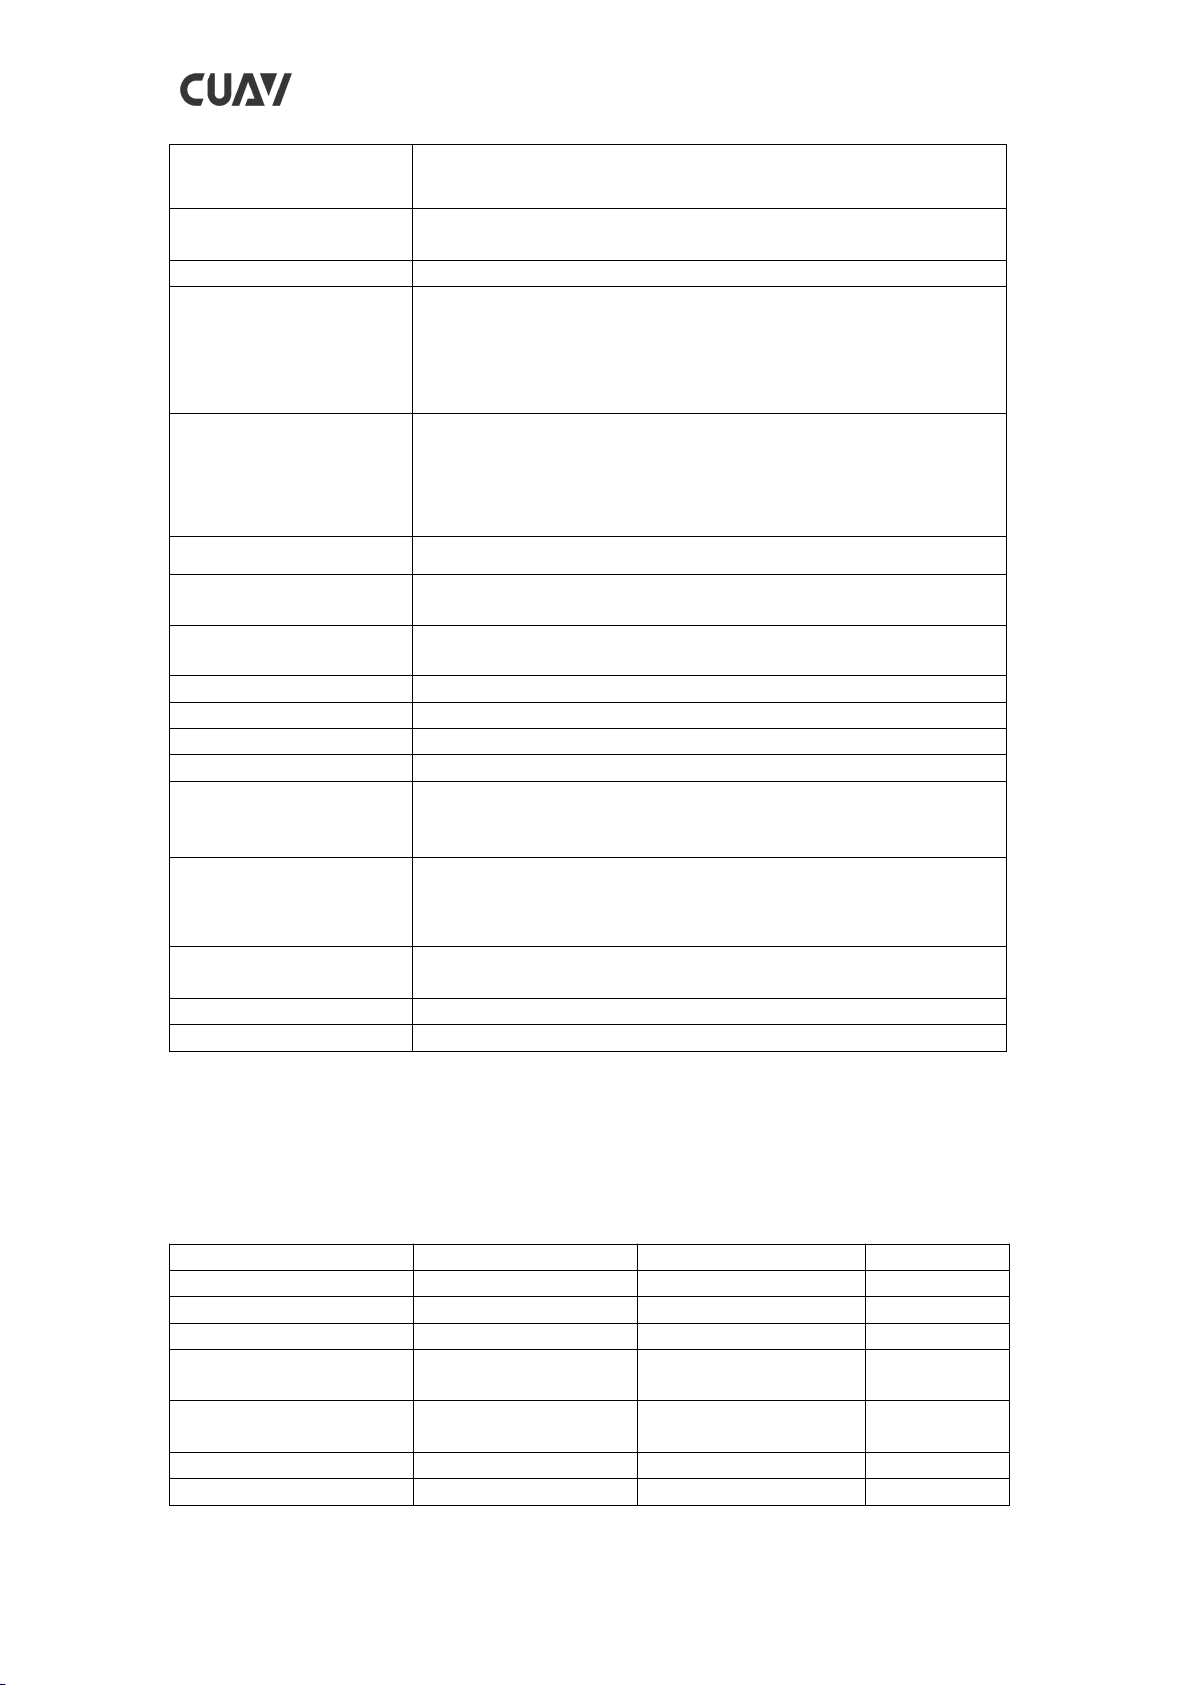
Product Specifications
Working frequency
840~845MHz
www.cuav.net
- 7 -
Spreading Method
Frequency Hopping/Fixed Frequency, GMSK,
2GFSK, 4GFSK, QPSK
Forward Error Correcti
on
Hamming, BCH, Golay, Reed-Solomon, Viterbi
Error Detection
32 bits of CRC, ARQ
Range
Limit distance: 60km+ (high-gain fiberglass antenna + uno
bstructed seaside) Reference distance: 40km
(The transmission distance is different under different envir
onments/configurations, please refer to actual use)
Sensitivity
-109dBM@115.2kbps
-108dBm@172.8kbps
-106dBm@230.4kbps
Transit power
100mw~1000mw(20~30dBm); default:1000mW
Antenna gain
3DBi
Link Rate
345kbps Max
Baud rate
300bps to 230kbps(57600)
Operating Modes
Point-to-Point, Point-to-Multipoint, Repeat Mode
Input voltage
12V~60V
Input Current
>2.5A
Power consumption
Sleep: < 1mA (Future) Idle: 20mA Rx: 45mA to 98mA
Tx Peak: 2A
Interface
Antenna: SMA inner needle Serial:GHR-06V-S
USB: TYPE-C
Power: XT30PW-M
Operation
Temperature
-40°C~85°C
Weight
P8 module;:55g Antenna:31g Total: 86g
Size
65mm×40mm×16.5mm
Packing List
The package list is for reference only. The details are displayed on your purchase
page.
Name
Sky Unit
Ground Unit
One Set
P8 Module
1
1
2
V5/X7 Series cable
1
-
1
Pixhack Data Cable
1
-
1
XT30-XT60 Power
Cable
-
1
1
XT30 Single-End
Power Cable
1
-
1
840MHz Antenna
1
1
2
Type-C Cable
-
1
1
www.cuav.net
- 8 -
FAQ
Port is not recognized after connected to the computer?
Please install the [USB driver] and try again.Please contact us to get the driver.
After connecting, the mouse moves and cannot communicate. What's the
matter?
Please power the Ground Unit first, and then power the sky Unit. If the data at the other
end is transmitted to the USB when the USB is started, the computer will automatically
install the Microsoft mouse driver.
Sometimes the P8 indicator will turn off does not work?
Please make sure that the maximum current input at the power port is greater than 2A;
Otherwise, the P8 may be stopped; It is recommended that the ground unit use
independent power supply instead of flight control power supply (connect V5 + flight
control can not use independent power supply).
Related Links
Official Website
Official Store
Official AliExpress
CUAV Doc Center
Follow us
https://www.youtube.com/channel/UCUom2xY7H5mI0LaDnj6Irdw
Other manuals for P8
1
Table of contents
Other CUAV Radio manuals


