9
Operations
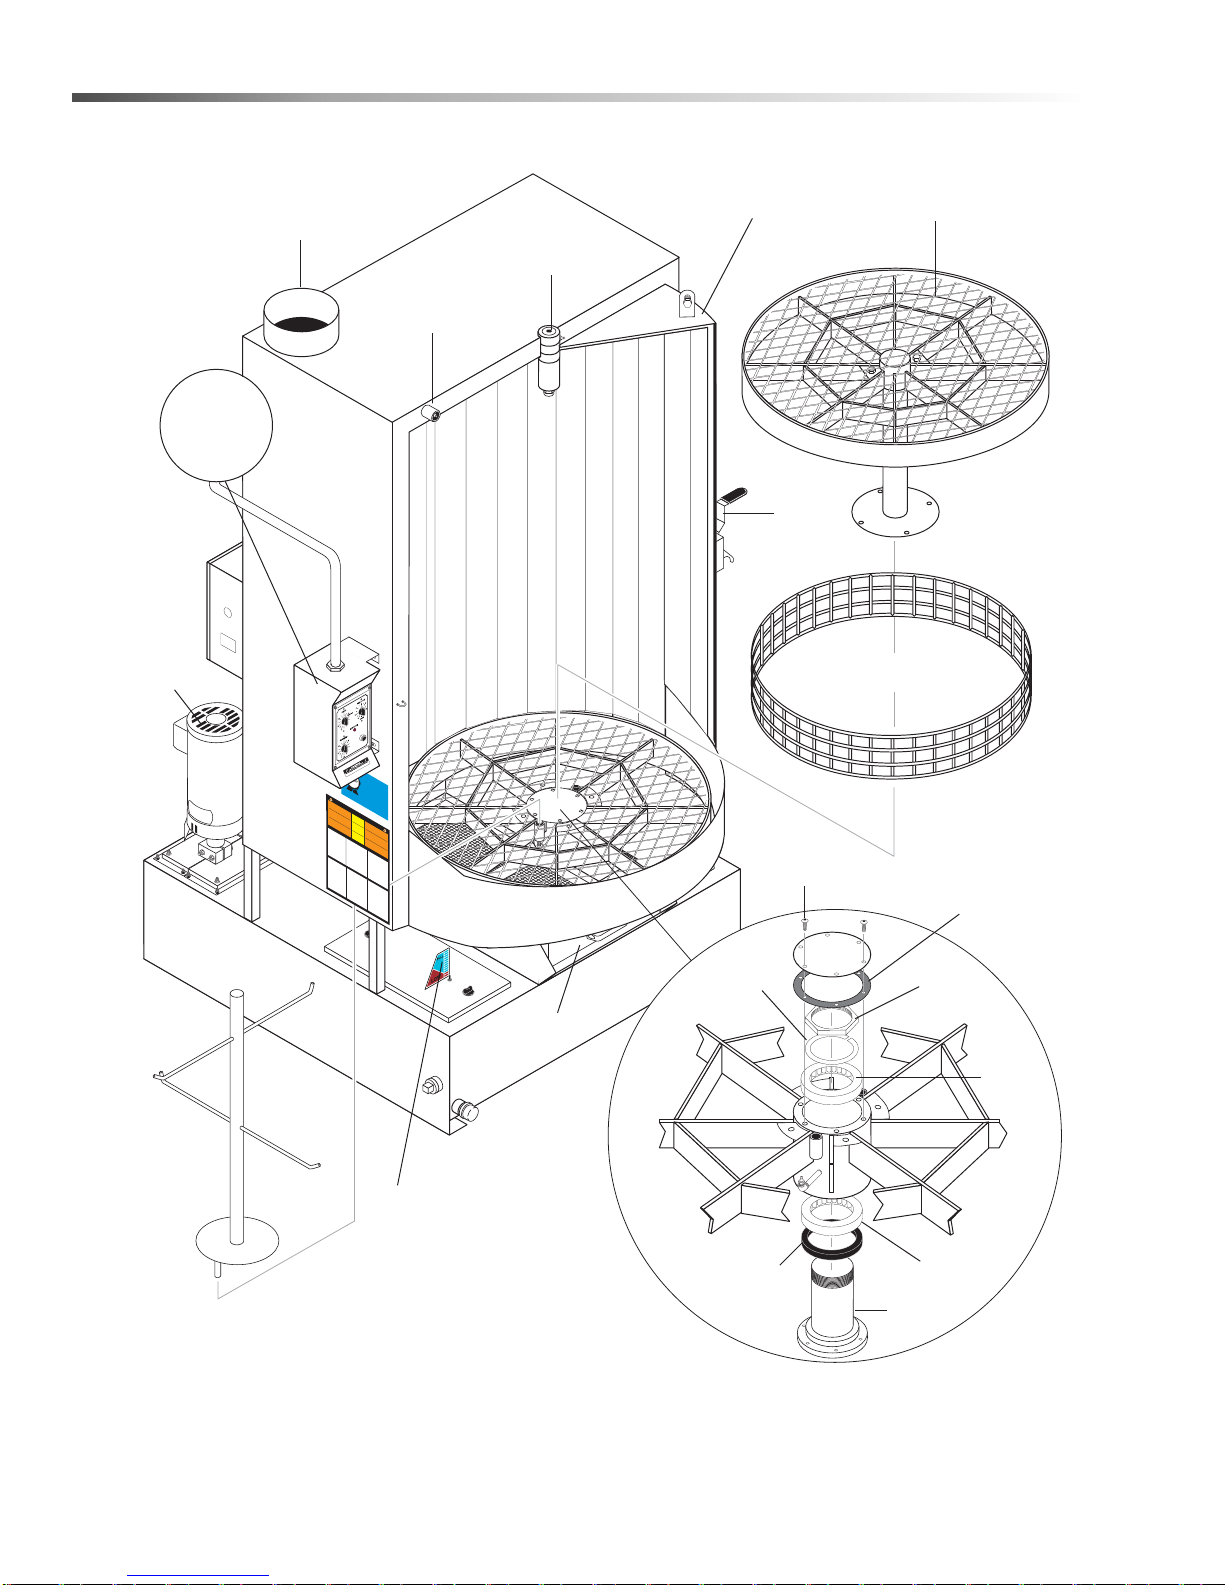
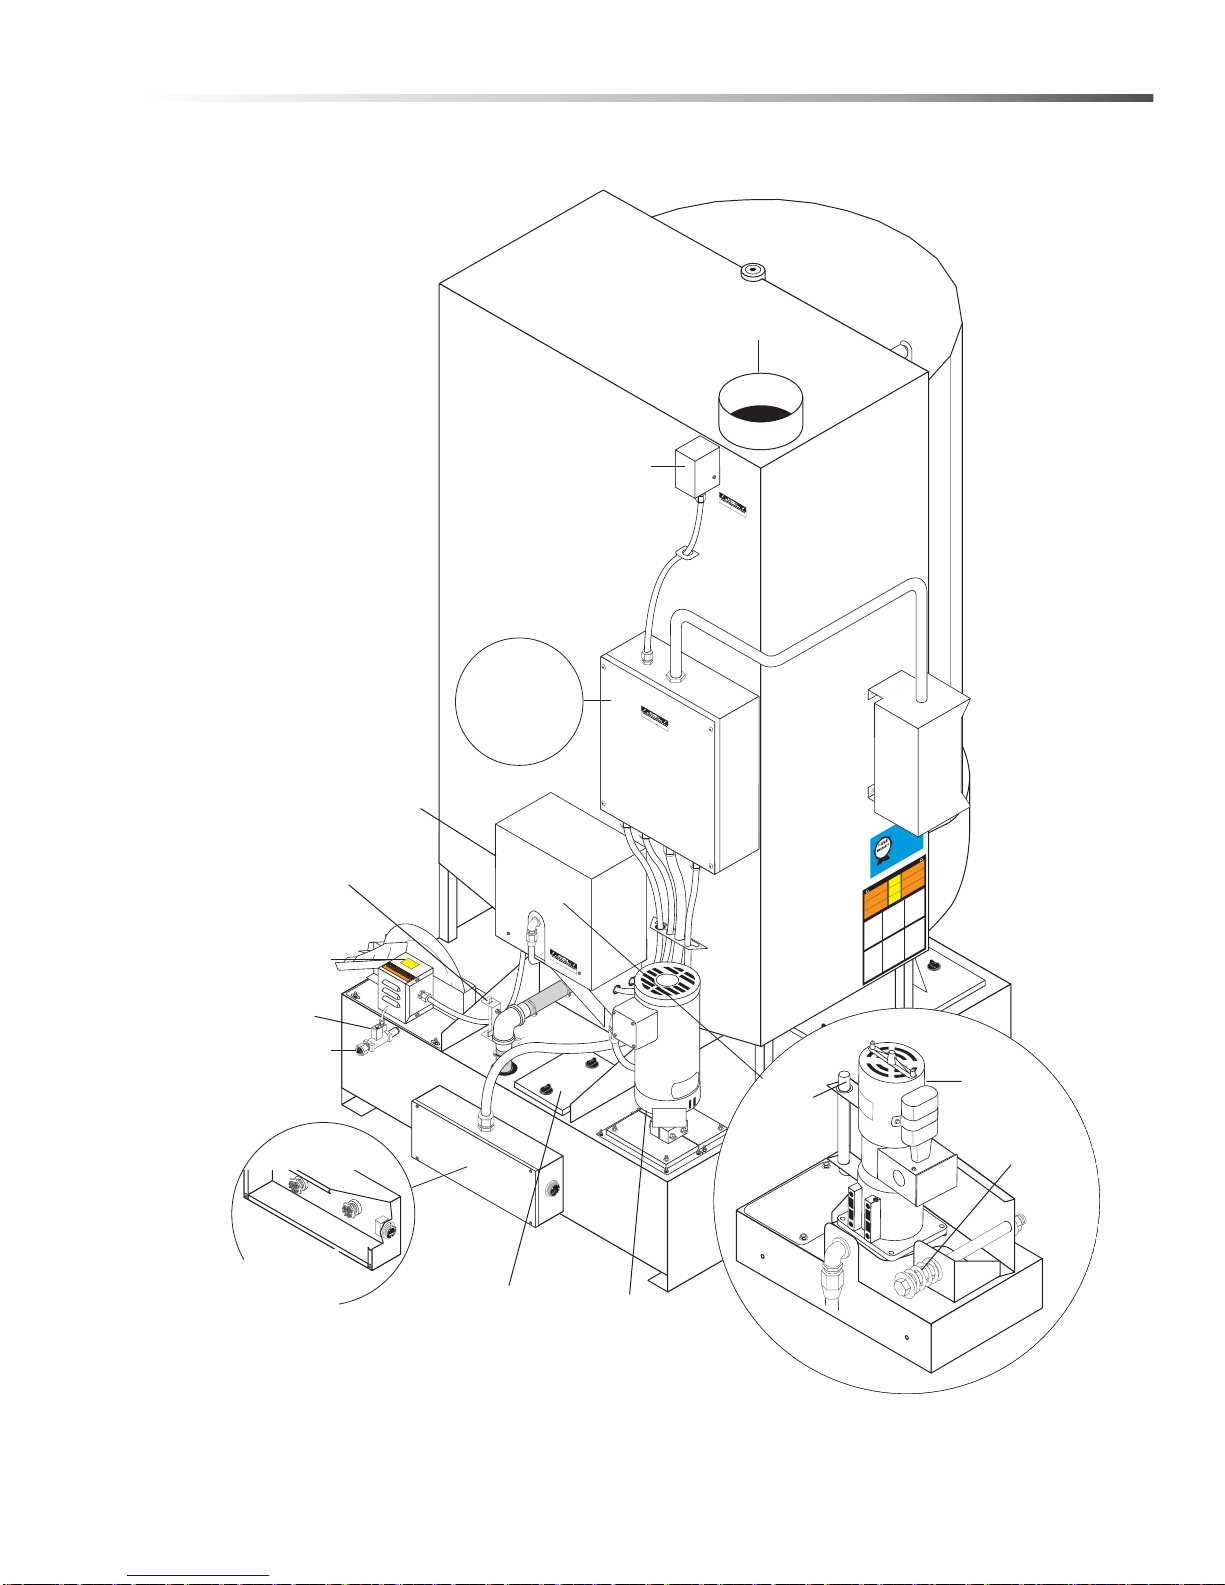
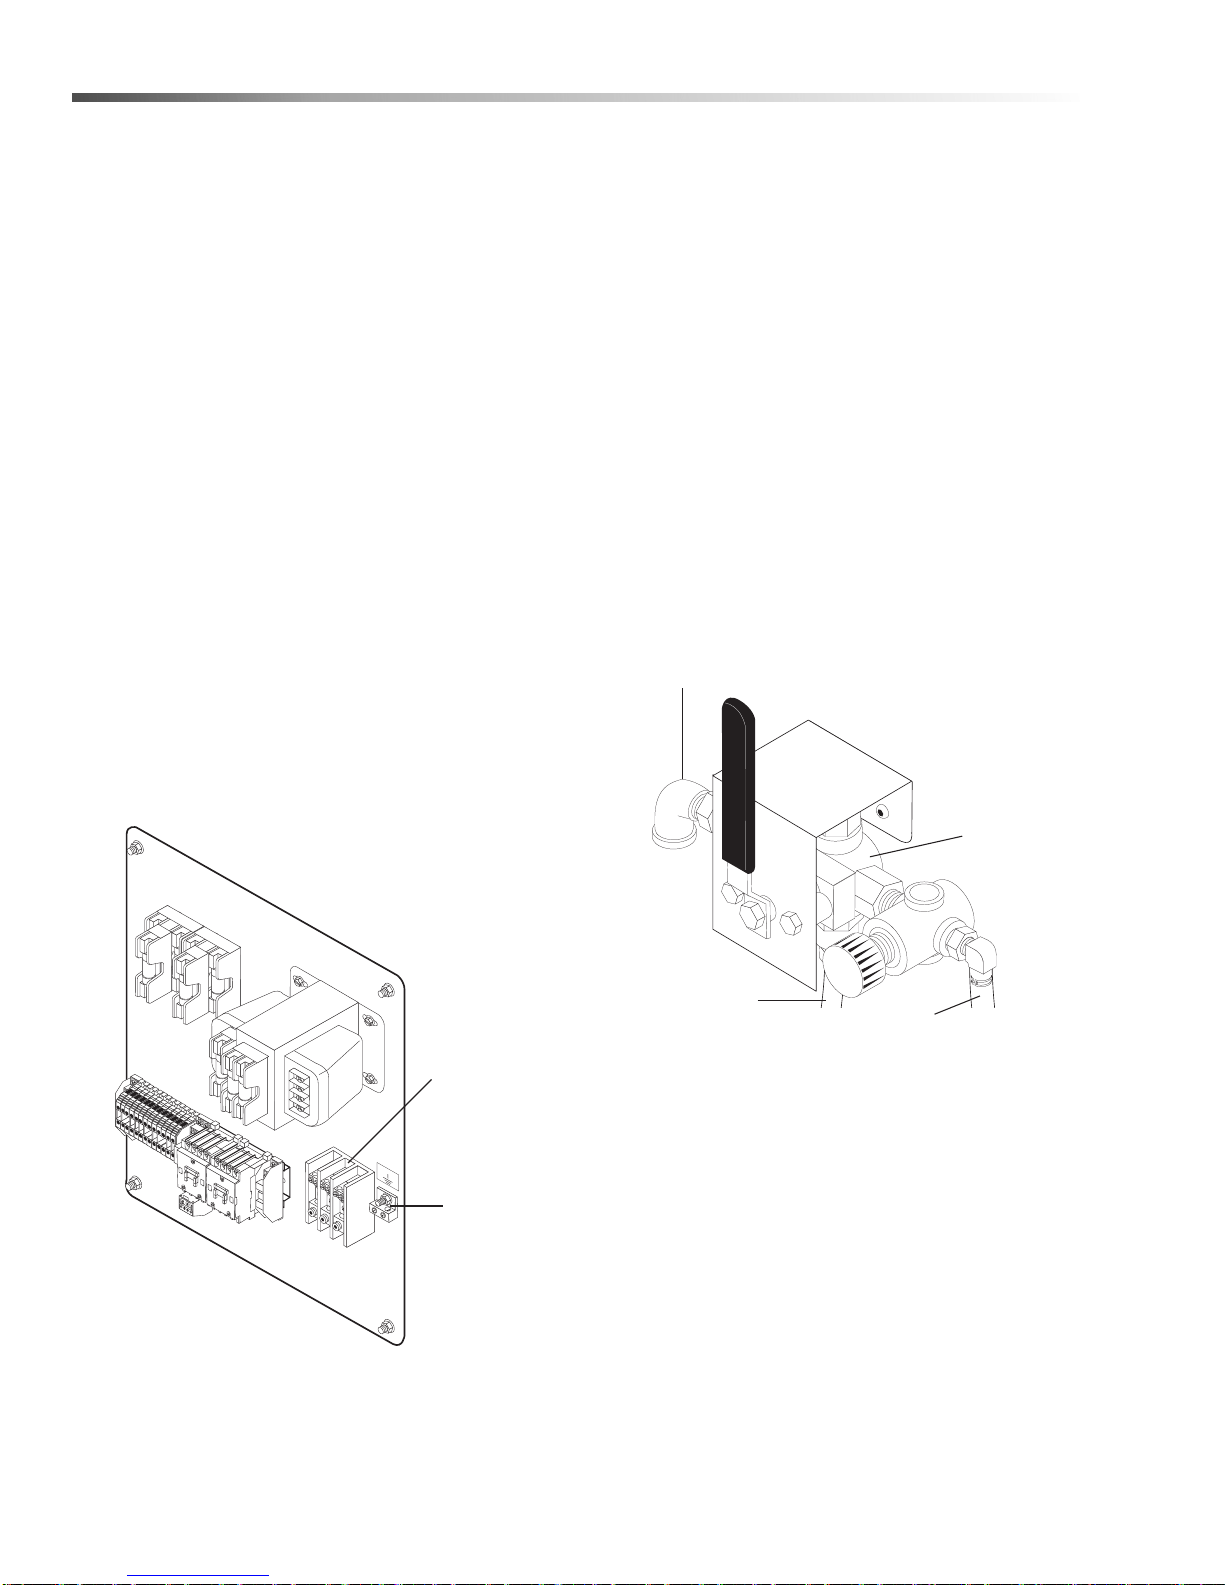
Component Identification - Rear View
KEEP
DRY
ATTENTION
USE ONLYCUDA APPROVED
DETERGENTSTO EX TEND
LABORWARRANTYTO1-YEAR!
MIXDETERGENTS 1 LB (1/2 KG) PER
5-GALLONS(15 LITERS) OF WATER
ForCUDA Approved Detergents visit
http://www.cudausa.comor
call888-319-0882
9.807-513.0
90-DAYLABOR WARRANTY
EXTENDSTO 1-YEAR
WITHEXCLUSIVE USE OF
CUDADETERGENTS
LIMITED
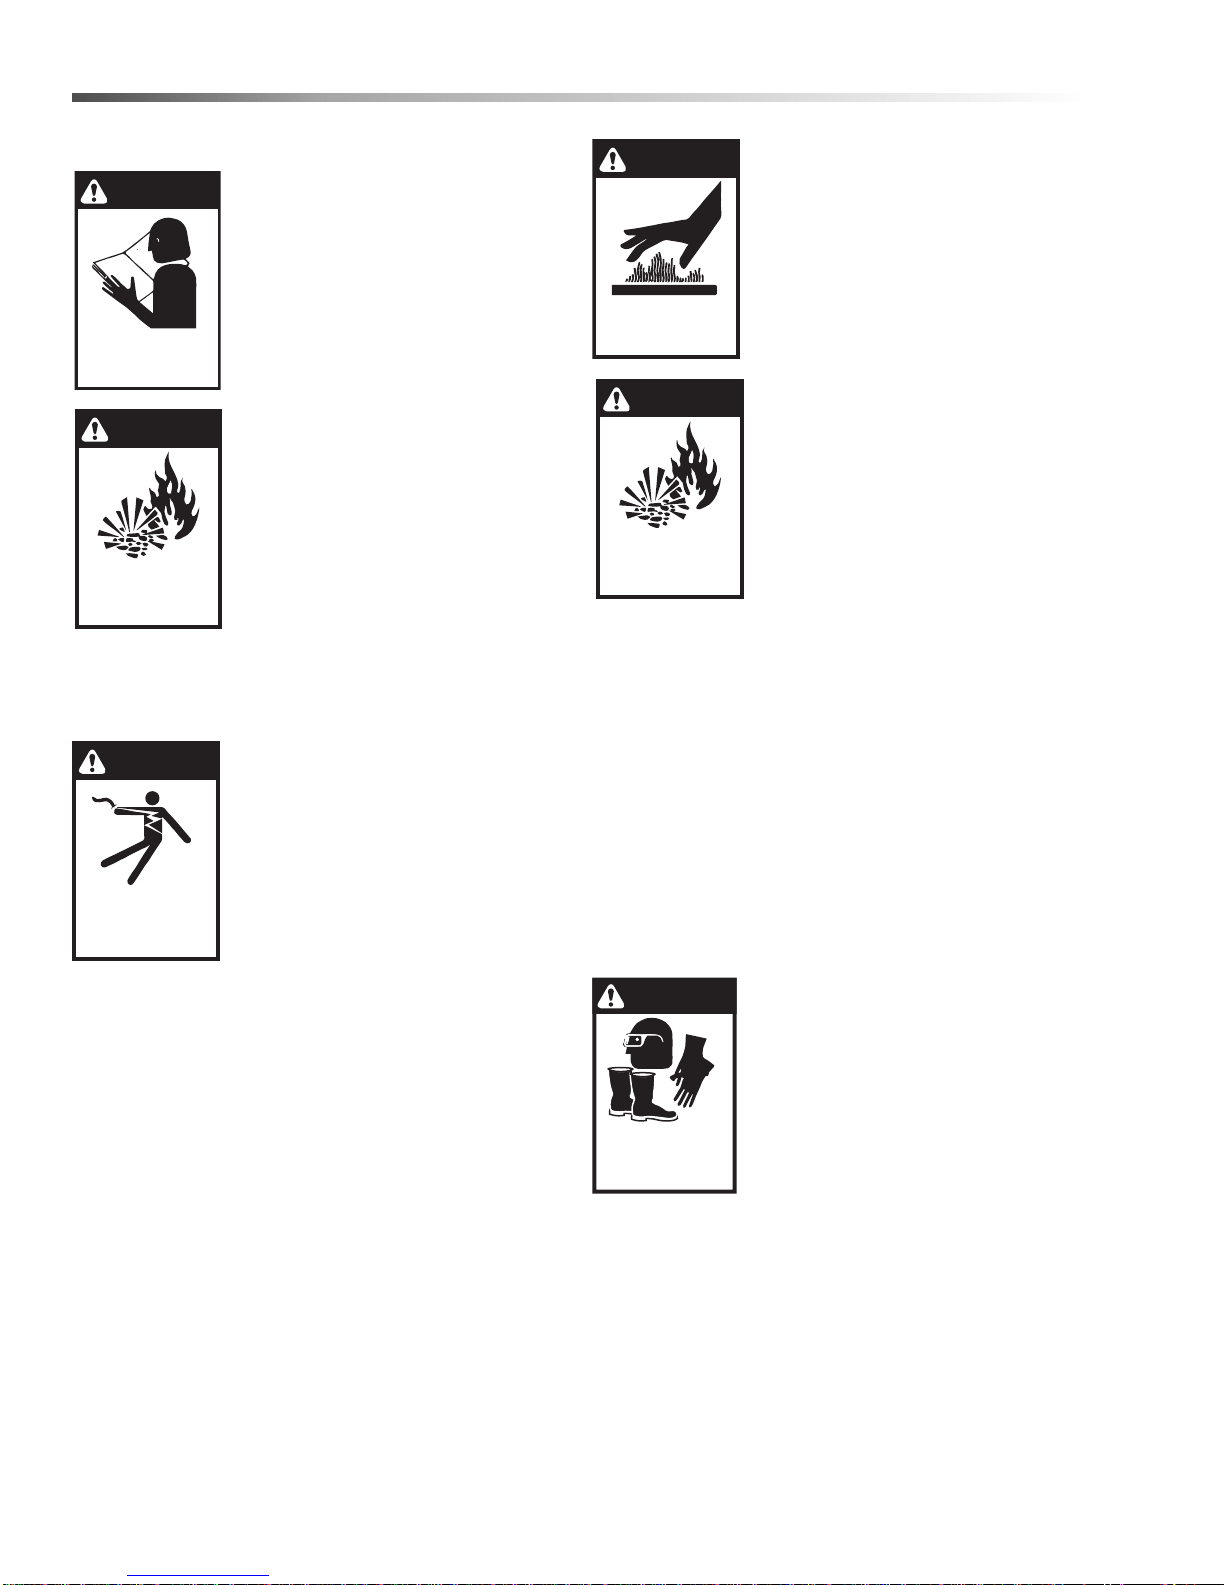
Thisisaheatedparts cleaner.Useonlynonflammable,non-
combustible,water-basedcleaningcompoundsinthismachine.
Donot fillorcontaminatewitha
nyflammableorcombustible
materialsuchasgasoline,alcohol,mineralspirits,etc.Drainparts
tobe cleaned of anycombustibleorflammablematerialbefore
placinginsidecabinet.Failuretoobservethiswarningwillcreate
anextremelyhazardouscondition.
Esteesun limpiadordepartesque secalienta.Utilicesola-
menteenestamáquinacomponentesdelimpiezabaseagua,no
inflamablesynocombustibles.Nollenarocontaminarconalgún
materialinflamablecomo,gasolina,alcohol,esenciasminerales,
etc.Drenelaspartesa ser limpiadasde cualquier combustible o
materialinflamableantesdeintroducir enelgabinete.Si
descuidaobservarestasprecauciones,puedencrearsecondicio-
nesextremadamentepeligrosas.
Cenettoyeurdepiècesestchauffé.Utiliserdanscet appareil
seulementdesnettoyeursàbased’eau, non combustiblesetnon
inflammables.Nepasyajouteroucontamineravec desmatériaux
combustiblestels:gasoline,alcool,etc.Viderlespiècescontenant
desmatériauxcombustiblesouinflammablesavantdelesplacer
àl’intérieurducabinet.Nepasobservercesavertissementspeut
créerdessituationsrisquées.
HOTWATER
Beforeopeninglid,wait5
secondstoallowspray
arm/turntableto stop
spinning.
AGUA
CALIENTE
Antesdeabrir la tapa,
espere5 segundos para
quelabarra rotatoriase
detenga.
EAUCHAUDE
Avantd’ouvrirlecouvert,
attendez 5 secondes pour
permettreaubras vaporisa-
teur/plaquetournanted’arrêter
detourner.
WARNING
PRECAUCION/ADVERTISSEMENT
CAUTION
CUIDADO/ ATTENTION
OPERATINGINSTRUCTIONSINSTRUCCIONESDE OPERACIONINSTRUCTIONSD’OPÉRATION
IMPORTANT:Beforeoperatingthismachine,
completelyfamiliarizeyourselfwith instruction
manualprovided.Onlyauthorized andproperly
instructedindividualsshouldoperate this machine.
Beforeloadingpartsonto turntable/ basket, be cer-
tainthepumpisoffandnotrunningandthe wash
solutionsareatoperatingtemperature.
1.Filltankwithwaterand cleaningsolution.
Waterlevelshouldbe2"belowthe accessdoors.
Checkdaily.
2.Programheatertimerfor desiredperiodof
operation.Allowtimefor unit topreheatcleaning
solution.
3.Opendoor/lidandplacearticles to becleanonto
basket/turntable.Becertainno partsprotrude
throughthebottomor beyondthesidesofthe
basket/turntable.Donotexceedthespecified
heightorweightlimitfor this spraywashcabinet.
4.Closedoor/lidandlatchsecurely.Withmachine
settowash, turn“washcycle”timer to the desired
cleaningtime.Pumpwill startand run until time
hasexpired.
5.Beforeopeningthe door/lid,turnwash cycle timer
offandwait5 secondsfor machineto stop spin-
ning.Thiswillallow steam toescapethe cabinet
andexcesswater to drainfrom yourparts.
IMPORTANTE:Antesde oparar elequipo,familiarícesecom-
pletamenteconelmanualdeoperaciónquese incluye. Solo
personalautorizadoydebidamente capacitadodebeoparar
ésteequipo.Antesde abrirla puerta/cubierta olaspiezasde
cargasobrelatornamesa/canasta,asegúresedequelabomba
estéapagaday sin funcionar, yque lassoluciones de limpieza
esténatemperaturadefuncionamiento.
1.Lleneeldepósito conagua yla soluciónparalimpieza.El
niveldelaguadebeestar2"pordebajo de las puerta de ac-
ceso.Verifiqueelniveldiariamente.
2.ProgrameelTemporizadordel calentadorparael períodode
operacióndeseado.Dejepasarun tiempo paraque la unidad
precalientelasoluciónparalimpieza.
3.
Abralapuerta/tapaycoloquelaspiezasa lavarenlator-
namesa/canasta,asegúresedequeningunapieza so-
brepaseelfondoni el perímetro de la tornamesa.No exceda
loslimitesespecificadosdepesoyalturaparael gabinetede
lavado.
4.Cierrelapuerta/tapayasegureel candado. Conlamáquina
enposicióndelavar,ajusteel temporizadorde“ciclode
lavado”altiempodeseado.Labombaarrancaráyfuncionará
duranteeltiemposeleccionado.
5.Antesdeabrirlapuerta/cubierta,apague el temporizadordel
ciclodelavadoyespere 5 segundos paraque la máquina
dejedegirar.Estopermitiráqueel vapor salga delgabinete y
elexcesode agua drenedelas piezas.
IMPORTANT:Avantd’utilisercettemachine,familiarisez-
vouscomplètementavecle manuel d’instructionfourni.Cette
machinedevraitêtreutiliséeseulementpardupersonnel
autoriséetformé.Avantl’ouverturedela porte/du couvercle
ouduchargementdespiècessurla table tournante/le panier,
s’assurerquelapompeest en position arrêt et ne fonctionne
pasetquelessolutionsdelavagesont à température de
fonctionnement.
1.
Remplirleréservoird’eauetd’unesolutiondenettoyage.
Leniveaud’eaudoitse trouver à5 cm (2po)sousles
portesd’accès.Vérifierquotidiennement.
2.
Programmerleminuterie dechauffagedel’appareil pour
lapériodedefonctionnement souhaitée.Prévoir du temps
pourquel’appareilpréchauffelasolutiondenettoyage.
3.
Ouvrirlaporte/couvertetplacezlesarticles à être lavé
surlepanier/plaquetournante.Assurez-vous qu’iln’yest
aucunepiècedépassantlepainer oudansle fond au-delà
dupainer/plaquetournante.
4.Fermezla porte/couvert et verrouillezde façonsécuritaire.
Lamachineprêtepourle lavage,tournez le minuteur“wash
cycle”autemps dela lavage désiré.Lapompefonctionnera
jusqu’àcequetempssélectionnésoitécoulé.
5.
Avantd’ouvrirla porte/lecouvercle, mettre la minuterie du
cycledelavageàl’arrêtet attendrependant 5 secondes que
l’appareils’arrêtede tourner.Celapermettraàla vapeurde
s’échapperducabinetetàl’excèsd’eaude s’écouler de vos
pièces.
WARNING
PRECAUCION/ADVERTISSEMENT
• Machinemustbeconnectedto aproperlysized
lockabledisconnect.
• InstallationmustcomplywithNEC code.
• Forsupplyconnection,usewiresaccept ablefor
atleast90 degrees C.
• Donot usebelowgrade floor or grade level.
Thefollowingscheduleisbasedonaverageuse.
Higherusagemayrequiremorefrequentmainte
-
nance.
IMPORTANT:BesureelectricalsupplyisOFF be-
foredrainingsump.Onlyqualified personnelshould
servicethismachine.
DAILY:
• Checkwaterlevelinthe sump daily.Topping
offthewaterdaily will preventdamagetothe
heaterelement.
• Removeandcleandebrisscreen.
• Visuallycheckforpluggednozzles.Remove
andcleanifneeded.Reinstallinthe exactorigi-
nalposition.
WEEKLY:
• Grease/oildoorhinges.
MONTHLY:
•Performvisualcheckofturntabledrivechain.
• Drainwashsolutionfromsump,removesand/
gritfrombottom of the sump.Careshouldbe
takentoavoidbending or damagingheater ele-
mentduringthecleaningprocess.
• Whensumphasbeencleanedandrefilledwith
water,addtherecommended quantityof deter-
gentforyour machine.
NOTE:Dissolvecleaningpowderinto warmwater
beforeaddingthemanufacturer’srecommended
amounttothetank.
8.922-402.0
• Lamáquinadebe estar conectadaa unenchufe
eléctricode seguridad.
• Lainstalación debe cumplir con el código NEC.
• Paralasconexiones de alimentación,use cablea-
doparaal menos 90 grados centígrados.
Noutilicepor debajo del niveldel piso.
• L’appareildoitêtreconnecté à un sectionneur
verrouillabledetaille appropriée.
• L’installationdoitse conformer au code NEC.
•Pourle raccordementde l’alimentation,utiliser des
filspouvantaccepteraumoins 90degrésCelsius.
Nepas utiliserun calibre ou un grade inférieur.
Letableausuivant est fondé surune utilisationmoyenne.
Uneutilisationplusimportantepeutexigerun entretien plus
fréquent.
IMPORTANT:S’assurerquelesystèmeélectrique est àl’arrêt
avantdeviderleréservoir.Seullepersonnel qualifiédoit ré-
parercetappareil.
QUOTIDIENNEMENT:
• Vérifierquotidiennementleniveaud’eau dansle rés-
ervoir.Leremplissagequotidiend’eaupermetd’éviter
d’endommagerl’élémentchauffant.
• Démonteretnettoyer le filtre à débris.
• Vérifiervisuellementsidesbusessontbouchées/ob-
struées.Démonteretnettoyer,lecas échéant.Réinstaller
danslapositioninitiale exacte.
HEBDOMADAIREMENT:
• Graisser/huilerlespentures/charnièresde laporte.
MENSUELLEMENT:
• Procéderàuncontrôlevisueldela chaîned’entraînement
delatabletournante.
• Assécherlasolutionde lavagedu réservoir, etenlevertout
sable/graviersetrouvantaufond. Des précautions doivent
êtreprisespour éviter deplier/courberl’élément chauffant
oudel’endommager au cours duprocessusdenettoyage.
•Lorsqueleréservoiraéténettoyéetremplid’eau,ajouterla
quantitédedétergentrecommandéepourvotreappareil.
NOTE:Biendissoudrelapoudredansl’eauchaudeavant
d’ajouterdansleréservoir.
Elplandemantenimientoquesepresentaacontinuación,está
basadoenunusopromediodelequipo.Unusomásfrecuenteo
severopuederequerirunmantenimientomásfrecuente.
IMPORTANTE:Asegúresedequeelsistema eléctrico esté
APAGADOantesde vaciarelcá rter.Sólopersonalcalificado
deberepararestamáquina.
DIARIAMENTE:
• Compruebeelnivel delagua enelcárter diariamente.
Mantenerelnivel adecuado delaguaevitarádañar el
elementodelcalentador.
•Retireylimpielos residuos de la criba.
•Compruebevisualmentequelasboquillasestán instaladas
correctamente.Retireylimpie si es necesario.Reinstale en
laposiciónoriginalexacta.
SEMANALMENTE:
• Lubriquelasbisagrasdela puerta.
MENSUALMENTE:
• Realiceunaverificación visual de lacadena depropulsión
delatornamesa.
• Drenelasolución delimpiezadelcárter, retire del fondo de
cárterlossedimentos.Debetenercuidadode no doblar o
dañarel elementodel calentadordurante el proceso de
limpieza.
• Unavezqueelcárter estálimpio y relleno de agua,
agreguelacantidadrecomendadadedetergente parala
máquina.
NOTA:Disuelvaeldetergenteenaguacalienteantesdeagregar-
loaltanqueenlacantidadrecomendadaporelfabricante.
MAINTENANCEINSTRUCTIONS
INSTRUCCIONESDEMANTENIMIENTOD
IRECTIVESD’ENTRETIEN
Steam Vent
Door Safety
Switch
Turntable
Drive
Enclosure
For
Detail See
Main Control
Panel Illus.
Fresh Water In
Pump
Sump Cover
Heating
Element &
Thermostat
Enclosure
Low Water
Shut-Off Assy.
Oil Skimmer Assy.
Optional
Solenoid Valve
Drive
Motor
Compression
Spring Assy.
Pivot
Pin
Cuda 4860 Operator’s Manual 8.914-383.0 - U