8
Operations
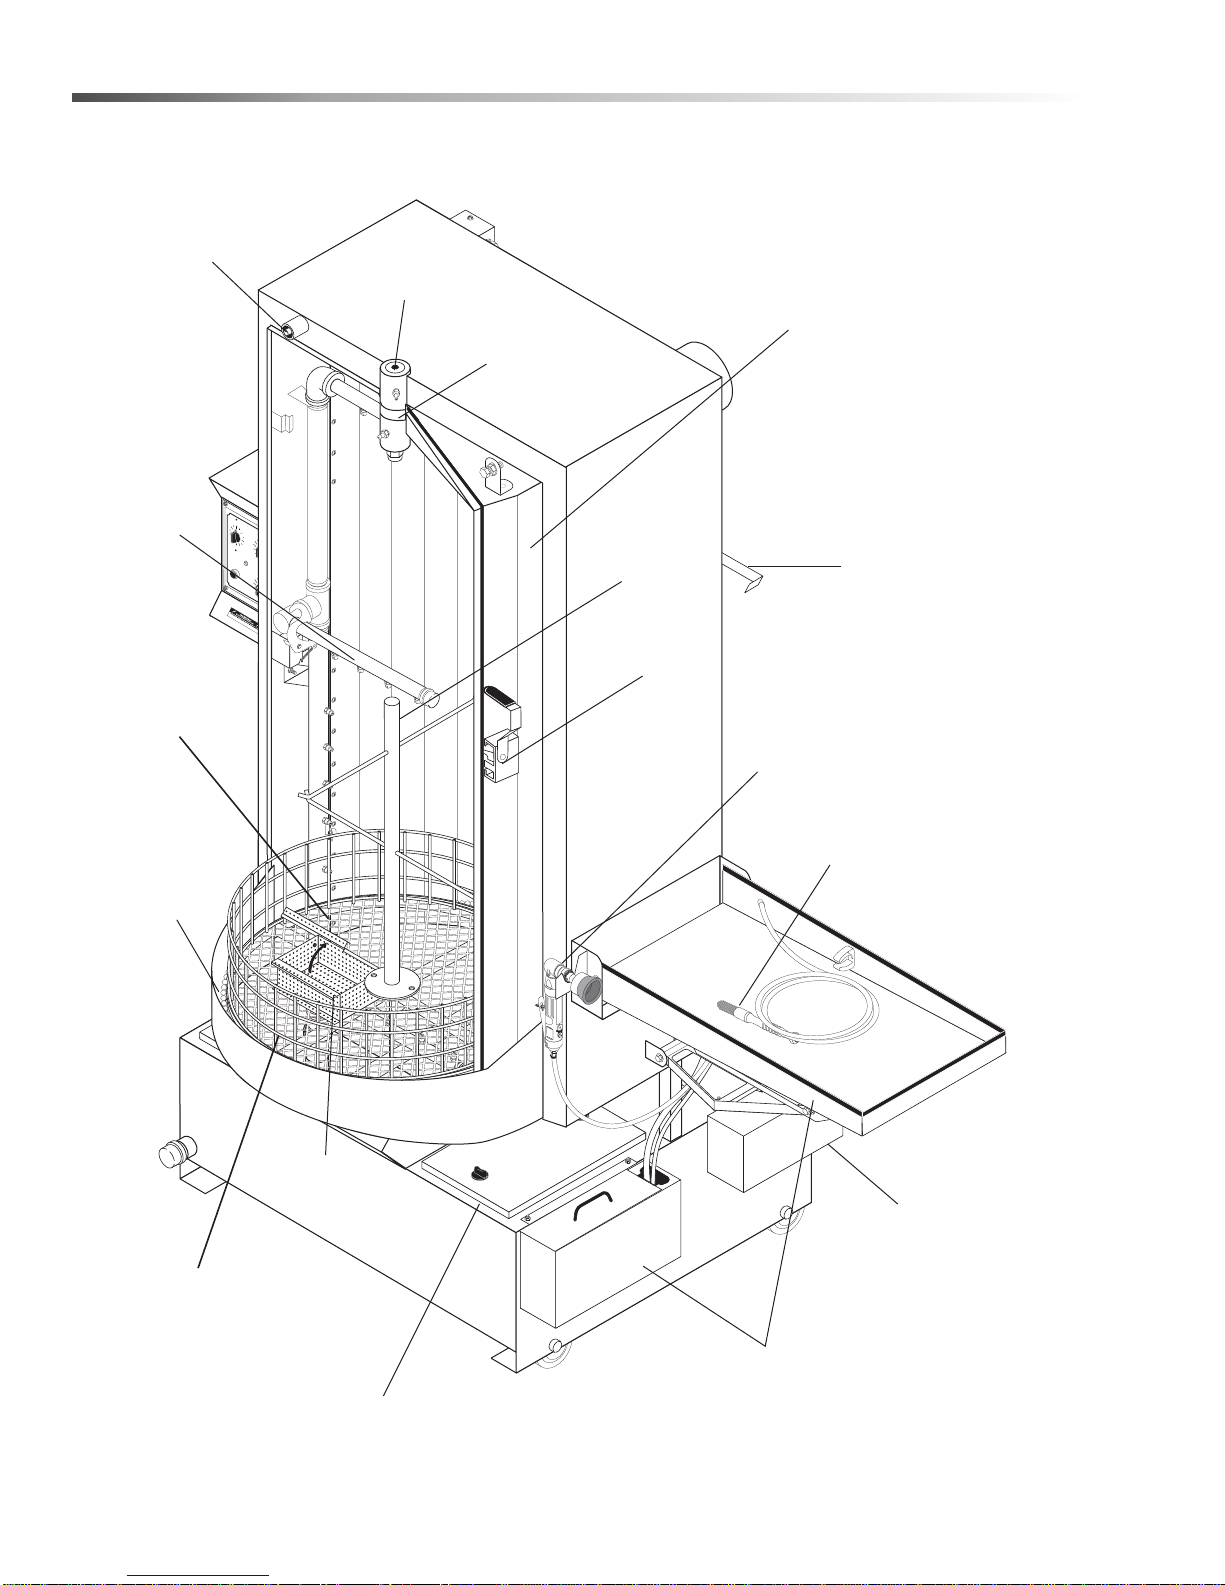
Component Identification
Front View
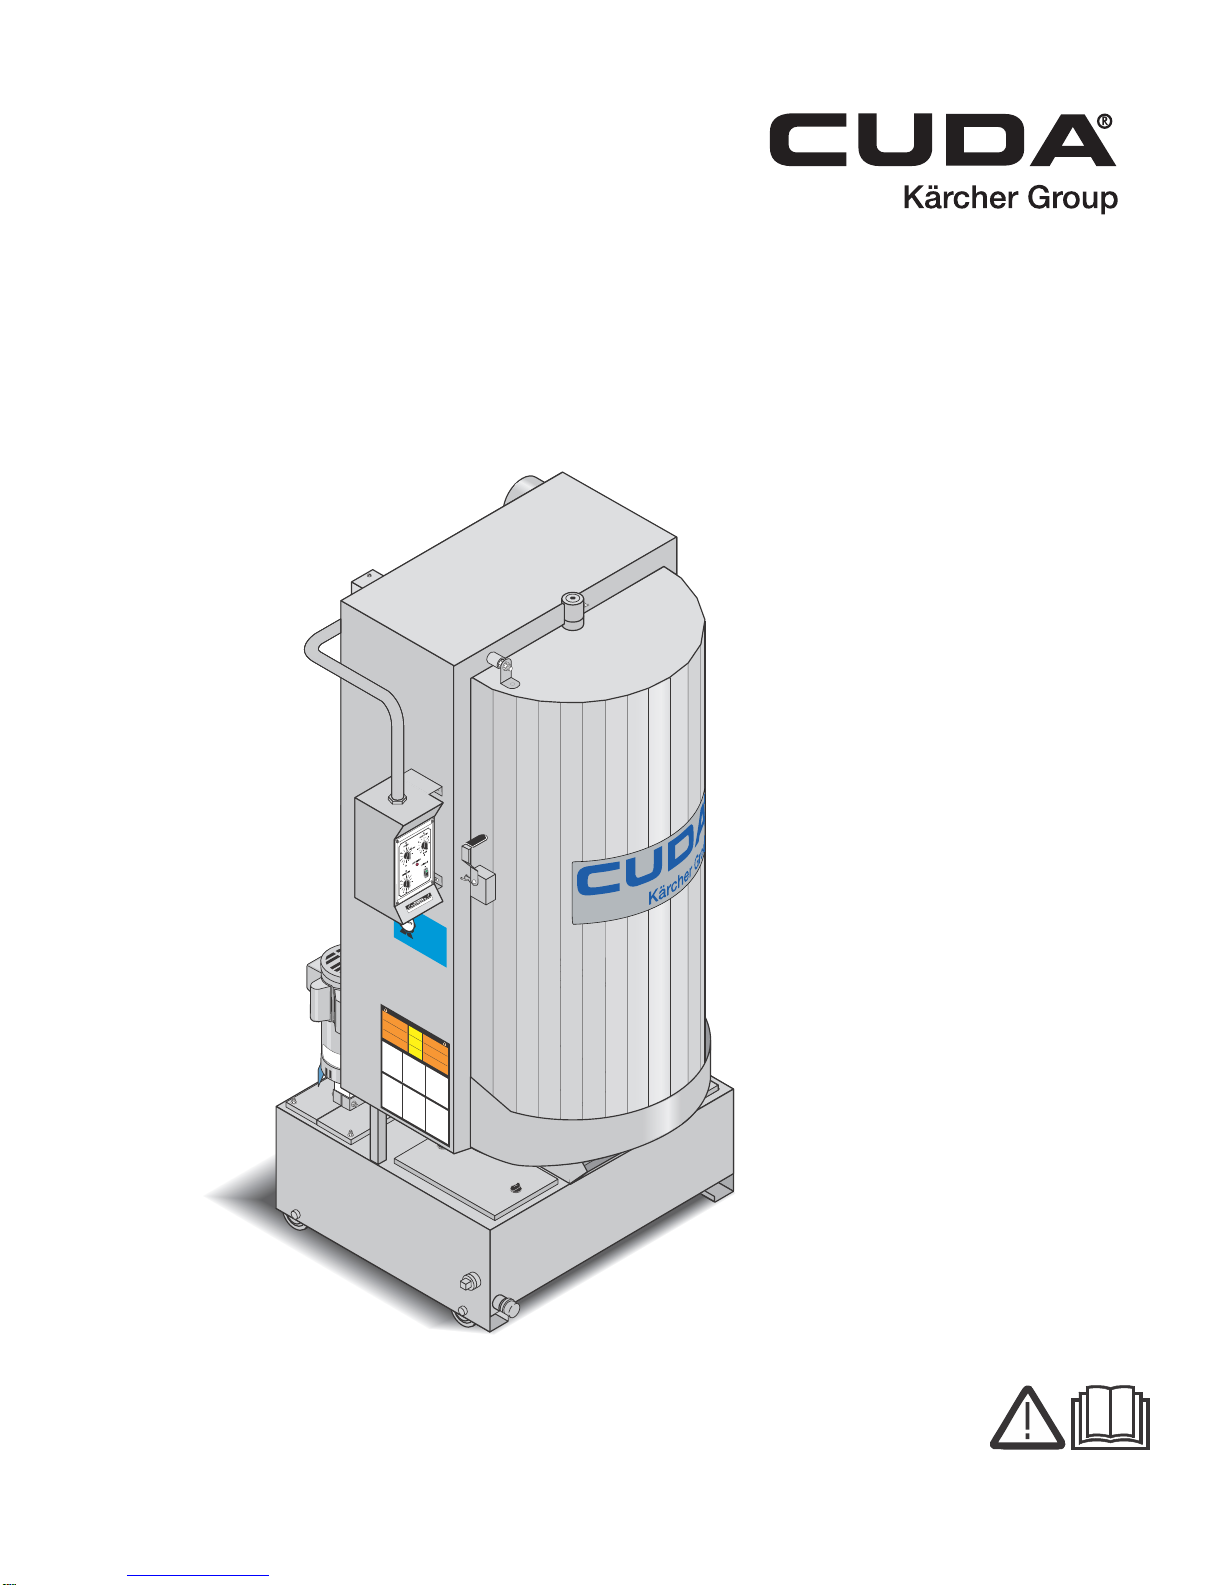
CUDA 2848 Operator’s Manual 8.930-369.0 -AG
ATTENTION
USE ONLYCUDA APPROVED
DETERGENTSTO EXTEND
LABORWARRANTYTO 1-YEAR!
MIXDETERGENTS 1LB (1/2KG) PER
5-GALLONS(15 LITERS) OFWATER
ForCUDAApproved D etergents visit
http://www.cudausa.comor
call888-319-0882
9.807-513.0
90-DAYLABORWARRANTY
EXTENDSTO1-YEAR
WITHEXCLUSIVE USE OF
CUDADETERGENTS
LIMITED
Thisisaheated partscleaner.Use onlynonflammable,non-
combustible,water-based cleaningcompoundsin this machine.
Do not fillor contaminate withanyflammable or combustible
materialsuchas gasoline,alcohol,mineralspirits,etc.Drain parts
tobe cleaned of anycombustible or flammable material before
placinginsidecabinet. Failure to observe this warningwillcreate
anextremely hazardous condition.
Este esunlimpiador de partesquese calienta.Utilice sola-
menteenestamáquina componentesde limpieza base agua,no
inflamablesyno combustibles.Nollenar ocontaminarconalgún
materialinflamablecomo,gasolina,alcohol,esencias minerales,
etc.Drenelas partes a ser limpiadas de cualquier combustible o
material inflamable a
ntesde introducir en el gabinete.Si
descuidaobservar estasprecauciones,puedencrearsecondicio-
nesextremadamente peligrosas.
Ce nettoyeurde pièces estchauffé.Utiliserdanscetappareil
seulementdesnettoyeursàbase d’eau,non combustibles et non
inflammables.Nepasyajouterou contaminer avecdesmatériaux
combustiblestels:gasoline,alcool,etc.Viderles pièces contenant
desmatériauxcombustiblesouinflammablesavantdelesplacer
àl’intérieurducabinet.Ne pasobservercesavertissementspeut
créerdes situations risquées.
HOTWATER
Beforeopening lid,wait 5
secondsto allow spray
arm/turntableto stop
spinning.
AGUA
CALIENTE
Antesde abrir la tapa,
espere5 segundos para
quela barra rotatoria se
detenga.
EAUCHAUDE
Avantd’ouvrir le couvert,
attendez 5 secondes pour
permettreau bras vaporisa-
teur/plaquetournante d’arrêter
detourner.
WARNING
PRECAUCION/ADVERTISSEMENT
CAUTION
CUIDADO/ATTENTION
OPERATINGINSTRUCTIONSINSTRUCCIONESDEOPERACION INSTRUCTIONS D’OPÉRATION
IMPORTANT:Beforeoperatingthis machine,
completelyfamiliarize yourself with instruction
manualprovided.Only authorized and properly
instructedindividuals should operate this machine.
Beforeloading parts onto turntable/ basket, be cer-
tainthe pump is off and not running and the wash
solutionsare at operating temperature.
1.Filltank with water and cleaning solution.
Waterlevelshould be2" below the access doors.
Checkdaily.
2.Programheater timer for desired period of
operation.Allowtimefor unit to preheat cleaning
solution.
3.Open door/lid and place articles to be clean onto
basket/turntable.Becertain no parts protrude
throughthe bottom or beyond the sides of the
basket/turntable.Donot exceedthespecified
heightor weight limit for this spraywashcabinet.
4.Closedoor/lid and latch securely.Withmachine
setto wash, turn“wash cycle”timer to the desired
cleaningtime.Pump will start and run until time
hasexpired.
5.Before opening the door/lid, turnwash cycle timer
offand wait 5 seconds for machine to stop spin-
ning.Thiswill allow steam to escape the cabinet
andexcess water todrain from your parts.
IMPORTANTE:Antesdeoparar elequipo, familiarícese com-
pletamentecon el manual de operación que se incluye.Solo
personalautorizadoy debidamente capacitado debe oparar
ésteequipo.Antes de abrir la puerta/cubierta o las piezas de
cargasobrelatornamesa/canasta, asegúrese de que la bomba
estéapagada y sin funcionar, y que las soluciones de limpieza
esténa temperatura de funcionamiento.
1.Llene el depósito conagua y la solución para limpieza.El
niveldel agua debe estar 2" por debajo de las puerta de ac-
ceso.Verifiqueelnivel diariamente.
2.ProgrameelTemporizadordelcalentador para el período de
operacióndeseado.Deje pasar un tiempo para que la unidad
precalientela solución para limpieza.
3.
Abrala puerta/tapa y coloque las piezas a lavar en la tor-
namesa/canasta,asegúrese de que ninguna pieza so-
brepaseel fondo ni el perímetro de la tornamesa.No exceda
loslimites especificados de peso y altura para el gabinete de
lavado.
4.Cierrela puerta/tapa y asegure el candado.Con la máquina
enposiciónde lavar,ajusteel temporizador de “ciclo de
lavado”altiempo deseado.La bomba arrancaráy funcionará
duranteel tiempo seleccionado.
5.Antesde abrir la puerta/cubierta, apague el temporizador del
ciclode lavado y espere 5 segundos para que la máquina
dejede girar.Esto permitirá que el vaporsalga del gabinete y
elexceso de agua drene de las piezas.
IMPORTANT:Avantd’utiliser cette machine,familiarisez-
vouscomplètement avec le manuel d’instructionfourni.Cette
machinedevrait être utilisée seulement par du personnel
autoriséet formé.Avant l’ouverture de la porte/du couvercle
oudu chargement des pièces sur la table tournante/le panier,
s’assurerque la pompe est en position arrêt et ne fonctionne
paset que les solutions de lavage sont à température de
fonctionnement.
1.
Remplirle réservoir d’eau et d’une solution de nettoyage.
Leniveau d’eau doit se trouver à 5 cm (2 po) sous les
portesd’accès.Vérifier quotidiennement.
2.
Programmerle minuterie de chauffage de l’appareil pour
lapériode de fonctionnement souhaitée.Prévoir du temps
pourque l’appareil préchauffe la solution de nettoyage.
3.
Ouvrirla porte/couvert et placez les articlesà être lavé
surle panier/plaque tournante.Assurez-vous qu’il n’y est
aucunepièce dépassant le painer ou dans le fond au-delà
dupainer/plaque tournante.
4.Fermez la porte/couvert et verrouillezde façonsécuritaire.
Lamachine prête pour le lavage, tournez le minuteur“wash
cycle”autemps de la lavage désiré.La pompe fonctionnera
jusqu’àce que temps sélectionné soit écoulé.
5.
Avantd’ouvrir la porte/le couvercle,mettrela minuterie du
cyclede lavage à l’arrêt et attendre pendant 5 secondes que
l’appareils’arrête de tourner. Cela permettra à la vapeur de
s’échapperdu cabinet et à l’excès d’eau de s’écouler de vos
pièces.
WARNING
PRECAUCION/ADVERTISSEMENT
• Machinemust be connected to a properly sized
lockabledisconnect.
• Installationmust comply with NEC code.
• Forsupply connection,use wires acceptable for
atleast 90 degrees C.
• Donot use below grade floor or grade level.
Thefollowingscheduleisbasedonaverageuse.
Higherusagemayrequiremorefrequentmainte-
nance.
IMPORTANT:Besureelectrical supply is OFF be-
foredraining sump.Only qualified personnel should
servicethis machine.
DAILY:
• Checkwater levelin the sump daily.Topping
offthe water daily will prevent damage to the
heaterelement.
• Removeand clean debris screen.
• Visuallycheck for plugged nozzles.Remove
andclean if needed.Reinstall in the exact origi-
nalposition.
WEEKLY:
• Grease/oildoor hinges.
MONTHLY:
•Performvisualcheckofturntabledrivechain.
• Drainwash solution from sump, remove sand/
gritfrom bottom of the sump.Care should be
takento avoidbending or damagingheater ele-
mentduring the cleaning process.
• Whensump has been cleaned and refilled with
water,add the recommended quantity of deter-
gentfor your machine.
NOTE:Dissolve cleaning powder into warmwater
beforeadding the manufacturer’srecommended
amountto the tank.
8.922-402.0
• Lamáquina debe estar conectada a un enchufe
eléctricode seguridad.
• Lainstalación debe cumplir con el código NEC.
• Paralas conexiones de alimentación,use cablea-
dopara al menos 90 grados centígrados.
Noutilice por debajo del nivel del piso.
• L’appareildoit être connecté à un sectionneur
verrouillablede taille appropriée.
• L’installationdoit se conformeraucod eNEC.
• Pourle raccordement de l’alimentation,utiliser des
filspouvant accepter au moins 90 degrés Celsius.
Nepas utiliser un calibre ou un grade inférieur.
Letableau suivant est fondé sur une utilisation moyenne.
Uneutilisation plus importantepeut exiger un entretien plus
fréquent.
IMPORTANT:S’assurerque le système électrique està l’arrêt
avantde vider le réservoir.Seulle personnel qualifié doit ré-
parercet appareil.
QUOTIDIENNEMENT:
• Vérifierquotidiennement le niveau d’eau dans le rés-
ervoir.Leremplissage quotidien d’eau permet d’éviter
d’endommagerl’élément chauffant.
• Démonteret nettoyer le filtre à débris.
• Vérifiervisuellement si des buses sont bouchées/ob-
struées.Démonteret nettoyer,le cas échéant.Réinstaller
dansla position initiale exacte.
HEBDOMADAIREMENT:
• Graisser/huilerlespentures/charnières de la porte.
MENSUELLEMENT:
• Procéderà un contrôle visuel de la chaîne d’entraînement
dela table tournante.
• Assécherla solution de lavage du réservoir,et enlever tout
sable/gravierse trouvant aufond.Desprécautionsdoivent
êtreprises pour éviter de plier/courber l’élément chauffant
oude l’endommager au cours du processus de nettoyage.
•Lorsqueleréservoiraéténettoyéetremplid’eau,ajouterla
quantitédedétergentrecommandéepourvotreappareil.
NOTE:Biendissoudre la poudre dans l’eau chaudeavant
d’ajouterdans le réservoir.
Elplandemantenimientoquesepresentaacontinuación,está
basadoenunusopromediodelequipo.Unusomásfrecuenteo
severopuederequerirunmantenimientomásfrecuente.
IMPORTANTE:Asegúresedeque el sistema eléctrico esté
AP
AGADOantes de vaciar el cárter.Sólo personal calificado
debereparar esta máquina.
DIARIAMENTE:
• Compruebeel nivel del agua en el cárter diariamente.
Mantenerel nivel adecuado del agua evitarádañar el
elementodel calentador.
• Retirey limpie los residuos de la criba.
• Compruebevisualmente que las boquillas están instaladas
correctamente.Retirey limpie si es necesario.Reinstale en
laposición original exacta.
SEMANALMENTE:
• Lubriquelas bisagras de la puerta.
MENSUALMENTE:
• Realiceuna verificación visual de la cadena de propulsión
dela tornamesa.
• Drenela solución de limpieza del cárter, retire del fondo de
cárterlos sedimentos.Debe tener cuidado de no doblar o
dañar el elemento del calentador durante el proceso de
limpieza.
• Unavez que el cárter está limpio y relleno de agua,
agreguela cantidad recomendada de detergente para la
máquina.
NOTA:Disuelvaeldetergenteenaguacalienteantesdeagregar-
loaltanqueenlacantidadrecomendadaporelfabricante.
MAINTENANCEINSTRUCTIONS
INSTRUCCIONESDEMANTENIMIENTODIRECTIVESD’ENTRETIEN
For Detail
See Control
Box Illus.
Steam Vent
Door Safety
Switch
Plunger
Revolving
Door Pivot
Assy.
Revolving
Door
Debris
Screen
Sump
Cover
Door Latch
Pump