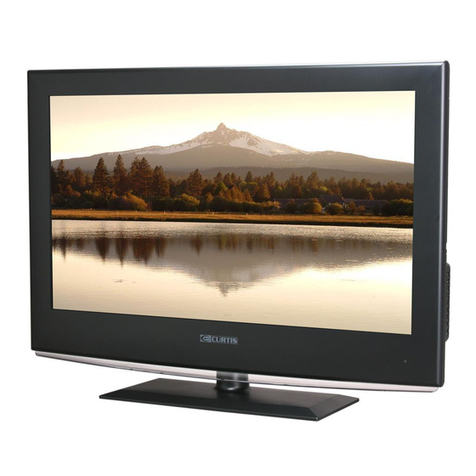
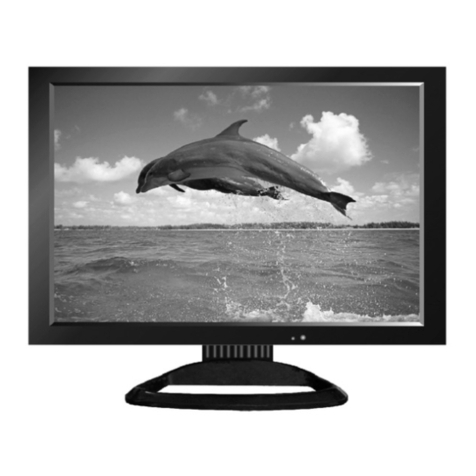
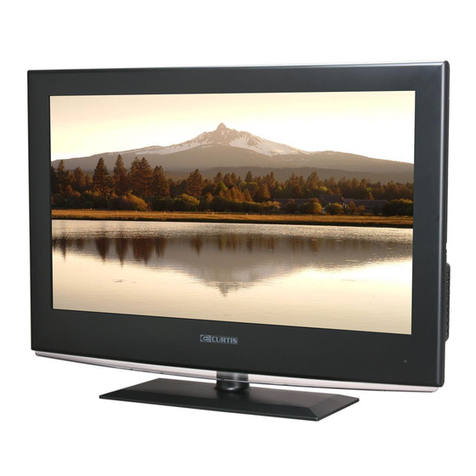
Curtis LCD1933 User manual


Power Cord Connection
AV Connection
Antennas Connection
8
9
8
7
7
3
3
SAFETY
PRECAUTIONS
2
1PREFACE
FRONT AND
CONNECTIONS
OF LCD TV
6
4
5
REMOTE CONTROL
6
INSTALLATION
BASIC
IN THE CARTON 5
3
8TV Operation
12
13
14
14
16
Select Input Source
Picture Menu
Sound Menu
Function Menu
Setting Menu
Channel Menu
11
BACK
7Basic Operation
10
YPbPr Connection
9

17
19
SPECIFICATIONS
10
18
TROUBLESHOOTING
9
Wall mounting
Assembly
Instruction
11
AND ADVICE

1. PREFACE
Thank you for buying this TV !Please read this manual throughly before operating the TV.
Make sure the TV was not damaged in transit.Should the TV is damaged,do not install
your dealer.Check that you have all the accessories according to the model.
it and contact
2. SAFETY PRECAUTIONS
Power cord and cables must be properly routed and protected to prevent
people from stepping on them and causing the TV to fall.
Minimum distances
25mm25mm60mm
Put the TV on a stable surface.
Do not place any material on the TV.
Do not block or cover the ventilation openings on the TV.
If you have a wall mount,check that it is steady.
Do not use the with fixtures other than those provided or
suggested by the manufacturer.
TV
25mm
3

Keep the TV dry and away from humidity.
Keep the TV away from heat sources .
Unplug the before cleaning it.Do not use solvent or liquidTV to clean
the TV.
Only clean the TV with a soft and dry cloth.
In case of troubleshooting,do not use spare parts other than those
suggested by the manufacturer.Using inadequate spare parts can
shocks,short-circuits fire or other incidents.lead to electric
Unplug the TV during lightening storms or when unused for long periods
of time.
4

3. IN THE CARTON
Remote Control
3. IN THE CARTON
Remote Control
TV SET
LIMITE D PROD UCT WARRA NTY
This qua lity p roduct i s warr anted to b e free f rom manu fact urer's d efec ts
in mater ial an d workma n-sh ip, prov ided t hat the un it is us ed under t he
normal o pera ting con diti ons inte nded b y the manu fact urer.
Should y ou hav e any prob lem wi th this pr oduc t, pleas e and it i s highly
recomm ende d to visit o ur web site at ww w.cur tisint .com b efore yo u take
any othe r step s as we have a ddit ional co pies o f instru ctio n manual s,
operat ing ma nuals an d trou ble shoo ting t ips on our w ebsi te which g ives
you the an swer o n most of th e ques tions yo u coul d have in op erat ing the
unit.
TERMS OF WA RRAN TY
C.I. Ser vice D ept. war rant s this pro duct t o be free fr om def ects in
materi als an d workma nshi p for 1 year o n part s and 90 day s on lab or. If
you orig inal ly purch ased y our prod uct mo re than 90 d ays ag o, a repai r
fee may ap ply.
Nothin g with in this wa rran ty shall i mply t hat C.I. w ill be r espons ible o r
liable f or any d amage to a ny ite ms place d in thi s produc t, whe ther due t o
any defe ct of th e produc t, or it s use, whe ther p roper or i mpro per.
EXCLUS IONS
Save as he rein p rovide d, C.I . Servic e Dept . (Canad a) or C. I. Servi ce
Dept. (U SA), t here are n o othe r warran ties , condit ions , repres enta tions
or guara ntee s, expre ss or im plied, m ade or i ntende d by C.I . or its
author ized d istrib utor s and all ot her wa rranti es, co nditio ns,
repres enta tions or g uara ntees, i nclu ding any w arra nties, c ondi tions,
repres enta tions or g uara ntees un der an y Sale of Go ods Act o r like
legisl atio n or statu e is her eby expr essl y exclud ed. Sa ve as here in
provid ed, C. I. Servi ce Dep t. (Cana da) or C .I. Serv ice De pt. (USA ), sha ll
not be res pons ible for a ny dam ages to pe rson s or prope rty, inc luding t he
unit its elf, h owsoev er cau sed or any c onse quenti al dam ages ari sing
from the m alfu nction o f the un it and by th e purc hase of th e unit , the
purcha ser do es hereb y agre e to indem nify a nd save ha rmle ss C.I. fr om
any clai m for da mages to p erso ns or prop erty c aused by t he uni t.
MODELE : LCD1 933
Veuil lez lire a tten tiveme nt ce ma nuel et le r eten ir pour fu tur
réfé rence av ant d' utilis er la Té lé.
MANUEL D'INSTRUCTI ON

1.Press “POWER” button to turn standby
mode on or off.
2.Press “CH+” or “CH-” to scan through
channels.
3.Press “VOL+” or “VOL-” to increase or
decrease the volume.
4.Press “MENU” to bring up the main menu
on the screen.
5.Press “INPUT” to select the input source.
6.POWER INDICATOR: Show red in standby
mode, show blue when your TV is
switched on.
7. REMOTE SENSOR: Infrared sensor for the
remote control.
4. AND TVFRONT BACK CONNECTIONS OF LCD
Front View
123
4
5
6
7
8910
(HDMI cable not inclued)
Antenna Input.

Power Cord Connection
5. BASIC AINSTALL TION
Antennas Connection
To ensure good picture and sound, TV antenna system needs to be installed. The antenna system as
shown can be sourced from TV equipment shops, which will provide service for correct installation
and connection. After installation, insert the 75-OHM antenna plug into the antenna jack as shown.
- Connect the power cord and AC adaptor correctly as shown.
- Press the POWER switch of your LCD TV to switch the unit on. The power indicator on the
front panel lights up in blue.
AC Adaptor
POWER Cord

AV Connection
YPbPr Connection
Connect the VIDEO and AUDIO output jack of the DVD or VCR to the AV IN jacks on the set using
the RCA cable (Yellow [video], White and RED [left & Right audio]).
Select the AV input source using the SOURCE button on the remote control.
Connect the YPbPr output of the DVD or VCR to the YPbPr input on the set. The picture quality is improved
compared to connecting a regular VCR to the video input. Connect the Audio output of the DVD or VCR to
the Audio input jacks on the set using the RCA cable.
Match the jacks colours: Y is green, Pb is blue, Pr is red, Audio left is white and Audio right in red.
Select YPbPr input source using the SOURCE button on the remote control.
(3.5mm plug-2 X RCA plug)
YPbPr Cable

Connect the RGB output of the PC to the VGA jack on the set. Connect the AUDIO output of the PC to the PC
AUDIO jack on the set. Select the PC input source using SOURCE button on the remote control.
HDMI connection allows the user to transfer both audio and video control signals through one cable only.
These signals are transferred in digital.
HDMI Connection
VGA Cable

1.STANDBY
To switch on the Tv or make the TV into
standby mode.
2.MUTE
Press this button to mute or restore sound.
3.INFO
Show the information of the program you are watching.
4.SOURCE
Press this button to select an input source.
5.PMODE
Press this button to select a picture mode for different
picture qualities.
6.SMODE
Press this button to select sound setting for different
sound effects.
7.0-9
Allows you to change the channel of the TV.
8.
Switches back and forth between the current and
previous channels.
9.SLEEP
To select the amount of time before your TV turns
Off automatically.
10.VOL+/VOL-
Increases/Decreases the Volume control.
11.CH+/CH-
Skips to the next/previous channel on TV mode.
12.UP/DOWN/LEFT/RIGHT
Moves the cursor upward/downward/to the left/to the right
when making a selection.
13.MENU
Displays the OSD Menu of the TV.
14.CC
Press the button to enter into the CC mode.
15.MTS
To change among STEREO, MONO and SAP. If there is no
second language available for the signal received, LCD
Display audio will output to mono.
16.ENTER
Enters the function selected.
17.Exit
Press this button to exit the on screen display.
10
6. REMOTE CONTROL
4
5
1
2
3
6
8
9
12
7
11
13
10
15
14
16
17

SELECT INPUT SOURCE
·Use INPUT button to display the input source list;
·Use 【▲】 /【▼】 button to select the input source you want to watch;
·Use ENTER button to enter the input source;
·Use MENU button to display the MAIN OSD MENU;
·Use 【▲】 /【▼】button to select the MENU you want;
·Use 【 ► 】 button to enter the sub menu;
You can use MENU or EXIT button to save and return back to the previous menu .
·Use 【▲】 /【▼】 button to select the option and then press 【◄】 /【 ► 】to adjust the value in the sub menu;
OSD Manual
INPUT SOURCE
BASIC OPERATION
7. BASIC OPERATION
11

OSD Manual
8. TV Menu
PICTUREPICTURE
The PICTURE menu offers options to enhance and refine the picture displayed on your TV based on ambient room light
and personal prefer-ences. Adjustment options include , BRIGHTNESS, COLOR, TINT,
SHARPNESS, COLOR TEMP. and NOISE REDUCTION.
How to Navigate:
Press the MENU button on the remote control. Navigate using arrow buttons to select PICTURE. Press
the down arrow button to highlight PICTURE MODE, then press the arrow button to select your viewing
Preference.
The STANDARD setting is recommended for most viewing environments. Depending on the ambient light level in the
room, you may select one of the other options more pleasing.
PICTURE MODE, CONTRAST
【◄ 】 /【 ►】
▼ 【◄ 】 /【 ►】
To make more critical adjustments based on your own preferences in PERSONAL:
CATV
• Use down arrow button to highlight CONTRAST. Navigate using the arrow buttons to increase or
decrease contrast intensity.
【▼】【◄ 】 /【 ►】
• Use down arrow button to highlight BRIGHTNESS. Navigate using the arrow buttons to increase or
decrease overall brightness.
【▼】【◄ 】 /【 ►】
• Use down arrow button to highlight COLOR. Navigate using the arrow buttons to increase or decrease
color intensity.
【▼】【◄ 】 /【 ►】
• Use down arrow button to highlight TINT. Navigate using the arrow buttons to adjust colors toward
green or reddish tint.
• Use down arrow button to highlight SHARPNESS. Navigate using the arrow buttons to soften or view
crisper edges in the picture.
• Use down arrow button to highlight COLOR TEMP.. Navigate using the arrow buttons to select COOL
(more bluish tone), NORMAL or WARM. The default setting is NORMAL.
【▼】【◄ 】 /【 ►】
【▼】【◄ 】 /【 ►】
【▼】【◄ 】 /【 ►】
• Use down arrow button to highlight NOISE REDUCTION. Navigate using the arrow buttons to select
it ON or OFF.
【▼】【◄ 】 /【 ►】
12

OSD Manual
The SOUND menu offers options to make sound enhancements while listening through the built-in speakers
SOUNDSOUND
How to Navigate:
Press the MENU button on the remote control. Navigate using arrow buttons to select . Press the
arrow button to highlight SOUND MODE, then press the arrow button to select your sound preference.
【◄ 】 /【 ►】SOUND
【▼】【◄ 】 /【 ►】
To make more critical sound adjustments based on your own preferences in PERSONAL:
• Use down arrow button to highlight Bass. Navigate using the arrow buttons to increase or decrease
low frequency intensity.
• Use down arrow button to highlight TREBLE. Navigate using the arrow buttons to increase or decrease
high frequency intensity.
• Use down arrow button to highlight BALANCE. Navigate using the arrow buttons to adjust sound
towards the left or right speaker.
【▼】【◄ 】 /【 ►】
【▼】【◄ 】 /【 ►】
【▼】【◄ 】 /【 ►】
• Use down【▼】arrow button to highlight AVL. Navigate using the【◄ 】 /【 ►】arrow buttons to select it ON or OFF.
13

OSD Manual
In the SETTING menu you may change the initial set up of preferences that include LANGUAGE, OSD TIMER, TRANSP-
-ARENCE, OVERSCAN, and RESET your TV back to its factory default status.
How to Navigate:
Press the MENU button on the remote control. Navigate using arrow buttons to select SETTING. Gain access
to display options by pressing the down arrow button to highlight LANGUAGE or other options, then press
arrow buttons on your remote to select.
【◄ 】 /【 ►】
【▼】【◄ 】 /
【 ►
SETTINGSETTING
·Use down【▼】arrow button to highlight LANGUAGE. Navigate using 【◄】 /【 ► 】arrow button to select the OSD
language. There are 6 language for selection: ENGLISH > GERMAN> FRENCH> SPANISH> ITALIAN> PORTUGUESE.
·Use down【▼】arrow button to highlight TRANSPARENCE. Navigate using 【◄】 /【 ► 】arrow button to select the
transparence of the OSD.
·Use down【▼】arrow button to highlight OSD TIMER. Navigate using 【◄】 /【 ► 】arrow button to select the OSD
timer. There are 6 modes for selection: 5 SEC>10 SEC> 15SEC> 20SEC> 25 SEC> 30 SEC.
·Use down【▼】arrow button to highlight OVERSCAN. Navigate using 【◄】 /【 ► 】arrow button to select it ON or
OFF. But this option is only available in the HDMI source.
·Use down【▼】arrow button to highlight RESET. Navigate using【 ► 】arrow button to reset the options in the SETTING
menu.
In the FUNCTION menu you may change the function set up of preferences that include SLEEP TIMER, ASPECT, CCAPTION
PARENT CTRL and BLUE SCREEN.
How to Navigate:
Press the MENU button on the remote control. Navigate using arrow buttons to select FUNCTION. Gain
access to display options by pressing the down arrow button to highlight SLEEP TIMER or other options, then press
arrow buttons on your remote to select.
【◄ 】 /【 ►】
【▼】
【◄ 】 /【 ►】
FUNCTIONFUNCTION
14

OSD Manual
·Use down【▼】arrow button to highlight SLEEP TIMER. Navigate using 【◄】 /【 ► 】arrow button to select the sleep
timer, and the TV will turn off automatically in the setting time . There are 9 modes for selection: 15 Min>30 Min> 45 Min>
60 Min> 75 Min> 90 Min> 105 Min> 120 Min> OFF.
·Use down【▼】arrow button to highlight ASPECT. Navigate using 【◄】 /【 ► 】arrow button to select: FULL> ZOOM
> SUBTITLE > 4:3>14:9>AUTO. The default setting is FULL. .
·Use down【▼】arrow button to highlight PARENT CTRL. Navigate using 【 ► 】arrow button to select this option.
Enter your 4 digit code (factory default code is "0000") unless previously changed to enter the submenu.
·Use down【▼】arrow button to highlight V-CHIP. Navigate using 【◄】 /【 ► 】arrow button to select this option
ON or OFF. When set the system lock OFF, the locks below will be unavailable.
·Use down【▼】arrow button to highlight TV-RATING. Navigate using 【 ► 】arrow button to enter the submenu and select.
·Use down【▼】arrow button to highlight MOVIE-RATING. Navigate using 【◄】 /【 ► 】arrow button to select this option.
·Use down【▼】arrow button to highlight CHANGE PASSWORD. Navigate using 【 ► 】arrow button to change the password
of the system lock. A dialog as above will appear, the enter the new password can change the password successfully.
·Use down【▼】arrow button to highlight ENGLISH-RATING. Navigate using 【◄】 /【 ► 】arrow button to select this option
EMPTY、C、C8 +、G、PG、14 + or 18 +.
NONE、G、PG、PG-13 、R、NC-17 or X.
·Use down【▼】arrow button to highlight FRENCH-RATING. Navigate using 【◄】 /【 ► 】arrow button to select this option
EMPTY、G、8 ANS +、13 ANS +、16 ANS + or 18 ANS +.
·Use down【▼】arrow button to highlight BLUE SCREEN. Navigate using 【◄】 /【 ► 】arrow button to select this option
ON or OFF.
·Use down【▼】arrow button to highlight C.CAPTION. Navigate using 【◄】 /【 ► 】arrow button to select: OFF> Cc1
> CC2 >CC3>CC4>TEXT1>TEXT2>TEXT3>TEXT4. The default setting is OFF.
15

OSD Manual
In the CHANNEL menu you may change the channel set up of preferences that include SOURCE, AUTO SCAN and MANUAL
PROGRAM .
How to Navigate:
Press the MENU button on the remote control. Navigate using arrow buttons to select CHANNEL. Gain
access to display options by pressing the down arrow button to highlight SOURCE or other options, then press
arrow buttons on your remote to select.
【◄ 】 /【 ►】
【▼】
【◄ 】 /【 ►】
CHANNELCHANNEL
·Use down【▼】arrow button to highlight MANUAL PROGRAM. Navigate using 【 ► 】arrow button to enter the submenu.
·Use down【▼】arrow button to highlight SOURCE. Navigate using 【◄】 /【 ► 】arrow button to select the option
·Use down【▼】arrow button to highlight PROGRAM. Navigate using 【◄】 /【 ► 】arrow button to select the program
that you want to watch.
·Use down【▼】arrow button to highlight SYSTEM. Navigate using 【◄】 /【 ► 】arrow button to select the option.
·Use down【▼】arrow button to highlight FINE. Navigate using 【 ► 】arrow button to select this option.
·Use down【▼】arrow button to highlight AFT. Navigate using 【◄】 /【 ► 】arrow button to select this option ON or OFF.
CATV or AIR.
·Use down【▼】arrow button to highlight AUTO SEARCH. Navigate using 【 ► 】arrow button to start auto scan.
·Use down【▼】arrow button to highlight ADD/ERASE. Navigate using 【◄】 /【 ► 】arrow button to select this option.
16

9. TROUBLESHOOTING AND ADVICE
Should your unit develop a problem,please refer to the below troubleshooting table before
requesting assistance.
Troubleshooting Control
No signal
No colour shades
Stain show on the
screen
Double or multiple
display image
Snow on the screen
The remote control
does not work
"Zip"noise on
coming from TV
No sound
Please check that all cables are correctly plugged in.
Adjust the contrast,colour and brightness
Maybe result from a lighting signal from car,motor,neon light and
other electrical devices or appliances.
Maybe the result of an electrical wave disturb from other TV,
Computer and Game machine or Radio
The cables of the antenna are not correctly plugged in.
Please check the polarity of the batteries.Check that the receiver
of the remote control is not sheltered by something.
Even if the display image is correct,the noise may come from an
unsteady fixation of the panel.
Make sure that you have not press the MUTE button o n t he remote
control.
17

10. SPECIFICATIONS
Screen Size
Resolution(Pixel)
Aspect Ratio
TV System
Video Input Format
Antenna Input
Audio Output
Input
(Video/S-Video/YPbPr/PC)
NTSC
NTSC
L/R W2X3
This manual is only for your reference,any change to the design and specification will not
be advised.
19 Inch
1366 X 768
16:9
HDMI
Standards TMDS Max. 1080P
R/L200mVrms (max3.0vp-p) 20K RCAΩ
Audio (AV/S-Video/YPbPr/PC)
Power Input
DC12V 4A
1366 X 768/60Hz
18

19
11. Wall mounting assembly instruction
Table of contents
Languages:
Other Curtis LCD TV manuals

Curtis
Curtis LCD1533 User manual

Curtis
Curtis LCD2425A User manual

Curtis
Curtis LCD1924 User manual

Curtis
Curtis PL4210A User manual

Curtis
Curtis KCR2620 User manual

Curtis
Curtis LCD2603A User manual

Curtis
Curtis LCD1923A User manual

Curtis
Curtis LCD1988 User manual

Curtis
Curtis LCD3718A User manual

Curtis
Curtis LCD2226A User manual

Curtis
Curtis LCD3213 User manual

Curtis
Curtis LCD3227A-2 User manual

Curtis
Curtis LCD3215 User manual

Curtis
Curtis LCD2226 User manual

Curtis
Curtis LCDVD152A User manual

Curtis
Curtis LCD2687A User manual

Curtis
Curtis LCD2424A User manual

Curtis
Curtis LCDVD326A-2 User manual

Curtis
Curtis LCD1911 User manual

Curtis
Curtis LCD1905A User manual