1 2
FUNCTION SETUP GUIDE
CP1200EIPFCLCD/CP1350EPFCLCD/CP1600EPFCLCD
K01-0001038-00
Power On: Press the POWER button for approximately 2 seconds and you will hear
a short steady tone (1 second). Release the button after a short beep.
Power Off: Press the POWER button for approximately 2 seconds and you will hear
a short steady tone (1 second). Release the button after 2 short beeps.
(DISPLAY Button):
(1) ( ): Short press the button to scroll down the function / option menu and
view the information about the UPS.
(2) LCD On/Off: The default setting is the off position. The LCD display will dim if
the buttons are not touched in 60 seconds. In Line Mode, press the button for 2
seconds to keep the LCD display always on. The LCD display will illuminate (and
beep once). Press the button again for 2 seconds to turn off the LCD display. The
LCD display will be off (and beep twice).
In battery mode, the LCD is always on regardless of the settings.
(MUTE Button):
(1) ( ):Short press the button to scroll up the function / option menu and view the information about the UPS.
(2) Audible Alarm: Press the button for 2 seconds to enable the audible alarm (beeps once) or disable (beeps twice) the
audible alarm. The MUTE icon will appear on the LCD display when the audible alarm is disabled.
Note: The default setting for the alarm is the on position.
ENTER (SETUP Button):
Setup Mode: Press the button for 2 seconds to access the setup mode’s 10 functions: Utility quality, High Transfer Voltage,
Low Transfer Voltage, Sensitivity, Low Battery Warning, Self Test, LCD Test, Event Reset, Return to Default Settings, and
Return to Status Display.
Short press the button ( ) or ( ) to view the functions. When a function is selected, short press the ENTER button to
access the function’s options.
Short press the button ( ) or ( ) to view the options. When the desired option is selected, short press the ENTER
button to confirm the setting.
Note: If there is no action for 30 seconds during setup, the LCD will leave setup mode and go back to the status display.
The setting will not be confirmed.
DISPLAY + SETUP Button:
Press both buttons at the same time for 2 seconds will clear the EVENT counter (and beep twice).
You can also clear the EVENT counter in setup mode.
Refer to the following table for a detailed list of functions and their descriptions.
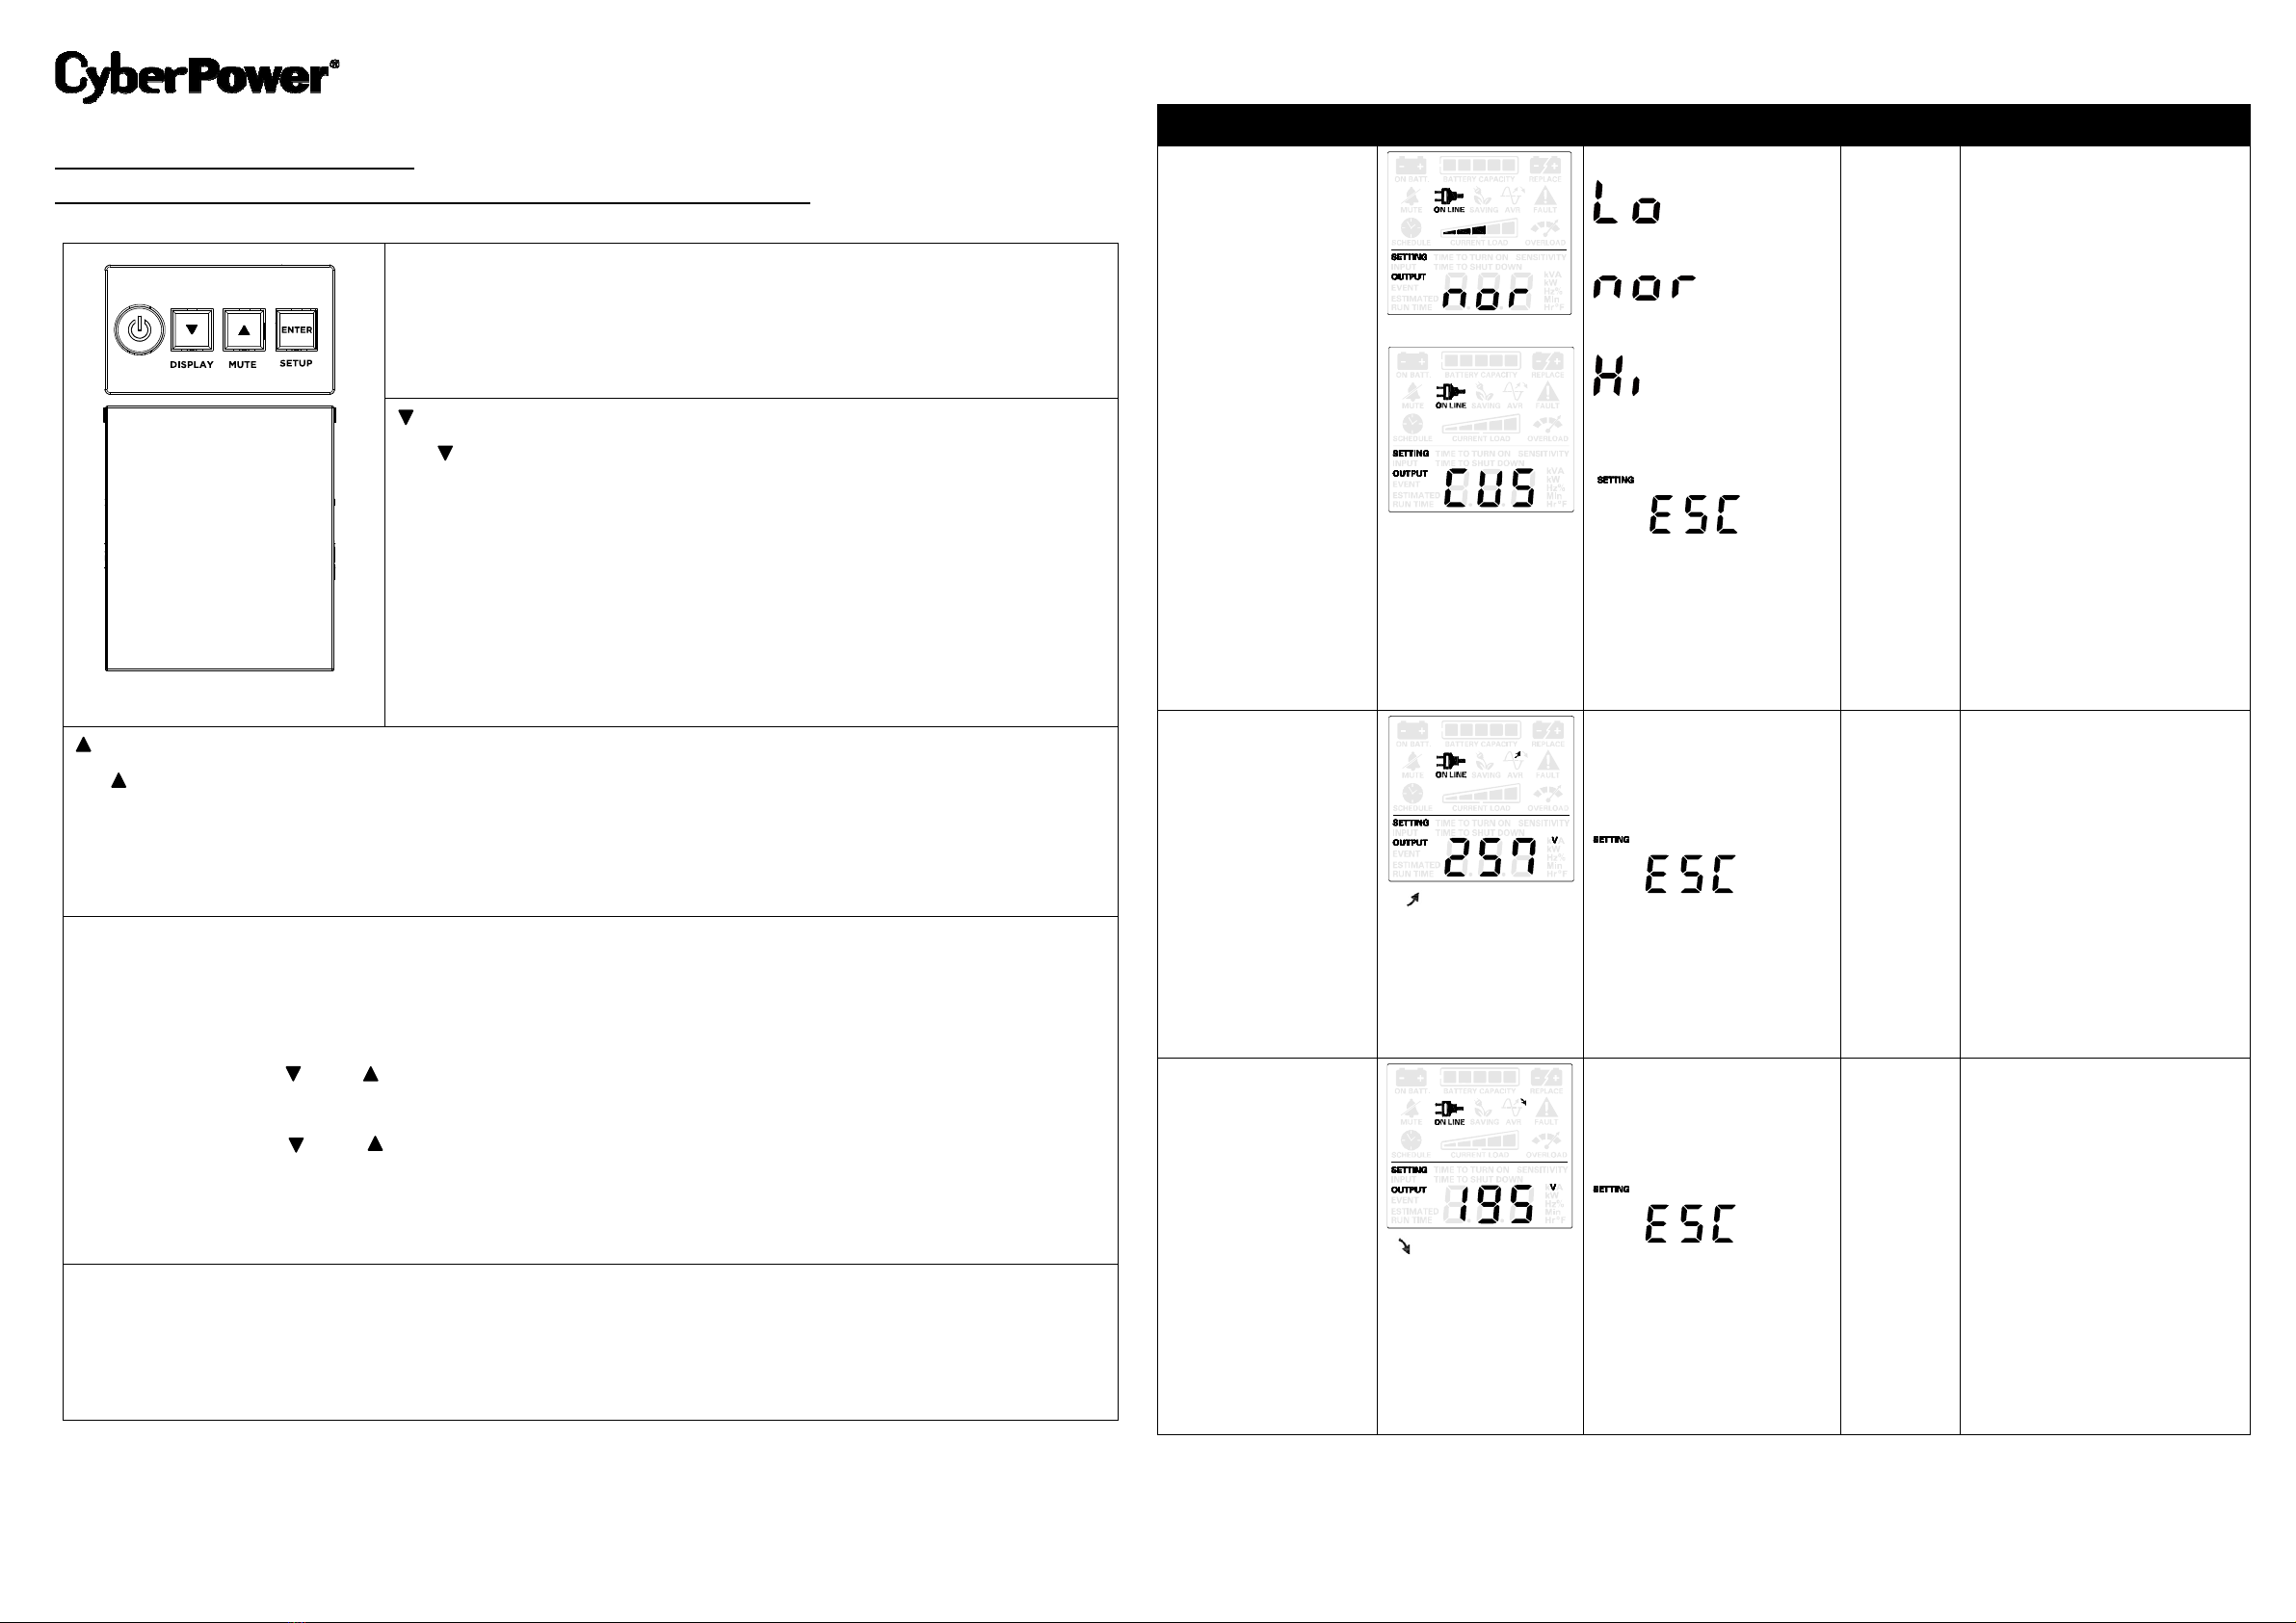
Function LCD Display Options Default Description
Utility Quality
(CUS)*
* Custom Setting:
Only when Low or
High Transfer Voltage
is configured.
Low (189V~271V)
Normal (195V~257V)
High (207V~253V)
Escape to Function
Menu
Normal Select the voltage quality of
the input utility power. If
High(207V~253V) is selected,
the UPS will go to the battery
mode more often to supply the
cleanest power to connected
devices. If Low(189V~271V) is
selected, the UPS will tolerate
more power fluctuations and
go to battery mode less often.
High Transfer Voltage
* = fine tune the
MAX O/P voltage
253~271
Escape to Function
Menu
257 In Utility Quality settings, only
3 types of fixed voltage ranges
can be chosen. However, you
can fine tune the MAX O/P
voltage in this function.
If the utility voltage is usually
high, and the connected
equipment can work in this
condition, you can set the
output voltage range higher to
reduce the UPS from going to
Battery Mode as often.
Low Transfer Voltage
*= fine tune the
MIN O/P voltage
189~207
Escape to Function
Menu
195 In Utility Quality settings, only
3 types of voltage ranges can
be chosen. However, you can
fine tune the MIN O/P voltage
in this function.
If the utility voltage is usually
low, and the connected
equipment can work in this
condition, you can set the
output voltage range lower to
reduce the UPS from going to
AVR Mode or Battery Mode as
often.


 Plus Startup manual")


