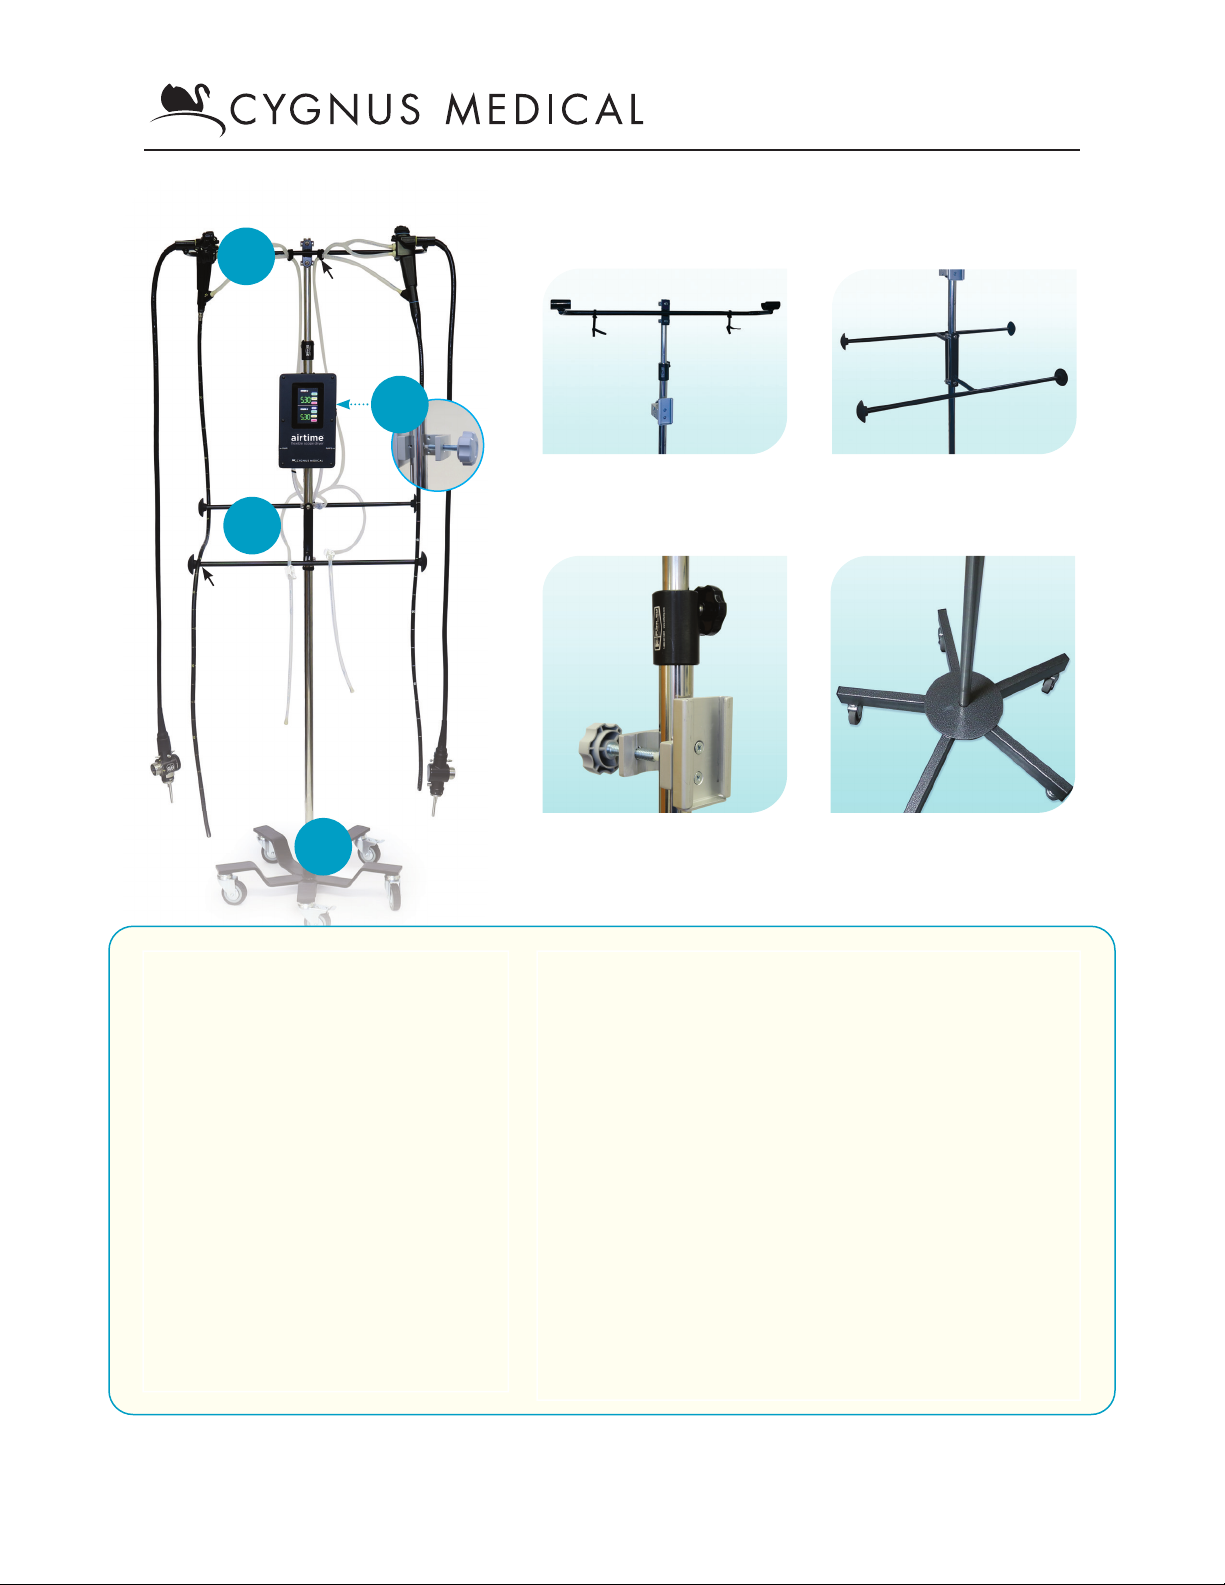
Airtime™ IV Pole Set – IV500 | Component Assembly Instructions
C. Airtime Control Unit Mounting Bracket
Parts: 1 Mounting Bracket with Tension Knob
1. Attach mounting bracket by tightening the Tension
Knob (screw) against the IV Pole. The height should
be approximately 60" from the floor. Slide the
Universal Mounting Plate on the back of the Airtime
Control Unit into the IV Pole Bracket.
Mounting Bracket Install
Tension Knob
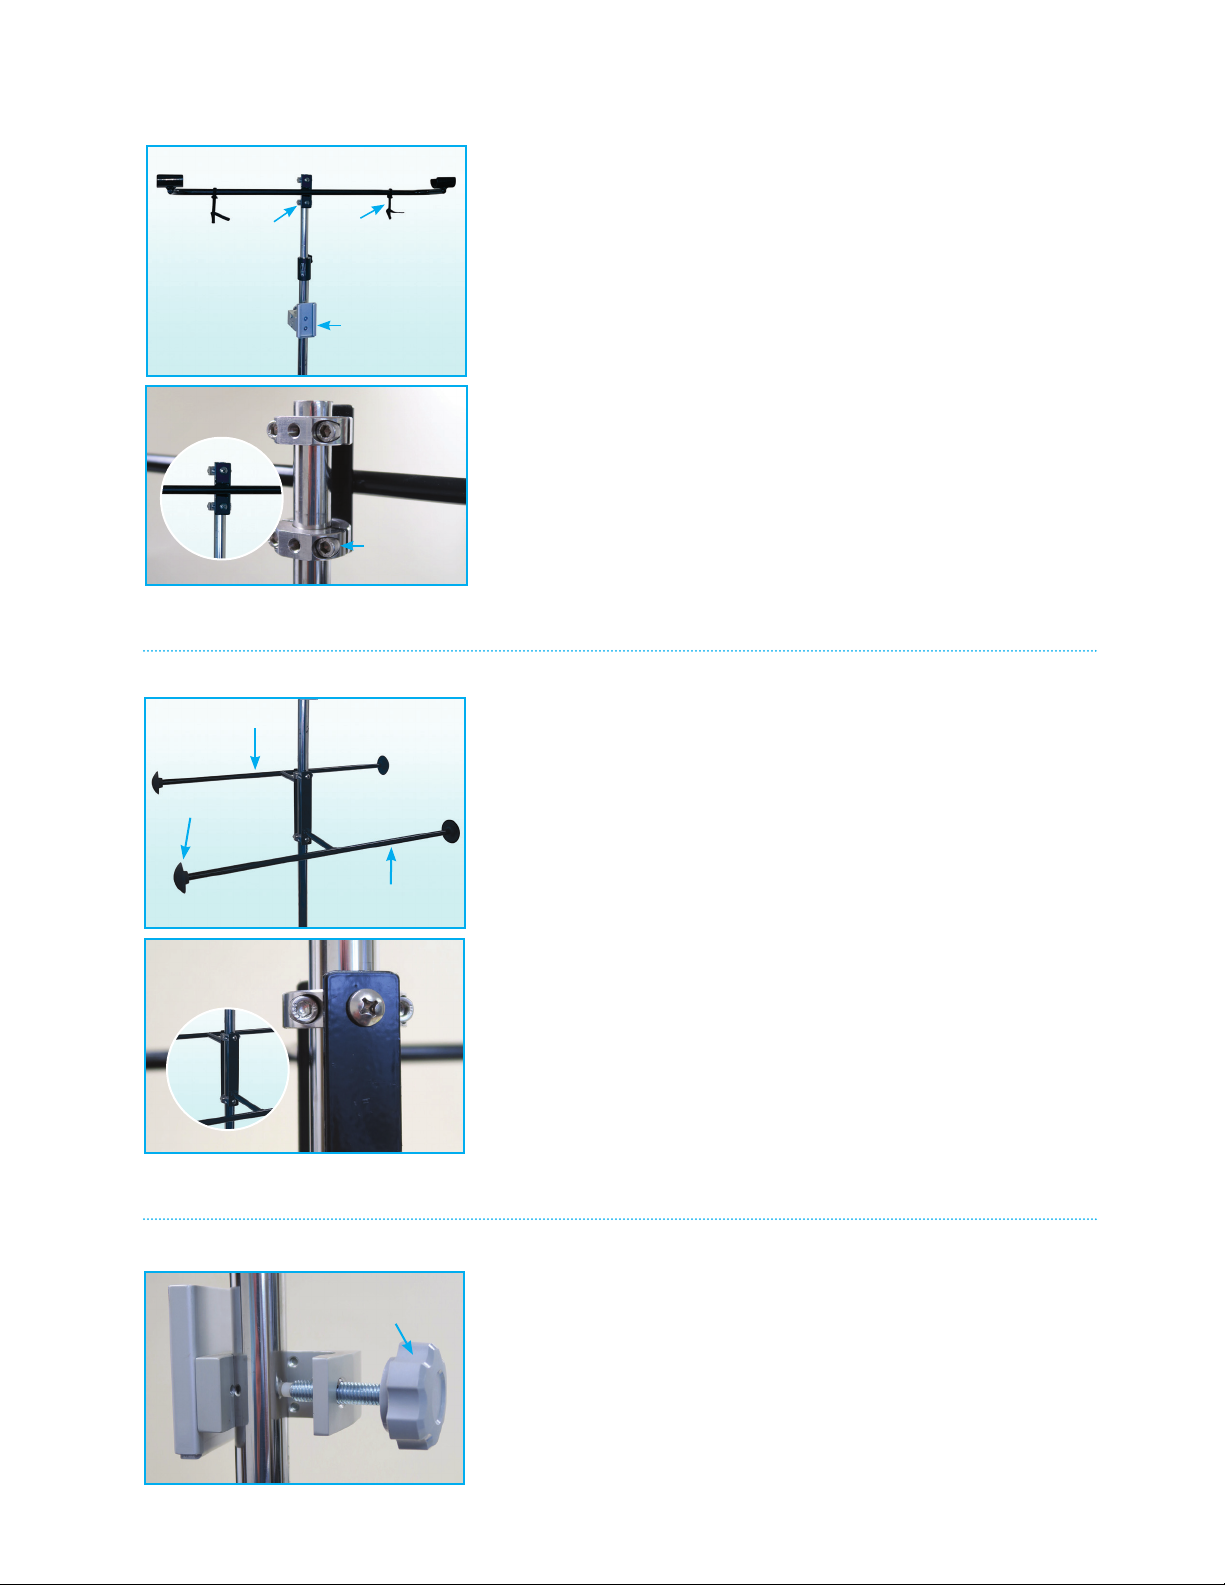
A. Scope Cradle
Parts: 1 Scope Cradle Bar, 1 Collar Bracket,
2 Velcro Tubing Ties, 4 Screws
1. The Scope Cradle is mounted approximately
1" below the top of the IV Pole.
2. Position the Scope Cradle Bar and Collar Bracket
around the IV Pole.
3. Align the Scope Cradle Bar Collar holes and collar
bracket holes and insert the fours screws. Use a
3/16" Allen Wrench to tighten the screws.
Scope Cradle Bar Install
Scope
Cradle Bar
and Collar
Bracket
Unit
Mounting
Bracket
Screws
Scope
Cradle
Bar Collar
Velcro
Tubing
Ties
B. Height Reduction Bars
Parts: 2 Bars (Front/Back), 4 End Caps, 4 Screws
1. The Height Reduction Bars are mounted
approximately 10" below the Airtime Control Unit.
2. Position the Front and Back bars around the IV Pole.
The Back Bar must be higher than the Front Bar.
3. Align the Front Bar holes and Back Bar holes and
insert the four screws. Use a 3/16" Allen Wrench to
tighten the screws.
Front Bar
Back Bar
End Caps
Height Reduction Bar Install
A.
C.
B.