EN 7
If the cooker has cast iron plates, set the hotplate
knobs to level 4 and leave them on for 30 minutes
without using any dishes. As the cooking zones heat
up, some smoke may appear on the cooking hob
surface. Thus, the cooking zone finish reaches its
maximum resistance.
When the oven heats up for the first time, the
characteristic smell of a new appliance will be
emitted. Ventilate the room thoroughly during the first
operation.
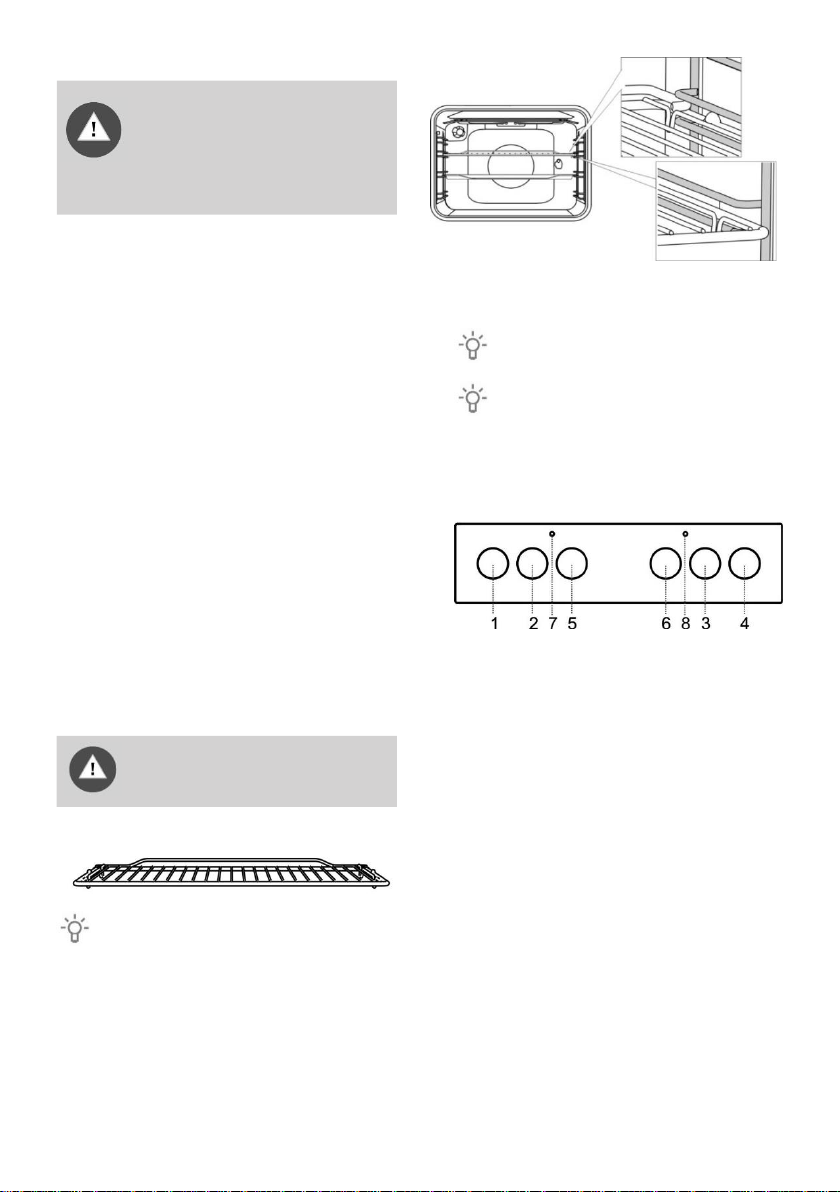
CHILD LOCK ON THE TEMPERATURE
CONTROL (Oven temperature knob)
A child lock is fitted on the temperature control for the
oven . The cooking zones and the oven only work
when the child lock has been disengaged. Using the
child lock prevents children from accidentally turning
on the cooking zones or the oven.
How to engage the child lock:
1. Pull the temperature control outward.
2. Turn approximately 15° to the left .
3. Release the control = Locked position.
How to disengage the child lock:
1. Pull the temperature control outward.
2. Turn approximately 15° clockwise.
3. Release the control = Unlocked position.
COOKING HOB
ELECTRIC HOBS
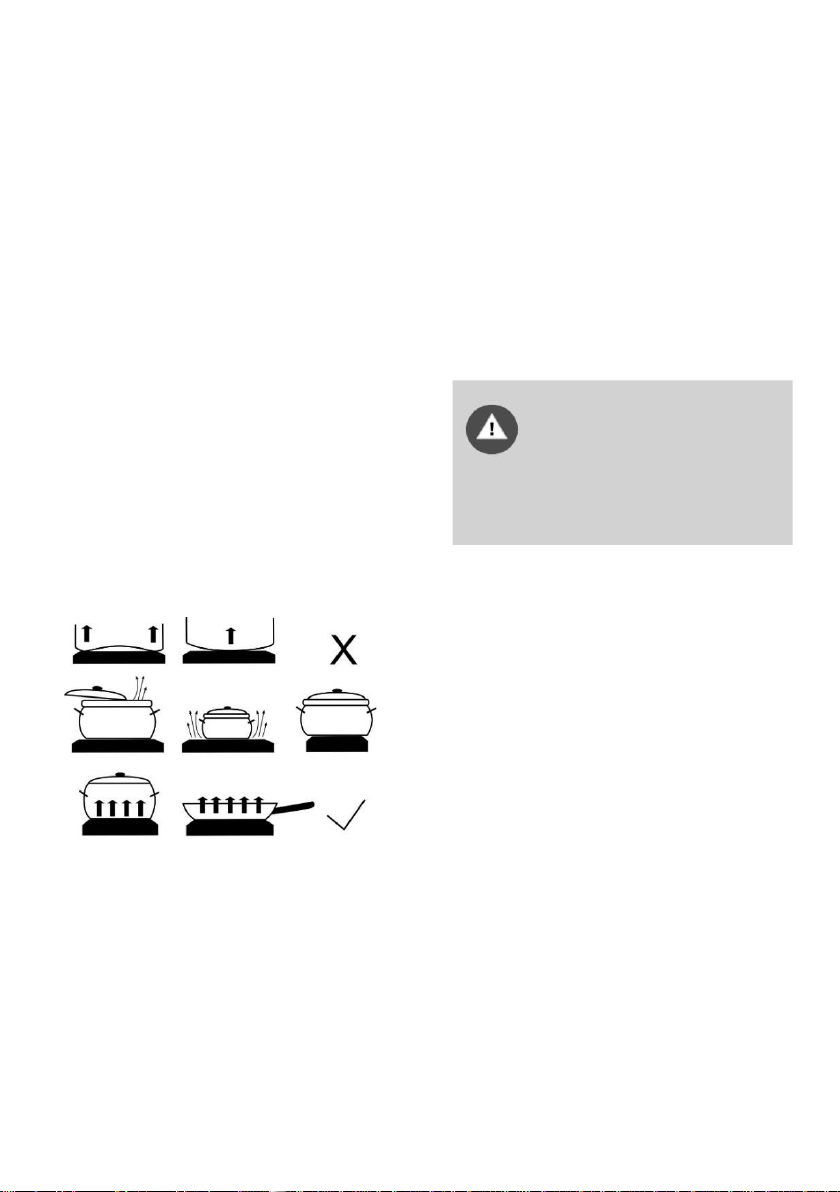
−Make sure the cooking zone and the cookware
bottom is clean and dry. This will allow better
conduction of heat and prevent any damage to the
heating surface.
−Overheated fat and oil on the cooking zones may
ignite. Therefore, be careful when cooking with fat
or oil and always control the cooking process.
−Do not place wet cookware or lids covered in
steam on the cooking zones. Moisture may
damage the cooking zones.
−Do not cool down the hot cookware by placing it on
the cooking zones that were not in use, because
the condensate that will appear under the
cookware bottom may aid corrosion.
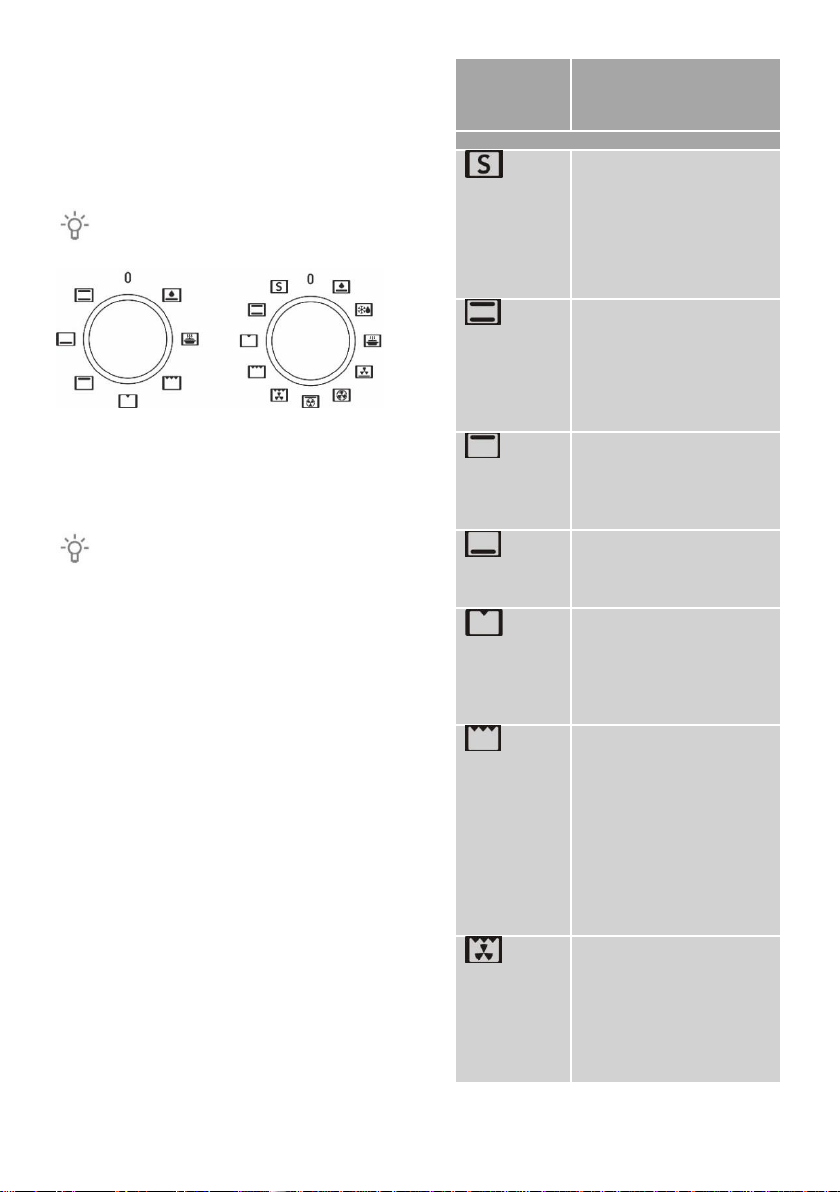
Rotate the knob to switch on the cooking zone.
Cooking zone heating power can be set in steps from
1 to 6.
Switch off the cooking zone 3 –5 minutes before
the end of the cooking process to make use of the
residual heat and save power.
Rapid cooking zones (only with some models)
can operate with greater power than regular cooking
zones, which means they can heat up more quickly.
These cooking zones are indicated with a red dot in
the middle. After repeated heating and cleaning, this
dot may disappear.
In case of prolonged use of cast iron
plates, the area of the plate and the edge
of the cooking zone may discolour.
Service in such case is not covered by
the warranty.
GLASS CERAMIC HOB
The power of the hob can be set in levels from 1 to 6.
The hobs are connected in different time intervals,
depending on the set level. Overheating of the
surface under the glass ceramic panel is prevented
by the temperature limiter.
CONTROL OF THE TWO-RING COOKING
ZONE
The area of the two-ring cooking zone can adapt to
the size and the form of your cookware.
To activate the larger heating zone, rotate the cooking
zone knob as far as it will go (a click will be heard),
then set the desired power level.
HI-LIGHT COOKING ZONES
Hi-Light cooking zones differ from the conventional
zones by rapid heating; therefore, the cooking
process begins very soon.
RESIDUAL HEAT INDICATOR
Each hob is equipped with a control light that stays on
also after the hob is turned off, if the hob is still hot.