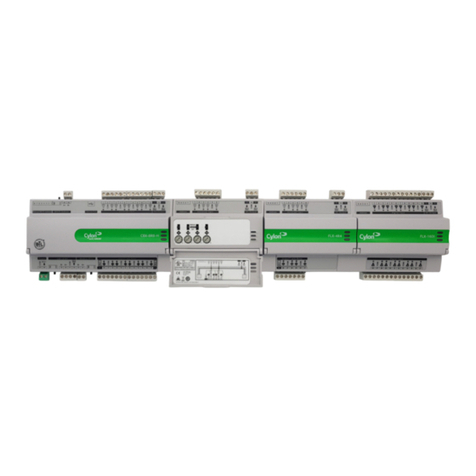
Cylon American Auto-Matrix Aspect Matrix MAX Manual

Matrix MAX™
Hardware Installation Guide

AspectFT-Matrix MAX Area Controller Installation Guide (1/05/2015) 1-1
1.1 ASPECTFT-MATRIX MAX INTRODUCTION
Unpack your AspectFT-Matrix MAX Area Controller and inspect the contents for damaged or missing
items. Included in this package, you should find the following items:
.AspectFT-Matrix MAX Area Controller
.AspectFT-Matrix MAX Controller Hardware Installation Guide (this document)
1.1.1 TOOLS REQUIRED
The following tools and supply may be required for installation:
.Small flat-bladed screwdriver - for field-bus and power connectors
.Drill - for mounting the product onto a wall
.Wire-strippers - for terminating EIA-485 connections
1.1.2 SAFETY PRECAUTIONS
NOTE
All equipment must be installed in accordance with
NEC and local codes. For more information on
local codes, please check state/local regulations in
your area.
CAUTION
To prevent damage to any of the electrical
components of this product and to ensure that it
continually operates, do not attempt to alter any
componentry.
SECTION 1
HARDWARE INSTALLATION
The following document provides general information relative to the hardware installation of the AspectFT-
Matrix MAX Area Controller hardware. Please read through this document carefully before proceeding with
the hardware installation process.

1-2 AspectFT-Matrix MAX Area Controller Installation Guide (1/05/2015)
1.1.3 STATIC DISCHARGE PRECAUTIONS
WARNING
Follow the precautions provided specific to
static discharge.
Static discharge can produce voltages high enough to damage electronic circuits and components. The
microprocessor and associated circuitry are sensitive to static discharge. Follow these precautions while
working with the product during service and installation:
.Work in a static free environments
.Discharge any static electricity you may have accumulated by touching a known, securely grounded
object.
.Do not handle the printed circuit board (PCB) without proper protection against static discharge. Users
should handle PCB components while wearing a ground bracelet or strap (connected to Earth
ground).
1.1.4 MISCELLANEOUS PRECAUTIONS
NOTE
Do not apply this product to aerospace systems,
mainline communication systems, nuclear power
control systems or medical equipment involved in
life support that require high reliabilitiy and safety,
as it is not intended for such use or application.
NOTE
This device complies with Part 15 of the FCC rules.
Operation of this equipment is subject to the
following conditions:
1.This device may not cause harmful interference.
2.This device must accept any interference
received, including interference that may cause
undesired operation.

AspectFT-Matrix MAX Area Controller Installation Guide (1/05/2015) 1-3
1.2 PRODUCT MOUNTING
The AspectFT-Matrix MAX Area Controller ships with an approved enclosure consistent with most
electrical standards and regulations. It is intended for indoor applications only and should be installed in a
location that is dry, away from direct sunlight and free from excessive dust, vibration, and electrical
interference. Mount the product in a location that allows clearance for ease of wiring and service. Use the
two keyhole-style screw holes located on the back of the enclosure for assistance with mounting. The
product is capable of being mounted on a DIN rail by installing the provided mounting bracket.
Figure 1-1 Product Mounting
1.2.1 ENCLOSURE COVER
The enclosure cover of the product is designed to be removed for servicing the device. The cover is
removed by unscrewing the single screw in the cover then lifting the cover away from the base as shown.
Care should be taken when removing the cover on a mounted unit to prevent it from being dropped and
damaging the cover.

1-4 AspectFT-Matrix MAX Area Controller Installation Guide (1/05/2015)
Figure 1-2 AspectFT-Matrix MAX enclosure
Figure 1-3 Enclosure cover removal

AspectFT-Matrix MAX Area Controller Installation Guide (1/05/2015) 1-5
1.3 HARDWARE LAYOUT
Below is an illustration of the hardware layout of the product. The device includes connection ports for
Main Power, EIA-485 network connectivity and Ethernet connectivity. Depending on the model of Matrix
MAX Area Controller you have purchased, your application may involve using one of the or both EIA-485
network ports.
Figure 1-4 - AspectFT-Matrix MAX Area Controller Board Layout

1-6 AspectFT-Matrix MAX Area Controller Installation Guide (1/05/2015)
1.3.1 POWER REQUIREMENTS
This product requires a transformer capable of providing 24VAC power to the product. Use of a UL listed
24VAC transformer is recommended.
To connect power, use the supplied two-position terminal plug. The output leads from the transformer
should be connected to the terminal plug. The terminal plug is then connected into the socket marked J1
on the PCB. American Auto-Matrix recommends using 18AWG cable for power wiring.
24VAC
Output
J1
PWR PWR
Figure 1-5 Connecting Power to Matrix MAX Area Controller
WARNING
Do not share the power source for AspectFT-
Matrix MAX MAX Area Controller with other
devices. Damage to the product as a result of
improper power and wiring will void product
warranty.
1.3.1.1 LED INDICATION
The PCB of the product includes diagnostic LEDs, providing user feedback when power has been
connected to the device. When power is connected, all three of the LEDs should be illuminated. The
power diagnostic LEDs are located near port 1’s terminal block switches.
24V
5V
3.3V
Figure 1-6 Power LEDs on AspectFT-Matrix MAX Area Controller PCB

AspectFT-Matrix MAX Area Controller Installation Guide (1/05/2015) 1-7
1.4 COMMUNICATION CONNECTIONS
Communication connections should be made with care. To avoid conflicts with existing networks, it is
recommended all communication configuration of the product be performed prior to connecting physical
media from the building automation system. Refer to AspectFT-Studio On-Line Help System for additional
information.
CAUTION
It is recommended that all software configuration
be performed prior to physically connecting this
product to any associated communication
networks.
1.4.1 ETHERNET NETWORK
Ethernet is a high-speed network layer widely used in commercial buildings. This product includes an on-
board Ethernet adapter, allowing users communicate with the device for product setup, as well as for
building automation routines and applications. The Ethernet network interface is located on the single
board computer card.
The on-board Ethernet network interface supports 10Base-T (10Mbps) and 100Base-T (100Mbps)
Ethernet connections. The product will automatically switch to 100Base-T operations if other devices and
cabling connected to the same subnetwork support this
1.4.1.1 CABLE TYPE AND LENGTH
Use an approved Category 5 (CAT5) Ethernet patch cable with RJ-45 plugs to connect the product to an
Ethernet switch or hub. Use professionally manufactured cables to assure reliable transmission rates and
connectivity between devices. Category 5 wiring is typically limited to about 100 meters (320 feet).
Pin 7
Reserved
Pin 8
Reserved
Pin 6
Receive -
Pin 5
Reserved
Pin 1
Transmit +
Pin 2
Transmit -
Pin 3
Receive +
Pin 4
Reserved
Figure 1-7 Standard Ethernet Connection Pinout

1-8 AspectFT-Matrix MAX Area Controller Installation Guide (1/05/2015)
1.4.2 EIA-485 NETWORK
The EIA-485 network ports are used to accommodate serial network protocols that utilize two-wire,
shielded-twisted pair cabling - such as BACnet MS/TP, American Auto-Matrix PUP, and Modbus RTU.
Terminals for EIA-485 network connections are located on the left side of the controller board and are
labeled J2 and J3. Each terminal has a connection for Network Positive (N+), Network Negative (N-), and
Signal Ground Reference Wire (SG, commonly used for serial networks that utilize a reference wire for
electrical stability).
The Matrix Area Controller should be installed at an electrical end of the EIA-485 network. Avoid network
topologies where the network is “t-tapped” or “starred”.
1.4.2.1 CONNECTING EIA-485 NETWORKS
Connect the serial network to the determined EIA-485 port. Be sure to maintain network polarity at all
times. Failure to do so can result in loss of network communications. For protection against ground loops
or noise, connect the drain wire of the 485 network wire to a reliable earth ground.
N+
N-
Figure 1-8 MS/TP Network Connection
1.4.2.2 NETWORK TERMINATION AND BIASING
Adjacent to each EIA-485 port is a two-position switch block, which applies termination and biasing to your
485 network. To enable either termination (TERM) or biasing (BIAS), configure the respective switch
towards the ON (Up) position.
When applying termination, be certain that it is applied at both ends of your EIA-485 network at the two
end devices. In termination applications, biasing should also be enabled to ensure proper idle state
voltage.
TERM BIAS
SW2
Figure 1-9 Termination and Biasing Switches and LED Indicators

AspectFT-Matrix MAX Area Controller Installation Guide (1/05/2015) 1-9
1.4.2.3 LED INDICATION
Located below the network termination and biasing switches is a set of diagnostic LEDs that can be useful
for troubleshooting network communication problems.
TXD
RXD
PERR
BERR
Figure 1-10 Network Diagnostic LEDs
Table 1-1: EIA-485 LED Diagnostics
LED Position Notes
TXD This LED will flash anytime data is transmitted by the Matrix Area Controller to
the field bus network. On an active network, this light should flash anytime the
device passes a network token to another device or routes a request made by
another device.
RXD This LED will flash anytime data is received by the Matrix Area Controller from
the field bus network. On an active network, this light should flash anytime
there is activity on the network.
PERR This LED will flash upon the event a parity error occurs on the network. A parity
error is caused by a mismatch between the calculated checksum and value
received with the packet. The most common reason for a packet error is if more
than one unit is attempting to communicate on the network at once, indicating
the presence of a duplicate token or duplicate address.
BERR This LED will flash upon the event a byte error occurs on the field bus network.
A byte error is caused when information is lost during network communications,
and is detected in the start, stop, or data bit timings. The most common reason
for a byte error is due to devices attempting to communicate on the network at
different baud rates.
NOTE
This product utilizes native EIA-485
communication drivers. Therefore, all network
communications to field-devices should occur over
specified network media as outlined in American
Auto-Matrix product documentation. The use of
media converters (such as Serial-to-Ethernet
modems) not certified or sold by AAM is
discouraged.

1-10 AspectFT-Matrix MAX Area Controller Installation Guide (1/05/2015)
1.5 PRODUCT SPECIFICATIONS
1.5.1 EIA-485 CONNECTIONS
.Connection Type: 3 position
.Termination Count: model dependent, up to 2 connections
.Serial: EIA-485
.Baud Rates Supported: 9.6kbps, 19.2kbps, 38.4kbps, 57.6kbps, 76.8kbps, 115.2kbps
.Data isolation: GMR Data Isolated
.Termination: 249 Ohm, switch selectable
.Biasing: 3.32k, switch selectable
.LED: indication for TXD, RXD, Byte-Error, Parity-Error
.Protocol: license enforced, driver selectable
.Network Load: license enforced, up to 64 devices per port, license restrictions apply
1.5.2 ETHERNET CONNECTION
.Termination Count: 1 connection
.Connection Type: RJ-45, female
.Speed: 10/100Mb auto-sensing
1.5.3 PRODUCT SETUP AND CONFIGURATION
.Software: AspectStudio with USB Copy Protection Key and License File
.Browser: Windows Internet Explorer v7.0 or later, Mozilla Firefox v3.0 or later, Apple Safari v3.2 or
later, Google Chrome v1.0 or later
1.5.4 CPU
.Processor: ARM Cortex-A8 1 Ghz
.Memory: 512MB RAM, 2 GB Flash
1.5.5 POWER REQUIREMENTS
.Connection: 2 position
.Power Source: 24 VAC, 50/60Hz, 2.7A max
1.5.6 OPERATING CONDITIONS
.Temperature: 32-104o F (0- 40oC) ambient
.Humidity: 0-80%, non-condensing
.Altitude: -2000 to + 10,000 ft. (-650 to + 3500m)
1.5.7 AGENCY APPROVALS
.CE Approved
.FCC, Class A Computing Device; Part 15
.UL listed 916, Management Equipment, Energy (PAZX)

This document is protected by copyright and is the property of American Auto-Matrix. It may not be used or copied in whole or
in part for any purpose other than that for which it is supplied without authorization. This document does not constitute any
warranty, expressed or implied. In the event of any conict between the English language version and the translated version, the
English language version shall take precedence.
Every eort has been made to ensure that all information was correct at the time of publication. American Auto-Matrix reserves
the right to alter specications, performance, capabilities, and presentation of this product at any time.
All trademarks, trade names, service marks, or logos contained herein are the property of their respective owners and are only
used to describe the product(s) being listed in this document. Every eort has been made to properly capitalize, punctuate, and
identify and attribute all required trademarks with the use of the appropriate ® or ™ wherever practical and possible. American
Auto-Matrix is not aliated or a licensee holder of any of the trademarks other than those detailed below. American Auto-Matrix,
the American Auto-Matrix logo, the Rocket-A, Smart Building Solutions, Aspect, Aspect-Enterprise, Aspect-Facility, Aspect-Matrix
MAX, Aspect-Nexus, Aspect-Studio and vSTAT are either registered trademarks or trademarks of American Auto-Matrix.
One Technology Lane |Export, PA 15632 |P(724) 733-2000 |F(724) 327-6124
Part No : 1E-01-00-0067
© American Auto-Matrix, A Cylon Energy, Inc. Company. American Made
Table of contents
Other Cylon Controllers manuals
Popular Controllers manuals by other brands

Magicfx
Magicfx FX-COMM4NDER MFX3203 User and installation manual

Oriental motor
Oriental motor LIMO EZS Series user manual

PowerGuard
PowerGuard PH5 PowerHalt Programming manual

Power Master
Power Master Mastertorque 9636 instruction sheet

K-Rain
K-Rain BL-KR V1.0 Quick installation guide

Air Lift
Air Lift 72000 user guide