Cypher Technology Ltd 2008 7
4 Detailed Operation
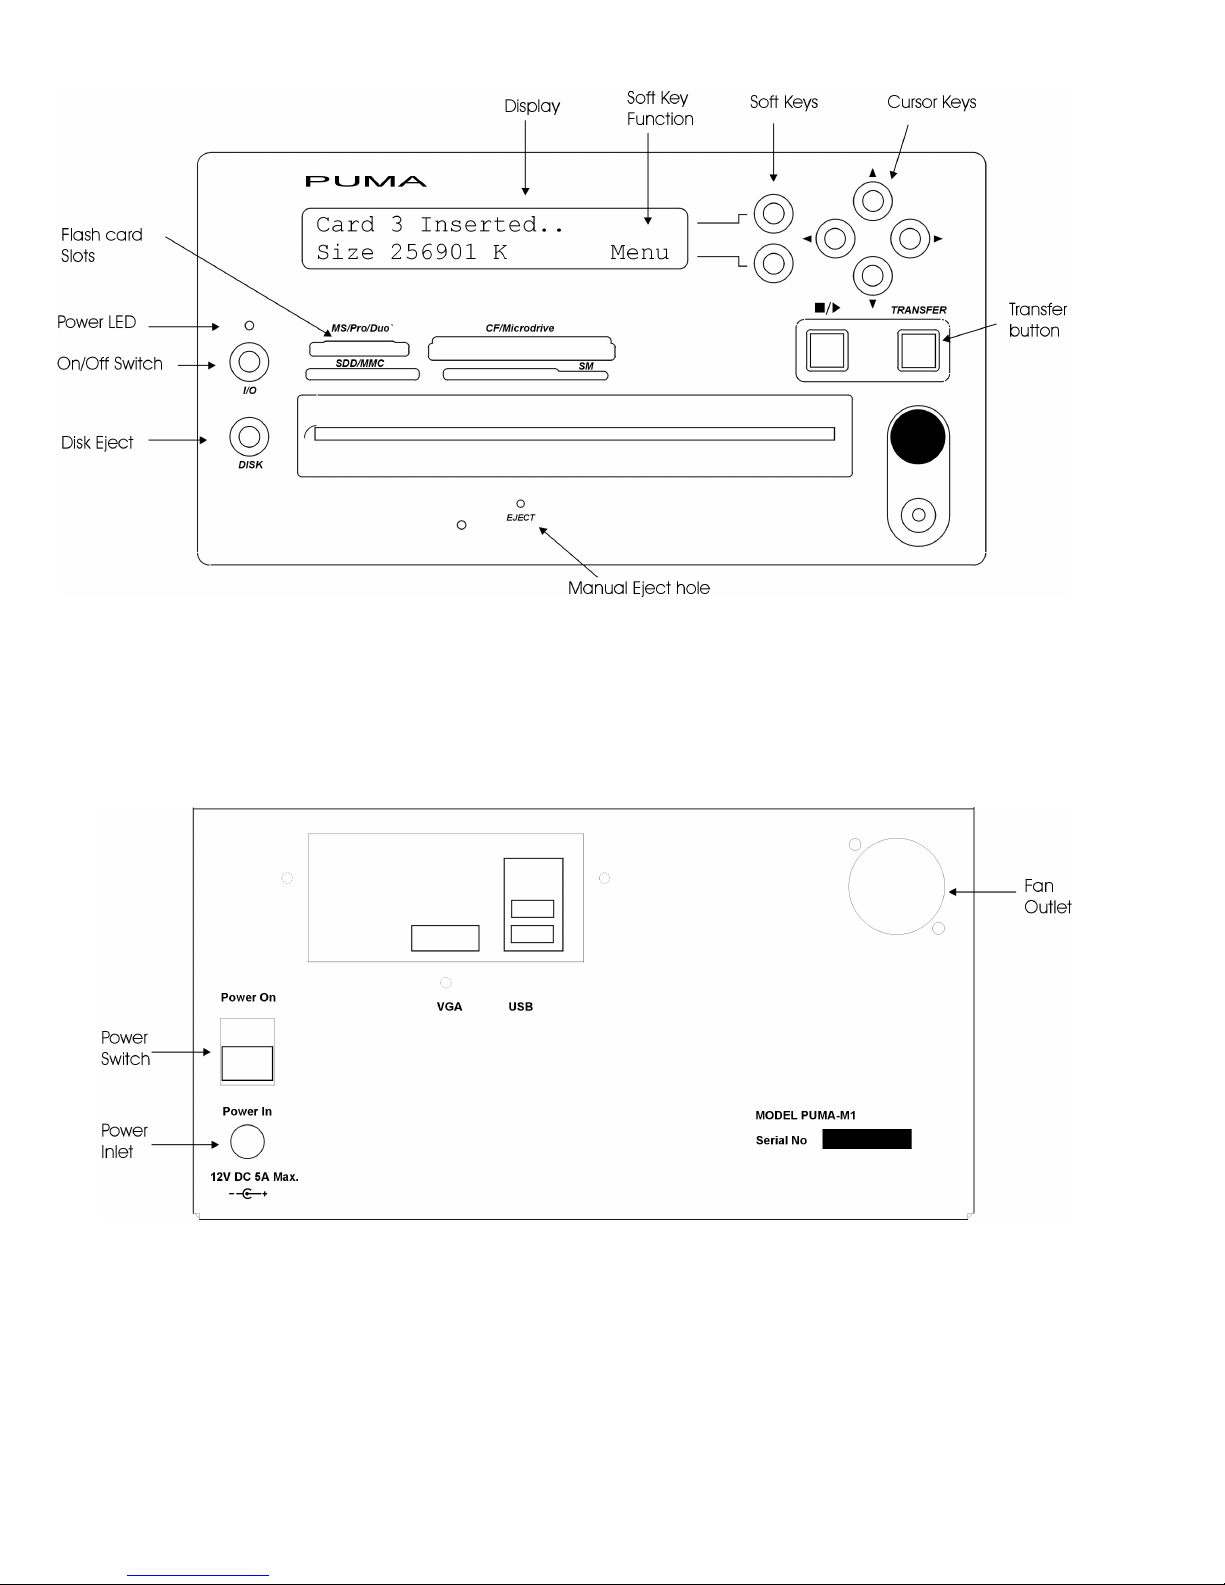
4.1 Setting up and Powering Puma
1. Connect the supplied 12V 5A power supply (PSU) lead to rear panel power inlet and
screw up the connector. Connect the PSU to a mains supply using the supplied
cable.
2. Remove any Flash card.
3. Switch on the Power Switch on the rear panel (switch up). The display panel will
light up and show “Press I/O”. The green front panel LED will flash.
4. Press the I/O (On/Off) switch below the green Flashing LED. “On..” will be displayed
and the green LED will be on constantly.
5. After a few, a growing line of dots will appear. This line will extend to the full width of
the screen and then “Wait” will be displayed. A few seconds after that “Ready” will
be displayed and the system is ready for use. The whole boot up procedure, from
switch on, takes about 20 seconds.
6. When PUMA makes a Working Copy of RAW image files, it creates JPEG versions
of these files for ease of viewing across a wide range of platforms. Where this
feature is required, it must be enabled from the menu. This is done by selecting the
“Enable JPEGs” function in the Menu (Section 4.13 ).
7. Check that the displayed time and date are correct. If not, use the “Adjust Time”
menu function to adjust the time and date (Section 4.15).
4.2 Turning Off (Display Software Revision and Serial Number)
Press the I/O button below the green LED to shutdown. Press {Y} to confirm. When
“Switch Off” is displayed, turn off the rear panel Power Switch.
If {N} is pressed the Software Revision and Serial Number (where appropriate) will be
displayed and Puma will resume operation.
4.3 Automated Transfer Operation
1. Place the Flash card in appropriate slot. If a USB drive is to be archived, plug this
into either of the USB slots in the rear panel. An extension lead may be required for
bulky USB flash drives
2. Place a blank CD-R or DVD +/- R in the drive. The Master Copy is generated first.
The size of the Flash card is shown on the display when it is inserted. A CD will hold
730Mbytes and a standard DVD 4,700 Mbytes. Where the flash card is larger than
the disk size, multiple disks will be produced. These disks will be automatically
numbered as Master Disk #1, Master Disk #2 etc. A Windows utility program is
supplied, which combines the multiple disks into one master image file for ease of
access. This utility program, called ImageMaker, is copied to the first disk of the set.