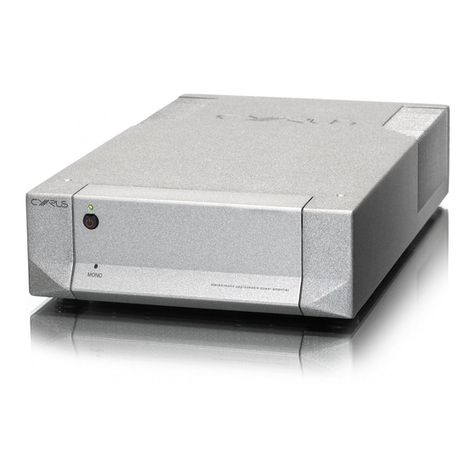
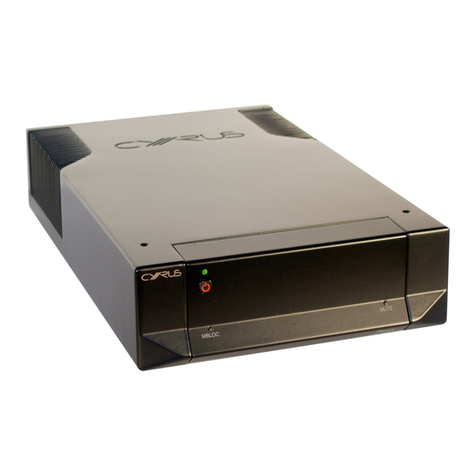
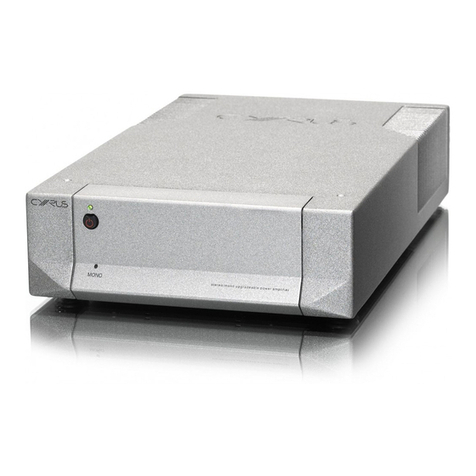
Cyrus aPA7.5 Mono Installation instructions


MUTE
aPA7.5
Mono
Zero Feedback
1$
1@ 1#
CAUTION:REPLACE WITH
SAME TYPE FUSE.
ATTENTION: UTILISER UN
FUSIBLE DE RECHANGE DE
MEME TYPE
FUSE: T2A/230V
230V-50/60Hz @ 320W
SPEAKERS
MC-BUS
OUT
IN
CHAIN
RCABAL
AUDIO
INPUT
MADE IN ENGLAND
ab c gfhd
i1)
1!
e
Fig 4a
Fig 1
Cyrus aPA7.5 Mono
Fig 2
Fig 4b
Fig 3
Cyrus CD Player
Cyrus FM tuner
Cyrus Pre-amplifier
Cyrus aPA7.5 Mono
Cyrus aPA7.5 Mono
aPA7.5 Mono
R R
R L
MADEIN ENGLAND
RL
L
R
Right
bass
Right
treble
+
-
-
+
Left
bass
Left
treble
+
-
-
+
MADEIN ENGLAND
RL
L
R
Right
bass
Right
treble
+
-
-
+
Left
bass
Left
treble
+
-
-
+

Cyrus aPA7.5 Mono User Instructions
1
GB
GB
IMPORTANT! Read before operating this equipment!
WARNING: To reduce the risk of electrical shock do not remove any unit
covers or panels. There are no user serviceable parts in this product.
WARNING: To reduce the risk of electric shock, do not expose this equipment
to rain or moisture.
HEED WARNINGS: All warnings on the product and in the operating
instructions should be adhered to.
READ ALL THE INSTRUCTIONS: All the safety and operating instructions
should be read before the product is operated.
RETAIN INSTRUCTIONS: The safety and operating instructions should be
retained for future reference.
FOLLOW INSTRUCTIONS: All operating and use instructions should be
followed.
CLEANING: Unplug this product from the mains before cleaning. Do not use
liquid or aerosol cleaners. Use a damp cloth for cleaning.
WATER AND MOISTURE: Do not use this product near water - for example,
near a bath tub, wash bowl, kitchen sink, or laundry tub, in a wet basement; or
near a swimming pool and the like. The product must not be exposed to
dripping or splashing and no objects filled with liquids, such as vases, shall be
placed on the product.
HEAT: The product should be situated away from heat sources such as
radiators, stoves, or any other products (including amplifiers) that produce
heat.
VENTILATION: Slots and openings in the cabinet are provided for ventilation,
to ensure reliable operation of the product and to protect it from overheating
and these openings must not be blocked or covered. The openings should
never be blocked by placing the product on a bed, sofa, rug or similar surface.
This product should not be placed in a built-in installation such as a bookcase
or rack unless proper ventilation is provided or the manufacturer's instructions
have been adhered to.
OBJECT OR LIQUID ENTRY: Never push objects of any kind into this
product through openings as they may touch dangerous voltage points or
short-out parts that could result in a fire or electric shock.
ACCESSORIES: Do not place this product on an unstable cart, stand, tripod,
bracket, or table. The product may fall, causing serious injury to a child or
adult, and serious damage to the product. Use only with a cart, stand, tripod,
bracket or table recommended by the manufacturer, or sold with the product.
Any mounting of the product should follow the manufacturer's instructions, and
should use a mounting accessory recommended by the manufacturer.
ATTACHMENTS: Do not use attachments not recommended by the product
manufacturer as they may cause hazards.
POWER SOURCES: This product should be operated only from the type of
power source indicated on the marking label. If you are not sure of the type of
power supply to your home, consult your product dealer or local power
company. For products intended to operate from battery power, or other
sources, refer to the operating instructions.
OVERLOADING: Never overload wall outlets, extension cords, or integral
convenience receptacles. This can result in an increased risk of fire or electric
shock.
POWER CORD PROTECTION: Power supply cords should be routed so that
they are not likely to be walked on or pinched by items placed upon or against
them, paying particular attention to cords at plugs, convenience receptacles,
and the point where they exit from the product.
NAKED FLAMES: No naked flame sources, such as candles, must be placed
on this product.
LIGHTNING: For added protection for this product during a lightning storm, or
when it is left unattended or unused for long periods of time, unplug it from the
wall outlet and disconnect the antenna or cable system. This will prevent
damage to the product due to lightning and power-line surges.
CAUTION! POLARISED CONNECTOR (CANADA and USA): To prevent
electrical shock, match wide blade of plug to wide slot, fully insert.
Do not alter or remove this plug if it does not fit your mains power socket.
Have a suitable socket installed by a competent electrician.
POWER SUPPLY:
Connect the moulded IEC connector of the AC cord supplied plugs into the
power inlet ion the rear of the unit. The mains fuse 1) is on the rear panel
next to the power switch. It must only be replaced as follows:
U.K. / Europe 230V T2A 20mm
The mains supply requirement for your Cyrus aPA7.5 Mono is marked on a
label on the rear panel. Before connecting, check that this voltage is the same
as your mains supply.
230V Products: Voltage Range 220V-240V
If you move to an area with a different mains voltage, contact your local Cyrus
distributor to have your product converted.
NOTE FOR UK CUSTOMERS:
The aPA7.5 Mono is supplied with a power cable terminated by a fused 13A
mains plug. This plug should not be removed but if it is removed, dispose of it
safely and do not re-use it. To connect a new 13A plug, proceed as follows:
Connect the brown wire to the terminal marked L or coloured red. Connect the
blue wire to the terminal marked N or coloured black. The internal plug fuse
should be 5A.
SERVICING:
Do not attempt to service this product yourself as opening or removing covers
may expose you to dangerous voltage or other hazards. Refer all servicing to
qualified service personnel.
CONDITIONS REQUIRING SERVICE: Unplug this product from the wall
outlet and refer servicing to qualified service personnel when:
•When the power supply cord or plug is damaged.
•If liquid has been spilled, or objects have fallen into the product.
•If the product has been exposed to rain or water.
•If the product has been dropped or damaged in any way.
•If the product does not operate normally by following the operating
instructions. (Adjust only those controls that are covered by the
operating instructions. Improper adjustment of other controls may
result in damage requiring extensive work by a qualified technician to
restore the product to its normal operation).
•When the product exhibits a distinct change in performance.
REPLACEMENT PARTS: When replacement parts are required, be sure the
service technician has used replacements specified by the manufacturer or
have the same characteristics as the original part. Unauthorised substitutions
may result in fire, electric shock, or other hazards.
SAFETY CHECK: Upon completion of any service or repairs to this product,
ask the service technician to perform safety checks to determine that the
product is in proper operating condition.
PRODUCT SERVICE CENTRES:
For product service or technical advice, contact only authorised Cyrus service
centres. The Cyrus distributors are listed at the end of this instruction manual.
MOVING THE PRODUCT: A product and cart
combination should be moved with care. Sudden stops,
excessive force, and uneven surfaces may cause the
product and cart to overturn.
CAUTION: The exclamation mark is to draw your attention
to important instructions and safety procedures in this
manual.
ATTENTION: The lightning flash warns you of the risk o
f
electrical shock presented by components inside this
product. Unauthorised personnel must not open this unit.

User Instructions Cyrus aPA7.5 Mono
2
GB
GB
Welcome to the world of Cyrus!
Congratulations on your choice of Cyrus Hi-fi products. Our state-of-the-art design
technology and outstanding quality of manufacture has won countless awards
around the world. We are confident that you will derive great pleasure from
owning a product from one of the most recognised and respected
manufacturers of hi-fi equipment.
Please read these instructions carefully before commencing installation. They
provide full guidance to help you install your aPA7.5 Mono safely and
correctly.
Preparations for Installation
Before installing the aPA7.5 Mono check that the following items are included
in the accessory box.
•Power Cable
•4 Loudspeaker plugs
•2 MC-Bus cables
After removing these items, please retain the packaging.
Install the aPA7.5 Mono in a well ventilated location away from sources of high
temperature, dust or humidity. Never stand the aPA7.5 Mono under another
unit or on any surface likely to hamper its cooling or ventilation.
INSTALLATION
Key to the rear panel drawing (Fig.1):
1. + Speaker Outputs 7. Chain Output
2. - Speaker Outputs 8. MC-Bus connections
3. Cooling Fan 9. IEC Power Inlet
4. Balanced (BAL) Input 10. Mains Fuse Holder
5. RCA (phono)/BAL Input Selector 11 Power Switch
6. Unbalanced RCA (phono) Input
Connecting to the AC Mains Supply
Connect the socket on the AC Power cable to the Power inlet i on the rear panel of
the aPA7.5 Mono. Now connect the cable to a suitable AC power point.
The mains power switch 1) on the rear panel of the aPA7.5 Mono should be
left on for normal operation, except when left unattended for a long period
when it should be switched off or disconnected from the AC supply.
Identifying System Channels
Each aPA7.5 Mono drives a single speaker. In a stereo system two aPA7.5
Monos are necessary, in an AV system, up to 5 aPA7.5 Mono amplifiers will
be necessary. Before proceeding to connect your amplifiers, take some time
to organise your system so that you can easily identify which amplifier will be
connected to each speaker.
Connecting a Pre-Amplifier or Surround Decoder
Phono (RCA) fand Balanced input connectors d are available to link the
aPA7.5 Mono to a pre-amplifier or surround decoder.
Phono (RCA) connections are recommended unless the aPA7.5 Monos are a
long distance from the pre-amplifier/decoder, or beside a loudspeaker, then
balanced XLR connections dmay give improved performance.
All aPA7.5 Mono’s must use the same method of input connection.
Input Connection via phono (RCA) interconnects
Set the input selector switch eto RCA. Connect a single phono interconnect
from the phono input fof each aPA7.5 Mono to the corresponding output of
the pre-amplifier/decoder.
In the system illustration Fig.4a, a Cyrus Pre aCA7.5 preamplifier is connected
to two aPA7.5 Mono amplifiers, one for the left channel and one for the right
channel. Input connections are shown using phono interconnects.
Input Connection using Balanced XLR cables
Set the input selector switch eto BAL. Connect a 3-pin XLR cable from the
balanced input dof each aPA7.5 Mono to the corresponding XLR output of
the pre-amplifier/decoder.
Connecting Loudspeakers
Fitting the loudspeaker plugs
Check for polarity indicators (+ and -) on the loudspeaker cable and fit the
plugs provided. Observe any signal directionality markings indicated on the
cable. If an arrow is printed on the cable it should point toward the speaker.
If additional or replacement loudspeaker plugs are required for the aPA7.5
Mono ensure that the correct ‘BFA’ type are purchased.
Connecting the cables
After checking all the assembled cables for polarity they can be plugged into
the loudspeakers and amplifiers. The ‘+’ and ‘-’ terminals of each loudspeaker
must be connected to the matching ‘+’ and ‘-’ terminals of each amplifier as
follows-
Connect the left loudspeaker to the rear panel sockets a (red speaker plug)
and b(black speaker plug) of the left channel aPA7.5 Mono. Connect the right
loudspeaker to the rear panel sockets a red speaker plug) and b(black
speaker plug) of the right channel aPA7.5 Mono.
Dual outputs are provided for the convenient connection of bi-wiring speaker
cables. Fig.4a shows a wiring schematic for a bi-wired stereo system.
Chain Output
The Chain output gallows more than one aPA7.5 Mono to be connected to
each channel of a pre-Amplifier or decoder.
Note: The Chain output is operational whether phono (RCA) or Balanced XLR
input connection is made to the aPA7.5 Mono.
Bi-Amplification
The Chain facility can be used with two or more aPA7.5 Mono amplifiers per
channel, for Bi/Tri-amping by connecting the Chain output of the first aPA7.5
Mono to the phono inputs of the next aPA7.5 Mono. Such a bi-amplified
system provides the sonic benefits of totally separate power amplification for
the bass and treble units of the loudspeakers.
In the bi-amplified system illustration Fig.4b, a Cyrus Pre aCA7.5 preamplifier
is connected to four aPA7.5 Mono amplifiers - two for the left channel and two
for the right channel. Phono input connections are shown.
Note: The Chain output is operational whether phono (RCA) or Balanced XLR
input connection is made to the aPA7.5 Mono.
Gain Matching
All Cyrus power amplifiers, and all power amplifier stages in Cyrus integrated
amplifiers have the same voltage gain characteristics. This means that you
can use the aPA7.5 Mono in conjunction with any Cyrus amplifier for bi-
amping, etc. without any set-up adjustments being required.
MC-Bus System Connection (Optional)
Connecting the MC-Bus sockets hof the aPA7.5 Mono in an MC-Bus system
provides unified system power control. An MC-Bus loop is established by
connecting single phono cables from the MC-Bus output of one unit to the MC-
Bus input of another in a daisy-chain. Complete the loop by returning the MC-
Bus output of the final component to the MC-Bus input of the first (see
example system connections in Fig.3).
With MC-Bus established you can control the power function of the system
from the front panel or remote control of the main Cyrus amplifier or Surround
Processor.

Cyrus aPA7.5 Mono User Instructions
3
GB
GB
OPERATION
Key to the front panel drawing (Fig.2)
12. Standby Switch
13. Standby Light
14. Mute Light
Switching On
When power is applied, the STANDBY key 1@ may be used for power control.
The Standby light 1# shows red when the aPA7.5 Mono is in Standby and
green when operational.
Remote power control can also be enabled by connecting the MC-Bus sockets
hof the aPA7.5 Mono to a Cyrus system which includes a Preamplifier,
Integrated amplifier or Surround decoder. A number of aPA7.5 Monos may be
connected in this way to provide remote standby control of all the system
power amplifiers.
Mute Indicator
The MUTE Indicator 1$ will glow red if the protector of the aPA7.5 Mono
switches in. This occurs for a few seconds following Standby operation or if a
temporary overload condition arises. If the MUTE Indicator glows continually,
refer to the Troubleshooting Guide.
Cooling
Due to the substantial power of the aPA7.5 Mono, air-cooling is provided via a
fan c. The fan in the aPA7.5 Mono features an Intelligent Power Controller.
When the unit is idling the fan turns off. As the amplifier warms up the fan
progressively speeds up, reaching maximum speed at maximum temperature.
In this way the fan speed is always related to the power output of the unit and
fan noise is barely discernible even at low volume levels. In quiet passages
and between tracks on a CD, the fan will slow down so as not to encroach on
the listening experience.
TROUBLESHOOTING GUIDE
If your aPA7.5 Mono is not operating properly, disconnect the power and
check all connections using the notes in this handbook. If problems persist,
the checklist below may be helpful.
If you are in doubt, consult your dealer.
No sound from both speakers
Check that the pre-amplifier and the power
amplifiers are on.
Check that the pre-amplifier and the power
amplifiers are not muted.
Check that the pre-amplifier responds to
front panel commands.
Check that the relevant program source is
selected.
Check that the correct amplifier input is
selected.
The standby lights should be
green.
The red Mute lights should not
be lit.
Tape Monitor should not be
selected.
The source device must be
operating normally.
The RCA/BAL switch must be
switched to the appropriate
input.
Check that the loudspeakers are
connected.
The connection at the
terminals of the loudspeakers
and the aPA7.5 Mono should
be checked.
No sound from one speaker
There may be a short circuit in the
speaker connections.
The protection circuit will
operate and the red Mute light
will stay lit.
Specifications
Power Supply
Voltage:....................................................................As plate on rear of unit
Power Consumption
Standby............................................................................................. (6.4W)
ON (No Signal)................................................................................... (23W)
ON (150W)....................................................................................... (255W)
Safety Requirements ................................................................... EN 60065
Enclosure
Dimensions (WxHxD)..................................................... 215 x 75 x 365mm
Weight.................................................................................................5.5Kg
Material ..............................................................................Die cast chassis
Audio Performance
Input Sensitivity (50W 8Ω) RCA.......................................................381mV
Input Sensitivity (50W 8Ω) BAL........................................................775mV
Input Sensitivity (150W 8Ω) RCA....................................................660mV
Input Sensitivity (150W 8Ω) BAL .......................................................1.3V
Input Impedance (RCA) ......................................................................19kΩ
Input Impedance (BAL).......................................................................20kΩ
Output Power (Continuous) 8Ω..................................................150Wrms
Output Power (Continuous) 4Ω..................................................240Wrms
THD+N @2/3 full power.............................. (20Hz - 20kHz 8Ω).....<0.05%
(1kHz 8Ω).................<0.004%
Slew Rate (input filter bypassed) ................................................... 700v/µS
Frequency Response (-3dB)................................................. 0.5Hz-130kHz
S/N Ratio (Ref. 150W / 8Ω)............................................................ 114dBA
Chain Output (buffered) .................................................(unity gain) 660mV
(ref. 660mV RCA input, 1.3V Balanced input.)
Cyrus reserves the right to change all specifications without notice. E & OE
WARRANTY
The warranty card enclosed should be completed by the Dealer and the
purchaser and returned to CYRUS or its Distributor within 8 days of purchase.
No Dealer or Distributor may vary the terms of this warranty which is personal
to the original Purchaser and is not transferable.
Please retain the sales receipt as proof of purchase.
Warranty claims must wherever possible be made through the Dealer from
whom the equipment was purchased.
This warranty excludes:
•Damage caused through neglect, accident, misuse, wear and tear, or
through incorrect installation, adjustment or repair by unauthorised
personnel. Any unauthorised servicing will result in loss of guarantee.
•Liability for damage or loss occurring in transit to or from the purchaser.
•Consequential damage, loss or injury, arising from or in conjunction with
this equipment.
Equipment for attention under warranty should be consigned return carriage
paid. If returned equipment is found to comply with the published specification,
CYRUS reserves the right to raise a charge.
The above conditions do not affect your statutory rights as a consumer.

Gebrauchsanleitung Cyrus aPA7.5 Mono
4
D
D
WICHTIGE HINWEISE! Unbedingt vor Benutzung des
Gerätes lesen!
Warnung: Um die Gefahr eines elektrischen Schlages zu vermeiden, dürfen die
Abdeckungen oder Gehäusewände dieses Geräts nicht entfernt werden. Das
Produkt enthält keine vom Benutzer zu wartenden Teile.
Warnung: Um die Gefahr eines elektrischen Schlages zu vermeiden, darf dieses
Gerät weder Regen noch Feuchtigkeit ausgesetzt werden.
BEACHTEN SIE DIE VORSICHTSHINWEISE: Alle Vorsichtshinweise am Produkt
und in der Gebrauchsanleitung müssen beachtet werden.
LESEN SIE ALLE ANLEITUNGEN: Alle Anweisungen zur Sicherheit und zum
Betrieb müssen vor der Benutzung des Gerätes gelesen werden.
BEWAHREN SIE DIE ANLEITUNGEN AUF: Die Anweisungen zur Sicherheit und
zum Betrieb müssen zum Nachlesen aufbewahrt werden.
BEFOLGEN SIE DIE ANWEISUNGEN: Alle Anweisungen zur Sicherheit und zum
Betrieb müssen befolgt werden.
REINIGUNG: Vor der Reinigung den Netzstecker ziehen. Keine flüssigen
Reinigungsmittel oder Sprays verwenden. Das Gerät mit einem angefeuchteten
Tuch reinigen.
WASSER UND FEUCHTIGKEIT: Verwenden Sie dieses Produkt nicht in der
Nähe von Wasser, z. B. Badewanne, Waschbecken, Spüle, Waschkübel, im
feuchten Keller oder in der Nähe eines Swimmingpools oder dergleichen. Das
Gerät darf niemals tropfenden oder spritzenden Flüssigkeiten ausgesetzt werden.
Stellen sie keinesfalls Vasen oder andere flüssigkeitsgefüllte Behälter auf das
Gerät.
WÄRME: Das Produkt darf nicht in der Nähe von Wärmequellen wie Heizkörpern,
Heizgeräten, Öfen oder von anderen wärmeerzeugenden Produkten
(einschließlich Verstärkern) aufgestellt werden.
LÜFTUNG: Die Schlitze und Öffnungen im Gehäuse dienen zur Belüftung, welche
den ausfallsicheren Betrieb des Produkts sicherstellt und es vor übermäßiger
Erwärmung schützt. Diese Öffnungen dürfen nicht blockiert oder verdeckt werden.
Aus dem Grund darf das Produkt nicht auf ein Bett, ein Sofa, einen Teppich oder
eine ähnliche weiche Oberfläche gestellt werden. Das Produkt eignet sich nicht für
den Einbau in ein Bücherregal oder ein Gestell, es sei denn, für eine
ausreichende Belüftung ist gesorgt und die Anweisungen des Herstellers werden
eingehalten.
EINDRINGEN VON GEGENSTÄNDEN ODER FLÜSSIGKEITEN: Durch die
Öffnungen dürfen keinerlei Gegenstände in das Gerät eingeschoben werden, da
diese spannungsführende Punkte berühren oder Teile kurzschließen könnten,
was einen Brand oder elektrischen Schlag verursachen kann.
ZUBEHÖR: Stellen Sie dieses Produkt nicht auf einen instabilen Rollwagen,
Ständer, Stativ oder Tisch oder bringen Sie es nicht an einer instabilen Halterung
an. Es kann herunterfallen, wobei Personen verletzt werden und Schäden am
Produkt entstehen können. Verwenden Sie nur Rollwagen, Ständer, Stative,
Halterungen oder Tische, die vom Hersteller empfohlen oder die mit dem Produkt
verkauft werden. Bei der Wandmontage des Produkts sind die Anweisungen des
Herstellers zu befolgen und das vom Hersteller empfohlene Zubehör ist zu
verwenden.
ZUSATZGERÄTE: Verwenden Sie keine Zusatzgeräte, die nicht vom Hersteller
empfohlen werden, da Gefahren entstehen können.
NETZSPANNUNG: Dieses Produkt darf nur mit der auf dem Geräteschild
angegebenen Netzspannung betrieben werden. Wenn Sie nicht wissen, welche
Netzspannung bei Ihnen vorliegt, wenden Sie sich an Ihren Fachhändler oder Ihr
Elektrizitätswerk. Hinweise zu den Produkten, die mit Batterie oder anderen
Stromquellen betrieben werden, entnehmen Sie der Bedienungsanleitung.
ÜBERLAST: Wandsteckdosen, Verlängerungskabel oder integrierte Steckdosen
dürfen nicht überlastet werden, da dies die Gefahr eines Brandes oder
elektrischen Schlages verursachen kann.
NETZKABELSCHUTZ: Netzkabel müssen so verlegt werden, dass Tritte auf das
Kabel oder Einklemmen durch Gegenstände verhindert werden. Besonders ist auf
die Bereiche des Kabels in der Nähe eines Steckers, einer Steckdose oder der
Austrittsstelle aus dem Gerät zu achten.
OFFENE FLAMME: Offene Flammen wie z. B. Kerzen dürfen nicht auf das Gerät
gestellt werden.
BLITZSCHUTZ: Bei Gewittern, oder wenn das Produkt längere Zeit unbeauf-
sichtigt oder unbenutzt bleibt, ziehen Sie als zusätzliche Schutzmaßnahme den
Netzstecker, und trennen Sie die Antenne oder das Kabelsystem. Damit werden
Schäden durch Blitz oder Überspannung verhindert.
NETZVERSORGUNG:
Der eingekerbte IEC-Stecker des mitgelieferten Netzkabels gehört in den
entsprechenden Anschluss iauf der Rückseite des Geräts. Die Netzsicherung 1)
befindet sich ebenfalls auf der Rückseite neben dem Netzschalter. Sie darf
ausschließlich durch folgende Typen ersetzt werden:
230V T2A 20 mm
Die erforderliche Netzspannung für Ihren Cyrus aPA7.5 Mono ist auf dem
rückseitigen Typenschild angegeben. Stellen Sie vor dem Anschluss sicher, dass
diese Ihrem örtlichen Stromnetz entspricht, z. B.
für Geräte mit 230V Spannungsbereich von 220 V bis 240 V
Wenn Sie in eine andere Region mit unterschiedlicher Netzspannung umziehen,
wenden Sie sich an Ihren Cyrus Vertrieb, um die Anpassung des Geräts
vornehmen zu lassen.
REPARATUREN:
Versuchen Sie nicht, dieses Produkt selbst zu reparieren oder die
Verkleidungen zu entfernen, da Sie sich dadurch gefährlicher Spannung
oder anderen Gefahren aussetzen würden. Überlassen Sie Reparaturen
stets qualifizierten Fachleuten.
UMSTÄNDE, DIE REPARATUREN ERFORDERN: Ziehen Sie den Netzstecker
und beauftragen Sie den Kundendienst mit der Reparatur des Gerätes, wenn:
•Netzkabel oder -stecker beschädigt sind
•Flüssigkeit oder Gegenstände in das Gerät eingedrungen sind
•das Gerät Regen oder Wasser ausgesetzt wurde
•das Gerät heruntergefallen oder anderweitig beschädigt ist
•das Gerät unter Befolgung der Bedienungsanleitung nicht normal
funktioniert. Verstellen Sie nur die Regler, die in der Bedienungs-
anleitung beschrieben werden. Das unsachgemäße Verstellen von
anderen Reglern kann Schäden verursachen und aufwendige
Reparaturen durch einen qualifizierten Techniker erfordern, um das
Gerät wieder in seinen normalen Betriebszustand zu versetzen.
•das Produkt eine deutliche Leistungsminderung aufweist - in dem Fall ist
eine Reparatur notwendig.
ERSATZTEILE: Wenn Ersatzteile erforderlich sind, sollten Sie sich vergewissern,
dass der Techniker Ersatzteile verwendet, die vom Hersteller angegeben werden
oder die die gleichen Eigenschaften wie die Originalteile aufweisen. Unzulässige
Ersatzteile können Brände, elektrischen Schlag oder andere Gefahren
verursachen.
SICHERHEITSKONTROLLE: Bitten Sie den Techniker, im Anschluss an
Wartungs- oder Reparaturarbeiten Sicherheitskontrollen durchzuführen, um den
ordnungsgemäßen Betriebszustand des Gerätes zu bestätigen.
KUNDENDIENSTZENTRALEN:
Wenden Sie sich bei Fragen zum Produktservice oder bei technischen Problemen
nur an den autorisierten Cyrus-Kundendienst. Entsprechende Adressen finden
Sie auf der letzen Seite dieser Bedienungsanleitung.
TRANSPORT: Wenn das Produkt auf einem Wagen transportiert
wird, ist Vorsicht geboten. Durch plötzliches Anhalten, übermäßige
Kraftanwendung und unebenen Boden kann der Wagen mit dem
Produkt umstürzen.
VORSICHT: Das Ausrufungszeichen soll Ihre Aufmerksamkeit auf
besonders wichtige Bedienungs- und Sicherheitshinweise in dieser
Anleitung lenken.
ACHTUNG: Das Blitzzeichen weist Sie auf die Gefahr eines
elektrischen Schlages durch Bauteile im Innern des Gerätes hin.
Öffnen des Gerätes nur durch fachkundiges Personal.
Cyrus aPA7.5 Mono Gebrauchsanleitung
5
D
D
Willkommen in der Cyrus Welt!
Vielen Dank, dass Sie sich für Produkte aus dem Hause Cyrus entschieden
haben. Mit „state-of-the-art“ Konzeptionen und hervorragender Produktqualität
wurde uns weltweit vielfache Anerkennung zuteil. Wir sind sicher, dass Ihnen
dieses Gerät – von einem der meistgeschätzten und anerkannten HiFi-
Hersteller – stets viel Freude bereiten wird.
Lesen Sie bitte diese Anweisungen sorgfältig durch, bevor Sie mit der
Installation beginnen. So können Sie Ihren Cyrus aPA7.5 Mono sicher und
korrekt in Betrieb nehmen.
Vorbereitung zur Installation
Prüfen Sie zu Beginn der Installation, ob der Verpackungsinhalt des aPA7.5
Mono vollständig ist:
•Netzkabel
•2 x Cinch-Kabel für MC-Bus Verbindung
•4 Lautsprecherstecker
Bewahren Sie die Verpackung nach dem Auspacken auf.
Bauen Sie Ihren aPA7.5 Mono an einem ausreichend belüfteten Platz auf – in
angemessener Entfernung von starken Wärmequellen, geschützt vor Staub
und Feuchtigkeit. Stellen Sie den aPA7.5 Mono niemals unter ein anderes
Gerät oder auf irgendeine Oberfläche, die die Kühlung durch Blockieren der
Ventilationsöffnungen behindern könnte.
INSTALLATION (siehe Abbildung 1)
Erläuterungen zur Abbildung der Rückseite des aPA7.5 Mono
1. Lautsprecher (+) 7. Durchschleif-Ausgang
2. Lautsprecher ( - ) 8. MC-Bus-Anschluss
3. Kühlventilator 9. Netzanschluss
4. Symmetrischer Eingang 10. Netzsicherung
5. RCA / BAL-Eingangsumschalter 11 Netzschalter
6. Cinch- (RCA-) Eingang
Anschluß an die Netzversorgung
Stecken Sie die Buchse des mitgelieferten Netzkabels in den rückseitigen
Netzanschluss ides aPA7.5 Mono. Dann stecken Sie den Netzstecker in die
Steckdose.
Der Netzschalter 1) auf der Rückseite des aPA7.5 Mono sollte normalerweise
eingeschaltet bleiben, es sei denn Sie nutzen das Gerät über längere Zeit
nicht. In diesem Fall sollten Sie ausschalten oder den Netzstecker ziehen.
Zuordnung von Verstärkerkanälen / Lautsprechern
Jeder Lautsprecher benötigt einen Endverstärker aPA7.5 Mono. In einem
Stereosystem sind zwei aPA7.5 Mono erforderlich, für eine AV-Anlage
(Surround) werden bis zu fünf Endverstärker aPA7.5 Mono benötigt. Bevor Sie
Ihre Verstärker anschließen, nehmen Sie sich bitte etwas Zeit, die Zuordnung
der Endverstärker zu den vorhandenen Lautsprechern zu planen.
Vorverstärker oder Surround-Decoder anschließen
Um den Vorverstärker oder den Surround-Decoder an die aPA7.5 Mono
anzuschließen, stehen wahlweise Cinch- (RCA-) foder symmetrische
Eingangsbuchsen dder Type XLR zur Verfügung. In den meisten Fällen sind
Cinch-(RCA-) Verbindungsleitungen ausreichend. Für größere Entfernungen
zwischen den aPA7.5 Mono und dem Vorverstärker / Decoder, oder wenn die
Endverstärker direkt neben den Lautsprechern aufgestellt werden, können
symmetrische Leitungen über die XLR-Anschlüsse dklangliche Vorteile
haben. Alle aPA7.5 Mono in einer Anlage sollten auf die gleiche Art
angeschlossen werden.
Signaleingang über die Cinch- (RCA-) Buchse
Stellen Sie den Eingangs-Wahlschalter eauf RCA. Verbinden Sie die Cinch-
(RCA-) Eingangsbuchsen jedes der aPA7.5 Mono über normale Cinch-
Tonleitungen mit den entsprechenden Ausgangsbuchsen des Vorverstärkers /
Surround-Decoders.
In der Abbildung Fig. 4a ist ein Cyrus Vorverstärker Pre aCA7.5 über Cinch-
(RCA-) Tonleitungen an je einen aPA7.5 Mono Verstärker für den linken und
den rechten Kanal angeschlossen.
Signaleingang über symmetrische XLR-Kabel
Stellen Sie den Eingangs-Wahlschalter eauf BAL. Verbinden Sie die
symmetrischen Eingänge djedes der aPA7.5 Mono über eine 3-polige
symmetrische Tonleitung mit den entsprechenden XLR-Ausgangsuchsen des
Vorverstärkes / Decoders.
Lautsprecher-Anschluss
Lautsprecher-Stecker montieren
Montieren Sie die mitgelieferten Stecker. Beachten Sie dabei eventuell
vorhandene Polaritätsmarkierungen (+ und -) auf dem Lautsprecherkabel und
beachten Sie eine eventuell vorgegebene Signalfluss-Richtung auf dem
Lautsprecherkabel. Entsprechende Pfeile sollten in Richtung Lautsprecher
zeigen.
Sollten Sie weitere Lautsprecherstecker für den aPA7.5 Mono benötigen,
achten Sie beim Kauf auf die passende Type ‘BFA’.
Kabelanschluss
Haben sie nach der Montage der Stecker alle Kabel nochmals auf die richtige
Polarität hin überprüft, können diese mit den Verstärkern und Lautsprechern
verbunden werden. Die ‘+’ und ‘-’ Anschlüsse der Lautsprecher müssen an die
entsprechenden ‘+’ und ‘-’ Anschlüsse der jeweiligen Verstärker wie folgt
angeschlossen werden:
Verbinden Sie den linken Lautsprecher mit den rückwärtigen Anschlüssen a(
roter Lautsprecherstecker) und b(schwarzer Lautsprecherstecker) des
aPA7.5 Mono für den linken Kanal. Verbinden Sie den rechten Lautsprecher
mit den rückwärtigen Anschlüssen a (roter Lautsprecherstecker) und b
(schwarzer Lautsprecherstecker) des aPA7.5 Mono für den rechten Kanal. Zur
bequemen Realisierung von "Bi-Wiring" sind die Lautsprecher-Ausgänge
doppelt vorhanden. Abb. 4a zeigt die Verkabelung eines Stereo-Sytems mit
"Bi-Wiring".
Durchschleif-Ausgang
Der Durchschleif-Ausgang ggestattet den Anschluss von mehr als einem
aPA7.5 Mono an jeden Ausgang des Vorverstärkers / Decoders.
Hinweis: Der Durchschleif-Ausgang kann unabhängig davon benutzt werden,
ob die Signalzuführung zum aPA7.5 Mono über eine Cinch- (RCA-) oder über
eine XLR-Tonleitung erfolgt.
"Bi-Amping"
Die Durchschleif-Funktion kann für zwei oder mehr aPA7.5 Mono pro Kanal
benutzt werden. Für Bi- / Tri- Amping verbindet man den Durchschleif-
Ausgang des ersten aPA7.5 Mono mit dem Cinch- (RCA-) Eingang des
nächsten. Solch ein "Bi-Amping"-System nutzt die klanglichen Vorteile der
vollständig getrennten Leistungsverstärkung für die Tief- und Hochton-Chassis
der angeschlossenen Lautsprecher.
In der Abbildung eines Systems mit "Bi-Amping" (Fig. 4b) ist ein Cyrus
Vorverstärker aCA7.5 Pre an vier aPA7.5 Mono angeschlossen - zwei für den
linken Kanal und zwei für den rechten. Es werden die Kabelverbindungen mit
Cinch-(RCA-) Tonleitungen gezeigt.
Hinweis: Der Durchschleif-Ausgang kann unabhängig davon benutzt werden,
ob die Signalzuführung zum aPA7.5 Mono über eine Cinch- (RCA-) oder über
eine XLR-Tonleitung erfolgt.
Identische Verstärkungsfaktoren
Alle Cyrus Endverstärker und alle Endverstärkerstufen in integrierten Cyrus
Vor-/ Endverstärkern haben übereinstimmende Spannungsverstärkungs-
faktoren. Sie können also den aPA7.5 Mono in Verbindung mit jedem anderen
Cyrus Verstärker für "Bi-Amping" etc. benutzen, ohne diesbezüglich irgend
welche Einstellungen vornehmen oder ändern zu müssen.
MC-Bus-Anschlüsse
Die Einbeziehung der MC-Bus-Buchsen ham aPA7.5 Mono in ein MC-Bus
System ermöglicht ein zentrales Schalten der gesamten Anlage. Eine MC-
Bus-Schleife kann mit einfachen (Mono-) Tonleitungen hergestellt werden,
indem der MC-Bus-Ausgang eines Gerätes mit dem MC-Bus Eingang des
nächsten Gerätes verbunden wird. Die Schleife ist geschlossen, wenn der
MC-Bus-Ausgang des letzten Gerätes und der MC-Bus-Eingang des ersten
Gerätes miteinander verbunden sind. (Siehe Anschlussbeispiel in Abb. 3.).
Der vollständig verkabelte MC-Bus gestattet das zentrale Ein- und Aus-
schalten der gesamten Anlage von der Frontplatte oder der Fernbedienung
eines Cyrus-Verstärkers oder Surround-Prozessors aus.

Gebrauchsanleitung Cyrus aPA7.5 Mono
6
D
D
BEDIENUNG
Erläuterungen zur Abbildung der Frontplatte des aPA7.5 Mono
12. Standby-Taste
13. Standby-Anzeige
14. Mute-Anzeige (Schutzschaltung)
Einschalten
Der Netzschalter 1! an der Rückseite des aPA7.5 Mono sollte bei normaler
Benutzung des Gerätes stets eingeschaltet bleiben. Bei längerer Abwesenheit
jedoch sollte das Gerät ausgeschaltet oder vom Netz getrennt werden.
Bei eingeschaltetem Netz kann die STANDBY-Taste 1@ zum Ein- und
Ausschalten benutzt werden. Die Standby-Anzeige 1# leuchtet rot, wenn der
aPA7.5 Mono in 'Standby' ist, und wechselt zu grün, sobald er eingeschaltet
wird.
Die Fernschaltung kann auch aktiviert werden, wenn die MC-Bus-Buchsen h
eines aPA7.5 Mono mit einem Cyrus-System verbunden werden, welches
einen Vorverstärker, einen integrierten Vor-/ Endverstärker oder einen
Surround-Decoder einschließt. Es können auch mehrere aPA7.5 Mono auf
diese Weise in die Fernschaltung der gesamten Anlage einbezogen werden.
Mute-Anzeige
Der MUTE-Indikator 1$ leuchtet, um anzuzeigen, dass die Lautsprecher durch
die Schutzschaltung vorübergehend abgeschaltet wurden. Normalerweise
dauert diese Standby-Phase sechs Sekunden, wenn es sich um Überlastung
handelt. Leuchtet die Mute-Anzeige andauernd, sollten Sie die "Hinweise zur
Fehlersuche lesen".
Kühlung
Wegen der hohen Leistung des aPA7.5 Mono ist eine Luftkühlung mittels
Ventilator cvorgesehen, dessen Drehzahl über eine "intelligente" Regelung
den Erfordernissen angepasst wird. Ist der Endverstärker im Leerlauf, schaltet
sich der Lüfter aus. Mit zunehmender Erwärmung des Verstärkers erhöht sich
die Drehzahl des Lüfters und erreicht ihr Maximum bei maximaler Temperatur.
Auf diese Weise hängt die Drehzahl des Lüfters von der Ausgangsleistung des
Verstärkers ab, und sein Geräusch ist selbst bei niedriger Wiedergabe-
Lautstärke kaum wahrnehmbar. Bei ruhigen Passagen und zwischen den
Titeln einer CD verringert sich die Drehzahl des Lüfters so, dass er nicht das
Hörerlebnis beeinträchtigt.
HINWEISE ZUR FEHLERSUCHE
Funktioniert Ihr aPA7.5 Mono nicht einwandfrei, trennen Sie das Gerät System
vom Stromnetz, und überprüfen Sie sorgfältig alle Kabelverbindungen anhand
der Hinweise in dieser Anleitung. Besteht das Problem weiterhin, kann die
folgende Checkliste möglicherweise weiterhelfen:
Bitten Sie im Zweifelsfalle Ihren Fachhändler um Rat.
Beide Lautsprecher bleiben stumm
Prüfen Sie, ob Vorverstärker und Endver-
stärker eingeschaltet sind.
Prüfen Sie, ob die Schutzschaltung
angesprochen hat ("Mute").
Prüfen Sie, ob der Vorverstärker auf die
Bedienungselemente an seiner Frontplatte
reagiert.
Prüfen Sie, ob Sie die richtige
Programmquelle gewählt haben.
Prüfen Sie, ob Sie den richtigen Signal-
Eingang am Verstärker gewählt haben.
Die Standby-Anzeige muss
grün leuchten.
Die rote Mute-Anzeige darf
nicht leuchten.
"Tape Monitor" darf nicht
gewählt sein.
Die Programmquelle muss
betriebsbereit sein.
Der Schalter RCA / BAL muss
auf den richtigen Eingang
geschaltet sein.
Stellen Sie sicher, dass die Lautsprecher
angeschlossen sind.
Die Anschlüsse am Laut-
sprecher und am aPA7.5
Mono überprüfen.
Ein Lautsprecher bleibt stumm
Kurzschluss in der Lautsprecherleitung
möglich.
Die Schutzschaltung spricht
an, und die Mute-Anzeige
leuchtet.
GARANTIE
TECHNISCHE DATEN
Netzteil
Betriebsspannung:.....................................siehe Typenschild auf der Rückseite
Leistungsaufnahme
Standby....................................................................................................... 12 W
Ein (ohne Eingangssignal).......................................................................... 23 W
Ein (150 Watt)........................................................................................... 255 W
Elektrische Sicherheit ............................................................. gemäß EN 60065
Gehäuse
Abmessungen (BxHxT).........................................................215 x 75 x 365 mm
Gewicht......................................................................................................5.5 kg
Material.................................................................................Spritzguss-Chassis
Audio-Daten
Eingangsempfindlichkeit (50 W / 8 Ω) .........Cinch................................ 381 mV
Eingangsempfindlichkeit (50 W /8 Ω) ..........Symmetrisch .................... 775 mV
Eingangsempfindlichkeit (150 W / 8 Ω) .......Cinch................................660 mV
Eingangsempfindlichkeit (150 W / 8 Ω) ....... Symmetrisch ........................ 1.3 V
Eingangsimpedanz .......................................Cinch..................................19 kΩ
Eingangsimpedanz .......................................Symmetrisch ......................20 kΩ
Ausgangsleistung pro Kanal.........................8 Ohm ................................ 150 W
Ausgangsleistung pro Kanal.........................4 Ohm ................................ 240 W
Klirrfaktor (1 kHz bei 2/3 Leistung) ...............(20 Hz - 20 kHz 8 Ω) ...... <0,05 %
(1 kHz 8 Ω)................... <0,004 %
Anstiegsrate (ohne Eingangsfilter)...................................................700 V /µsec
Frequenzgang (-3 dB)........................................................... 0,5 Hz bis 130 kHz
Geräuschspannungsabstand (DIN-A)...................................................... 114 dB
Durchschleif-Ausgang (entkoppelt).........................................................660 mV
(Bezug: 660 mV am Cinch- bzw. 1,3 V am symm. Eingang)
Cyrus behält sich das Recht vor, alle technischen Spezifikationen ohne vorherige Ankündigung zu ändern. E
& OE.
Die Garantie tritt nur in Kraft, wenn die beigefügte Garantiekarte vom Händler
und Käufer ausgefüllt und innerhalb von 8 Tagen nach dem Kauf an den CYRUS
Vertrieb zurückgeschickt wird. Keinem Händler oder Vertreiber ist es gestattet die
Bedingungen dieser Garantie zu verändern, die nur für den Erstbesitzer gilt.
Bitte bewahren Sie die Rechnung als Kaufnachweis auf.
Ansprüche müssen, wenn möglich, über den Händler geltend gemacht werden,
bei dem die Ware gekauft wurde.
Die Garantie beinhaltet nicht:
•Alle Schäden, die durch Unfall, falschen Gebrauch, Verschleiß oder durch
falsche Installation, Einstellung oder Reparatur durch unautorisiertes
Personal verursacht wurden. Alle nicht autorisierten Service-Eingriffe
haben den Garantieverlust zur Folge.
•Haftung für Beschädigung oder Verlust während des Transportes vom und
zum Käufer.
•CYRUS haftet nicht für eventuelle Sach- oder Personenschäden, die durch
den Gebrauch dieser Geräte oder in Verbindung mit diesen Geräten
entstanden sind.
Die Transportkosten (zum Händler und zurück) sind vom Käufer zu tragen. Stellt
sich bei der Überprüfung eines Gerätes heraus, daß es den angegebenen
technischen Spezifikationen entspricht, behält sich CYRUS das Recht vor,
Überprüfung und Rücktransport in Rechnung zu stellen.
Die hier angegebenen Bedingungen schränken Ihre Rechte als Käufer nicht ein.

Cyrus aPA7.5 Mono Distributor List
7
CYRUS ELECTRONICS
Spitfire Close, Ermine Business Park, Huntingdon, PE29 6XY
Tel: +44 (0) 1480-435577, Fax: +44 (0) 1480-437715
AUSTRALIA: Crestmore Pty Ltd.
PO Box 199, North Turramurra, NSW 2074
Tel: +61 29 482 3922 Fax: +61 29 482 3699
Email: [email protected]om.au
AUSTRIA: Tepax GmbH
Georg-Büchner-Strasse 4
D-61476 Kronberg im Taunus
Tel: +49 (0) 700 077 77 77-1 Fax: +49 (0) 700 077 77 77-2
BELGIUM: Belram Hi-Fi nv/sa
Waversesteenweg 1600, Chaussée de Wavre, Oudergem , 1160
Tel: + 32 2 736 5000 Fax: + 32 2 735 3816
CROATIA: SONATEL doo
A Heinza 3, 10 000 Zagreb
Tel: +385 1 463 3419 Fax: +385 1 463 3434
CZECH REPUBLIC: DATART International
Pernerova 35, Praha 8 - 186 00, Karlin
Tel: +42 0 221897 111/275 Fax: +42 0 221897 171
DENMARK: SAS Scandinavia
Industrivej 30, Brondby, DK 2605
Telephone: + 45 4343 1777 Fax: + 45 4343 1767
FINLAND: SAS Scandinavia
Industrivej 30, Brondby, DK 2605, Denmark
Telephone: + 45 4343 1777 Fax: + 45 4343 1767
FRANCE: Audio Marketing Services
1 Rue Jean Perrin, Le Blanc Mesnil, Paris, 93150
Tel: + 33 1 55 81 00 70, Fax: + 33 1 48 67 51 96
Email: Info@AudioMarketingServices.fr
GERMANY: Tepax GmbH
Georg-Büchner-Strasse 4
D-61476 Kronberg im Taunus
Tel: +49 (0) 700 077 77 77-1 Fax: +49 (0) 700 077 77 77-2
HOLLAND: TES Nederland BV
Coenecoop 81A, 2741 PH, Waddinxveen
Tel: + 31 182612669, Fax: + 31 182614765
Email: info@tesnl.demon.nl
HUNGARY: Infovox KFT
Terez Korut 31, 1067 Budapest
Tel: + 36 1 332 5578, Fax: + 36 1 302 2515
ICELAND: Radiobaer EHF
Armula 38, PO Box 8933, 128 Reykjavik
Tel: + 354 553 1133 Fax: + 354 588 4099
IRELAND: Audio Vision Import Ltd
Acoustic House, John F Kennedy Drive, Nass Road, Dublin 12
Tel: +353 1 450 4855 Fax: +353 1 450 4870
ITALY: MPI Electronic srl
Via de Amicis 10/12, Cornaredo 20010, Milan
Tel: + 39 02 936 1101 Fax: + 39 02 935 62336
KOREA: Sungmin Acoustics Co Ltd
2nd Floor, #559-32, Dobong-Dong, Dobong-Gu, Seoul, 132-010
Tel: + 822 34922586 Fax: + 822 34922588
NEW ZEALAND: Crestmore Pty Ltd
Unit A4, 1066 Great South Road, Mt. Wellington, Auckland
Tel: + 64 9 270 4001 Fax: + 64 9 270 4007
NORWAY: SAS Scandinavia
Industrivej 30, Brondby, DK 2605, Denmark
Tel: + 45 4343 1777 Fax: + 45 4343 1767
POLAND: Misja Audio
al. Armii Ludowej, 13 Warszawa, 00-632
Tel: + 48 228254879 Fax: + 48 226481665
PORTUGAL: Diper-Comecio
Rua Veloso Salgado 971-C, 4450 Leca Palmeira
Tel: + 351 2 9968246 Fax: + 351 2 9968248
RUSSIA: NEXT Company
Granatniy per 3-2, Moscow, 103889
Tel: + 7 095 290 6007 or 3109 Fax: + 7 095 2902579
SINGAPORE: Asia Sound Equipment(s) Pte Ltd
1 Coleman Street, #4-49/62 The Adelphi, 179803
Tel: + 65 2596120 Fax: + 65 2596617
SLOVENIA: Bofex doo
Ljubljana, Smartinska 152, Hala 5, Ljubljana, 61000
Tel: + 386 611873511 Fax: + 386 61445 478
SOUTH AFRICA: Hif Fi Specialists (Pty) Ltd
155 Durbon Road, Bellville, 7530
Tel: + 27 219461441 Fax: + 27 219464364
SPAIN: EAR SA
Heraclio Fournier 5, Vitoria, 01006
Tel: + 34 945 14 11 10 Fax: + 34 945 13 53 75
SWEDEN: SAS Scandinavia
Industrivej 30, Brondby, DK 2605, Denmark
Telephone: + 45 4343 1777 Fax: + 45 4343 1767
SWITZERLAND: Montana Audio Systems GmbH
Allmendstrasse 14, CH 8320, Fehraltorf
Tel +41 1 955 0101 Fax +41 1 955 0303
Email: [email protected]h

Distributor List Cyrus aPA7.5 Mono
8
NOTES
Table of contents
Languages:
Other Cyrus Amplifier manuals

Cyrus
Cyrus AV5 User manual

Cyrus
Cyrus Pre User manual

Cyrus
Cyrus CLASSIC POWER User manual

Cyrus
Cyrus aEQ7 User manual

Cyrus
Cyrus SmartPower User manual

Cyrus
Cyrus X Power User manual

Cyrus
Cyrus Power User manual

Cyrus
Cyrus integrated 6 vs2 User manual

Cyrus
Cyrus Stereo 200 User manual

Cyrus
Cyrus CLASSIC AMP User manual
Popular Amplifier manuals by other brands

D.A.S.
D.A.S. PS Series user manual

Pro-Ject Audio Systems
Pro-Ject Audio Systems DS2 Instructions for use

YORKVILLE
YORKVILLE AP6020 owner's manual

Grandinote
Grandinote DIVINA user manual

Danaher Motion
Danaher Motion Kollmorgen SERVOSTAR 300 Series Assembly, Installation, Setup

Harman Kardon
Harman Kardon Citation II Operation manual