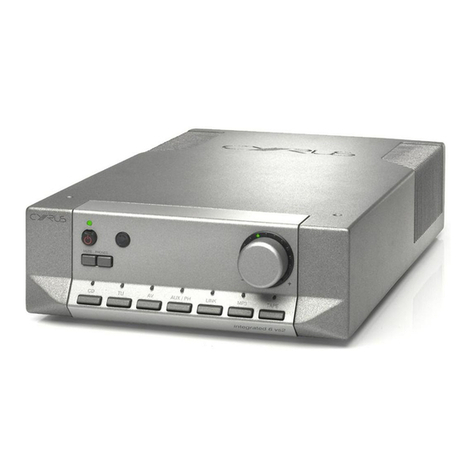
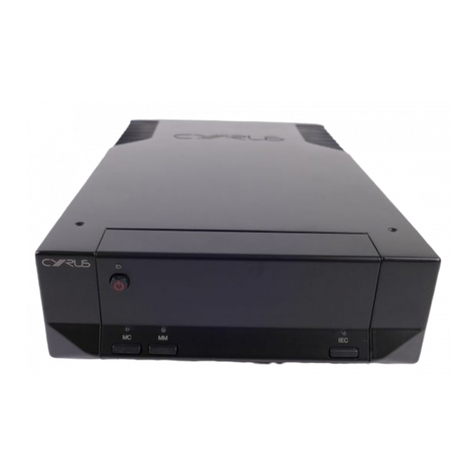
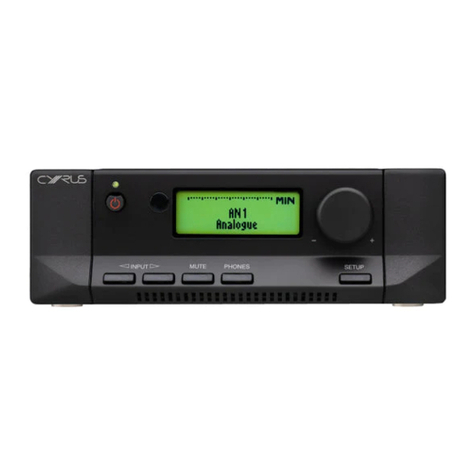
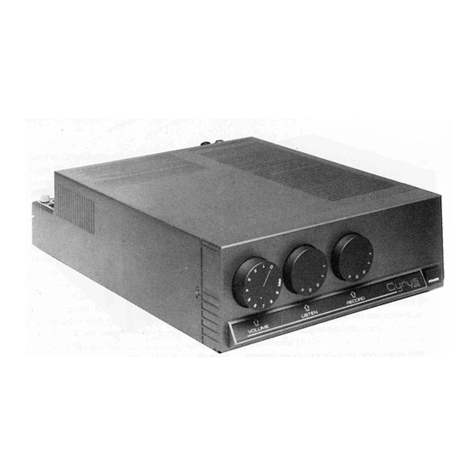
Cyrus 6a User manual

ENGINEERED
TO ENTERTAIN

Cyrus 6a, Cyrus 8a User Instructions
IMPORTANT! READ BEFORE OPERATING THIS EQUIPMENT! .. 1
Power supply: ...................................................................... 2
Servicing: ............................................................................ 2
Product service centres: ...................................................... 2
FCC NOTICE.......................................................................... 3
WELCOME TO THE WORLD OF CYRUS!...................................... 4
................................................ 4
INSTALLATION.............................................................................. 5
Key to the rear panel drawing:........................................ 5
.................................... 6
..... 6
................................................... 6
........................................................ 6
.................................................... 7
.......................... 7
...................... 7
...................... 7
.............. 7
Bi-amping............................................................................. 8
......................................... 8
..................................................... 8
..................... 8
........ 8
MC-BUS System ................................................................... 9
External Power Supply - PSX-R ............................................ 9
CONFIGURATION ....................................................................... 10
Input names .................................................................. 10
Display mode ................................................................ 11
.................................................. 11
................................................................. 11
OPERATION ................................................................................ 12
.................................... 12
Power................................................................................. 12
.............................................................. 12
.................... 12
.......................................................... 13
Mute .................................................................................. 13
Listening to headphones ................................................... 13
Playing music in Zone 2 ..................................................... 13
.................................... 14
REMOTE CONTROL OPERATION ............................................... 15
....................................... 15
............................................. 15
........................ 15
Sending commands to Cyrus components:................... 15
Switching on Cyrus components:.................................. 15
................................................ 16
Cyrus CD player commands ............................................... 17
Cyrus Audio streamer commands...................................... 18
................................. 19
............................................... 19
Learning commands:..................................................... 19
.............................. 20
Problems with learning:................................................ 20
........................................... 20
TROUBLESHOOTING GUIDE...................................................... 21
SPECIFICATIONS......................................................................... 22
Power Supply ................................................................ 22
..................................................... 22
Enclosure ...................................................................... 22
........................................ 22
........................................ 22
WARRANTY................................................................................. 22
WEEE........................................................................................... 22
CONTENTS

Cyrus 6a, Cyrus 8a User Instructions
1
WARNING:
remove any unit covers or panels. There are no user
serviceable parts in this product.
expose this equipment to rain or moisture.
HEED WARNINGS: All warnings on the product and in the
READ ALL THE INSTRUCTIONS:
RETAIN INSTRUCTIONS:
FOLLOW INSTRUCTIONS:
CLEANING:
cleaning. Do not use liquid or aerosol cleaners. Use a damp
WATER AND MOISTURE: Do not use this product near water
shall be placed on the product.
HEAT:
VENTILATION: Slots and openings in the cabinet are
OBJECT OR LIQUID ENTRY:
into this product through openings as they may touch
dangerous voltage points or short-out parts that could
ACCESSORIES: Do not place this product on an unstable
POWER SOURCES: This product should be operated only
OVERLOADING:
POWER CORD PROTECTION: Power supply cords should be
NAKED FLAMES:
must be placed on this product.
LIGHTNING:
disconnect the antenna or cable system. This will prevent
damage to the product due to lightning and power-line
surges.
BATTERIES:
CAUTION! POLARISED CONNECTOR (CANADA and USA):
installed by a competent electrician.
ACCESS TO THE MAINS PLUG: The means to disconnect this
IMPORTANT! READ BEFORE OPERATING THIS EQUIPMENT!
CAUTION:
procedures in this manual.
ATTENTION:
inside this product. Unauthorised personnel
must not open this unit.
MOVING THE PRODUCT: A product and cart
cause the product and cart to overturn.
ATTACHMENTS:
Cyrus 6a, Cyrus 8a User Instructions
2
Power supply:
plugs into the power inlet 2)
this voltage is the same as your mains supply.
contact your local Cyrus distributor to have your product
converted.
Servicing:
or removing covers may expose you to dangerous voltage
personnel.
CONDITIONS REQUIRING SERVICE: Unplug this product
personnel when:
When the power supply cord or plug is damaged.
product.
way.
REPLACEMENT PARTS: When replacement parts are
SAFETY CHECK:
Product service centres:
cyrusaudio.com.

Cyrus 6a, Cyrus 8a User Instructions
3
FCC NOTICE*
Reorient or relocate the receiving antenna.
receiver is connected.

Cyrus 6a, Cyrus 8a User Instructions
4
WELCOME TO THE WORLD OF CYRUS!
Preparations for Installation
items are included in the accessory box.
Power Cable
Remote Handset

Cyrus 6a, Cyrus 8a User Instructions
5
INSTALLATION
1.
2.
3.
4.
5.
Input 66.
Key to the rear panel drawing:
Input 57.
Input 48.
Input 39.
Input 210.
Input 111.
12.
PSX-R13.
14.
Power inlet15.
*Cyrus 8aonly
USE PSX-R ONLYHEADPHONE
MADE IN ENGLAND
LEFTSPEAKERRIGHTSPEAKERIN-11IN-10IN-9IN-8IN-7IN-1IN-2IN-3IN-4IN-5IN-6ZONE 2OUTPRE OUT 1PRE OUT 2MC-BUSINOUT
1@abcdefghi1)1!1%1#1$

Cyrus 6a, Cyrus 8a User Instructions
6
Connecting to the AC Mains Supply
1%
to a suitable AC power point.
supply is the mains plug. Ensure that the mains plug is
Important – read before making any audio
connections
Connecting Audio Sources
audio sources including -
Televisions
Analogue Satellite Receivers
Cyrus surround decoder
Input 1 – CD
Input 2 – Tuner
Input 6 – Tape
to play in a Zone 2 system.
connect a stereo audio interconnect cable between each
the inputs can be re-named at the set-up stage.
Connecting a Turntable
To play a turntable through your unit an external phono pre-
the inputs.

Cyrus 6a, Cyrus 8a User Instructions
7
Connecting Loudspeakers
and - at each end. Most cables have polarity indicators and
1@ and
a.
Your product includes a Zone 2 pre-amp output that can be
used by a system in a second room. You can then extend the
Setting up Zone 2 with powered speakers
2 output e
phono cables to the Zone 2 output eand route them to one
control.
Connecting a Tape/Disc recorder for recording
e
+
+
-
-
-+
-+
RightbassLeftbassRighttrebleLefttrebleAmplifierConnecting a bi-wired speaker system

Cyrus 6a, Cyrus 8a User Instructions
8
Bi-amping
Both stereo and high power monobloc Cyrus power
Connecting a Cyrus Surround Sound
decoder
appropriate level.
Connecting a Surround Sound decoder
(other brand)
surround decoder.
level.
Connecting Headphones
1$
RightbassLeftbassRighttrebleLefttreble+
+
-
-
-
-
+
+
AmplifierPower amplifierConnecting a bi-amplified speaker system

Cyrus 6a, Cyrus 8a User Instructions
9
MC-BUS System
bin an MC-BUS system
External Power Supply - PSX-R
The PSX-R is a unique DC power supply which will upgrade
PSX-R
stable power source while other requirements are supplied
noise and power supply ripple.
To connect the PSX-R
PSX-R
PSX-R
An MC-BUS loop is
in a daisy-chain. Complete
the loop by returning the
component to the MC-BUS
When a Cyrus Surround Processor is included in the MC-BUS
details.
CyrusTunerCyrus PowerAmplifierCyrus CD playerCyrus amplifierMC-BUS outMC-BUS outMC-BUS outMC-BUS outMC-BUS inMC-BUS inMC-BUS inMC-BUS in

Cyrus 6a, Cyrus 8a User Instructions
10
CONFIGURATION
to best match your system.
f. Turn the Rotary control e
available on the display. Press the Rotary control eto select
move to the next or previous step by pressing the Input up
Press the SETUP f
Name Input 1 Choose a name for input 1 from the name list
Choose a name for input 2 from the name list
Choose a name for input 3 from the name list
Choose a name for input 4 from the name list
Choose a name for input 5 from the name list
Choose a name for input 6 from the name list
Set the sensitivity offset for input 1
Set the sensitivity offset for input 2
Set the sensitivity offset for input 3
Set the sensitivity offset for input 4
Set the sensitivity offset for input 5
Name Input 2
Name Input 3
Name Input 4
Name Input 5
Name Input 6
Trim Input 1
Trim input 2
Trim input 3
Trim input 4
Trim input 5
The display will show ‘Storing Settings’, then exit setup.
Setup
Display Mode Select large input, small input or large volume
Set the sensitivity offset for input 6
Trim input 6
Input names
set as shown below
Input 1 – CD Input 5 – Input 5
Input 2 – Tuner Input 6 – Tape
Input 4 – Input 4
name may only be used once. When a name is assigned to
surround decoders. This input name must only be used
an input number will not appear in the input selector scroll
sequence or in the Zone 2 select sequence.

Cyrus 6a, Cyrus 8a User Instructions
11
Display mode
Factory Settings
and re-connect the power cord.
in the display centre.
a two line display with the volume
reading at the top and a larger
input legend below.
display large volume characters at
bargraph above.
Input sensitivity offset
enables the volume level when
playing low or high output source
system sources.
-27CD
-27-27dB
OffsetInput 6+4dB
-27CD

Cyrus 6a, Cyrus 8a User Instructions
12
Standby switch1.
Standby light2.
Remote eye3.
Display window4.
Level control and setup adjust5.
OPERATION
Setup select6.
Zone 2 select7.
Headphones select8.
Mute select9.
Input select10.
Power
a
control. The Standby light b
supply.
Selecting an Input
1)
inputs available.
setup menu.
Selecting the ‘Cyrus AV’ or ‘AV Direct’
Inputs
Key to the front panel drawing:
-27CDMUTEPHONESSETUPZONE 2INPUT
abcdefghi1)

Cyrus 6a, Cyrus 8a User Instructions
13
Volume and Balance
The level control e
and balance.
Volume: In normal mode the level control sets the volume
standby.
Balance:
e
Listening to headphones
h
hagain.
honly operates when headphones
headphones can cause hearing loss.
Playing music in Zone 2
play the same source as the main system. Changing the
main system source will also change the source playing in
Zone 2.
source displayed.
The balance may be adjusted in 1 dB steps by up to 4dB
control.
Mute
Pressing the MUTE Key iwill mute the volume to minimum
muted the display will show that the volume is muted. Press
The volume display will change
display will show the input source
-27Balance
Zone 2 OutputCD

Cyrus 6a, Cyrus 8a User Instructions
14
Tape/Disc Playback and Recording
Analogue Input to which you connected your tape recorder.
displayed.
purposes.

Cyrus 6a, Cyrus 8a User Instructions
15
REMOTE CONTROL OPERATION
Remote control introduction:
The iR14 remote control will send commands to Cyrus
The remote control can also be programmed with the
could also be other audio components such as a Cyrus tuner
Remote control backlight:
command is sent.
Fitting batteries to the remote control:
control.
1234579680/10SATTVSTOREMENUENTERSELECTLISTCHSETUPabcdefghijklmnopqrstuvwxyz
GUIDE
INFO
TEXTTV/AVCONTROLSOURCE
Switching on Cyrus components:
1234579680/10SATTVSTOREMENUENTERSELECTLISTCHSETUPabcdefghijklmnopqrstuvwxyz
GUIDE
INFO
TEXTTV/AVCONTROLSOURCE
1234579680/10SATTVSTOREMENUENTERSELECTLISTCHSETUPabcdefghijklmnopqrstuvwxyz
GUIDE
INFO
TEXTTV/AVCONTROLSOURCE
Sending commands to Cyrus components:
AAAAAA
ab
Press the catch on the1.
the cover.
2.
compartment as shown.
3.
into the remaining space.
4.
cover.
same voltage and type.
Press the CYRUS
remote control to
Cyrus mode.
1234579680/10SATTVSTOREMENUENTERSELECTLISTCHSETUPabcdefghijklmnopqrstuvwxyz
GUIDE
INFO
TEXTTV/AVCONTROLSOURCE
Press or to
switch on and
send commands
to a Cyrus
Press the
on a Cyrus CD
player and send
commands to a
Cyrus CD player
Press the
to switch on
a Cyrus Audio
streamer and
send commands
to a Cyrus Audio
streamer and

Cyrus 6a, Cyrus 8a User Instructions
16
mode.
mode.
1.
Standby.
Set the handset to send commands to Cyrus2.
components.
3.
4.
CD player.
5.
6.
7.
8.
9.
10.
11.
12.
13.
14.
15.
16.
17.
18.
19.
20.
21.
22.
23.
24.
25.
26.
27.
28.
29.
Balance.30.
31.
32.
33.
34.
35.
36.
Step to the previous input.37.
38.
Audio streamer.
39.
1234579680/10SATTVSTOREMENUENTERSELECTLISTCHSETUPabcdefghijklmnopqrstuvwxyz
GUIDE
INFO
TEXTTV/AVCONTROLSOURCEabcdefghi1)1!1@1#1$1%1^1&1*1(2)2!2@2#2$2%2&2^2*2(3)3!3@3#3$3%3^3&3*3(

Cyrus 6a, Cyrus 8a User Instructions
17
Cyrus CD player commands
Press the
mode.
commands are being sent in CD mode.
The CD mode commands available are listed below –
1.
Standby.
2.
3.
4.
CD player.
5.
6.
CD player repeat.7.
8.
9.
10.
11.
12.
13.
14.
15.
CD player audio phase. Changes in phase are subtle and16.
signal is in normal or phase inverted mode.
CD player stop.17.
18.
19.
20.
21.
22.
CD player memory store.23.
24.
CD player pause.25.
26.
27.
28.
29.
30.
31.
32.
33.
1234579680/10SATTVSTOREMENUENTERSELECTLISTCHSETUPabcdefghijklmnopqrstuvwxyz
GUIDE
INFO
TEXTTV/AVCONTROLSOURCEabcdefghi1)1!1@1#1$1%1^1&1*1(2)2!2@2#2$2%2&2^2*2(3)3!3@3#3$3%3^3&3*3(
34.
35.
36.
37.
38.
Audio streamer.
39.

Cyrus 6a, Cyrus 8a User Instructions
18
Cyrus Audio streamer commands
Press the
streamer mode.
being sent in Audio streamer mode.
The Audio streamer mode commands available are listed
below –
1.
Standby.
2.
3.
Select an input named CD and set the handset to send4.
5.
6.
Audio streamer repeat.7.
8.
Audio streamer cursor up.9.
Audio streamer cursor right.10.
Audio streamer cursor down.11.
12.
13.
14.
15.
16.
Audio streamer stop.17.
18.
19.
20.
21.
22.
23.
24.
Audio streamer pause.25.
26.
27.
28.
29.
30.
31.
32.
Audio streamer select.33.
Audio streamer home.34.
35.
36.
37.
1234579680/10SATTVSTOREMENUENTERSELECTLISTCHSETUPabcdefghijklmnopqrstuvwxyz
GUIDE
INFO
TEXTTV/AVCONTROLSOURCEabcdefghi1)1!1@1#1$1%1^1&1*1(2)2!2@2#2$2%2&2^2*2(3)3!3@3#3$3%3^3&3*3(
38.
Audio streamer.
39.
This manual suits for next models
1
Table of contents
Other Cyrus Amplifier manuals

Cyrus
Cyrus SmartPower User manual

Cyrus
Cyrus Pre-XR User manual

Cyrus
Cyrus X Power User manual

Cyrus
Cyrus aCA7.5 User manual

Cyrus
Cyrus Phono Signature User manual

Cyrus
Cyrus Mono X User manual

Cyrus
Cyrus CLASSIC POWER User manual

Cyrus
Cyrus XPA User manual

Cyrus
Cyrus DAC X Signature User manual

Cyrus
Cyrus IIIi User manual

Cyrus
Cyrus integrated 6 vs2 User manual

Cyrus
Cyrus ONE HD User manual

Cyrus
Cyrus POWER-XR User manual

Cyrus
Cyrus CLASSIC AMP User manual

Cyrus
Cyrus Pre XPd User manual

Cyrus
Cyrus Mono X 300 Signature User manual

Cyrus
Cyrus 6 Power User manual

Cyrus
Cyrus 6 DAC User manual

Cyrus
Cyrus 1 User manual

Cyrus
Cyrus Pre User manual