CytoSMART Lux2 User manual

INSTRUCTION MANUAL
Lux2
Your best friend
in the lab

INDEX
Safety Information 4
1. Introduction 5
Technology to Make Your Work Easier 5
How Easy the CytoSMART™ Lux2 Works 5
Ideal Circumstances for Cell Cultures 6
System Overview 6
2. Getting Started 7
3. Setting Up the System 8
Cable Placement 8
Securing the Cable 9
Status Indicator 9
Vessel Placement 9
Starting the Software 9
4. Setup an Experiment 10
Zoom Level 10
Focus 10
Registration of the Device 11
Account Setup 12
Start a Project 13
Start an Experiment 14
Ending an Experiment 15
5. Connecting to the Cloud 15
Conrmation Email 15
Project Overview 16
Experiment Overview 17
Experiment Results 18
Time-Lapse Movie Pane 19
Experiment Summary Pane 19
CytoSMARTTM Lux2 Instruction Manual

Notes Pane 20
Notication Pane 20
Logbook Pane 21
Cell Coverage Graph 21
Temperature Graph 21
6. Oine Experiment 22
Zoom and Focus 22
Start an Oine Experiment 22
Ending an Oine Experiment 24
Accessing Experiment Results 24
7. Cleaning and Troubleshooting 25
Cleaning and Maintenance 25
Removing Dust Particles from Optical Window 25
Troubleshooting 25
Please connect the device 26
Please connect the charger 26
Please connect to the internet 26
Server oine, online functionality unavailable 27
Warning! Prolonged live mode can cause increased temperature 27
No Project Email Received 27
Video Is Shaking 27
8. Technical Specication 28
9. Warranty 29
10. Cytosmart Care - Ordering Information 30
Contact Information 32
CytoSMART Lux2
Live Cell Imaging System
Instruction Manual

Safety Information
To avoid damage or malfunction of the CytoSMART™ Lux2:
• Be sure to set this device on a rm, stable and horizontal surface. The device may
break or cause injury if it falls
• Shut down the device immediately if it produces smoke, a strange odor or unusual
noise. Continued use may lead to re. Unplug the USB cable immediately
• Do not connect cables in ways other than those mentioned in this manual, as this
may cause damage and lead to re
• If water or other liquid enters the device, discontinue use immediately. Continued
use may lead to re. Unplug the USB cable immediately
• Do not attempt to repair or remove the outer case of the device. If you open this
instrument, you put yourself at risk of bodily harm due to electrical shock in addition
to damaging the device.
• Never attempt to repair, disassemble or modify this device yourself, tampering with
this product may result in injury or re
• Do not drop the device or allow objects to fall onto it.
• Do not allow the device to be submerged in liquid
• Do not place heavy objects on top of this device and never stand or lean on this
device. Failure to follow this may cause the equipment fall or collapse, which results
in possible breakage and/or injury
• Do not autoclave the device
• Do not perform the sterilization cycle of an incubator with the device inside
CytoSMARTTM Lux2 Instruction Manual
4

1. Introduction
Technology to Make Your Work Easier
Thank you for purchasing the CytoSMART™ Lux2. Soon you will be monitoring cell
cultures from any location at any time. It is not only an easy way to be more ecient,
live-cell monitoring and alerts will also save you thousands of dollars by preventing your
precious research cells from dying.
This second generation CytoSMART™ Lux2 allows for time-lapse videos of a cell culture
next to capturing single images. Real-time information and notications regarding
the cell culture are available, due to instant analysis of the experiment. All results are
accessible from any internet browser, which allows you to check-in from any PC, laptop
or smartphone. It really is that simple.
How Easy the CytoSMART™ Lux2 Works
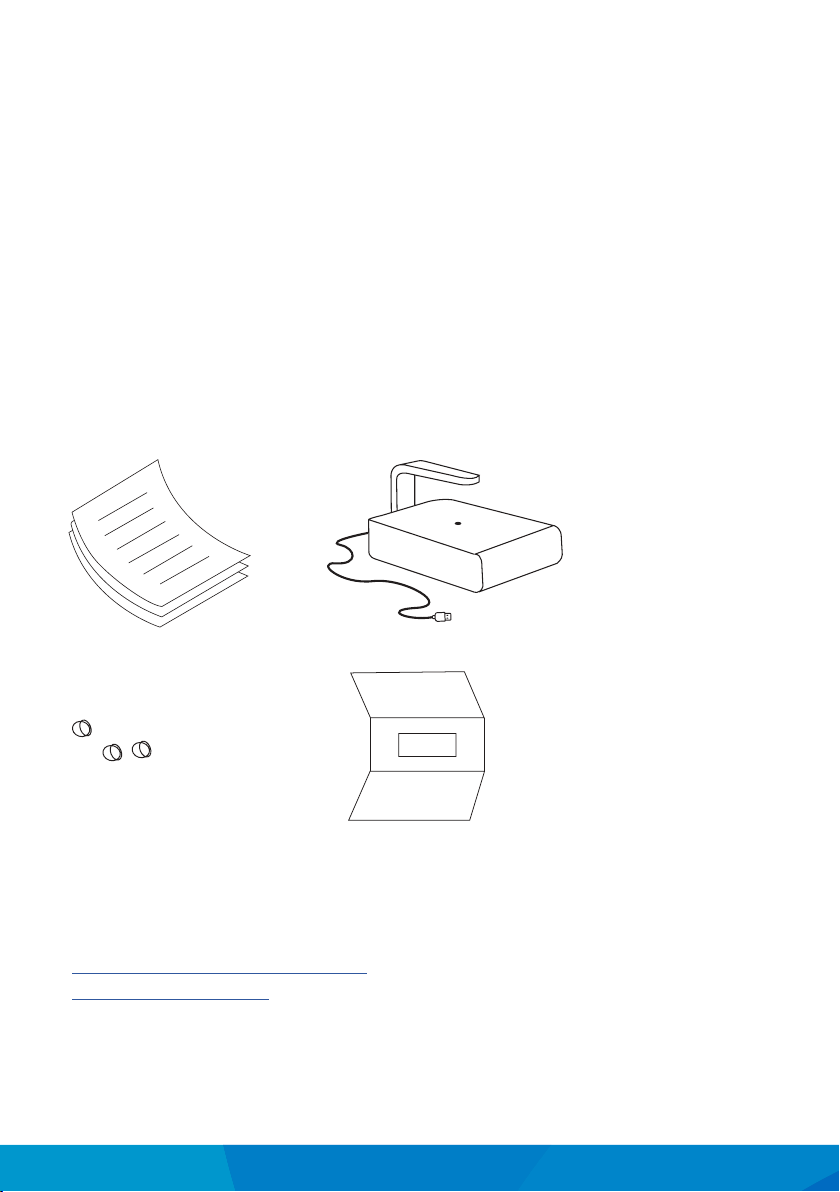
The CytoSMART™ Lux2 system can be installed within several minutes and requires
minimal training.
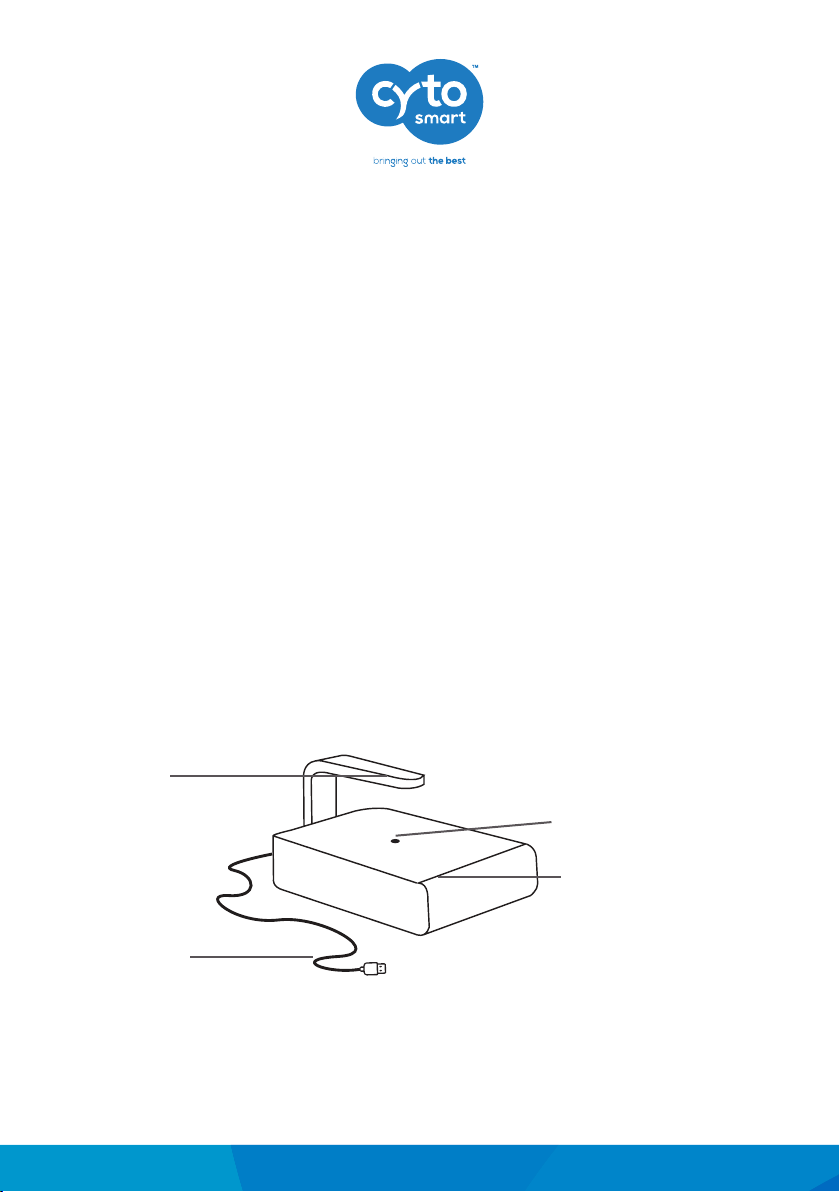
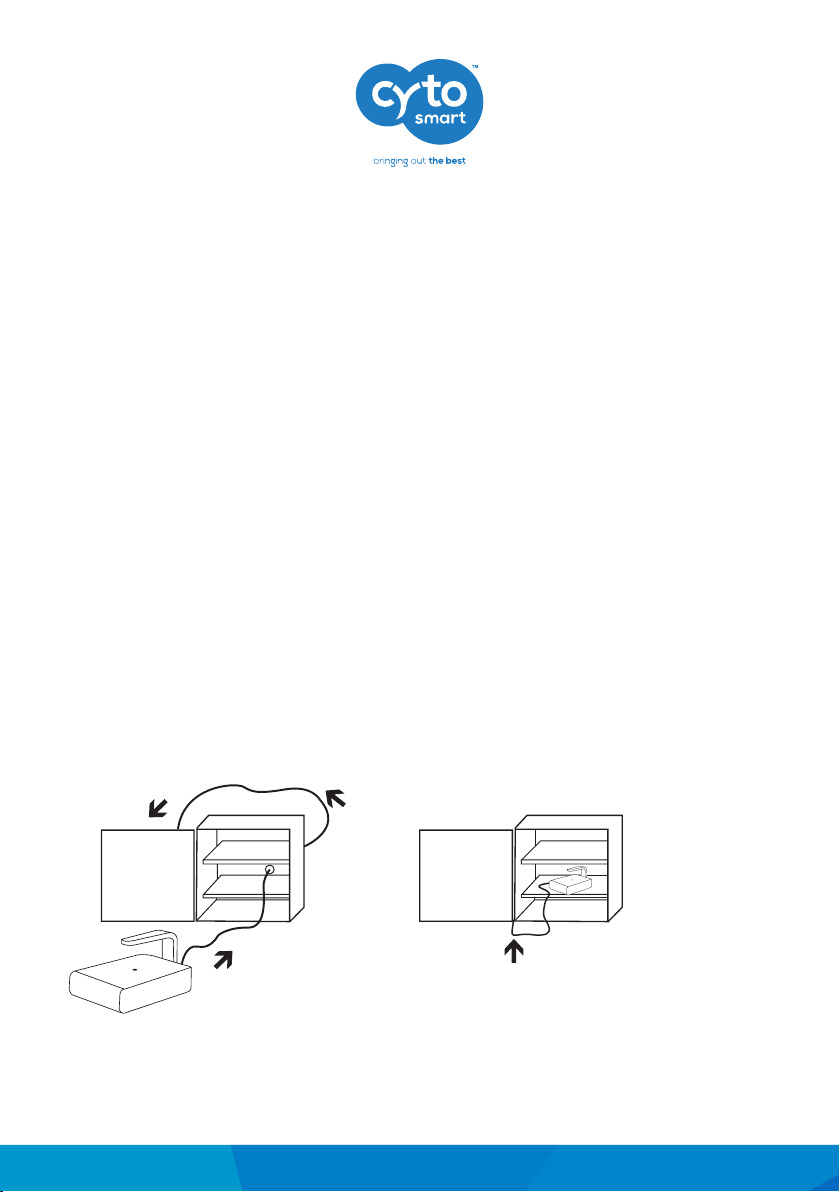
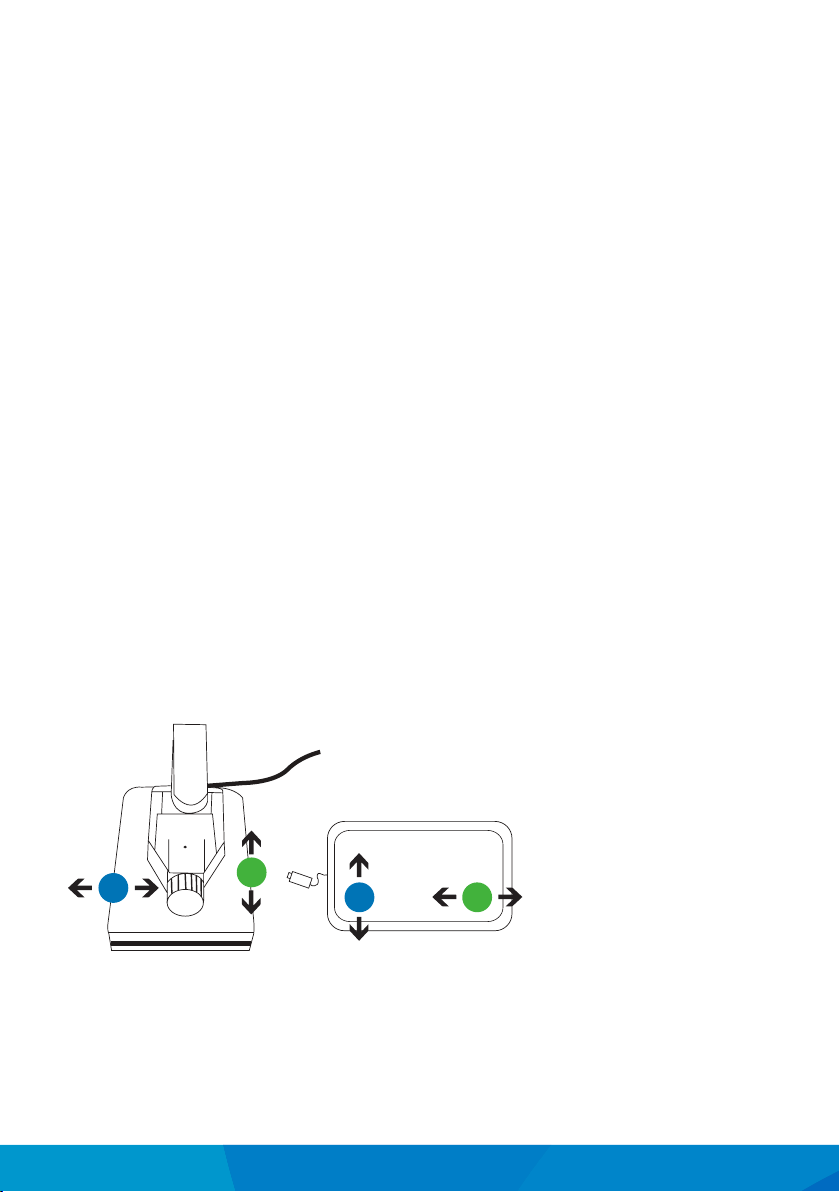
Hardware and software work together like a charm. The system consists of a monitoring
device, which operates inside a CO2-incubator. The device is linked to a Windows tablet
or computer. The Lux2 is delivered with a Windows tablet, so no additional hardware
is required. Via the tablet, you can customize the imaging settings and get started. The
images are then transferred to the CytoSMART™ Cloud via an internet connection.
All image les are temporarily stored on the tablet to assure data safety. They are then
transferred to the CytoSMART™ Cloud, which is accessible via any web browser. In the
cloud, it is possible to view and/or download images, videos and other results regarding
the cell culture. All your data is right there when you need it.
With the CytoSMART™ Lux2 comes a two-year subscription to the CytoSMART™ Cloud.
This includes 50 Gb image storage, access to the cloud and online image analysis.
CytoSMART Lux2
Live Cell Imaging System
Instruction Manual
5

Ideal Circumstances for Cell Cultures
With the CytoSMART™ Lux2, cells can remain in their dened culture conditions inside
the incubator while monitoring them online. There is no need to disturb the ideal
circumstances of your experiment. The system also provides automatic email alerts
regarding the cell culture, e.g. email notications when a specied cell conuency or
temperature is reached.
The CytoSMART™ Lux2 is ideal for monitoring migration assays or hypoxic cell cultures.
The system can also be used for cell growth curves and the screening of eects from
culture media and growth factors.
System Overview
The hardware of the CytoSMART™ Lux2 is shown below (g. 1):
1. Light arc - Contains the light source for imaging
2. USB cable - For connecting the device via USB, which is also the power source for
the device
3. Optical window – Cover glass, allowing for image acquisition
4. Sample stage – Can hold most commonly used culture vessels
1. Light Arc
3. Optical window
4. Sample stage
2. USB cable
CytoSMARTTM Lux2 Instruction Manual
6

2. Getting Started
The content of the CytoSMART™ Lux2 package is shown below (g. 2):
1. CytoSMART Lux2
2. CytoSMART Lux2 Instruction Manual
3. CytoSMART Lux2 Quick Starter Guide
4. Cable clips
5. License key
Remember, if you ever have any questions regarding your purchase, please visit
https://www.cytosmart.com/support or contact our support sta via
[email protected]. We are happy to help you out.
CytoSMART Lux2
Live Cell Imaging System
Instruction Manual
Fig. 2. CytoSMART™ Lux2 package overview.
Manual and Quick Start Guide
Cable Clips (3 pieces)
License Key
CytoSMART™ Lux2
7

3. Setting up the system
It is really easy to set up the CytoSMART™ Lux2 system. All you need are these items:
• An incubator
• The CytoSMART™ Lux2 device
• Cable clips
• A Windows tablet or PC
• An internet connection
Be sure to remove any wrapping before placing the CytoSMART™ Lux2 inside the
incubator. Also clean the device with a damp lint free cloth and IPA or EtOH (70%).
Important:
Do not use acetone to clean the device and do not autoclave the device.
Cable Placement
Check if the incubator has a cable port in the back.
• If so, guide the USB cable from the CytoSMART™ Lux2 through it (g. 3a)
• If no port is present, place the cable between the door and frame of the incubator
(g. 3b).
After the cable is properly guided, place the CytoSMART™ Lux2 inside the incubator.
Important:
Be careful when guiding the cable between the door and frame of the
incubator. The door hinges can cause a cable breach, which is not covered by warranty.
CytoSMARTTM Lux2 Instruction Manual
8
Fig. 3. When a port is present, guide the cable through it (a), otherwise guide it between the door and frame (b).
A. B.

CytoSMART Lux2
Live Cell Imaging System
Instruction Manual
Securing the Cable
You can easily secure the USB cable on the outside of the incubator using the three
cable clips. We recommend you attach the tablet on the incubator door. When doing so,
use one cable clip to secure the USB cable connection near the tablet. For more details,
please check the quick start guide of the tablet.
Status Indicator
To check if the device is active, open the incubator to see if the CytoSMART™ Lux2 is
illuminated:
• Green light: the device is active and an image is visible on the live screen.
• No light: the device is in-active. The device is powered down, as it is in between
imaging or not properly connected.
Vessel Placement
It does not matter which culture vessel you use. The CytoSMART™ Lux2 is compatible
with a variety of culture vessels, including T-asks, well plates, petri dishes and at tubes.
Please place the CytoSMART™ Lux2 in the incubator with the logo facing the operator.
This way the image moves in the directions indicated by the arrows when the culture
vessel is moved on the CytoSMART™ Lux2 (Fig. 4).
Starting the Software
You do not have to manually activate the software. The CytoSMART™ software will start
automatically when the tablet is activated. To start recording, the CytoSMART™ Lux2
needs to be properly connected via USB.
Fig. 4. Movement of the cell culture with the corresponding movement on the live screen.
2
21
1
9

4. Setup an experiment
This is it, the real magic begins here. With the CytoSMART™ Lux2 properly placed inside
the incubator and the software active, you can begin with the imaging of an experiment.
Place a culture vessel on the Lux2 to begin. An image of the cells will be visible on the
live screen (g. 5).
Zoom Level
Before you can get your images, you need to select what these images should look like.
Select the correct zoom level for the experiment. Just select ‘Menu’ (1) on the bottom
left corner and select ‘Zoom in’ or ‘Zoom out’ (2), for a 200x or 100x magnication
respectively (Fig. 5).
Focus
The right focus is all you need to get the perfect images. Use the ‘Slide bar’ (3) to adjust
the focus (Fig. 5). The plus and minus buttons can be used for more precise adjustments.
Important:
Registration of your device is required before you can start imaging! The
next pages will help you with this.
Fig. 5. The live screen will show an image, when the Lux2 is active.
2
1 4
3
CytoSMARTTM Lux2 Instruction Manual
10

Registration of the Device
After you press ‘Start experiment’ (4) for the rst time, the device needs to be registered
using the license key provided. By selecting ‘Existing organization’ (5) from the menu
(Fig. 6), the device can also be added to a pre-existing CytoSMARTTM account. If you are
a new user, please select ‘New registration’ (6).
To register the CytoSMART™ Lux2, enter a name (7) for the device, e.g. company name or
research group. Other CytoSMARTTM products can be added to this name. Next, create a
personal account using an email address (8) and a personal password (9). An on-screen
keyboard will appear, allowing you to enter your details. To nish, select ‘Sign Up’ (10)
from the menu (g. 7).
CytoSMART Lux2
Live Cell Imaging System
Instruction Manual
Fig. 6. Registration menu.
Fig. 7. Account details menu.
5 6
7
9
10
8
11

Enter the provided license key (11) and select “Register” (12) to continue (g. 8).
Account Setup
It does not matter whether you want to include one or multiple experiments in one
project. The CytoSMART™ Lux2 can do it all. An experiment is one imaging session of a
cell culture experiment.
Select “Start Experiment” (4) in the live screen (g. 5), to start a new experiment simply
login. A menu will appear (Fig. 9) asking to provide login details (13). Use the details
created previously, and select ‘Log in’ (14).
Do you want to create new account? Just select ‘Create an account with’ (15) from the
menu.
Fig. 8. Registration details menu.
Fig. 9. Account log in menu.
12
11
14
15
13
CytoSMARTTM Lux2 Instruction Manual
12

Start a Project
If you are the creator of a new project, you will be assigned as a project owner or an
admin (16) and this cannot be changed (g. 10). A project can hold multiple experiments.
Optionally, you can give additional users access to a project by adding their email
address (17). These additional users will receive an invitation email to join the project.
You need to provide a project name to continue (18).
Next, an optional project description and visual representation (Project Icon) can be
added to a project (19). Here you can provide additional information regarding the
project, for all users with project access.
After entering all details, select ‘Create my project’ to create a new project (20).
CytoSMART Lux2
Live Cell Imaging System
Instruction Manual
Fig. 10. Project menu.
19
18
20
16
17
13

Start an Experiment
After you have created a project, the new experiment screen (Fig. 11) will appear. By
selecting the dropdown menu (21), you can assign the experiment to a dierent project.
When you want to start a new project, select the ‘Create a new project’ (22) option. This
will return you to the project menu.
An experiment name is required to continue (23). Additionally, an experiment specic
description can be added if you wish (24).
Next, set the desired imaging frequency by selecting “Snapshot interval (in minutes)”
(25). A drop down menu will appear with dierent intervals to choose from.
Important:
Since biological cells can be susceptible to light, it is advised not to use a
higher recording frequency than needed.
Now it is time to push the big button. After selecting ‘Start my experiment’ (26), the
imaging will begin and a conrmation email with a link to the experiment will be sent to
the project owner and optional additional users.
When the imaging has started, the system will go in sleep mode. For more details
regarding the sleep mode, please check the quick start guide of the tablet.
Fig. 11. Experiment menu.
23
25
26
22
21
CytoSMARTTM Lux2 Instruction Manual
14
24

Ending an Experiment
Stopping is as easy as starting. To end an experiment, select the red ‘Stop experiment’
button (27) from the live screen and select ‘Yes’ to conrm (g. 12). A conrmation email
indicating that the project has ended will be sent.
CytoSMART Lux2
Live Cell Imaging System
Instruction Manual
Fig. 12. Ending an experiment.
27
5. Connecting to the Cloud
One of the coolest features of this hardware is that the experiment results can be
accessed through the CytoSMART™ Cloud. If you want to access the cloud, the following
are required:
• PC, tablet or another device with a web browser.
• Active internet connection.
• CytoSMART™ Cloud login details.
A two-year subscription to the CytoSMART™ Cloud is included with the CytoSMART™
Lux2. After starting an experiment, the captured images will be stored in the cloud. To
allow for this, make sure the system has an active internet connection. All time logs in
the cloud are set to GMT.
Conrmation Email
After starting an experiment, a conrmation email
is sent that contains a link to the cloud (g. 13).
Important:
When you did not receive a
conrmation email, please check the spam folder.
Fig. 13. Conrmation email.
15

Alternatively, go to https://cloud.cytosmart.com/ to log in and view your projects and
experiments. This link will lead you to the CytoSMART™ Cloud login page (Fig. 14). Use
your credentials created earlier to log in, see §4.
Fig. 14. Login menu.
Project Overview
After logging in to the CytoSMART™ Cloud, you will get access to an overview of all
projects (g. 15).
Navigating the portal is pretty simple. If you have multiple projects in an account, use
the ‘Search Projects’ bar (1) to quickly search for a project. To create a new project,
select ‘New Project’ (2). This is similar to when beginning a new project, as described in
§4. It is not possible to start an experiment from the cloud.
You can get to your data easily. To access a project and all its assigned experiments,
select the projects corresponding ‘Project Icon’, ‘Project Title’ or ‘Arrow Icon’ (3).
To delete a project, select the ‘Waste Bin Icon’ (4).
Select the ‘Pencil Icon’ (5) to edit project details. This allows you to change the project
name and its description.
2
3
CytoSMARTTM Lux2 Instruction Manual
16
Fig. 15. Project overview.
5
4
1

Experiment Overview
After selecting a project (3), you will get access to an overview of all experiments
assigned to that project (g. 16). In the top, you can see an overview of the project data
(6). As with the project overview, use the ‘Search’ bar (7) to nd a specic experiment
within a project.
Select a specic experiment by clicking on its ‘Experiment Icon’, ‘Experiment Title’ or
the ‘Arrow Icon’ (8). This will bring up the experiment page of that specic experiment.
To edit details of an experiment, select the ‘Pencil Icon’ (9). This allows you to change
the name and description of an experiment.
To delete an experiment entirely, select the ‘Waste Bin Icon’ (10).
CytoSMART Lux2
Live Cell Imaging System
Instruction Manual
Fig. 16. Experiment overview.
7
109
8
17

Experiment Results
After you select a specic experiment, the data collected during that experiment will be
presented in the CytoSMART™ experiment page (g. 17). In the next few pages, you will
nd an overview of the panes and buttons in this Experiment Page.
Overview:
11: Time-lapse movie of the cell culture.
12: Download buttons to download movies (.mp4), images (.jpeg) and cell coverage,
and temperature values (.csv).
13: Experiment Summary Pane.
14: Notes Pane.
15: Notication Pane.
16: Logbook Pane.
17: Cell coverage graph.
18: Temperature graph.
Fig. 17. Experiment page.
13
11
17
18
14
15
16
12
CytoSMARTTM Lux2 Instruction Manual
18

Time-Lapse Movie Pane
This pane shows you a time-lapse
movie of the cell culture (g. 18). You
can control the playback of the movie
by the buttons below the image, these
include play, pause, forward one picture,
backward one picture. It also has a slider
to control the movie (point in time).
The ‘View Tracking’ button allows to
display the cell coverage in the time-
lapse movie. Adjust the playback speed
of time-lapse movie with the ‘Turtle-
Cheetah’ slider.
Experiment Summary Pane
The summary pane (g. 19) does exactly
what you would expect: it provides an
overview of the project i.e. project start
date, duration, average temperature
and number of images taken (snapshot
count).
CytoSMART Lux2
Live Cell Imaging System
Instruction Manual
Fig. 18. Time-lapse movie pane.
Fig. 19. Experiment summary pane.
19

Notes Pane
You can add additional information (e.g. passage
number, experiment conditions, etc.) regarding your
project in the notes pane (g. 20). This information will
be stored in the database with your project, including
a date and time-stamp.
Notication Pane
In the notication pane (g. 21), you can set thresholds to enable email notication if:
• Cell coverage reaches a specied percentage.
• Temperature crosses a specied limit.
To set a notication, select the “+” button. The
notication pane will unfold allowing you to specify
the Type and Value of the desired notication. You
can add multiple upper and lower limits. Furthermore,
you can delete or add these notications at any time
throughout the duration of the experiment. When a
limit is reached, the project owner receives an email
notication.
Fig. 21. Notication pane.
Fig. 20. Notes pane.
CytoSMARTTM Lux2 Instruction Manual
20
Other manuals for Lux2
1
Table of contents
Other CytoSMART Laboratory Equipment manuals