manuals.online logo
Brands
  1. Home
  2. •
  3. Brands
  4. •
  5. D-Link
  6. •
  7. Security Camera
  8. •
  9. D-Link DCS-4612EK User manual

D-Link DCS-4612EK User manual

Additional documentation is also available on the D-Link website
DCS-4612EK
Quick Installation Guide
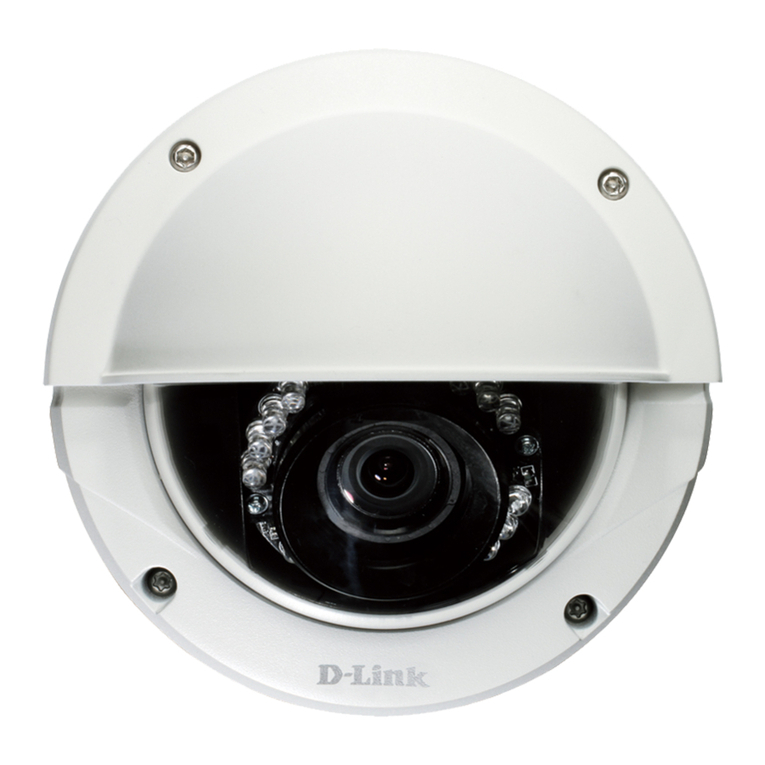
Vigilance Outdoor Dome Camera
DCS-4614EK
DCS-4618EK
Contents
ENGLISH 1
DEUTSCH 13
FRANÇAIS 25
ESPAÑOL 37
ITALIANO 49
РУССКИЙ 61
УКРАЇНСЬКА 76
Quick Installation Guide 1
ENGLISH
Hardware Overview
DCS-4612EK/DCS-4614EK Front/Side
Figure 1: Front View Features
# Feature Description
1microSD
Slot
Slot for a microSD card.
2
Vertical
Adjustment
Screw
Loosen to adjust the vertical
angle of the camera
3 IR LED Provides illumination for low-
light environments
4
Horizontal
Adjustment
Screw
Loosen to adjust the horizontal
angle of the camera
5 Camera Lens Fixed camera lens
Table 1: Front View Descriptions
Before You Begin
This installation guide provides instructions
for installing and configuring your camera.
Additional documentation is also available on
the D-Link support website.
Refer to the manual for your model for
additional information on how to configure
the device using the associated Setup Wizard.
The manual and Setup Wizard may be found at
https://dlink.com/support/.
Package Contents
This package includes the following items:
• Vigilance Outdoor Dome Camera
• Cable Waterproofing Connector
• Mounting Kit
• Allen Key
• Alignment Sticker
• Documentation
If any of the above items are damaged or
missing, please contact your local D-Link reseller.
Note: Using a power supply with a different
voltage than the one recommended for the
device will cause damage and void the warranty
for this product.
System Requirements
• Computer running Microsoft Windows®
• Internet Explorer 11
2
3
4
5
1
2Quick Installation Guide
ENGLISH
DCS-4618EK Front/Side
Figure 2: Front View Features
# Feature Description
1
Vertical
Adjustment
Screw
Loosen to adjust the vertical
angle of the camera.
2 IR LED Provides illumination for low-
light environments
3 Camera Lens Motorized camera lens
4microSD
Slot
Slot for microSD card.
Table 2: Front View Descriptions
DCS-4612EK/DCS-4614EK/DCS-
4618EK Cable Interfaces
Figure 3: Cable Interfaces
# Feature Description
1Ethernet
Jack
RJ-45 connector for Ethernet. Can
also be used to power the camera
using Power over Ethernet (PoE)
2Power
Connector
Connects to an optional 12 V / 1.5 A
power adapter (not included)
3Reset
Button
Press and hold for more than five
seconds, then release to perform
a factory reset
Table 3: Cable Interface Descriptions
Management Options
To configure and manage your camera, it
is recommended that you download the
associated Setup Wizard and the D-ViewCam
software suite, both of which are available from
the D-Link website.
Installing the Setup Wizard
1. Open a web browser, navigate to
dlink.com/support/, and select your
region.
2. On the next screen, enter the model
number of your camera in the search bar
and click Search. Click the picture of your
camera. On the product page, click the
Download button next to SetupWizard.
3. Once the executable file has finished
downloading, click it and follow the
instructions to install the Setup Wizard.
1
2
3
3
2
14
Quick Installation Guide 3
ENGLISH
Conguring the Camera
1. Ensure that your camera is plugged in
(either using a 12 V 1.5 A power adapter
or a PoE-enabled device) and connected
to your computer with an Ethernet cable.
2. Open the Setup Wizard. It will display
the MAC address and IP address of your
camera. If you have a DHCP server on your
network, this will be a dynamic IP address.
If your network does not use a DHCP
server, the network camera’s default static
IP 192.168.0.20 will be displayed. Select
your camera, then click the Link button to
continue.
Figure 4: Launching the Setup Wizard
3. If this is your first time logging in, you will be
prompted to create a password, which must
be between 8 and 30 characters and must
contain both letters and numbers. Press OK.
Figure 5: Creating a Password
4. To view the camera display, on the main
screen of the Setup Wizard, click the
Search button, then select your camera
and click the Link button to open the
camera’s web UI. Alternatively, open a
web browser and type the camera’s IP
address (displayed in step 2) into the URL
bar and press Enter. Enter the password
you created, and click Login to continue.
Figure 6: Authenticating
Installing D-ViewCam
1. Open a web browser, navigate to
dlink.com/support/, and select your
region.
2. On the next screen, click the D-ViewCam
link and click the most recent version to
download the D-ViewCam setup wizard
(packaged as a zip file).
3. Once the file has finished downloading,
unzip it, and click the executable file
SetupTool.exe. Follow the instructions
to install the D-ViewCam software suite.
For advanced viewing options, refer to the
D-ViewCam User Manual.
4Quick Installation Guide
ENGLISH
Mounting the Camera
Note:It is highly recommended that you configure
and test your camera before mounting it.
The DCS-4612EK, DCS-4614EK and DCS-4618EK
can be installed on the ceiling or wall. The
process is identical for both cameras.
Mounting the Camera
1. Use the included T10 or T15 screwdriver
to unscrew the three screws on the dome
cover and remove it.
Figure 7: Removing the Cover
2. Press the sides of the plastic lining and
gently lift it to remove the lining from
the camera.
Figure 8: Removing the Lining
3. Place the installation sticker on the ceiling
or wall. Using a 4 mm drill bit, drill three
holes 30 mm deep into the wall or ceiling.
Drive the plastic wall anchors into the holes.
Figure 9: Attaching the Camera
4. Insert three mounting screws into the
holes in the base of the device. Place the
device against the mounting sticker and
screw it in to attach it to the wall or ceiling.
Three screws with rubber gaskets are
provided with DCS-4618EK. To ensure
waterproofness you MUST mount the
DCS-4618EK with all three of the provided
screws.
Quick Installation Guide 5
ENGLISH
5. Reattach the lining to the camera body
by sliding it on until it clicks. Replace
the dome cover and refasten the screws
securing it in place.
Figure 10: Replace the dome cover
Adjusting the Lens
The angle, zoom and focus of the lens can
adjusted using the web UI. For information on
how to do this, refer to the User Manual.
15° - 90°
0 - 350° 0 - 335°
10° - 90°
0 - 350°
0 - 335°
Figure 11: Positioning the Lens
Waterproong Your Installation
To waterproof your camera, follow the instructions
below. A round Ethernet cable, a crimping tool,
and RJ-45 plugs are required for this procedure.
1. Place the washer around the base of the
Ethernet connector as shown.
Figure 12: Attaching the Washer Ring
2. Thread the bare Ethernet cable through
the waterproof connector as shown.
Figure 13: Threading the Cable
3. Attach an RJ-45 plug to the end of the
cable using a crimping tool.
Figure 14: Attaching the RJ-45 Connector
6Quick Installation Guide
ENGLISH
4. Connect the RJ-45 plug into the Ethernet
connector, then screw the waterproof
connector to the Ethernet connector by
turning it clockwise about one half-turn.
Figure 15: Attaching the Waterproof Connector
5. Screw the back part of the waterproof
connector clockwise until there is a tight
seal around the Ethernet cable.
Figure 16: Tightening the Connector
6. The power connector and reset
button cables are not waterproof. It is
recommended to use waterproof tape
to protect them. Wind the tape around
each cable in an overlapping manner to
cover them.
Figure 17: Wrapping the Power
Connector and Reset Button
Quick Installation Guide 7
ENGLISH
Using the DCS-37-5 Mount (optional)
1. 3.
4.2.
8Quick Installation Guide
ENGLISH
Using the DCS-37-6 Mount (optional)
1. 3.
4.2.
Quick Installation Guide 9
ENGLISH
5. 7.
8.6.
10 Quick Installation Guide
ENGLISH
9. 11.
10.
Quick Installation Guide 11
ENGLISH
PM5*16mm
PM4*8mm
Using the DCS-37-4 Mount (optional)
DCS-37-6
PM4*10mm PM4*10mm
DCS-37-4
DCS-37-5
DCS-37-4
Model no.
DCS-37-4 DCS-37-5 DCS-37-6
Screw hole Screw size Screw hole Screw size Screw hole Screw size
DCS-4612EK
DCS-4614EK - - B PM4*8mm B PM4*10mm
DCS-4618EK - - G PM4*8mm A PM4*10mm
DCS-37-5 H PM5*16mm - - - -
DCS-37-6 F PM4*10mm - - - -
12 Quick Installation Guide
ENGLISH
TECHNICAL SUPPORT dlink.com/support
Additional Information
If you are encountering problems setting up
your network, please refer to the user manual.
Product specifications, size and shape are
subject to change without notice, and actual
product appearance may differ from that
depicted on the packaging. Visit your local
D-Link website for technical support details.
Additional help is available online. To find out
more about D-Link products or marketing
information, please visit the D-Link support
website at http://dlink.com/support/.
Warranty Information
Please visit http://warranty.dlink.com/ for
warranty information for your region.
Installation Information
Hardware-Übersicht
DCS-4612EK/DCS-4614EK Front/
Seite
Abbildung 1: Elemente Vorderseite
Nr. Funktion Beschreibung
1microSD-
Steckplatz
Steckplatz für microSD-
Karte.
2Vertikale
Einstellschraube
Lockern, um den vertikalen
Winkel der Kamera
anzupassen
3 IR-LED
Beleuchtung für
schwach ausgeleuchtete
Umgebungen
4Horizontale
Einstellschraube
Lockern, um den
horizontalen Winkel der
Kamera anzupassen
5 Kameraobjektiv Festes Kameraobjektiv
Tabelle 1: Beschreibung Vorderseite
Vor der Inbetriebnahme
Diese Installationsanleitung beschreibt die
Installation und Konfiguration Ihrer Kamera.
Weitere Unterlagen finden Sie auf der Support-
Website von D-Link.
Für weitere Informationen zur Konfiguration
des Geräts mit dem Setup-Assistenten siehe
das Handbuch Ihres Produkts. Handbuch
und Setup-Assistenten finden Sie unter
https://dlink.com/support/.
Packungsinhalt
Im Lieferumfang ist Folgendes enthalten:
• Vigilance Outdoor Dome Camera
• Wasserdichter Steckverbinder
• Montageset
• Innensechskantschlüssel
• Klebeschablone
• Dokumentation
Sollte eines der oben aufgeführten Teile
beschädigt sein oder fehlen, wenden Sie sich
bitte an Ihren D-Link-Händler vor Ort.
Hinweis: Die Verwendung eines Netzteils mit
einer anderen Betriebsspannung als der für
dieses Gerät empfohlenen führt zu Schäden
und einem Erlöschen des Garantieanspruchs
für dieses Produkt.
Systemvoraussetzungen
• Computer mit Microsoft Windows®
• Internet Explorer 11
2
3
4
5
1
Quick Installation Guide 13
DEUTSCH
DCS-4618EK Front/Seite
Abbildung 2: Elemente Vorderseite
Nr. Funktion Beschreibung
1Vertikale
Einstellschraube
Lockern, um den vertikalen
Winkel der Kamera
anzupassen.
2 IR-LED
Beleuchtung für
schwach ausgeleuchtete
Umgebungen
3 Kameraobjektiv Motorisiertes
Kameraobjektiv
4microSD-
Steckplatz
Steckplatz für microSD-
Karte.
Tabelle 2: Beschreibung Vorderseite
DCS-4612EK/DCS-4614EK/
DCS-4618EK Kabel
Abbildung 3: Kabel
Nr. Funktion Beschreibung
1Ethernet-
Anschluss
RJ-45-Verbindungsstecker
für Ethernet. Kann auch für
die Stromzufuhr mittels PoE
für die Kamera verwendet
werden
2Stromanschluss
Zum Anschluss an ein
Netzteil (12 V / 1,5 A) (nicht
im Lieferumfang enthalten)
3 Reset-Taste
Halten Sie die Taste über fünf
Sekunden lang gedrückt und
lassen Sie dann los, um das
Gerät auf Werkseinstellungen
zurückzusetzen
Tabelle 3: Beschreibung Kabel
Kameraverwaltung
Es wird empfohlen, für Konfiguration und
Verwaltung Ihrer Kamera den entsprechenden
Setup-Assistenten und die D-ViewCam-Software
von der D-Link-Website herunterzuladen.
Den Setup-Assistenten installieren
1. Öffnen Sie dlink.com/support/ in einem
Webbrowser und wählen Sie Ihre Region.
2. Geben Sie im nächsten Bildschirm die
Modellnummer Ihrer Kamera in die
Suchleiste ein und klicken Sie auf Suchen.
Klicken Sie auf das Bild Ihrer Kamera.
Klicken Sie auf der Produktseite neben
Setup-Assistent auf Download.
1
2
3
14 Quick Installation Guide
DEUTSCH
3
2
14
3. Klicken Sie auf die heruntergeladene
ausführbare Datei und folgen Sie den
Anweisungen, um den Setup-Assistenten
zu installieren.
Konguration der Kamera
1. Stellen Sie sicher, dass die Kamera mit
Strom versorgt wird (entweder über ein
Netzteil mit 12 V/1,5 A oder ein PoE-
Gerät) und per Ethernet-Kabel mit Ihrem
Computer verbunden ist.
2. Öffnen Sie den Setup-Assistenten. Er zeigt
die MAC- und IP-Adresse Ihrer Kamera an.
Wenn in Ihrem Netzwerk ein DHCP-Server
vorhanden ist, ist dies eine dynamische
IP-Adresse. Weist Ihr Netzwerk keinen
DHCP-Server auf, wird die standardmäßige
statische IP-Adresse 192.168.0.20 der
Netzwerkkamera angezeigt. Wählen Sie
Ihre Kamera aus und klicken Sie auf Link,
um fortzufahren.
Abbildung 4: Den Setup-Assistenten starten
3. Wenn Sie sich zum ersten Mal anmelden,
werden Sie aufgefordert, ein Kennwort
zu erstellen. Es muss zwischen 8 und 30
Zeichen lang sein und Buchstaben und
Ziffern enthalten. Drücken Sie OK.
Abbildung 5: Ein Kennwort erstellen
4. Um die Kamera anzuzeigen, klicken Sie im
Hauptbildschirm des Setup-Assistenten
auf Suche , wählen Sie Ihre Kamera aus
und klicken Sie auf Link, um die Web-
Benutzeroberfläche der Kamera zu öffnen.
Alternativ können Sie auch die in Schritt 2
angezeigte IP-Adresse der Kamera in die
Adresszeile eines Webbrowsers eingeben
und die Eingabetaste drücken. Geben
Sie das erstellte Kennwort ein und klicken
Sie auf Anmelden.
Abbildung 6: Authentizierung
D-ViewCam installieren
1. Öffnen Sie dlink.com/support/ in einem
Webbrowser und wählen Sie Ihre Region.
2. Klicken Sie im nächsten Bildschirm auf
den D-ViewCam-Link und auf die aktuelle
Version, um den D-ViewCam Setup-
Assistenten als Zip-Datei herunterzuladen.
3. Entpacken Sie die heruntergeladene
Datei und klicken Sie auf die ausführbare
Datei SetupTool.exe. Folgen Sie den
Anweisungen zur Installation der
D-ViewCam-Software.
Für weitere Ansichtsoptionen siehe das
D-ViewCam-Benutzerhandbuch.
Montage der Kamera
Hinweis: Es ist unbedingt ratsam, die Kamera
vor der Montage zu konfigurieren und zu testen.
Quick Installation Guide 15
DEUTSCH
DCS-4612EK, DCS-4614EK und DCS-4618EK
können an Decken oder Wänden installiert
werden. Die Montage ist für beide Kameras
dieselbe.
Montage der Kamera
1. Lockern Sie mit dem inbegriffenen
T10- oder T15-Schraubendreher die drei
Schrauben auf der Abdeckhaube und
entfernen Sie sie.
Abbildung 7: Die Abdeckung entfernen
2. Drücken Sie die Seiten der
Kunststoffverkleidung und heben Sie sie
vorsichtig hoch, um sie von der Kamera
zu entfernen.
Abbildung 8: Die Verkleidung entfernen
3. Bringen Sie die Klebeschablone an der
Decke oder der Wand an. Verwenden Sie
einen 4-mm-Bohrkopf und bohren Sie drei
30 mm tiefe Löcher in Wand oder Decke.
Stecken Sie die Kunststoffdübel in die
Löcher.
Abbildung 9: Anbringen der Kamera
4. Stecken Sie die drei Befestigungsschrauben
in die Löcher im Boden des Geräts. Setzen
Sie das Gerät auf die Klebeschablone
auf und schrauben Sie es an, um es an
der Wand oder Decke zu befestigen.
Drei Schrauben mit Gummidichtungen
sind im Lieferumfang der DCS-4618EK
enthalten. Um die Dichtigkeit gegen
Wasser zu gewährleisten, MÜSSEN Sie die
DCS-4618EK mit allen drei mitgelieferten
Schrauben montieren.
16 Quick Installation Guide
DEUTSCH
5. Schieben Sie die Verkleidung wieder auf
das Kameragehäuse, bis es klickt. Setzen
Sie die Abdeckhaube wieder auf und
schrauben Sie sie fest.
Abbildung 10: Die Abdeckhaube aufsetzen
Einstellung des Objektivs
Winkel, Zoom und Fokus des Objektivs können
über die Web-Benutzeroberfläche angepasst
werden. Informationen dazu finden Sie im
Benutzerhandbuch.
15° - 90°
0 - 350° 0 - 335°
10° - 90°
0 - 350°
0 - 335°
Abbildung 11: Das Objektiv ausrichten
Ihre Installation wasserdicht
machen
Um Ihre Kamera wasserdicht zu machen, gehen
Sie wie folgt vor. Dafür benötigen Sie ein rundes
Ethernet-Kabel, eine Crimpzange und RJ-45
Stecker.
1. Bringen Sie den Dichtungsring auf dem
Ethernet-Steckverbinder (wie in der
Abbildung zu sehen) an.
Abbildung 12: Unterlegscheibe anbringen
2. Führen Sie das blanke Ethernet-Kabel
wie abgebildet durch den wasserdichten
Steckverbinder.
Abbildung 13: Kabel durchführen
3. Bringen Sie mit der Crimpzange einen
RJ-45-Stecker am Kabelende an.
Abbildung 14: RJ-45-Stecker anbringen
Quick Installation Guide 17
DEUTSCH
4. Stecken Sie den RJ-45 Stecker in den
Ethernet-Steckverbinder und drehen Sie
den wasserdichten Steckverbinder im
Uhrzeigersinn etwa einehalbeUmdrehung
auf den Ethernet-Steckverbinder.
Abbildung 15: Wasserdichten
Steckerbinder anbringen
5. Drehen Sie den hinteren Teil des
wasserdichten Steckanschlusses im
Uhrzeigersinn, bis eine feste Abdichtung
um das Ethernet-Kabel erreicht ist.
Abbildung 16: Steckverbinder xieren
6. Netzanschluss- und Reset-Kabel sind
nicht wasserdicht. Es wird empfohlen,
sie mit wasserdichtem Klebeband zu
schützen. Umwickeln Sie dazu die Kabel
überlappend mit Klebeband.
Abbildung 17: Netzanschluss und
Reset-Taste umwickeln
18 Quick Installation Guide
DEUTSCH

Other manuals for DCS-4612EK

1

This manual suits for next models

2

Other D-Link Security Camera manuals

D-Link Mydlink DCS-8200LH User manual

D-Link

D-Link Mydlink DCS-8200LH User manual

D-Link DCS-942L Manual

D-Link

D-Link DCS-942L Manual

D-Link DCS-P6000LH User manual

D-Link

D-Link DCS-P6000LH User manual

D-Link DCS-930L Manual

D-Link

D-Link DCS-930L Manual

D-Link DCS?6010L User manual

D-Link

D-Link DCS?6010L User manual

D-Link DCS?6010L Installation and operation manual

D-Link

D-Link DCS?6010L Installation and operation manual

D-Link SECURICAM DCS-6511 User manual

D-Link

D-Link SECURICAM DCS-6511 User manual

D-Link DCS-8300LH User manual

D-Link

D-Link DCS-8300LH User manual

D-Link DCS-930L User manual

D-Link

D-Link DCS-930L User manual

D-Link SECURICAM DCS-5635 User manual

D-Link

D-Link SECURICAM DCS-5635 User manual

D-Link DCS-6314 User manual

D-Link

D-Link DCS-6314 User manual

D-Link DCS-6500HLV2 User manual

D-Link

D-Link DCS-6500HLV2 User manual

D-Link DCS-3511 User manual

D-Link

D-Link DCS-3511 User manual

D-Link DCS-1130 - mydlink-enabled Wireless N Network... User manual

D-Link

D-Link DCS-1130 - mydlink-enabled Wireless N Network... User manual

D-Link DCS-942L User manual

D-Link

D-Link DCS-942L User manual

D-Link SECURICAM DCS-6511 User manual

D-Link

D-Link SECURICAM DCS-6511 User manual

D-Link DCS-6517 User manual

D-Link

D-Link DCS-6517 User manual

D-Link DCS-3410 User manual

D-Link

D-Link DCS-3410 User manual

D-Link DCS-6815 User manual

D-Link

D-Link DCS-6815 User manual

D-Link DCS-2310L User manual

D-Link

D-Link DCS-2310L User manual

D-Link DCS-5010L User manual

D-Link

D-Link DCS-5010L User manual

D-Link DCS-2330L User manual

D-Link

D-Link DCS-2330L User manual

D-Link SECURICAM DCS-7110 User manual

D-Link

D-Link SECURICAM DCS-7110 User manual

D-Link DCS-5230L User manual

D-Link

D-Link DCS-5230L User manual

Popular Security Camera manuals by other brands

Samsung Techwin SCP-2270H user manual

Samsung

Samsung Techwin SCP-2270H user manual

JVC V.NETWORKS VN-C625U user guide

JVC

JVC V.NETWORKS VN-C625U user guide

CamTron ccd camera Instruction guide

CamTron

CamTron ccd camera Instruction guide

EverFocus ECMD100i operation instruction

EverFocus

EverFocus ECMD100i operation instruction

cctv camera pros HCPRO-420SC Osd manual

cctv camera pros

cctv camera pros HCPRO-420SC Osd manual

Commax DRC-4U user manual

Commax

Commax DRC-4U user manual

Emos H4031 manual

Emos

Emos H4031 manual

Axis P3265-LV installation guide

Axis

Axis P3265-LV installation guide

Vitek VTC-C2BAZE manual

Vitek

Vitek VTC-C2BAZE manual

EGPIS HD2100 quick start guide

EGPIS

EGPIS HD2100 quick start guide

EverFocus Polestar EZN7221 user manual

EverFocus

EverFocus Polestar EZN7221 user manual

Panasonic WV-SW550 Series operating instructions

Panasonic

Panasonic WV-SW550 Series operating instructions

Lorex CVC7731 SERIES quick start guide

Lorex

Lorex CVC7731 SERIES quick start guide

Interlogix TruVision TVB 2102 installation instructions

Interlogix

Interlogix TruVision TVB 2102 installation instructions

Swann MBC4MPCAM280116E instruction manual

Swann

Swann MBC4MPCAM280116E instruction manual

System Q Zip SEE852 instruction manual

System Q

System Q Zip SEE852 instruction manual

Eneo TVB-2080Z03IR Quick installation guide

Eneo

Eneo TVB-2080Z03IR Quick installation guide

Vitek Alpha VTC-IRLED24 datasheet

Vitek

Vitek Alpha VTC-IRLED24 datasheet

manuals.online logo
manuals.online logoBrands
  • About & Mission
  • Contact us
  • Privacy Policy
  • Terms and Conditions

Copyright 2025 Manuals.Online. All Rights Reserved.