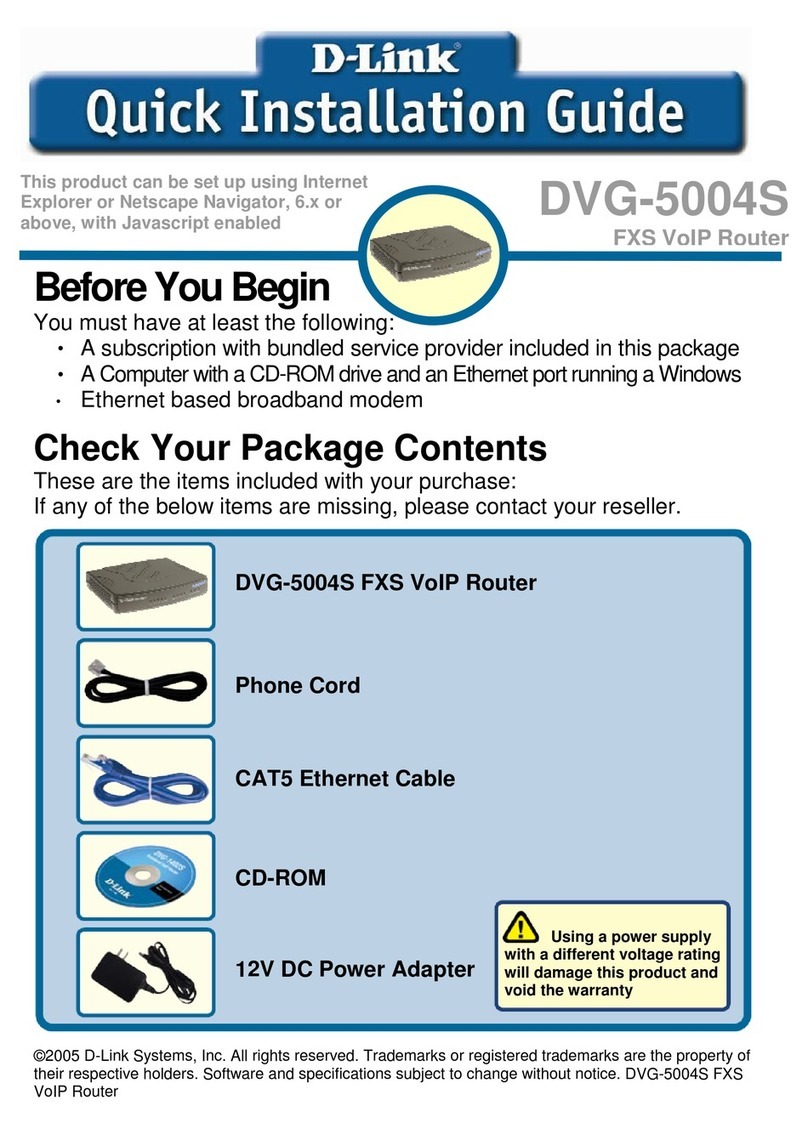
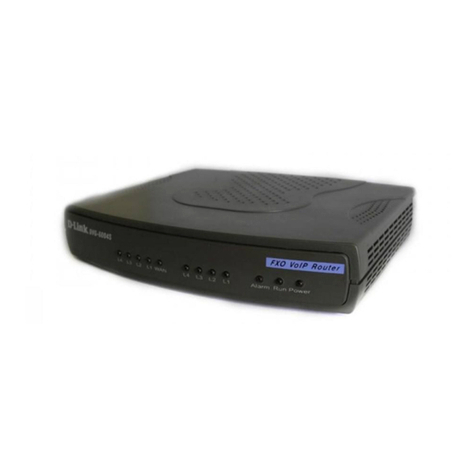
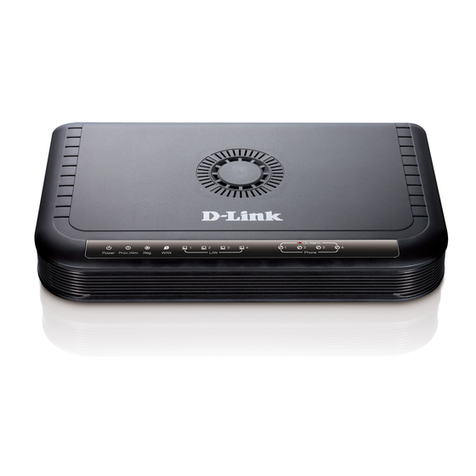
D-Link DVX-1000 User manual

DVX - 1000: Network Telephone Exchange
User Manual
Version 0.6
D-Link India Ltd.,
Software and R&D Center,
Bangalore.

DVX-1000 User Manual
D-Link Confidential 2
1Revision History
Originator Comments Revision
Level
Release
date
Hareesh N.S. Initial Draft 0.1 18/05/2005
Sunil George Updates for DVX-1000 0.5 16/06/2005
Sunil George Added FAQ 0.6 21/06/2005
Last Saved on 7/21/2005 2:02 PM

DVX-1000 User Manual
D-Link Confidential 3
TABLE OF CONTENTS
1REVISION HISTORY.................................................................................................................. 2
2INTRODUCTION........................................................................................................................... 6
2.1 ABOUT THIS MANUAL ................................................................................................................ 6
2.2 CONVENTIONS ............................................................................................................................ 7
3DVX WEB REQUIREMENTS .................................................................................................... 7
4CONFIGURING SYSTEM PARAMETERS ........................................................................... 7
4.1 USING THE WEB INTERFACE TO CONFIGURE THE SYSTEM ....................................................... 7
4.1.1 Configuring the IP............................................................................................................ 8
4.1.2 Configuring the DNS server address........................................................................ 8
4.1.3 Setting the system time................................................................................................ 8
4.1.4 Setting other configurable parameters.................................................................... 9
4.2 CONFIGURING THE SYSTEM THROUGH THE COMMAND LINE INTERFACE ............................... 9
4.2.1 Help Command:................................................................................................................ 9
4.2.2 History Command: .......................................................................................................... 9
4.2.3 Set IP Command: .......................................................................................................... 10
4.2.4 Set Netmask Command:............................................................................................. 10
4.2.5 Set DHCP Command: ................................................................................................... 10
4.2.6 Set Gateway Command: ............................................................................................. 10
4.2.7 Set DNS Server Command: ....................................................................................... 10
4.2.8 Set Primary DNS Server Command: ...................................................................... 11
4.2.9 Set Secondary DNS Server Command:................................................................. 11
4.2.10 Set NTP Server Command: ................................................................................... 11
4.2.11 Set Primary NTP Server Command: .................................................................. 11
4.2.12 Set Secondary NTP Server Command:............................................................. 12
4.2.13 Set Zone Command:................................................................................................ 12
4.2.14 Set Date Command: ................................................................................................ 12
4.2.15 Set Time Command:................................................................................................ 12
4.2.16 Set Year Command:................................................................................................. 13
4.2.17 Set Month Command: ............................................................................................. 13
4.2.18 Set Day Command:.................................................................................................. 13
4.2.19 Set Hour Command: ................................................................................................ 13
4.2.20 Set Minute Command: ............................................................................................ 14
4.2.21 Show IP Command: ................................................................................................. 14
4.2.22 Show Netmask Command:.................................................................................... 14
4.2.23 Show Gateway Command: .................................................................................... 14
4.2.24 Show DNS Server Command: .............................................................................. 14
4.2.25 Show Alarms Command:........................................................................................ 14
4.2.26 Restore Certificate Command: ........................................................................... 15
4.2.27 Restart Command:.................................................................................................. 15
5CONFIGURING THE CALL SERVER .................................................................................. 15
5.1 GENERAL CONFIGURATION ...................................................................................................... 15
5.2 USER CONFIGURATION ............................................................................................................ 16
5.2.1 Adding a new user......................................................................................................... 16
5.2.2 Customizing features for users. ............................................................................... 17
5.2.3 Modifying user details.................................................................................................. 18
5.3 REGISTRATIONS ....................................................................................................................... 18

DVX-1000 User Manual
D-Link Confidential 4
5.4 CONFIGURING GATEWAYS ....................................................................................................... 18
5.5 CONFIGURING ROUTES ............................................................................................................ 19
5.6 CONFIGURING GROUPS ........................................................................................................... 20
6USING THE FEATURE MANAGER..................................................................................... 20
6.1 CONFIGURING FEATURES ......................................................................................................... 20
6.2 ACTIVATING AND DEACTIVATING FEATURES .......................................................................... 20
6.2.1 Activating and deactivating features from the Web Interface...................... 21
6.2.2 Activating and deactivating features from the phone...................................... 21
6.3 CALL FEATURE DESCRIPTION .................................................................................................. 21
6.3.1 Call Forward ..................................................................................................................... 21
6.3.2 Call Forward: Always .................................................................................................... 21
6.3.3 Call Forward: On Busy ................................................................................................. 21
6.3.4 Call Forward: No Answer............................................................................................. 22
6.3.5 Do Not Disturb – Forward To Voicemail ................................................................ 22
6.3.6 Follow Me – Call Forwarding ...................................................................................... 22
6.3.7 Hunt Group....................................................................................................................... 22
7CONFIGURING THE AUTO ATTENDANT ....................................................................... 22
7.1 CONFIGURING VOICE PROMPTS ............................................................................................... 23
7.2 UPLOADING VOICE PROMPTS................................................................................................... 23
7.3 DELETING VOICE PROMPTS...................................................................................................... 23
7.4 CUSTOMIZING YOUR MENUS................................................................................................... 23
7.5 CONFIGURING AUTO ATTENDANT PARAMETERS AND SELECTING PREFERRED PROMPTS..... 23
7.6 CONFIGURING MENUS.............................................................................................................. 24
7.6.1 Adding menu options.................................................................................................... 24
7.6.2 Editing menu options.................................................................................................... 25
7.6.3 Deleting menu options................................................................................................. 25
7.7 HOLIDAY MENU CONFIGURATION............................................................................................ 25
7.8 CONFIGURING CALENDAR INFORMATION ................................................................................ 25
7.9 RESTORING THE DEFAULT MENU ............................................................................................. 25
7.10 MAKING CALLS THROUGH THE AUTO ATTENDANT .................................................................. 25
8CONFIGURING THE VOICEMAIL SERVER.................................................................... 26
8.1 CONFIGURING VOICEMAIL PARAMETERS ................................................................................. 26
8.2 USING THE MAIL BOX ADMIN ................................................................................................. 26
8.3 USING THE VOICE MAIL SERVER.............................................................................................. 26
8.3.1 Leaving a voice message for another user .......................................................... 26
8.3.2 Accessing your voice mailbox.................................................................................... 27
8.3.3 Retrieving voice messages from your voice mailbox....................................... 27
8.3.4 Customizing your mailbox greeting ........................................................................ 27
9LICENSING ................................................................................................................................... 28
10 PROVISIONING ......................................................................................................................... 28
11 SOFTWARE UPGRADE............................................................................................................. 29
11.1 UPGRADING FROM A WINDOWS MACHINE.............................................................................. 29
11.2 UPGRADING FROM A LINUX MACHINE ..................................................................................... 29
11.3 VIEWING UPGRADE HISTORY .................................................................................................. 29
12 INSTALLING AN SSL CERTIFICATE................................................................................ 30

DVX-1000 User Manual
D-Link Confidential 5
13 FACTORY RESET ........................................................................................................................ 30
13.1 FACTORY RESET FUNCTIONALITY............................................................................................ 30
14 SYSTEM REBOOT....................................................................................................................... 31
15 FIRMWARE INFORMATION................................................................................................. 31
16 VIEWING CALL DETAIL RECORDS (CDR) ................................................................... 31
17 VIEWING ALARMS .................................................................................................................. 32
18 CONFIGURATION BACKUP AND RESTORE................................................................. 32
19 FREQUENTLY ASKED QUESTIONS................................................................................... 32
20 REFERENCES................................................................................................................................35
21 APPENDIX..................................................................................................................................... 36
21.1 FEATURE PRIORITY TABLE ....................................................................................................... 36
21.2 FIREWALL .................................................................................................................................. 36
21.2.1 Firewall Feature List ................................................................................................. 36
21.2.2 Firewall Feature Description.................................................................................. 37

DVX-1000 User Manual
D-Link Confidential 6
2 Introduction
D-Link's Network Telephone Exchange (DVX-1000) is a SIP based solution,
addressing the VoIP communication requirements of small and medium enterprises.
DVX-1000 has built in Call Server, IVR/Auto-attendant and Voice Mail functionalities.
It helps VoIP devices like SIP phones, gateways etc to make and receive calls,
implements host of voice call features and manages accounts and provisioning of D-
Link endpoints.
DVX-1000, developed around state of the art hardware and embedded software, are
specially designed to address the requirements in the following environments:
♦Installation of a new enterprise IP communications network.
♦Expansion of an existing enterprise communications network.
♦Cost effective branch office communications.
DVX-1000 has the following built-in components
♦Call Server: A SIP based proxy server, that is responsible for call
establishment, call control and call account management. In addition to the
regular call processing, it offers a host of voice call features.
♦Auto Attendant: The auto attendant is a complete automated attendant with
customizable messages and configurable menu that helps the user to get to
the required extension within the system.
♦Voice Mail Server: DVX-1000 has a built-in voice mail server. Voice mail
server is responsible for managing voice mail boxes of individual users.
♦License Server: DVX-1000 comes with a license of maximum of 5 users and
a set of basic features as default. A set of advanced features and more
number of users can be added to the system. License Server manages
licensing of users advanced features.
♦Provisioning Server: Provisioning server is responsible for provisioning end
points, that support D-Link’s provisioning scheme.
♦Firewall: A custom made firewall, this monitors and controls the packets
going in and out of the DVX-1000
♦CLI: The Command Line Interface (CLI) is accessible through the console port
of DVX-1000. The CLI allows the administrator to view and modify system
configuration parameters. The complete set of commands are described in
detail in section ‘Configuring the system through the Command Line Interface’
♦Web Server: DVX-1000 has a built-in web server, that helps administrators
and users to access the system using a standard web browser.
2.1 About This Manual
This document provides information related to the installation and configuration of
DVX-1000 along with a description of all its features. The tasks described in this
document are intended for service providers and network administrators who guide
the deployment of VoIP services.

DVX-1000 User Manual
D-Link Confidential 7
Note:
Copyright to this manual is owned by D-Link. This document shall not be
reproduced, distributed or copied without the permission from D-Link.
Please contact Mr. Hareesh N.S. for suggestions regarding modifications to this
document.
2.2 Conventions
This document uses the following notational conventions:
bold face This convention is used to give strong emphasis.
0x0 Prefix to denote hexadecimal number.
0b0 Prefix to denote binary number.
3 DVX WEB Requirements
This section specifies the WEB requirements of DVX-1000.
The following browsers have been tested to be fully compatible with the DVX-1000
web interface:
oInternet Explorer (Version 4.0 and above)
oNetscape (Version 7.0 and above)
oMozilla ( Version 5.0 and above)
oGaleon (Version 7.0 and above).
4 Configuring system parameters
DVX-1000 can be configured through the following interfaces
•The web interface
•Command Line Interface (CLI)
The following section provides details regarding how the DVX system can be
configured through these interfaces. System configuration and call monitoring
are solely the privileges of users configured as administrators. DVX-1000
ships with a single administrator already configured (for security reasons, we recommend
changing the default administrator password). Regular users are allowed to configure only
their individual features.
4.1 Using the web interface to configure the system
The DVX-1000 web interface can be accessed from any web browser supporting
frames and java script. Internet explorer (Version 4.0 and above) is the preferred
browser. The web interface can be accessed using the URL http://IPADDRESS ,
where IPADDRESS is the address assigned to the DVX-1000 board. The system
configuration page can be accessed by clicking the system configuration link from the
DVX-1000 web interface.

DVX-1000 User Manual
D-Link Confidential 8
4.1.1 Configuring the IP
IP configuration for the DVX-1000 board can be static or through DHCP. The default
factory setting for IP is 10.0.0.1. To bring the board up for the first time; configure
an IP for the board from the CLI interface. Subsequently, all configurations can be
done through the web interface by accessing the board’s configured IP.
4.1.1.1 Configuring the IP address automatically using DHCP
DVX-1000 can be configured to get it’s IP through DHCP. To enable this, select DHCP
and click on Apply.Please note that on some browsers, redirection to the new
IP is not possible. In this case, the new IP has to be ascertained from the CLI
interface and the corresponding web page should be accessed.
4.1.1.2 Configuring the IP address manually.
Assigning a static IP for the DVX-1000 is the recommended method for IP
configuration as it is advisable to have the call server work on a fixed IP address. To
configure a static IP for DVX-1000, click on the system configuration link. Now,
under IP configuration, select static and enter a static IP, subnet mask and gateway.
Click ‘Apply’. Please note that on some browsers, redirection to the new IP is
not possible. In this case simply access the new static IP that you have now
configured for the board from the web.
4.1.2 Configuring the DNS server address.
DVX-1000 has a DNS client built in that will resolve hostnames accessing the DNS
server that is configured. To set the DNS server that is relevant to your network,
access the system configuration page; modify the primary and secondary DNS
servers and click apply.
4.1.3 Setting the system time.
DVX-1000 can either be configured to get its time through manual configuration or
through NTP. It ships with a factory default setting of 1st of January 2005 10.10
a.m. A large fraction of the call server data is dependent on the system time.
This data includes registrations, feature time settings and call detail records (CDR)
amongst others. Changing the time configuration has to be done with a lot of
caution. Changing the time to a time prior to the current time would be a malicious
attempt to invalidate the call detail records and extend registrations. The
administrator should be wary of this. Changing the time to one in the future should
be done taking into account the fact that current registrations may expire at the new
time specified and hence phones may have to re-register to get the calls started
4.1.3.1 Setting the system time manually.
In order to set the time manually, access the system configuration page. Under time
configuration, choose manual and modify the time to the required value. Now click
apply. The time should now be set to the new one.
4.1.3.2 Automatically configuring the system time using NTP
DVX-1000 can synchronize its system time with an NTP server that has been
configured. This server could either be a local LAN NTP server, that in turn
synchronizes with a stratum 1 or stratum 2 NTP server, or directly a stratum1 or 2

DVX-1000 User Manual
D-Link Confidential 9
NTP server that is relevant to your network. Access the system configuration page,
under time configuration, choose NTP and specify the primary and secondary NTP
servers. Select the appropriate time zone. Click ‘Apply’. The NTP servers will be tried
for a predefined number of times and if these attempts fail, the present system time
will be retained.
Note: Daylight savings time is automatically supported by DVX-1000 provided the system is
configured to get the time from an NTP server and the correct time zone is selected.
4.1.4 Setting other configurable parameters
The following options can be specified in this section.
RTP Port (Min & Max) The minimum and maximum ports that DVX-1000 uses
for its media. Changing this also modifies the firewall
settings to block ports other than the ones configured.
Operator Number The operator’s extension that will be contacted if the
call through the automated attendant fails, or if the
caller dials an invalid extension or no extension at all.
Operator User Group User Group of the operator.
4.2 Configuring the system through the Command Line Interface
This section describes the DVX-1000 system configuration through the command line
interface. Whenever the user connects to the DVX-1000 using the serial port, he will
be prompted for login name & password. The user must be an administrator to log
on to DVX-1000 & execute any CLI commands. Once the user name & password
verification succeeds, the DVX command prompt will now appear and the user can
now configure the system with the aid of the CLI commands described below.
The CLI commands are structured in tree-style architecture. All the CLI commands
are case insensitive & at any time the user can enter ‘?” to display what all
commands are available at this level or depth.
4.2.1 Help Command:
Command Name: help
Command description: The ‘help’ command displays all the available
commands to the console.
Command Format: help
4.2.2 History Command:
Command Name: history
Command description: The ‘history’ command displays the list of
previously executed commands in the current
session to the user.
Command Format: history

DVX-1000 User Manual
D-Link Confidential 10
4.2.3 Set IP Command:
Command Name: set ip
Command description: The ‘set ip’ command is used for setting the IP
address statically.
Command Format: set ip <ipaddress> <netmask (optional)>
e.g. set ip 192.168.10.89 255.255.255.0"
4.2.4 Set Netmask Command:
Command Name: set netmask
Command description: The ‘set netmask’ command is used for setting
the netmask statically.
Command Format: set netmask <net mask>
e.g. set netmask eth0 255.255.255.0"
4.2.5 Set DHCP Command:
Command Name: set dhcp
Command description: The ‘set dhcp’ command sets the network
configuration (such as IP address, netmask, etc)
using DHCP.
Command Format: set dhcp
E.g.setdhcp
4.2.6 Set Gateway Command:
Command Name: set gateway
Command description: The ‘set gateway’ command configures the
default gateway.
Command Format: set gateway <gateway ipaddress>
E.g. set gateway 192.168.10.6
4.2.7 Set DNS Server Command:
Command Name: set dnsserver
Command description: The ‘set dnsserver’ command configures the
primary & secondary DNS server address.

DVX-1000 User Manual
D-Link Confidential 11
Command Format: set dnsserver <primary dns server ipaddress>
<secondary dns server ipaddress (optional)>
e.g. set dnsserver 192.168.10.5 192.168.10.6
4.2.8 Set Primary DNS Server Command:
Command Name: set primarydnsserver
Command description: The ‘set primarydnsserver’ command configures
the primary DNS server address.
Command Format: set primarydnsserver <ipaddress>
e.g. set primarydnsserver 192.168.10.5
4.2.9 Set Secondary DNS Server Command:
Command Name: set secondarydnsserver
Command description: The ‘set secondarydnsserver’ command
configures the secondary DNS server address.
Command Format: set secondarydnsserver <ipaddress>
e.g. set secondarydnsserver 192.168.10.6
4.2.10 Set NTP Server Command:
Command Name: set ntpserver
Command description: The ‘set ntpserver’ command configures the
primary & secondary NTP server address. It will
automatically sync the time with the NTP server.
Command Format: set ntpserver <primary ntp server ipaddress>
<secondary ntp server ipaddress (optional)>
e.g. set ntpserver 192.168.10.9 192.168.10.10
Warning: On executing the following NTP server commands the system will assume that the
time configuration should be obtained from the NTP server and the time configuration will be
set to ‘NTP server’ if it is in manual mode currently. If you do not want this to happen, please
undo the change through the web page.
4.2.11 Set Primary NTP Server Command:
Command Name: set primaryntpserver
Command description: The ‘set primaryntpserver’ command configures
the primary NTP server address. It will
automatically sync the time with the NTP server.
Command Format: set primaryntpserver <ipaddress>

DVX-1000 User Manual
D-Link Confidential 12
e.g. set primaryntpserver 192.168.10.9
4.2.12 Set Secondary NTP Server Command:
Command Name: set secondaryntpserver
Command description: The ‘set secondaryntpserver’ command
configures the secondary NTP server address. It
will automatically sync the time with the NTP
server if not already sync with the primary NTP
server.
Command Format: set secondaryntpserver <ipaddress>
e.g. set secondaryntpserver 192.168.10.10
Warning: Using the following commands to configure the system time will result in the time
configuration mode being set to manual. If you do not want this to happen, please undo the
change through the web page.
4.2.13 Set Zone Command:
Command Name: set zone
Command description: The ‘set zone’ command sets the system time
zone. Use 'set zone ?' to get zone numbers.
Command Format: set zone <zone number>
e.g.setzone4to set pacific time zone.
4.2.14 Set Date Command:
Command Name: set date
Command description: The ‘set date’ command configures the system
date and time manually. All the parameters have
to be given in the same order as they appear in
the format below. However, the user can give
any number of parameter; all the other
parameters will be set to current value.
Command Format: set date <year> <month> <day> <hour>
<minute> <seconds>
e.g. set date 2005 Jan 30 10 35 45
4.2.15 Set Time Command:
Command Name: set time
Command description: The ‘set time’ command configures the system
time manually. All the parameters have to be

DVX-1000 User Manual
D-Link Confidential 13
given in the same order as they appear in the
format below. However, the user can give any
number of parameter; all the other parameters
will be set to current value.
Command Format: set time <hour> <minute> <seconds>
E.g. set time 15 35 45
4.2.16 Set Year Command:
Command Name: set year
Command description: The ‘set year’ command configures the year
parameter of the system date.
Command Format: set year <year>
E.g. set year 2005
4.2.17 Set Month Command:
Command Name: set month
Command description: The ‘set month’ command configures the month
parameter of the system date.
Command Format: set month <month>
E.g.setmonthJan
4.2.18 Set Day Command:
Command Name: set day
Command description: The ‘set day’ command configures the day
parameter of the system date.
Command Format: set day <day>
E.g.setday30
4.2.19 Set Hour Command:
Command Name: set hour
Command description: The ‘set hour’ command configures the hour
parameter of the system time.
Command Format: set hour <hour>
E.g.sethour10

DVX-1000 User Manual
D-Link Confidential 14
4.2.20 Set Minute Command:
Command Name: set minute
Command description: The ‘set minute’ command configures the minute
parameter of the system time.
Command Format: set minute <minute>
E.g.setminute35
4.2.21 Show IP Command:
Command Name: show ip
Command description: The ‘show ip’ command displays the configured
IP address of the system.
Command Format: show ip
4.2.22 Show Netmask Command:
Command Name: show netmask
Command description: The ‘show netmask’ command displays
configured system netmask parameter to the
user.
Command Format: show netmask
4.2.23 Show Gateway Command:
Command Name: show gateway
Command description: The ‘show gateway’ command displays default
gateway configured for the system.
Command Format: show gateway
4.2.24 Show DNS Server Command:
Command Name: show dnsserver
Command description: The ‘show dnsserver’ command displays the
primary & secondary DNS server IP address.
Command Format: show dnsserver
4.2.25 Show Alarms Command:
Command Name: show alarms

DVX-1000 User Manual
D-Link Confidential 15
Command description: The ‘show alarms’ command displays alarms
being raised by the DVX.
Command Format: show alarms
4.2.26 Restore Certificate Command:
Command Name: restoreCert
Command description: The ‘restoreCert’ command restores the default
SSL certificate that came installed with DVX-
1000.
Command Format: restoreCert
4.2.27 Restart Command:
Command Name: restart
Command description: The ‘restart’ command restarts DVX-1000.
Command Format: restart
5 Configuring the Call Server
The following section explains the functionality of the various call server features and
also provides information about how the features and the basic call server system
parameters are to be configured.
5.1 General Configuration
The DVX-1000 Call Server configuration information can be viewed by clicking Call
Server -> Configuration. To change the configuration, click on Edit. The following
configuration options can be changed.
Domain Specifies the SIP domain that this server manages. This
will be used in all the SIP addresses on this server.
Port Specifies the UDP port number on which call server
would listen for SIP messages. Some ports are
internally used by the call server, auto attendant
and media server and are reserved. If the port
specified here conflicts with one of the reserved ports,
an error message will be displayed.
Default
Authentication
Specifies the default authentication scheme that will be
used to authenticate SIP user. Note that the
authentication scheme is configurable per user (during
user configuration).
Default Expiry Time Specifies the default expiry time for SIP registrations.
This value will be used for registration requests when
neither the Expires header is present nor is an expires
parameter specifed in contact header. Default Expiry
Time is specified in seconds.

DVX-1000 User Manual
D-Link Confidential 16
Min (Expiry Time) Specifies the minimum expiry time the server would
accept for SIP registrations. Registration requests with
smaller expiry time will be rejected with a 423 (Interval
too brief).
No Answer Timeout The time for which a call will be tried, before it is
assumed that the user is not answering. This can be
specified anywhere between 10 and 30 secs.
5.2 User Configuration
A user needs to be configured before registration. The current user configuration
information can be obtained by clicking, Call Server->Users.
5.2.1 Adding a new user
A new user can be added by clicking, ‘ADD’. User configuration changes done
through web interface will take effect immediately. The following user configuration
options can be added or modified.
User Name Name of the user. Used only for display purposes.
User ID SIP (user ID) user identifier with which the client
would send registration. This could be the phone
number of a sip phone.
Example: for user ID 9001 and domain name dlink.co.in, the
registration.
Email ID User’s Email id.
RouteGroup Route group that the user belongs to. DVX-1000
comes with a default route group configured with a
local route, for all local numbers to be contacted.
UserGroupId UserGroup to which the user belongs. Every user
belongs to alteast one of the user groups. Which user
group a particular user belongs to will determine the
functionality of some features like call pickup. Please
refer to the call pickup feature description for details.
Authentication
Required
This specifies whether the user needs to be
authenticated by the call server for registration and
for regular calls. Check the appropriate check box.
Password This specifies the password for authenticating the
user. This along with the user ID will be used to
calculate the actual digest response for the user.
User Type This specifies whether the user is to be given
administrative privileges or not.
Password Password to be used for logging into the user
WebPages. Click on change password and enter the
new password. The default password is the user ID of
the user. Please note that this is the login
password of the user NOT his SIP
authentication password.

DVX-1000 User Manual
D-Link Confidential 17
5.2.2 Customizing features for users.
Clicking the icon in the ‘Feature’ column in Call Server->Users page will show
the Feature Information for the corresponding user. Activation and deactivation of all
features for that user can be done from here.
The features currently available for configuration are described below.
Do not disturb
Redirect all your incoming calls to your voice
mailbox
Follow me – call forwarding Same as Call forward, but the options for
forwarding incoming calls can be controlled more
minutely based on the time, date and day of
week. This is described in more detail in the
Section 5.2.2.1.
Call forward Forward all incoming calls to the specified
number.
‘Always’
Blindly forward all
incoming calls.
‘No answer’ Forward incoming calls if
it is not answered within
the ‘No answer timeout’
‘On Busy’ Forward incoming calls if
the extension is busy.
Change feature password Change the password used for feature activation
and deactivation from a phone. This password is
also used for accessing the user’s mailbox.
No answer timeout The time after which incoming calls are
forwarded when Call forward on No Answer is
enabled.
5.2.2.1 Configuring Follow me – call forwarding.
Follow me – call forwarding can be used to control the way incoming calls are
handled based on the time of the day, date and/or the day of week. The
configuration parameters can be accessed by clicking on the ‘Setup’ hyperlink on the
feature configuration page.
The call is forwarded based on a set of rules that are displayed on the top pane of
the web page (by default, this list will be empty). Each rule has the following
configurable parameters.
Forwarded No. The number to which the call will be forwarded if it matches
this rule.
Time Select a duration within which this rule will be active, or select
‘Always’ to make this rule active at all times.
Date Select the dates between which this rule should be enforced.
Days of week Select the weekdays on which this rule will be effective, or
select ‘All days’ to activate this rule irrespective of the
weekday.

DVX-1000 User Manual
D-Link Confidential 18
5.2.3 Modifying user details.
Clicking icon in the EDIT Column in Call Server->Users will allow you to edit
user information. All the information that is configured while adding the user, except
the ‘UserId’ can be modified here. Please refer Section 5.2.1 for the details regarding
the configuration parameters.
5.3 Registrations
Current user registrations can be monitored by accessing
Call Server->Registrations
The administrator may add or delete a registration if required. However, registration
through SIP messaging is recommended. The following values need to be provided
for adding a registration.
Note: A new registration for a particular userID cannot be added unless a
SIP user is configured with that ID.
User ID Specifies the user ID for registration. For the registration
to be successfully added, the user ID should be a
configured user in SIP users.
Contact Specifies the contact for registration. Any SIP call to the
user identified by User ID will be redirected to this
Priority Specifies the priority value for the contact. Priority value
is a value between 0.0 and 1.0, with 0.0 indicating least
priority and 1.0 indicating highest priority. This is used to
prioritize between contacts if more than one contact exists
for a user ID. Refer to Q Value in SIP RFC 3261 for more
details
Expiry Time Specifies the expiry time for the registration. The
registration would expire after the specified expiry time.
While adding a registration, Expiry Time is specified in
seconds, whereas while displaying current registrations, it
shows the time and date at which the registration would
expire.
5.4 Configuring Gateways
Gateways are used to connect DVX-1000 to external SIP based servers or PSTN
network. DVX-1000 can be connected to other SIP servers by configuring the servers
as ‘INET’ gateways. DVX-1000 can connect to PSTN network through a ‘PSTN’
gateway. This is not to be confused with the default gateway configured
during system configuration.
The Gateway configuration information can be viewed by clicking Call Server->
Gateways. To add a new gateway, click on ‘Add New’. The following parameters are
to be configured.
Gateway Id A unique Gateway Id
Gateway Type The type of gateway. It can be INET / PSTN
Domain Name Specifies the domain name / IP address of the
Gateway. This is used and the domain name/IP
Address when the call server has to register to the

DVX-1000 User Manual
D-Link Confidential 19
gateway.
Port Specifies the port number that the gateway is
configured on.
Outbound Proxy Enabled Check this box if the gateway is connected through
an outbound proxy.
IP Address IP Address of the outbound proxy.
Port Port number of the outbound proxy.
Registration Required Check this box if DVX-1000 needs to register with
the external gateway.
SIP User ID SIP User ID associated with this gateway
User Name SIP display name for the gateway user
Password Specifies the password associated with this gateway.
This will be used for authentication.
5.5 Configuring Routes
The Route configuration information can be obtained by clicking Call Server-
>Routes. To add a New RouteGroup configuration, click on Add New. Atleast one
route should be created and added while creating a RouteGroup. The Route View
Column helps in viewing all the Routes belonging to a RouteGroup. New Routes can
be Added / Deleted / Edited from here. Routes can be moved from one RouteGroup
to another by editing a Route. All Routes except the highest priority Route can be
deleted from a RouteGroup. Deletion of a RouteGroup is possible only if it is not
being used by any user.
The following are the route configuration options.
RouteGroupName Specify a new unique RouteGroup Name (Max 20
Char)
Duration Parameters Specify the time for which this Route is valid. All time
parameters are mandatory.
Route Name Specify a new unique Route Name (Max 20 Char)
DestinationType Type of the Route Destination. It can be
LOCAL/PSTN/INET.
Destination Id Indicates the Gateway Id corresponding to this route.
For LOCAL destination type Gateway Id need not be
specified, hence disabled.
Priority Indicates priority of this route in its RouteGroup. The
value can be in the range of 1 to 25. If the new route
is added with an existing priority, the priority of the
old Route will be incremented to next value.
Min Digits Indicates the minimum dial digits for this route
Max Digits Indicates the maximum dial digits for this route.
No of Mask Digits
Indicates the number of Dial Digits to be masked.
Dialed Digits Dialed strings to be matched to select this route entry.
A dialed string of '*' matches any string of 0 or more

DVX-1000 User Manual
D-Link Confidential 20
elements.
Prefix Prefix to be added to the number after masking.
5.6 Configuring Groups
The Group configuration information can be viewed by clicking Call Server-
>Groups. Groups can be of two types
•UserGroup
•Hunt Group
The user group is specifically used for determining user privileges during Call Pickup.
A particular user can pick up calls for him on another extension only if that extension
belongs to the same user group as him. A new Group can be added by clicking Add
New. A unique Id needs to be given to each Group. Group Type distinguishes
between a user group and a hunt group. The mode field is relevant only to a hunt
group. A hunt group can be configured in three modes (First Only /Sequential
/Parallel). Members in a user group are added when the user is actually added to the
call server. Hunt Group members can be added/edited/deleted by clicking the edit
button in the view members page.
A group can be deleted only if it does not contain any user.
Note: Each Group (User/Hunt Group) can have a maximum of 20 users.
Beyond this a new user group has to be created to add more users. Also, a
user can belong to a maximum of 5 user groups.
6 Using the feature manager
The following section gives an overview of what the call server features are, how
they are to be activated and what their functionality actually is.
6.1 Configuring features
Feature configurations can be viewed by following the links Feature Manager-
>Feature Configuration. Feature prefix and the list of features can be viewed.
Feature prefix specifies the digit user needs to dial while activating/deactivating
feature from the phone. The default value is ‘*’. The feature configuration page
displays the following fields for each feature.
Feature Name Specifies the name of the feature
Feature Code Specifies the feature code. This feature code needs to be
dialed when activating/deactivating a feature from the
phone. This can be configured to be a custom number.
Care should be taken that no two feature codes conflict.
Edit This link can be followed to change the feature code for
the feature
6.2 Activating and deactivating features
Feature activation can either be done from the web interface or from a phone.
However for certain features where additional data is essential (for
instance, a call forwarding number for call forward, or a time interval for
Other manuals for DVX-1000
2
Table of contents
Other D-Link VoIP manuals