www.doerrfoto.dewww.doerrfoto.de DÖRR GmbH Fotomarketing • Postfach 1280 • 89202 Neu-Ulm/GermanyDÖRR GmbH Fotomarketing • Postfach 1280 • 89202 Neu-Ulm/Germany
11
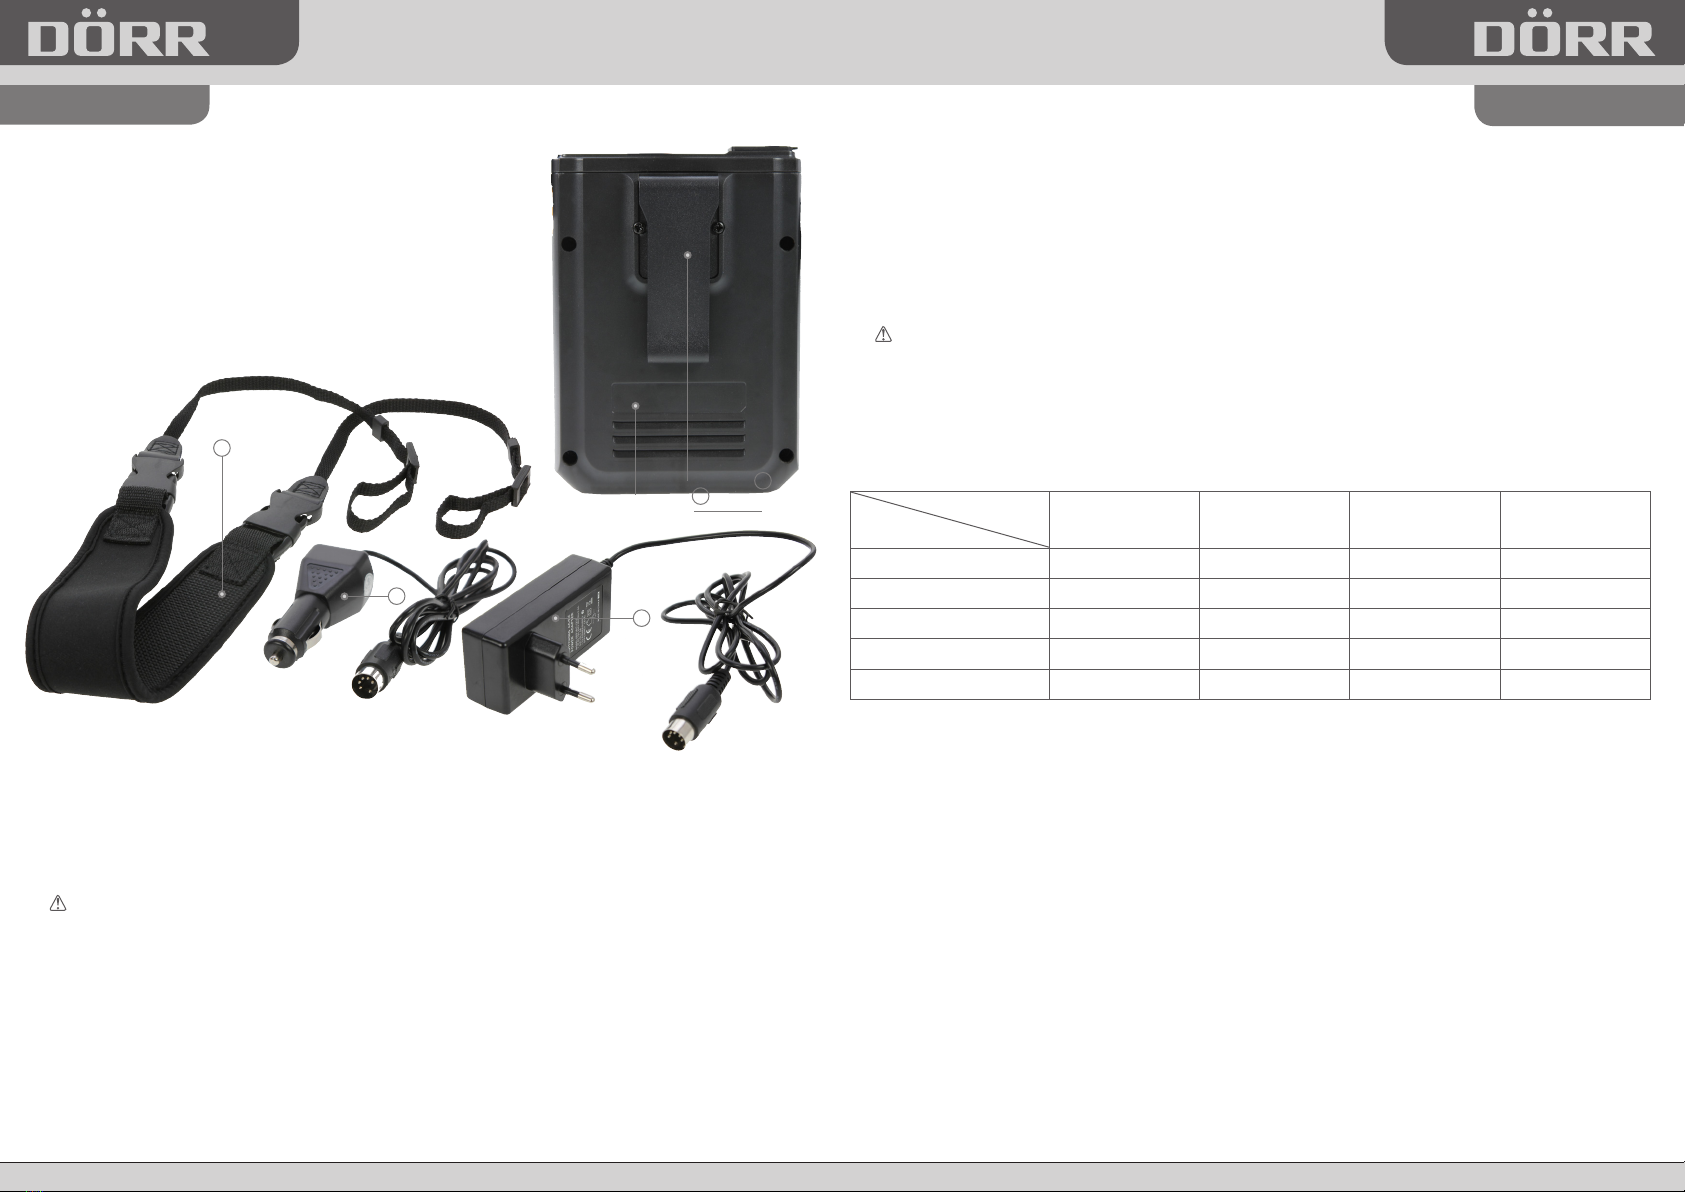
3
8
10
9
1. Boîtier
2. Boucle de sangle
3. Fixation de sangle
4. Achage de témoins: État batterie,
témoin mode , état d’avancement chargement
5. Bouton de pression
6. Port multi-fonctionnel
7. Câble de connexion avec l’appareil de ash
8. Ventilation
9. Câble d’alimentation réseau
10. Chargeur adaptateur véhicule
11. Sangle de transport
I. Nomenclature des pièces IV. Description des modes relevants du pack d’accus
• Hors service: aucun LED n’est allumé , aucun courant ne coule par le port multi-fonctionnel ; la consommation
d’énergie est très basse, la perte d’énergie de la batterie peut être négligée.
• Mode de test: lorsque le câble de connexion n’est pas branché avec le port multi-fonctionnel, enfoncez le bouton
pour arriver au mode de test .Dès lors l’état de chargement des batteries sera aché. Enfoncez le bouton
encore une fois ou attendez 3 secondes pour éteindre l’appareil.
• Mode de travail: branchez le câble de connexion avec le port multi-fonctionnel et enfoncez le bouton pour
mettre l’appareil en service. L’achage de mode (LED 5) s’allume. Enfoncez encore une fois le bouton ou
retirez le câble de connexion du port multi-fonctionnel an d’éteindre l’appareil.
Fonction coupure automatique: Cet appareil a une fonction de coupure automatique après 12 heures
d’utilisation an d’éviter une consommation d’énergie trop élevée
• Mode de chargement: lorsque l’appareil est branché avec le réseau par le port multi-fonctionnel, alors
l’appareil est en mode de chargement. En ce mode le témoin de chargement s’allume (LED 6) et les témoins
du pack d’accus clignotent. Lorsque les 4 LED ne clignotent plus et s’allument en continu le pack d’acus
sera complètement chargé.
V. Témoins LED
1. Achage de l’état de la batterie (LED 1-4)
Niveau batterie
LED 1 LED 2 LED 3 LED 4
Faible clignote éteint éteint éteint
Bas allumé éteint éteint éteint
Moyen allumé allumé éteint éteint
Presque plein allumé allumé allumé éteint
Plein allumé allumé allumé allumé
• Chargez les batteries à temps selon l’indication des témoins LED.
• Lorsque le LED 1 clignote , l’appareil s’éteint automatiquement et doit être chargé avant la prochaine utilisation.
2. Achage de mode (LED 5)
• Dans le cas d’utilisation avec un appareil de ash ce LED ne s’allume pas pendant le temps de chargement
du ash. Le LED s’allume lorsque le ash est complètement chargé.
• Dans le cas où le témoin d’achage clignote, le ash a été surchargé. Lors de températures trop élevées à
l’intérieur du pack, la protection contre surchaue empêche l’utilisation de l’appareil. Après environ 10,
minutes vous pouvez utiliser l’appareil.
3. Achage de chargement (LED 6)
• Lorsque le chargement de la batterie n’est pas en cours, ce témoin est éteint.
• Le témoin reste allumé pendant le chargement de la batterie ou la batterie est complètement chargée.
• Le LED clignote lorsque la batterie n’est pas complètement chargée après 4 heures de chargement.
Ceci indique un défaut au niveau de la batterie. Dans ce cas la batterie doit être remplacée.
VI. Durée de fonctionnement
Avec le pack d’acus HC2000 les appareils Canon 580EX II, Nikon SB900 et Sony F58AM seront chargés dans
une seconde. ( pleine puissance). Le ash peut être déclenché jusqu’à 500 fois.
LED
II. Description
Mise en service
• Sélectionnez un câble de connexion compatible avec votre appareil de ash
• Branchez le câble avec le port multi-fonctionnel du pack d’accus
• Branchez l’autre bout du câble avec votre appareil ash
• Enfoncez le bouton de pression. Le témoin batterie ache l’état de charge de batterie.
Remarque: Lorsque le pack d’accus est utilisé avec un appareil ash, veillez à ce que les
batteries du ash aient une capacité susante .
Mise hors service – vous pouvez éteindre votre pack d’accus en
• enfonçant le bouton de pression encore une fois
• déconnectant les câbles
III. Chargement des batteries
• Branchez le pack d’accus avec une prise de courant électrique(100-240V), ou,dans le cas où vous utilisez le
chargeur adaptateur véhicule avec l’allume cigare de votre véhicule. L’achage de témoins s’allume et les
4 LED clignoteront: le chargement du pack d’accus est en cours.
• Les LEDs 1-4 clignotent pendant l’opération de chargement et ils s’allumeront en continu aussitôt que
l’opération sera terminée.
• Le pack d’accus a un port multi-fonctionnel pour l’alimentation électrique et pour la fonction de chargement
des batteries.
Notice d’utilisation N o t i c e d ’ u t i l i s a t i o n
Pack d’accus DÖRR HC 2000Pack d’accus DÖRR HC 2000
FrançaisFrançais